• Hey Guest!
    British Car Forum has been supporting enthusiasts for over 25 years by providing a great place to share our love for British cars. You can support our efforts by upgrading your membership for less than the dues of most car clubs. There are some perks with a member upgrade!

    **Upgrade Now**
    (PS: Upgraded members don't see this banner, nor will you see the Google ads that appear on the site.)
Tips
Tips

TR2/3/3A Control Head wiring

charles brooks

Freshman Member
Offline
Hi All,
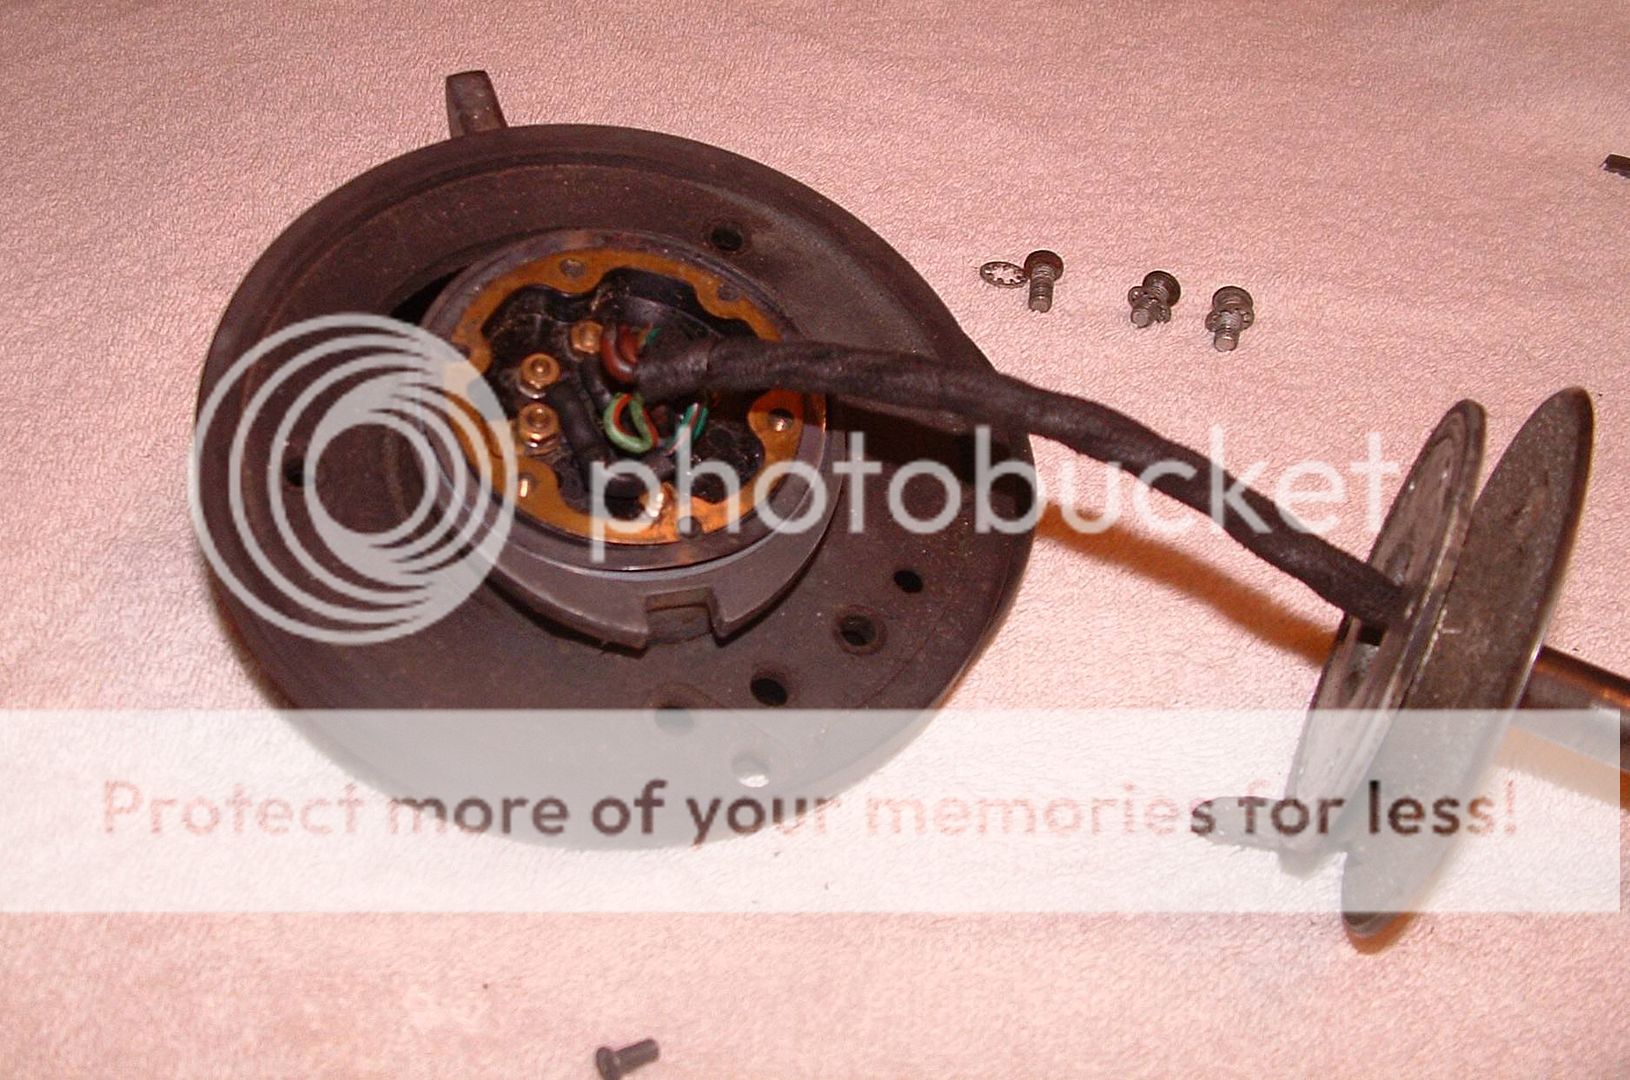
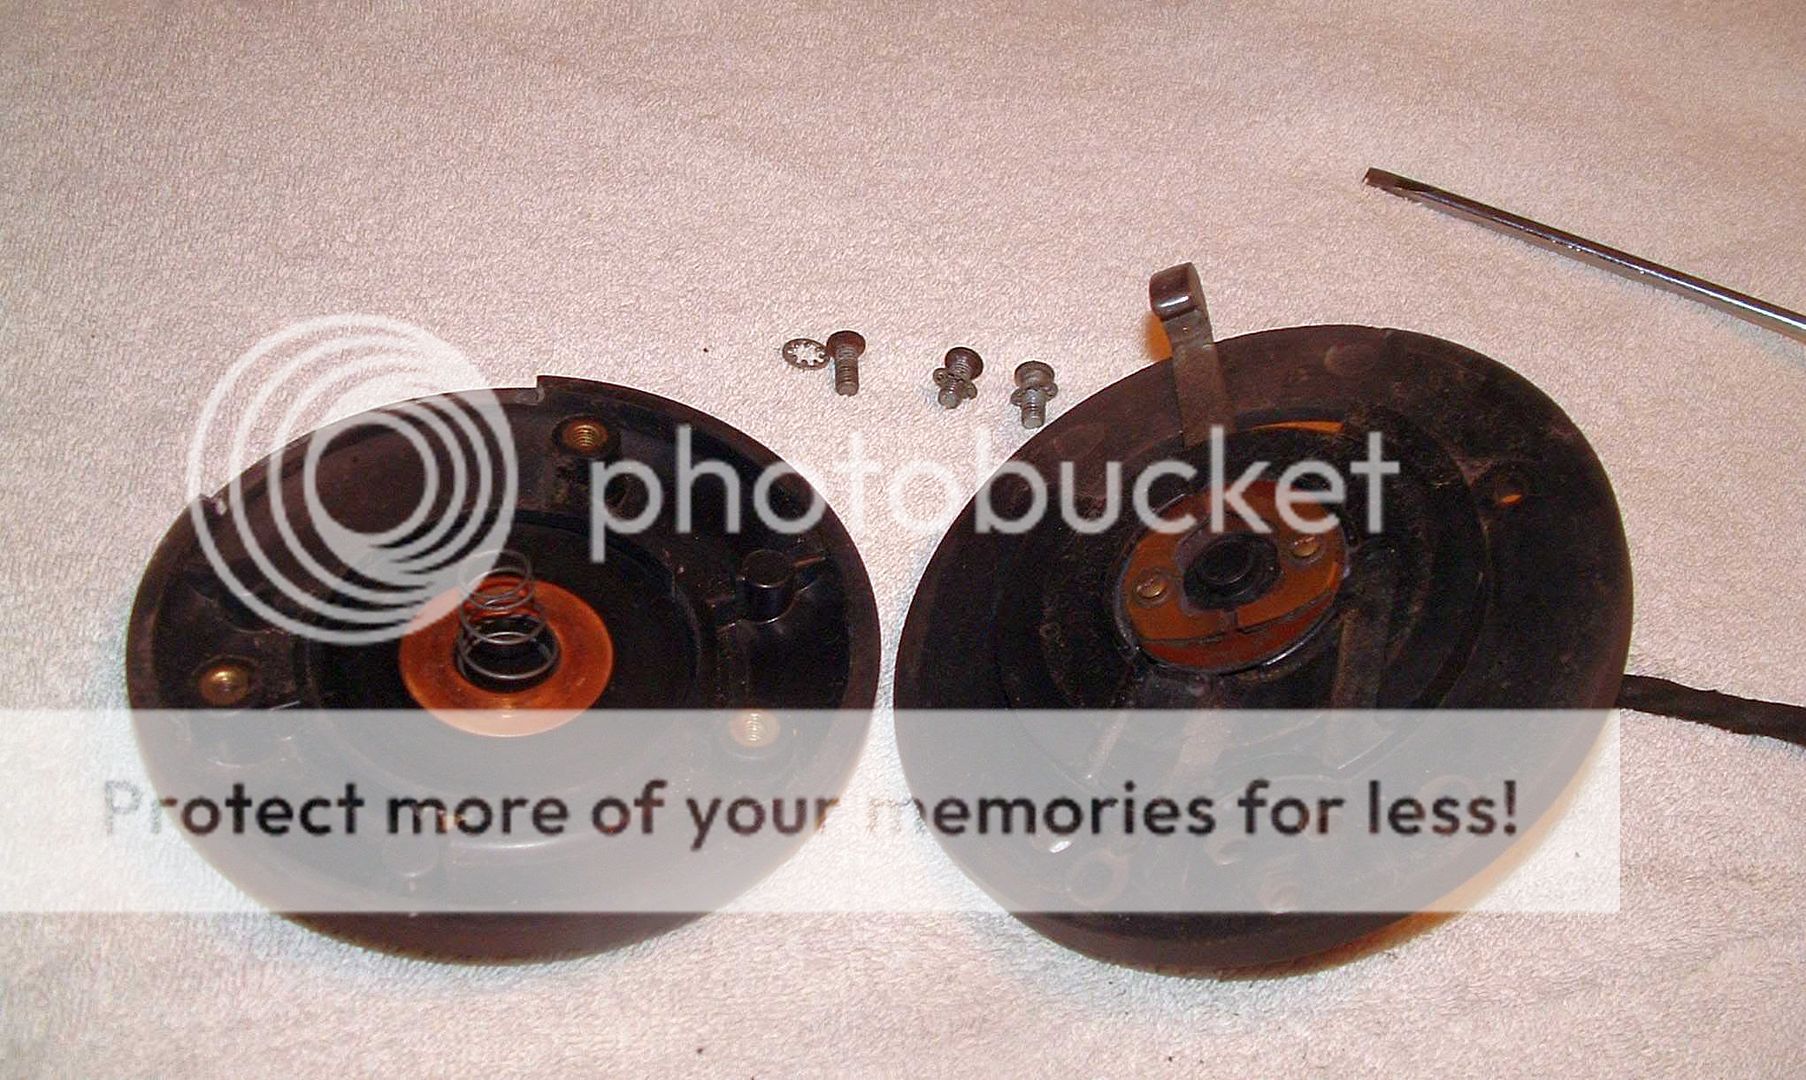
I just purchased a new control head from Roadster Factory and since my original wiring is fine is it possible to remove the wiring from the new unit and connect the originals to it? I'm replacing because the turn indicator won't cancel and the bakelite is cracked but as I say the wiring is all good and I prefer to not take the chance of getting the wiring lost either coming or going in the black hole of the stator tube.
Thanks for any information
Charles
 
Charles,
Yes you can use the old wires if they are in good shape. Just be careful when you take the new control head apart and write down the location of the wiring connections before you remove them so you can attach the old wires in the correct location. There are several small parts in the control so be careful!

John
 
You'll need to partially disassemble the head, though. The horn wire attaches to what appears to be a stud, but is actually a long screw, so you'll have to pull the horn button off to hold the screw head while you tighten the nut.

Note that the wire terminals have little tabs that fit into holes in the Bakelite.
 
It's been a while since I was into the control head, but I'm pretty sure it has to come off in order to get it apart enough to get to the wire connections. All the screws holding it together are on the steering wheel side.
 
There are as well some springs in there that complicate the reassembly of the unit. Also because of the short wires coming out of the tube you will be working in the car over the steering wheel. Not a great place to work with spring loaded things and multiple layers of parts.
Alternately the only real problem of changing the unit as a whole with wiring is getting the new wires fed down through the stator tube. By using a wire connected to the old wires as you pull them up through the tube you can attach the new control head wires to the wire fed up the tube and pull the new wires back down back down. I will admit that I have had some trouble getting this step done. But I think next time I will use some shrink wrap to cover the ends of the wires and the pull wire. You want to make that end of the wires as small as possible to get it down the tube.
Charley
 
There are as well some springs in there that complicate the reassembly of the unit.
You should be able to leave the switch compartment assembled, which is where the "complicated" springs are. Only the back plate (with the stem to engage the stator tube) and the horn button/cover need to come off the switch. There is one spring that goes under the horn button, but it's easy to deal with IMO.

Basically, you stop here in the disassembly process
DSCF0006_crop1.jpg~original


DSCF0007.jpg~original
 
Wow!! My first question and such quick and knowledgeable replies. Thanks so much to everyone. I think I'll try to just use my original wiring since it's in excellent condition and for the reason of naivety my confidence is higher to take the head apart rather than try to pull the wires through the tube. I'll report back.
Thanks again
 
Thanks so much for the photos and your information and now knowing I don't have to get into the difficult spring department I'll definitely try this approach.
 
I'm confused as to what you would gain from using your old wires verses the risk of ruining your new control head if your not experienced in dismantling one?
 
Charles,

I think you'll quickly see that some of the members on this forum are a walking encyclopedia of TR knowledge. Over and over it amazes me how quickly and accurately many of these folks nail the answers to questions almost on a moments notice. I truly think they enjoy sharing to keep our "hobby" alive.
 
Randall’s picture is spot on and the only thing I would add is to move the selector over to each nut as you loosen each nut. This will keep pressure on the brass nut because if I remember correctly, the brass stud can fall out of its key way when the nut is off the stud as you swap the wires out. I have done it the way you are doing it, and you will see more as you take apart the new one. TRF parts are often of high quality and their wire looms are probably the correct size and putting them through would/might not be difficult either, so either way should work. There were some wirer looms around a while back that were just a fuzz bigger and they were a nightmare to get through the stator tube. I tried it once and it was a disaster, so if you go new look real close at the wirer size. I think it is Macys Garage that makes the corrected size wire loom to fit the stator tube hole if you need it and again TRF probably has it correct.
 
I would actually prefer to replace the entire unit including the wiring but am concerned that pulling the wiring through the tube sounds more difficult that changing the wires. A possible pitfall to changing the wiring is that I haven't taken the new unit apart enough to see if the connections are screws or if it has soldered connections. Do you know by chance. It's from the Roadster Factory. If soldered I would definitely opt for replacing the entire unit.
Thanks for any information.
 
FWIW, The control head harness I got from TRF some years back was definitely larger than the original, and difficult to get through the tube. The individual wires appeared about the same, but the cloth covering was at least twice as thick as the original. I finally had to use wire pulling lubricant to get it through. Unfortunately, the lubricant has dried out and effectively glued it in place. I will probably have to destroy the harness to get it out again.

If I do it again, and find the same problem, I plan to strip off the cotton cloth and replace it with modern poly sleeving. The poly is thin and slick, and while clearly not period correct, looks pretty good IMO.
DSCF0029_crop.jpg~original
 
I had my control head apart and the advice above is all good. There is an online article covering control head disassembly. I was concerned about getting the wires through the tube too, but in my case it was one of those jobs that caused lots of concern in advance but actually went very easily. Make sure the wires are all different lengths so that they "pack together" to minimize diameter of the bundle. I believe I used some thin mechanics wire to gently pull the wires trough the tube. Likely good idea to make sure the inside of the tube is very clean before starting. Cheers, Mike
 
I used the TRF unit. The wire lengths were staggered so the bullet connectors followed each other in single file, rather that being clumped at the same place. Installation instructions included a tip to slightly twist the loom while feeding it down the stator tube. Installation was quick and easy. I used a single pull wire taped lightly to each bullet.
Bob
 
I prefer to use the new unit and new wiring but am concerned that getting the harness to go through the tube may be more difficult than swapping the wires from old head to new one. Perhaps I've read too many horror stories of wiring getting stuck. I would definitely go with trying to get the new wires through the tube if the wiring connections on the new unit are soldered rather than screw connections. I haven't taken the back off yet to see how it's made. Anyone know??
Thanks
 
There could be a 3rd path here because often the stator tube is broken or weak. You could get a new stator tube from that Macys Garage and fit the 2 together and pop it in the car that way. Kind of prices I think they are 50bucks, but almost every old tube I have seen is going to break or broken at the keyway slot cut in the tube. So, I suggest at least loosening up the olive nut and sliding your tube up a couple inches and having a look where the head keys into the tube.
 
I decided I should try getting the new wiring through the tube and guess what??? it took all of 15 minutes using some picture hanging wire pulled through with the old wiring and then the picture wire taped to the new wires for the return trip...
 
Back
Top