• The Roadster Factory Recovery Fund - Friends, as you may have heard, The Roadster Factory, a respected British Car Parts business in PA, suffered a total loss in a fire on Christmas Day. Read about it, discuss or ask questions >> HERE. The Triumph Register of America is sponsoring a fund raiser to help TRF get back on their feet. If you can help, vist >> their GoFundMe page.
  • Hey there Guest!
    If you enjoy BCF and find our forum a useful resource, if you appreciate not having ads pop up all over the place and you want to ensure we can stay online - Please consider supporting with an "optional" low-cost annual subscription.
    **Upgrade Now**
    (PS: Subscribers don't see this UGLY banner)
Tips
Tips

INNOVATIONS

G

Guest

Guest
Guest
Offline
Firstly, I admire anyone that restores a Triumph (or any LBC) to original condition. That said, most of you know that my car is a resto-mod, something personal, with lots of "improvements" that I have talked about over time. The question I pose is: What have ya'll done to improve or repair your cars, something different than stock? Like an innovative way to mount an aftermarket part, different gauge clusters, exhaust improvements, etc., etc.? Pictures would be a bonus.
 

swift6

Yoda
Offline
Interesting topic Bill, I feel I've been pretty conservative with my resto-mod. Other than a non-factory color and sitting 1.5 inches lower, it looks pretty normal until I lift the bonnet anyway.

Should be interesting to see what people come up with.
 

Got_All_4

Luke Skywalker
Country flag
Offline
I did Good Parts triple intakes in Tr250 and glad I did. I met Richard at a TRF Summer Party and he let me drive his car. The one on the front of his catalog. Man was I sold. I did not like his air box though. Looked to boxy. So I designed one of my own. I tried to mimic the original Triumph fuel injection system. It looks so awesome especially for it's time. There was no way however to do the cylinder effect because of the lack of room caused by the extension of the intakes. So I machined a plate to mount on the carbs and used my brake to form the cover for the air box. I then ran the intake hose through the radiator shroud and used a cone shaped K&N style air filter. I'm picking up cooler air before the radiator and now have plenty of power from taking off even after sitting in traffic on the hottest summer days.

I did his springs too and really improved the ride not to mention the handling. I was concerned about ride ability being to rough but not the case. Urethane bushings are also a help. More control but no decrease in the ride comfort. I have a set of Adco anti sway bars waiting to go on. I can't imagine the car handling any better.

For driving comfort I took the seats from a 71 TR6 and had them reupholstered with cloth. What a difference. I can drive for 3 hours none stop with these covers. Vinyl if you attempt that long of a dive, take an extra pair of undies because you'll need to change along the route. I found a old retired automotive upholster that does it for a few extra bucks and he used the old seat covers for a pattern. One of the best things I've done for mods.

If I think of more I post later. My garage is calling me.
 

Attachments

  • 12109.jpg
    12109.jpg
    39.8 KB · Views: 5,972

BobbyD

Jedi Knight
Offline
Bill.....like you, I admire originality and the folks that strive to get their cars to look like they did the day they came off the assembly line. However, I drive my car like a daily driver and am always looking for the balance between reliability and maintaining a stock "look". All my upgrades are posted on my web site noted below and they range from Dan Masters' wire harness to Rick Patton's TBI conversion and Herman's Toyota 5 speed conversion and Richard Good's Nissan diff. Some have renamed my car a TRI-ota-san! My favorite conversion is TBI. I love watching people at car shows look at my "carbs" and try and figure out what they are.

EngineBayRight.jpg
 

LastDeadLast

Jedi Knight
Country flag
Offline
I pretty much feel the same way most other people that have posted on this thread; I feel that my TR.. or any car for that matter is a blank canvas. I usually start with a theme and go from there. For my current TR6, the rule has been modifications that "look" period. My mods are outlined below:

Engine: Dual HS8 carbs with ported intake, balanced assembly, 1.5 roller rockers, mild head work, GP2 cam, 10:1 compression, electric fan (OEM fan eliminated), alloy flywheel, Stainless headers and a custom quad torpedo stainless exhaust.

Drive train: 4sp with j-type overdrive, Spec stage 2 clutch, HVDA Hydraulic throw-out bearing, Quaife LSD, Moss CV axles, I have a HVDA 5sp conversion ready for the fall/winter project season :smile:

Suspension/brakes: Goodparts f/r sway bars, Nylatron bushings, springs and adjustable trailing arm brackets. Stainless brake lines, Morgan wheel cylinders, alloy drums

Electrical: Cibie headlights and driving lights powered by Advance Auto Wire electricals. All the relays are hidden in the passenger foot well.

Interior: John Skinner full leather trim with wool carpeting (light tan), Randy Keller African Rosewood dash

Wheels/Tires: Dayton 72 spoke rims with Yoki Avid 205/70-15 tires.

Here are a couple pics:
normal_2008-06-27_-_HS8_004.jpg


And:
normal_2007-09-02%20-%20TR6%20Outside%20Pics%20005.jpg
 
OP
G

Guest

Guest
Guest
Offline
Lets' see.
<span style="font-style: italic">
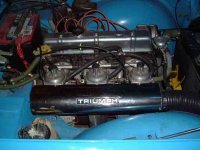
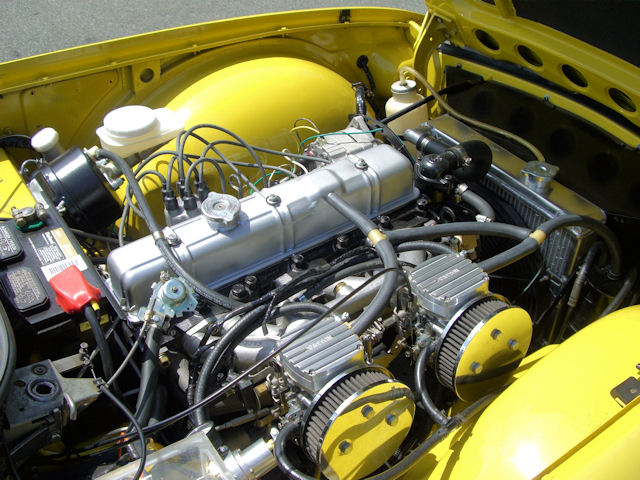
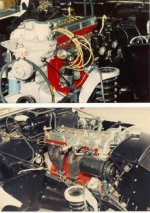
<span style="font-weight: bold">Engine</span>
Carillo rods
Wiseco forged pistons
Custom cam
Nitrided crank
1.5:1 Roller rockers on hardened shaft
Hardness tested lifters - if you are reading this you probably know why...
Waisted valves, uprated springs
6-blade water pump
Close toleranced oil pump
Porting
Tri-metal bearings
Head skim for 8.5:1 compression

Custom intake manifold
FoMoCo 24# injectors
Megasquirt bank fired ecu - dyno tuned

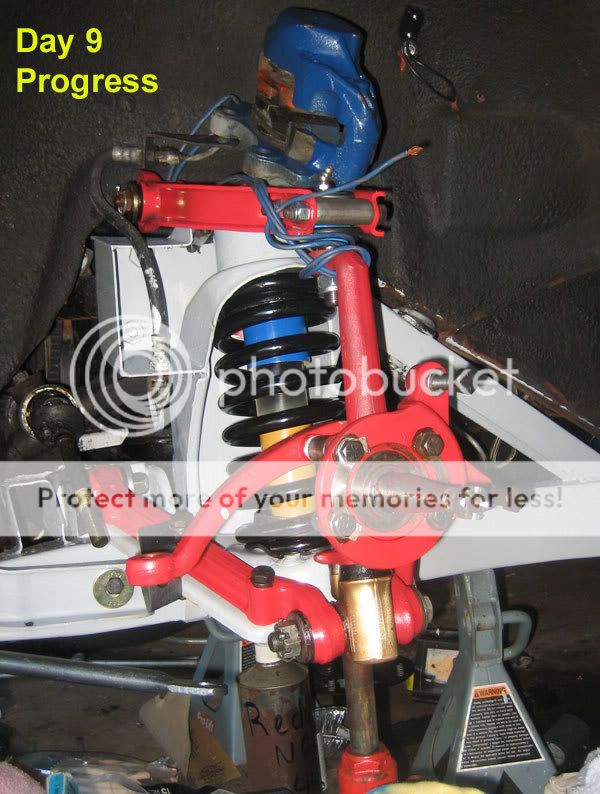
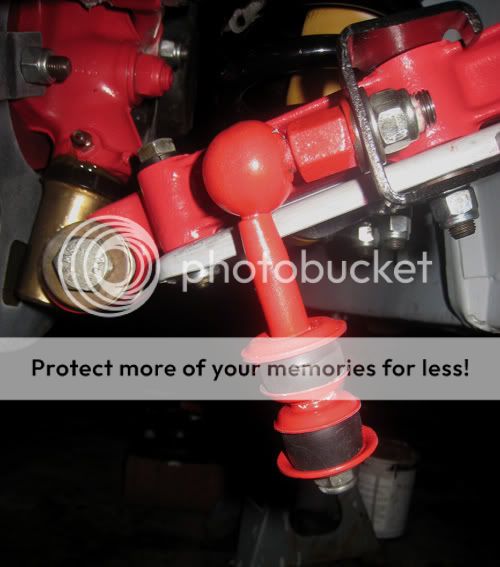
<span style="font-weight: bold">Suspension, steering and brakes</span>
Goodparts springs all round
Nylatron bushings all round.
Adjustable rear trailing arm mounts.
Goodparts front and rear swaybars.
Goodparts aluminium steering rack mounts.
Toyota front caliper conversion with drilled rotors.
Morgan rear cylinders
Stainless brake lines

<span style="font-weight: bold">Drivetrain</span>
Rebuilt (Mantran) W58 5-speed gearbox with HVDA conversion.
Kevlar clutch
Goodparts R200 LSD
Nylatron diff mounts
Custom CV axles/hubs from cvaxles.com – these are the ones Richard Good is now selling.
New UJ’s in driveshaft.

<span style="font-weight: bold">Frame</span>
Diff mounts boxed

<span style="font-weight: bold">Other</span>
Moss Headers – Jet Hot coated.
Stock stainless exhaust.
Panasport 16x7 wheels with Yokohama Avid tires
Custom 15 gallon stainless fuel tank
Aeromotive Tsunami fuel pump and filters.
Aeromotive regulator
AN fuel lines throughout.
Goodparts crankcase catch can.
Wizard cooling aluminium radiator
New Front Hub
16” electric fan.
Fan eliminator kit.
High Torque starter
New Tie-rods
</span>

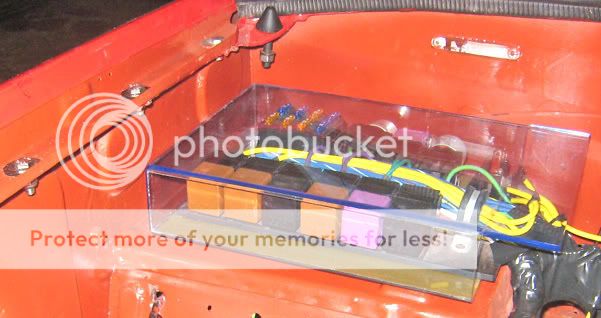
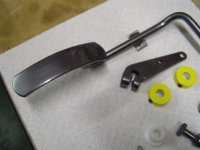
I'm sure I'm forgetting some stuff, but that'll do for a start.

Here are a couple of pictures I shot recently:

Side1small.jpg


Engine1small.jpg


Engine3small.jpg


InsideTrunksmall.jpg
 
OP
T

Tinster

Guest
Guest
Offline
Probably my driver's side floor replacement is my most
innovative upgrade. And I sometimes powder coat things.
Dan/Mike Master Power Block wire harness

bcfCrypty.jpg


progDay9.jpg


swaybarlink8.jpg


newBox.jpg
 

Brosky

Great Pumpkin
Offline
Dale, you have a lot innovations to list with all that you've done. And nearly all of it was done alone and without experience.

Your tutorials are well written and documented with great pictures and those should count as well. Those have provided help to many others in a silent manner that can go unnoticed.
 

swift6

Yoda
Offline
I've been having a little fun lately in my engine compartment. It started a while ago with a freshly rebuilt and re curved distributor from Jeff. Then I started accumulating other parts, the Ratco throttle cable, a Macy's Garage bonnet release, one of the first ARE (Joe Alexander) heat shields for triple ZS175's and finally fully rebuilding my 3 ZS's. I didn't go the micro-polishing route, call me a rebel if you must, but I was inspired by an Aston Martin DB2/4 I was working on a few months ago. Also, opposite of the growing trend with BCFers, I like to slightly "de-bling" the upgrades under my bonnet. Not that there is anything inherently wrong with bright colors under the bonnet, its just not for me. I also used some tips and tricks that are being used more and more in some of the hot-rod/muscle car circles. So here is the finished result.
P6290001.jpg


Paul's tips with the Ratco cable used with triple ZS's was very handy. :thumbsup: :thankyousign: The Macy's Garage emergency release works extremely well. The underside of the heat-shield is painted with a high heat ceramic white paint and the carburettors are painted with a high heat ceramic black paint. The last two items are part of a growing trend in high performance V8 circles. The white has tested very well at reflecting heat while the black has tested very well at expelling heat.

The Aston Martin DB2/4 I was referring to also had a black painted manifold and black carburettors. This particular DB2/4 was outfitted by the factory, as a special order car, for rallying on the continent. It has history with the Monte Carlo, Tulip, Alpine and several other rallye's. It also has factory documentation of the changes made for competition, including the black manifold and carburettors. I liked the idea of black carburettors but couldn't go completely black with the manifold and the air box.

What I can say so far is; the rebuilt/re-curved distributor, coupled with the fully rebuilt carburettors have made a wonderful driving difference. I didn't think my carbs were in that bad of shape until after trying the newly rebuilt ones. The Ratco cable made throttle modulation very smooth. The heat shield works well too as the carbs are much happier about heat issues.

While I had everything off I intended to wrap the headers in sleeves. These are not the tight fitting header wrap though they are made of a similar material. The sleeves wouldn't cover enough of the header pipes to make it worthwhile because there is not enough clearance. So I 86'ed the header sleeves and figured I'd make do for now with a heat shield for the starter and the heat shield for the carbs. So far, its working out just fine.

For those that might remember, a few weeks ago I mentioned something that might cause a stir with some BCFers. This is it.
 

Brosky

Great Pumpkin
Offline
There were several Aston Martins at the show today.

I couldn't take any pictures because I was drooling too much!
 
OP
G

Guest

Guest
Guest
Offline
Anti-bling.
Are you going to powdercoat the airbox and intake manifolds black too? That would look cool.
 

Brosky

Great Pumpkin
Offline
Close, but black chrome is even better!
 

Attachments

  • 12124.jpg
    12124.jpg
    35.3 KB · Views: 5,528

swift6

Yoda
Offline
alana said:
Anti-bling.
Are you going to powdercoat the airbox and intake manifolds black too? That would look cool.

I thought about blacking it all out. Still might but for now I like the alternating black then polished look.

No bling means all business. :smile: And easier upkeep. :wink:
 
OP
G

Guest

Guest
Guest
Offline
TR6BILL said:
Firstly, I admire anyone that restores a Triumph (or any LBC) to original condition. That said,..... Pictures would be a bonus.

OK, I'll take the roll of "restorer to original condition" here.

One thing that can be said for restoring to "original condition" is it's really inexpensive compared to the numerous upgrades that most others have done.

<span style="font-weight: bold">First picture is how the engine looked when I bought it last August</span>
AengineA.jpg

<span style="font-weight: bold">Second picture is after these items purchased</span>
NOS Motorcraft labeled (Bosch)alternator (-$1.04 Ebay)
Early style alternator brackets (-$20.00)
New heater control valve (-$18.00 Ebay)
TRF green wires (-$29.00)
OEM valve cover (free from PO)
New washer pump (-$8.00 Autozone)
New oval washer bottle and bracket (-$25.00 Ebay)
8 hex head carb screws and brass washers (-$8.50)
3 cans engine cleaner to de-Ziebart bay (-$12.00)
_____ _____ ______

Sold alloy valve cover on Ebay (+$125.00)
Virtually break even but sadly not much bling on a stock engine.

AengineB.jpg


In my opinion the TR6 engine as plain stock is a rather nice looking engine.
 

tom628

Senior Member
Offline
I have some engine and susp. mods like triple ZS, Isky cam, elec. fan; stiffer springs, Koni's all around, sway bars, etc., but they all pale in comparison to what some of you folks have done.

So to offer some lower tech, and maybe boring, mods:

* auxilliary fuse box for power to trunk lite (76 had to have running lites on); power outlet(cig lighter) under dash for my daughter's elec. vest in winter; relay for engine fan,etc.
* a 3rd choke cable, for the 3rd of my triple carbs. I think it helps on start-up, or I may just like the idea.
* I replaced the heater valve control wire with a stiffer 0.065" wire from an aircraft carb heat wire I happened to have around. Had to slightly enlarge the hole in the dash knob, but now I have a heater valve which, after I open it, I definitely know that I can close it fully.
* Homemade air cleaner assys. that permit using stock pleated filter elements with the triple ZS. Front and rear mounting holes offset from centers ~1/2" to allow the larger (than K&N) stock filters to fit.
* removed rubber bumpers from F&R bumpers, and plugged holes with chrome plugs. Saved 40 lbs.and I like the clean look.
* Almost forgot, Richard Good"s machined aluminum fuel distribution block for the triple ZSs. Allows a neat, direct routing of 5/16" rubber lines to the carbs. Looks good, too.

Tom
 

DrEntropy

Great Pumpkin
Platinum
Country flag
Offline
Shawn said:
but I was inspired by an Aston Martin DB2/4 I was working on a few months ago.

A few years back I had the "pleasure" of redoing a 2/4 drophead. It came to us in buckets and tubs of parts. Apologies for the poor pix, they were from a point-and-shoot. Progress pix.
 

Attachments

  • 12125.jpg
    12125.jpg
    31.1 KB · Views: 5,528
Similar threads
Thread starter Title Forum Replies Date
BobbyD General MG Gasket Innovations - Silicone Gaskets MG 2
BobbyD Gasket Innovations - Silicone Gaskets Austin Healey 1

Similar threads

Top