• The Roadster Factory Recovery Fund - Friends, as you may have heard, The Roadster Factory, a respected British Car Parts business in PA, suffered a total loss in a fire on Christmas Day. Read about it, discuss or ask questions >> HERE. The Triumph Register of America is sponsoring a fund raiser to help TRF get back on their feet. If you can help, vist >> their GoFundMe page.
  • Hey there Guest!
    If you enjoy BCF and find our forum a useful resource, if you appreciate not having ads pop up all over the place and you want to ensure we can stay online - Please consider supporting with an "optional" low-cost annual subscription.
    **Upgrade Now**
    (PS: Subscribers don't see this UGLY banner)
Tips
Tips

Installing New Leaf Springs on 100-6 - Am I missing something obvious?

blueskies

Jedi Warrior
Country flag
Offline
Maybe I'm missing something really obvious here. But, at the risk of embarrassment, I will ask anyway.

The BN-4 came with six or eight used, worn out rear springs; no two matched in condition and arc. So I ordered new ones. My first experience with 100-6 springs came back when I was twenty and a spring broke. As I recall it, while lying on my back in the parking lot, a big hammer and a couple of wrenches sufficed to install a replacement spring from a Healey we found in the junkyard.

Now to yesterday. I first laid the rear axle across the top of the frame members, resting the axle on the quarter inch or so thick rubber covered rectangular rebound pads. Then I installed the springs, with the bolt at the front and the shackles at the rear. They appeared to be the right springs, as everything lined up at both ends.

It then became obvious that this was not going to be an easy job. There was nearly three inches of space between the mid point top of the leaf springs and the metal pads on the bottom of the axle. The new U bolts would not come close to reaching; about two inches short. A hydraulic jack placed under the mid-point of the spring did not help much as the rear of the car (light, since it is disassembled with no drive train or outer body) just rose up in the air.

Thinking that I had the wrong parts, I called the supplier. They confirmed that I had the right parts, and their tech guy had no helpful ideas. He had not heard of this problem before.

Finally, I made up a longer U bolt out of threaded rod and used that, with the hydraulic jack to hold the plate with four holes below the spring from tilting, and pulled the spring and axle together to the point where the proper length U bolts would reach. Then I replaced the temporary longer U bolt with the correct one. Then I did the same thing on the other side of the car.

This still does not seem correct to me. For one thing, the axle is sitting solidly on the frame/rebound pads, with considerable tension forcing the axle against the frame. It seems that it will take quite some weight to bring movement into the springs. Maybe once the drivetrain and body are installed, the springs will work as designed?? Another thing that concerns me has to with the safety of installing and removing springs with this much tension on them. One needs to treat these things with respect.

Has anyone else experienced this, and is this normal? If so, how did you install the springs? Could these springs be over-arched?

Thanks for any insights.
 

Tech396

Senior Member
Country flag
Offline
This may be a long shot, but is it possible that the springs are so tightly bound together, that they are not being alowed to slide against one another ? Old stock paint can be a pretty good glue.... Depending on the style of fasteners ("U" clamps on the springs) maybe you can slack them off just enough to neutralize the springs ?.. Food for thought.
Out of curiosity, did the new springs come with zinc strips between the top 3 leaves? To my knowledge, they act as a form of lubricant.
Paul
 

Keith_M

Jedi Knight
Country flag
Offline
I agree that these springs have to be treated with respect. To get my springs up to the axle, I used a tie-down strap and a floor jack as shown in the picture below. It worked, and it felt reasonably safe, but all the standard disclaimers apply.

20110725_03.jpg
 
OP
B

blueskies

Jedi Warrior
Country flag
Offline
Keith, Those look much like the new springs that I installed. Quite the interesting strap/jack setup! I first tried a ratchet strap before making up the longer U bolt, but the way I had it rigged put the strap in the way of the various parts.

In your picture, I can see part of the number marked in yellow on the springs at the factory. Can you tell me that complete number? If it is the same as mine, that would be comforting. I would trust that number more than the small white label applied by the vendor with their own part number.
 
OP
B

blueskies

Jedi Warrior
Country flag
Offline
This may be a long shot, but is it possible that the springs are so tightly bound together, that they are not being alowed to slide against one another ? Old stock paint can be a pretty good glue.... Depending on the style of fasteners ("U" clamps on the springs) maybe you can slack them off just enough to neutralize the springs ?.. Food for thought.
Out of curiosity, did the new springs come with zinc strips between the top 3 leaves? To my knowledge, they act as a form of lubricant.
Paul

Paul, I didn't see zinc strips, although they might be there.
 
Country flag
Offline
I used a largish (8-12") C-clamp to pull the axle housing down to the spring(s). You can position the bottom plate on the swivel-pad (of the screw) and still have room for the nuts to go on the U-bolts. Not sure what I put over the bump-cone to protect it, but probably a piece of exhaust tubing, and a flat plate atop that.
 

steveg

Yoda
Gold
Country flag
Offline
When I bought new Daur springs from Cape they contained no zinc strips and were painted [glued] together. I disassembled them and put marine teflon tape between the leaves. A friend used teflon home window glide material. Someone mentioned jumping up and down on them to break the paint free.

Raising the spring enough to engage the u-bolts: a bottle jack under the lower retaining plate has worked for me.
 

Keith_M

Jedi Knight
Country flag
Offline
In your picture, I can see part of the number marked in yellow on the springs at the factory. Can you tell me that complete number? If it is the same as mine, that would be comforting. I would trust that number more than the small white label applied by the vendor with their own part number.

I'll have a look at it this afternoon when I get home.
 

vette

Darth Vader
Country flag
Offline
Blueskies, I don't think that you are that far off in what you are doing. I had similar situation installing my springs and mine were the original which are probably somewhat softer than new ones.
i too found that with the springs bolted in place the axle housing was pulled down hard against the frame rails and wondered the same thing you did. But it is correct, because when the car was later put on the ground for running it works fine. A far as the method to get the springs bolted up, I too found that the jack under the center point of spring raised the whole car before it brought the spring near the perch plate or the bolts. So since my body shell was light and there was no interior in it. I cut two 2x4 pieces of timber and ( having the car on sturdy jack stands on the frame rails) I wedged the 2x4s between the interior rear seat surfaces and the ceiling of my shop. I kept the 2x4s outboard as much as possible so as not to bend the metal around the seat area. Now the body was literally wedged between the 2x4s to the ceil and the jackstands to the floor. It wasn't going to move no how. Then I used the floor jack to jack the spring into position.
With the width of the floor jack plate it was hard to get to the nuts and washers. So I fashioned a small "U" shaped piece out of wood. Just as you see in that capital U. i made the bottom horizontal piece out of a 1" square piece about 3" long. the legs of the U were each made with a 1" square piece of wood. I screwed them together to create the U. The U was put on the jacking plate of the floor jack and the legs of the U were pressed up agains the clamping plate of the spring. This then gave me separation from the jack plate and the spring clamp plate and I was able to reach between the two to get the nuts and washer on. Dave.
 
OP
B

blueskies

Jedi Warrior
Country flag
Offline
After hearing these stories, I must say that I am impressed with the various innovative things people come up with. And I feel better about not being the only one to spend more time on this than expected.
 

Griz

Jedi Hopeful
Offline
142.jpgI made a cross beam from a 2x4 tapered at the near end in the attached picture and braced up against the rear seat ledge at the far end. With the bottle jack leveled with a shim on top the frame member and a nylon strap around the beam and the spring I was able to slide the rear end in and raise the spring up to the axle. Griz
 

bob hughes

Luke Skywalker
Country flag
Offline
I put new springs on my first Healey around about 1974, a 100/6, whilst it was in the road, did not take long, bought them from John Chatham. I can not remember having to fight them in but the car was fully loaded up with engine, gear box, spare wheel etc. The were uprated springs too.

Also took the springs off my BJ7 and fettled them and put them back in with no problems, again the car was fully loaded, maybe that is the difference.


:cheers:

Bob
 

fordtrucks4ever

Jedi Trainee
Country flag
Offline
After hearing these stories, I must say that I am impressed with the various innovative things people come up with. And I feel better about not being the only one to spend more time on this than expected.

After reading some of these stories I better understand Darwins theory.
 

chapelfarmer

Freshman Member
Offline
I wonder whether there is a problem with spring length though? I've started a different thread (Leaf spring length) before finding this one - should maybe have searched better first - sorry! My springs do seem to be too long and, since as far as I can see there's one big main spring from front to back I don't really see how leaves sticking could cause that. Or am I missing something?
 

chapelfarmer

Freshman Member
Offline
Where did you get to blue skies? I'm still stuck with mine and - yes - they do have the same number as yours - SUR121. My axle is sitting about an inch too far back (diff housing touches back bulkhead) and my shackles are lying too flat, giving too little travel for proper suspension.
 
OP
B

blueskies

Jedi Warrior
Country flag
Offline
I haven't noticed that the axle is sitting too far back but will check on that. It does look as if the spring does not have much room for travel, and the shackle is not vertical but forced to the rear. I won't know how it actually will work until the car is completed. That could be a year or two from now, as the BJ7 is the first priority and the BN4 will have to wait.

Looking forward to hearing what you come up with.
 

steveg

Yoda
Gold
Country flag
Offline
My springs are labelled: "DAUR 576". Got them from Cape 10 years ago; they fit fine with the right curve and the rear shackle at about the 7 o-clock position.
There may be a number before the 5, but can't see it in this picture:
https://www.pbase.com/stevegerow/image/39218389

Think there's a pretty good chance you have the wrong springs - if the axle's too far back, they're too long.
 
OP
B

blueskies

Jedi Warrior
Country flag
Offline
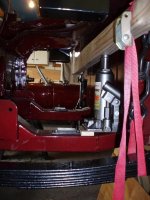
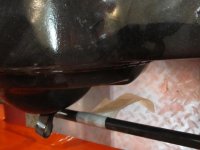
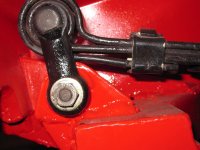
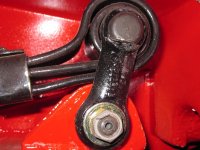
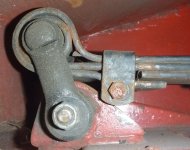
Chapelfarmer, here is a pic of the clearance behind the axle. It looks as if it has about two inches space there, which appears to be enough space for the panhard bar and whatever goes in that loop (brake lines? - have not got that far yet) to fit in that space. Also attached are pics of the right and left side shackles and shackle angle. Hope this helps. Do you have pics of your set up?

I'm hoping that this is within the normal range and that it will work. As mentioned before, I'm not the one who took the car apart, so this is a bit like doing a jigsaw puzzle, without the picture on the box.

IMG_9382 diff space.jpgIMG_9384 right shackle.jpgIMG_9385 left shackle.jpgThoughts, anyone?
 
Similar threads
Thread starter Title Forum Replies Date
H TR2/3/3A TR3- installing rear leaf springs = nightmare.... Triumph 5
J Installing Adapter Hubs for Wire Wheels on a Bugeye Austin Healey 5
S Installing a Radiator Fan Austin Healey 9
G Installing New Rocker Shaft Assembly Austin Healey 3
W Need advice on installing new side curtain glass Spridgets 1
Bayless Help please installing bonnet release cable Spridgets 8
M TR6 Installing Retrosound? Triumph 4
S TR2/3/3A Installing the distributor pedestal. Triumph 3
K TR2/3/3A Question about installing the steering wheel control head? Triumph 1
A TR6 Installing differential and transmission Triumph 10
Z Installing Toe Board Panels Austin Healey 1
K TR2/3/3A Installing Brake Caliper pistons into the bore? Triumph 21
CJ Burton MGB-GT Installing Seat Covers for 1962 - 1967 MGB GT MG 0
A Early 1967 AH Sprite - installing steering column and new directional switch? Spridgets 0
B Installing cam bearings 1275, can I do it? Spridgets 1
bighealeysource Installing stainless steel brake hose on BN2 Austin Healey 5
steveg TR6 Installing stock trailing arm bushings on the car - is it possible? Triumph 2
steveg TR6 Installing adjustable trailing arm brackets Triumph 7
T Installing Garmin GPS in a BJ7 Austin Healey 19
F Installing AC in my 1960 Healey Austin Healey 14
S TR2/3/3A technique for installing a door Triumph 5
R TR2/3/3A Installing wiring harness in steering column Triumph 59
R TR2/3/3A Installing gas tank Triumph 6
C Installing rubber grommets in firewall? Austin Healey 6
S TR2/3/3A installing a fuse in the red tail lights Triumph 4
S TR2/3/3A installing the wiring harness Triumph 8
R Installing Sprite Luggage Rack Spridgets 9
Lukens TR2/3/3A Installing a throttle. Triumph 2
J Powertune booster for a bj8 , trouble installing Austin Healey 2
B TR2/3/3A Installing dzus fastners in bonnet Triumph 8
D Prepping Floors Before Installing Interior Restoration & Tools 6
drooartz Installing front hubs, tips? Spridgets 15
E TR4/4A Wiring the horn when installing a Moto -Lita steering wheel Triumph 4
K TR2/3/3A Installing Moss wheel spacers? Triumph 5
D BT7 tri-carb installing my crank Austin Healey 4
aero3113 Installing Front rotors to hubs Austin Healey 2
C Advice for installing a 3000 Grille??? Austin Healey 7
B MGB Installing new upper fulcrum bushings MG 5
B MGB Installing upper fulcrum bushings MG 0
S TR4/4A procedure for installing gauges etc Triumph 0
I Tips for installing intake manifold plugs in a stock Bugeye? Spridgets 6
55modified Help installing toggle dip switch on dash for lights. Austin Healey 23
TRMark TR4/4A Installing a new windscreen Triumph 9
55modified Rear anti-roll bar. Is it worth installing on a BN1? Austin Healey 22
T Installing a Lucas 16 ACR alternator on Bugeye Spridgets 10
KVH General Tech Installing the Pistons and Rings Triumph 7
T Need advice for installing a Winner's Circle Panhard rod on a BE Spridgets 4
6 General Tech Installing New Oil Pressure Gauge MG 5
6 Installing Oil Pressure Gauge Spridgets 2
T TR4/4A Installing wheel arch covers in a Tr4a Triumph 0

Similar threads

Top