• Hey Guest!
    British Car Forum has been supporting enthusiasts for over 25 years by providing a great place to share our love for British cars. You can support our efforts by upgrading your membership for less than the dues of most car clubs. There are some perks with a member upgrade!

    **Upgrade Now**
    (PS: Upgraded members don't see this banner, nor will you see the Google ads that appear on the site.)
Tips
Tips

ZS carb rebuilding - lessons learned so far

tdskip

Yoda
Country flag
Offline
#1 - you will never know exactly how messed up your carbs are until you take them apart.

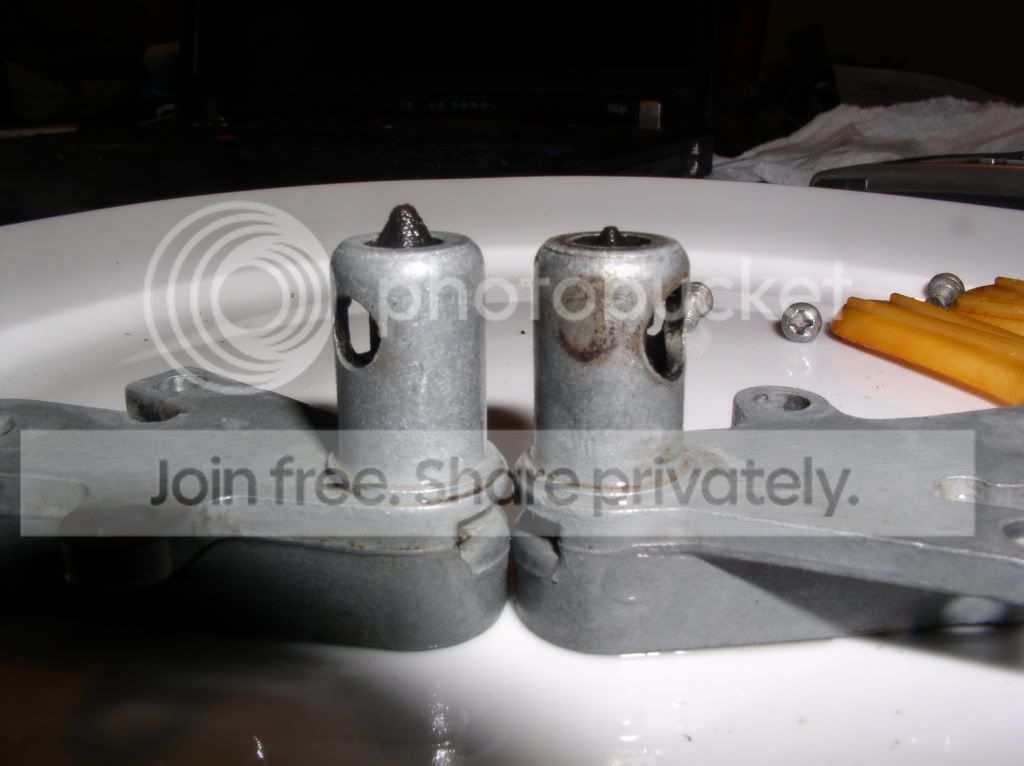
I cleaned and soaked the Cold Start Valve, good think I did it since I didn’t even know that there was a spring in there and it was all varnished up and stuck shut. After cleaning it opened up and moves freely now.

When I reinstalled the cold start valve I noticed that the vent port prong wasn’t moving when the throttle and cold start valve moved, so I pushed a bit from inside and it sprang out. It was varnished in place as well – yikes.


31YRRAQ9Q0L._SL500_AA260_.jpg
 
Check out the difference in the temperature compensation at the same room temperature, and this is after they have had their initial cleaning dip.

1974CarbRebuildCompensatorMis-Ma-1.jpg
 
Kind of amazing what 30 + years of gas and fumes will do to a carb, isn't it?
 
No kidding Paul, it's been an education. I'm down to replacing the o-rings in the damper now. Those are a bugger to get out.

Once thing I can say is that I thinking tuning them will be more intuitive now that I've seen how they come apart. Not a bad job at all, <span style="font-weight: bold">much</span> simpler than overhauling a set of SUs.

Wouldn't have gotten to this point without the Forum's help and encouragement along the way - thanks guys!
 
A long drift of the diameter of the needle shank and gently BEAT th' things out... when you reassemble, first wind the jet adjustment all the way up then reinsert the clip. That keeps the "screw" located and insures the mix will lean out rather than the screw climbing up the tube.

Fun, innit? :laugh:
 
IMO you're a lot less likely to damage something if you first remove the needle & it's carrier through the bottom : Loosen (or remove) the locating screw on the side then completely unscrew (full lean) the mixture adjustment. Then gently tug on the needle to pull the needle & carrier out.

Then I insert an unsharpened wood pencil into the hole, and rap the eraser end on the bench to tap the screw & clip out the top.

There's a great write-up, with photos, on the Buckeye Triumphs site:
https://www.buckeyetriumphs.org/technical/Carbs/CarbsII/CarbsII.htm
 
TR3driver said:
IMO you're a lot less likely to damage something if you first remove the needle & it's carrier through the bottom : Loosen (or remove) the locating screw on the side then completely unscrew (full lean) the mixture adjustment. Then gently tug on the needle to pull the needle & carrier out.

Then I insert an unsharpened wood pencil into the hole, and rap the eraser end on the bench to tap the screw & clip out the top.

Yep - basically what I did but I wasn't smart enough to use an unsharpened pencil and went to Home Depot to by a dowel...

One of the guys on 6-pack also turned me on to this, which was a big help.

https://www.bowtie6.com/CarbRepair/
 
I don't think there's a way to DO it with th' needle in place, is there?!?
 
DrEntropy said:
I don't think there's a way to DO it with th' needle in place, is there?!?
Not certain, but I think the needle & carrier could be driven through along with the adjustment screw. Somehow when you said "drift of the diameter of the needle shank" I got the impression that's what you meant.

My mistake obviously! So please consider my reply as purely a clarification.
 
hehee... my (poor) 'assumption' was the needle was out already. I shoulda been more specific.
 
Back
Top