
-
 Hey Guest!
British Car Forum has been supporting enthusiasts for over 25 years by providing a great place to share our love for British cars. You can support our efforts by upgrading your membership for less than the dues of most car clubs. There are some perks with a member upgrade!**Upgrade Now**
(PS: Upgraded members don't see this banner, nor will you see the Google ads that appear on the site.)

Tips
- We have a special forum called "Member Articles" where you can submit actual articles for consideration for publication. Learn More
- Don't have an Avatar? If not, your avatar will default to the 1st character in your username. Go into "Account Details" to change your Avatar.
- Some basic forum navigation info: click
 Hey - did you know if you click on the title of a thread it will take you to the first unread post since you last visited that thread?
- Hey Guest - Is your British Car Club in our Clubs database? If not, send me a PM - Basil

- Looking for a local club? Click the "Clubs" tab above and browse hundreds of clubs world-wide.
- Add Android or iPhone APP: click
- Did you know - any picture or video you add in your posts in any marque-specific forum will also get added to the Media Gallery automatically.
- A few more tips about posting and replying: click
- Hey there Guest - be sure to keep your profile page up to date with interesting info about yourself: learn more
- More tips and tricks on Posting and Replying: click
 but were afraid to ask:
  STOP!! Never post your email address in open forums. Bots can "harvest" your email! If you must share your email use a Private Message or use the
  smilie in place of the real @
- Want to mention another member in a post & get their attention? WATCH THIS

- So, you created a "Group" here at BCF and would like to invite other members to join? Watch this!
- Hey Guest - A post a day keeps Basil from visiting you in the small hours and putting a bat up your nightdress!
- Hey Guest - do you know of an upcoming British car event?
 Pretty Please - add it to our Events forum(s) and add to the calendar! >> Here's How <<
- Hey Guest - you be stylin' Change the look and feel of the forum to fit your taste. Check it out
- If you run across an inappropriate post, for example a post that breaks our rules or looks like it might be spam, you can report the post to the moderators: Learn More
- If you would like to try some different "looks" or styles for the site, scroll to the very bottom, on the left and click the Style Selector.
You are using an out of date browser. It may not display this or other websites correctly.
You should upgrade or use an alternative browser.
You should upgrade or use an alternative browser.
TR2/3/3A Upholstery ?!
- Thread starter CJD
- Start date
OP
CJD
Yoda
Online
The one from Jonathon is a dense pressed board, about 1/8" thick. I think it's called MFB (manufactured fiber board) in the construction world? It then has an additional 1/8" of foam padding glued to it. It appears to me similar to the original backing, but much lighter in color. Of course, I guess the original may have darkened over the 62 years?!?
Yeh I think originally it was a 3/16 fiber board. The door pocket looks original and that is nice. In the past, I bought some door pockets and whole panels that they wanted me to drill a hole and fish the cable, but again a TR2 and early TR3 have a different door pull.
Are you happy so far with the door panel quality? I ask because you basically built it over.
Steve
Are you happy so far with the door panel quality? I ask because you basically built it over.
Steve
OP
CJD
Yoda
Online
The quality of the panel is great. Naturally I was a bit bummed that the panel size was off. At first i thought it was all the door work I did, but the original panel fits. Oh well...better larger than smaller!
If you find a pocket source, fabbing your own panel would be easy.
If you find a pocket source, fabbing your own panel would be easy.
Last edited:
Yes I have some kinda nice old ones and that is where I am going -----just use vinyl on the doors and side pieces, but I get thinking--- I like the leather on the cockpit capping, so maybe some leather. The old bid sheet says red leather seats and that is what it had in it when I got it 1974 for a parts car for 250.00; however, bid sheet says black side curtains and top, but when I got it the top and windows were white. I kinda like the white, but I bought a black top so the windows should match.
OP
CJD
Yoda
Online
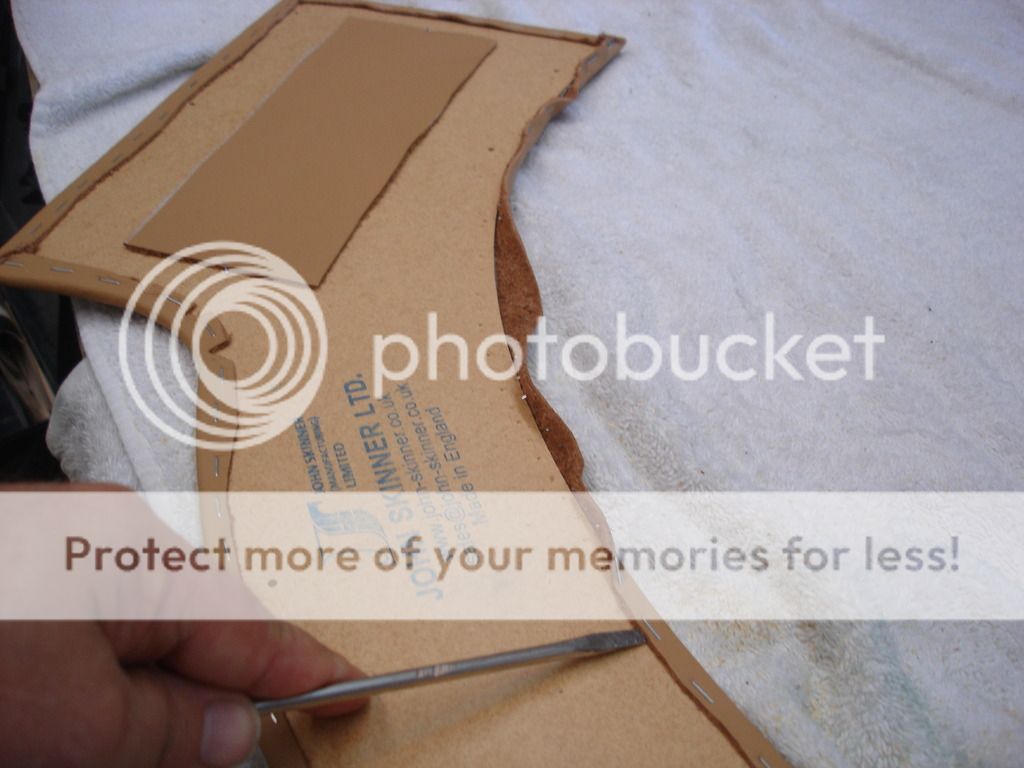
I have come to the conclusion that Jonathon intentionally made some of the pieces too large, fully knowing that, because we have hand made cars, there are variances in sizes. To make the trimming easy, he only stapled the panels that need trimming. Other panels fit perfectly...and on those he glued the covering to them. Anyway...
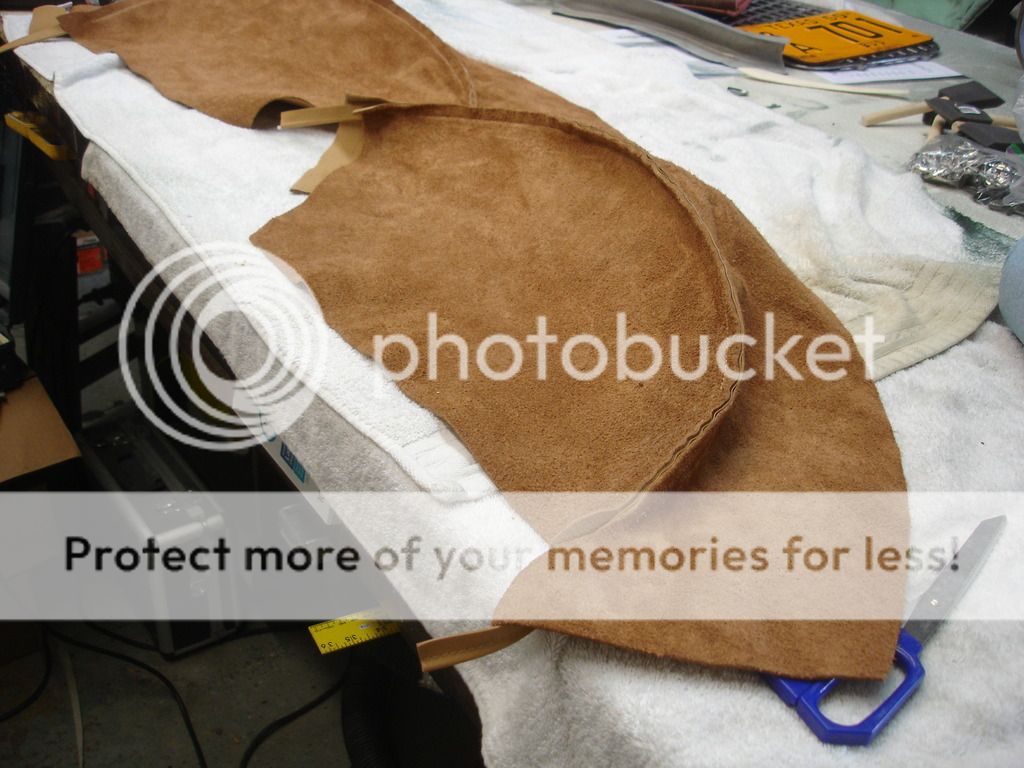
These are the rear wheel well covers.
I started by using the covers to make 2 swaths of batting for each well. The bare stripe is where the seam will be glues down. I used glue to hold the batting down, but will not glue the cover to the batting.

It takes some peal up and re-lay to get the seam positioned right. On the back side of the cover, you must glue the seam to the cover, so it is entirely downward once attached to the well.
Here the edges are glued and smoothed with the bone.

And that's the wheel well. Again, it doesn't work out first time...it takes a good bit of pealing and reattaching to get it right. Do not be afraid to remove or add more batting if it is needed.

This pic is showing the staple strip that runs down the front of the quarter panel. The original is a kind of twisted vine looking stick. I am using white pine.
I cut it into 3/8 X 3/8" strips to fit.

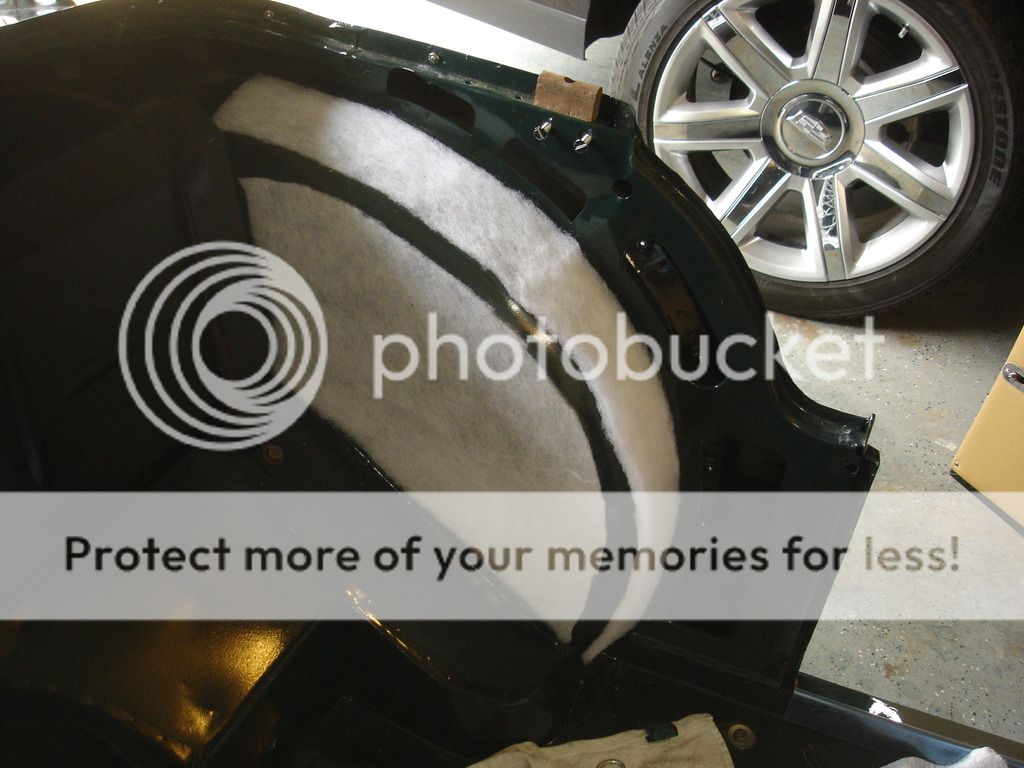
Here is the left wheel arch all finished.
As with the door panels, the rear quarter panels will need some trimming. Again, notice how the covering is held with staples to make this job as easy as possible. The material stapled to the inside of the panel is to prevent the panel from getting wet, I assume?!?
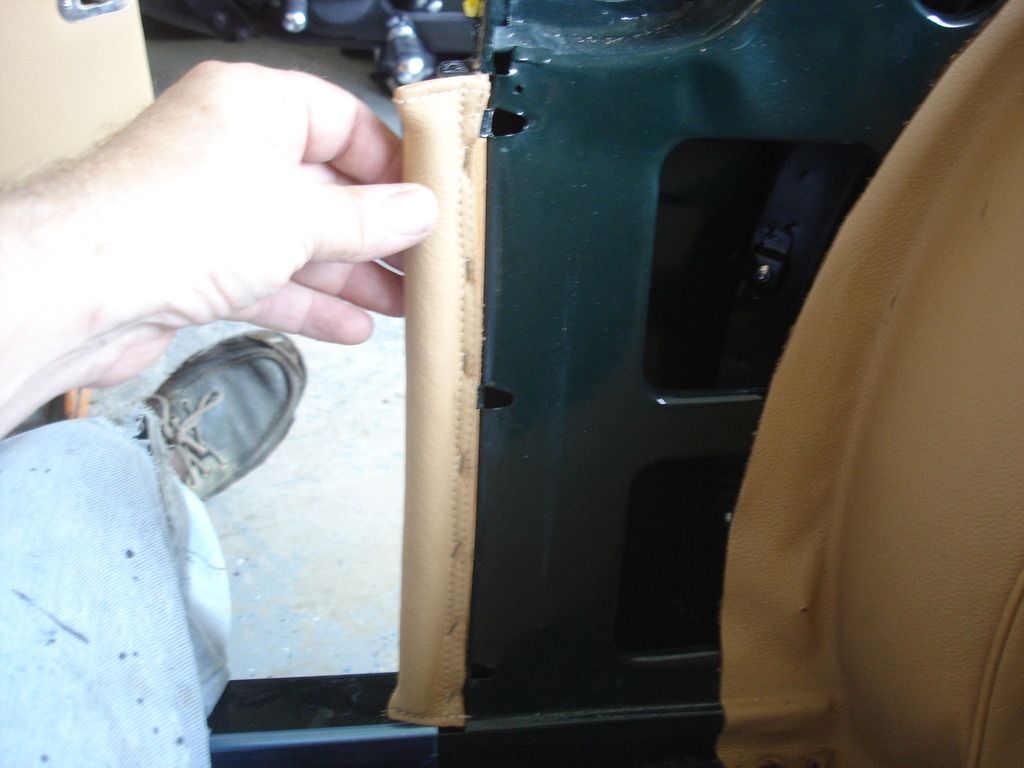
Once the quarter panels are trimmed, we now staple the weather strip to the tack strip. On TR2's this is vinyl. On TR3's it is fuzzy seal.
Notice you have to find and poke the holes for the hood sticks.

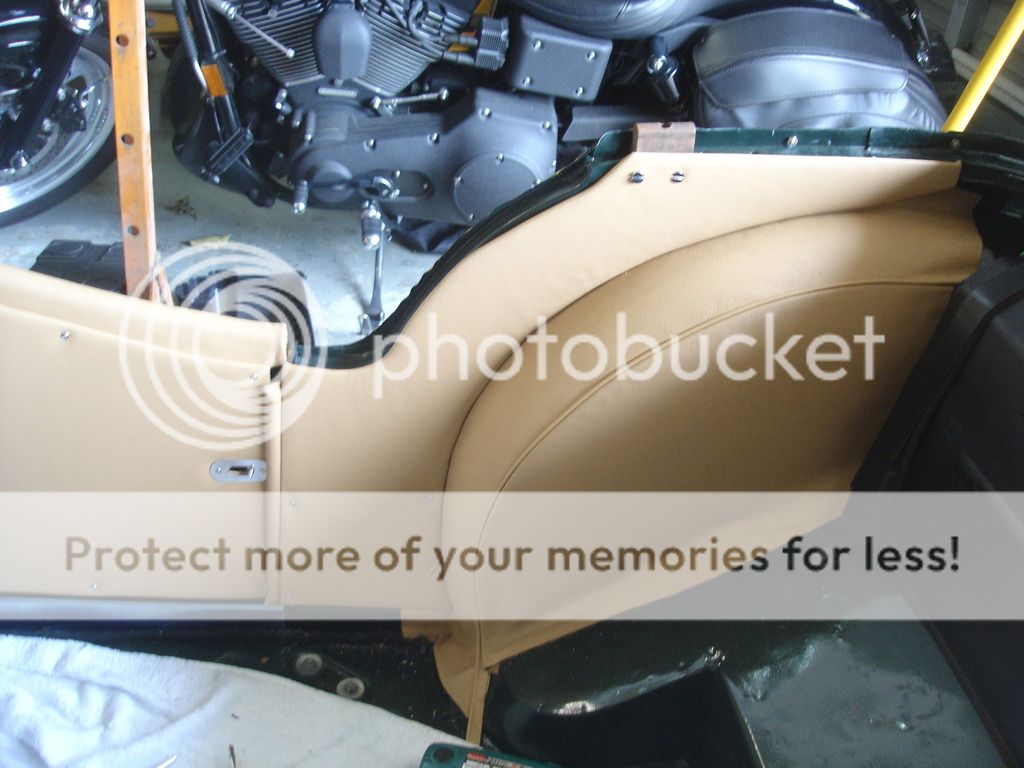
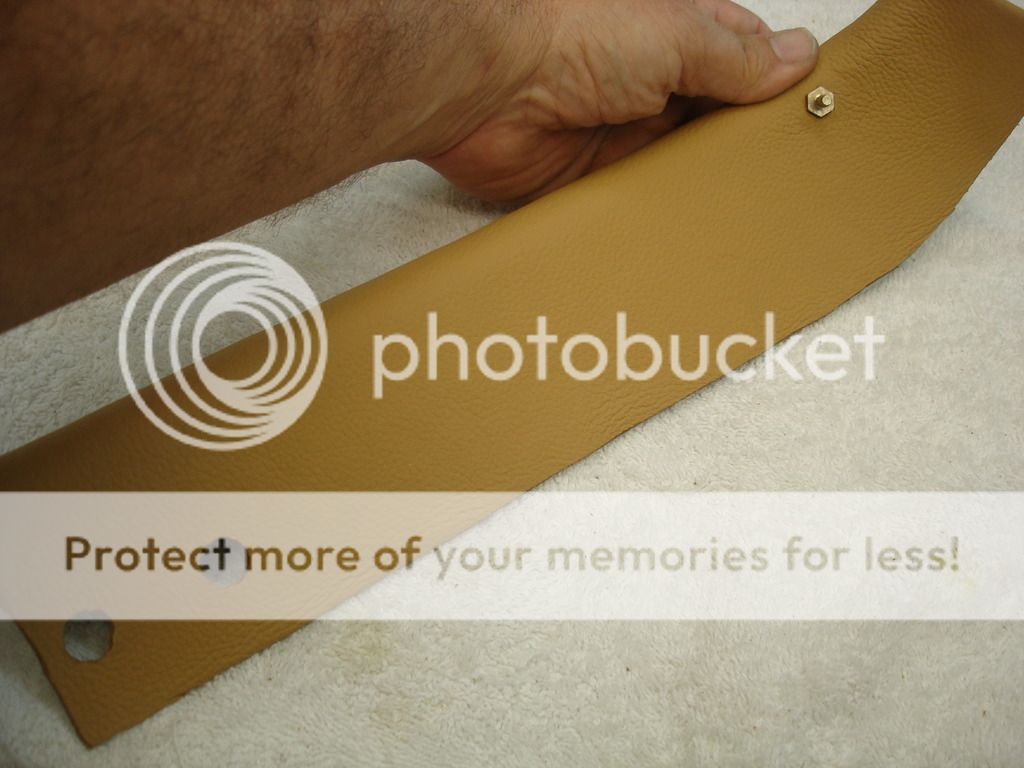
Here I am covering the quarter capping. This is , by far, the most difficult piece to cover on the entire car. It has several compound curves that require both stretching and shrinking to make it work out right.
I glue the center first, and let it harden.
Sorry, no more pics, as I was too busy using both hands to stretch and tug!!
This is the right rear capping piece.
Here the rear capping has the tenax for the stick cover installed, and the holes for the stick screw are opened up.

The quarter capping goes over on the TR2, under on the TR3!
The rear capping always goes under.

These are the rear wheel well covers.

I started by using the covers to make 2 swaths of batting for each well. The bare stripe is where the seam will be glues down. I used glue to hold the batting down, but will not glue the cover to the batting.

It takes some peal up and re-lay to get the seam positioned right. On the back side of the cover, you must glue the seam to the cover, so it is entirely downward once attached to the well.

Here the edges are glued and smoothed with the bone.

And that's the wheel well. Again, it doesn't work out first time...it takes a good bit of pealing and reattaching to get it right. Do not be afraid to remove or add more batting if it is needed.

This pic is showing the staple strip that runs down the front of the quarter panel. The original is a kind of twisted vine looking stick. I am using white pine.
I cut it into 3/8 X 3/8" strips to fit.

Here is the left wheel arch all finished.

As with the door panels, the rear quarter panels will need some trimming. Again, notice how the covering is held with staples to make this job as easy as possible. The material stapled to the inside of the panel is to prevent the panel from getting wet, I assume?!?

Once the quarter panels are trimmed, we now staple the weather strip to the tack strip. On TR2's this is vinyl. On TR3's it is fuzzy seal.

Notice you have to find and poke the holes for the hood sticks.

Here I am covering the quarter capping. This is , by far, the most difficult piece to cover on the entire car. It has several compound curves that require both stretching and shrinking to make it work out right.

I glue the center first, and let it harden.
Sorry, no more pics, as I was too busy using both hands to stretch and tug!!

This is the right rear capping piece.

Here the rear capping has the tenax for the stick cover installed, and the holes for the stick screw are opened up.

The quarter capping goes over on the TR2, under on the TR3!
The rear capping always goes under.
OP
CJD
Yoda
Online

The rear tank cover fit perfect...and Jonathon had it glued to the backing.


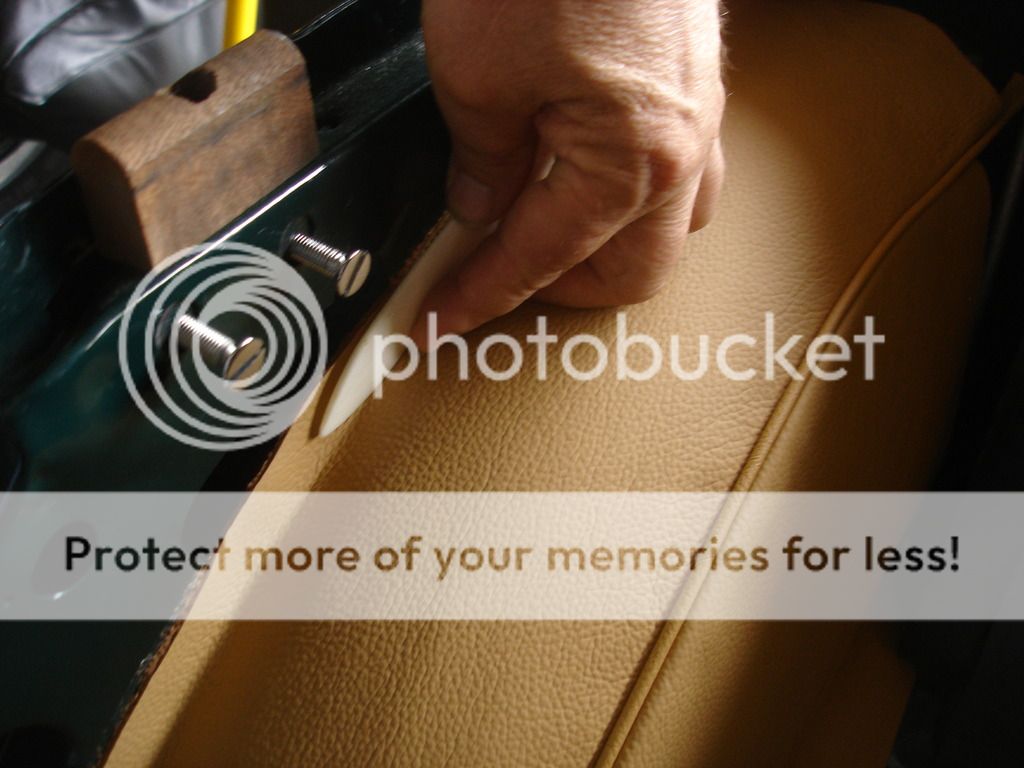
Here I am stapling the weather seal to the left side front kick panel. This will make it easier to line up later.

Here the seals and end strips are stapled to the kick panel carpet and ready to install with the "4 trim screws.


Right side. You can glue the front of these panels, but I let the floor carpet hold them without glue.

I bought the floor padding set. It is made of very thick felt. I will start with the tunnel first. The felt padding will be snapped to the tunnel. The carpet pieces will then be glues to the felt. If I need to access the tunnel, the entire felt and carpet will unsnap and lift off.


Here I have laid the pads out, so I can visualize which goes where and understand how to proceed.
The flooring is made to pull out if it gets wet in a rain storm, so it both snaps in AND is installed last, so it will remove easily.
OP
CJD
Yoda
Online


Here I am installing the padding to the tunnel using snaps. I decide where I want the snap and use an ice-pick to jab through the padding and mark the tunnel wall. I then drill an 1/8" hole for a pop rivet. Or you can use a #4 trim screw like the factory did.

On the padding, I use the hole the ice pic made to center the snap. Here the "claw" is jabbed through the pad.


The teeth of the claw go through the snap and get bent outward. Sorry, I don't know the correct term for the claw!?!

I used 2 snaps on the right side and 3 on the left. Notice I used speed tape to pull areas of the padding inward, where it tended to pucker.

I used 4 snaps total to hold the rear tunnel padding on.
Here is the first of the 26 individual carpet sections on the TR2!!

Again, the carpet will now be clued to the tunnel padding. Here I am actually using the 3M series 90 spray adhesive. It is easier to deal with on larger surfaces like carpet.

Right side forward.


Now the overlap is such that I work rearward on the tunnel.


Front floor panel also snaps, so it can be removed if it gets wet or dirty.


The driver side front floor gets a hole for the throttle stop.


Here we move to the rear area...
These little sections get glued directly to the floor.


The rear floor carpet is held by the seat tracks. Note I am measuring the distance between the tracks, front and rear. If the tracks are not parallel, the seat slide will bind.


John you are making it look too easy. I like how you left the gap in the foam on rear wheel well. The 2 piece foam idea should help finding the line for the panel piece easier, so it does not look warped. The last time I did that on a wheel well I had Tim on the phone twice telling him his stuff is wrong and I was not happy. Tim was very cool and said he has made hundreds and it will fit and it did. I am still working on painting this summer but also doing little stuff because I cannot concentrate properly on the getting the panels straight, but I will get there. I am starting to see it is putty, primer, and sanding over and over for the new guy. Your pictures and step by step lay out is much appreciated.
steve
steve
OP
CJD
Yoda
Online
Thanks guys...just hope it helps. I admit I was a bit bummed to have to alter the new panels, but now that it's done, I have nothing but admiration for Jonathon's kit. Everything either fits perfectly, or requires just a slight trim on one edge. I don't think you can get away from a little bit of trimming on a hand made car. It's very nice to be able to trust the cuts!
For those who like a challenge, there is very little you couldn't do yourself. The hardest would be getting the wheel arches true. The rest would be a matter of holding it up and marking. I'm still glad I got the kit, though, as it has saved me at least a month's additional work.
For those who like a challenge, there is very little you couldn't do yourself. The hardest would be getting the wheel arches true. The rest would be a matter of holding it up and marking. I'm still glad I got the kit, though, as it has saved me at least a month's additional work.
John the quality of work you are doing is fantastic, and it's great you are documenting it all. I don't know if you are going concours or not but it looks like it could be. I did see a few problem areas you may want to correct.
1- The side trim panel on top of the wheel arch should be under the capping, not over it.
2- The draught extruders on the B-post should have the tops done differently, not sewn across the top. And I made the length about an inch longer to fill in that small opening at the top. Maybe you have an enough material left over from where you trimmed the side panels to make new ones.
3- The carpet over the trans cover shift lever should have the opening for the lever cut out and the rubber shift boot goes over top.
Other than that you are doing a fantastic job. Please don't get mad at me I just wanted to let you know about these few things that will get points deducted if you show the car in concours.
OP
CJD
Yoda
Online
Had to study that Keith! The rear side capping does go on top. It's very hard to find a picture of the capping without the stick cover or something covering it. I went by the VTR rather nebulous description of the capping...but I finally found a pic of the correct orientation...thanks!
The draught excluders are as provided by Jonathon. How are they supposed to be done at the ends?
You bring up a good question I've had about all the rubber plugs. The VTR description says the plugs go over the carpet and metal opening. Are there special plugs with a thicker groove to accept the carpet under the lip? Most plugs I have seen are barely able to go over the 18 gage metal.
Jonathon's shifter ring has a nifty little plastic ring...it's shown on the TR2 page of his website. For now I have left it as he made it. Once I cut the holes for the oil dip stick and the unjointed grease accesses I'll re-visit whether I'll keep the ring or go as original.
Let me know if you see anything else. Even if I don't go all original, I still enjoy learning what the car was like off the production line!
OP
CJD
Yoda
Online
On another thought...
The Rimmer Bros Seats Suck!!!
I allowed today to do the seat covers. In preparation, I pulled the brand new Rimmer seats out of their plastic wrappings. OMG do they suck! The seat backs are fine. The bottoms are distorted beyond belief! The bottom rims have the reinforcement ridges stamped...not as original. I knew this from the pictures. What was not obvious is that the outer rim is welded on. That in itself is not that bad, but some of the welds are ground off completely, leaving air gaps around the rim of the pan! Then the bottom stamping is so distorted that you could not sit the seat on a level table. It would rock and roll with over and inch of heat distortion.
Honestly...I could have made the seat bottoms and they would have looked better than these POS's.
So, I never got to the covering today. I spent 3 hours per seat using metal shrinking techniques to get the bottom pan flat, so the seat tracks could even be bolted to them. I then had to re-weld about half of the rim, especially around the rear track mounting bolt holes.
The funny thing is that these were powder coated...obviously trying to make a turd look good!?! Unfortunately, powder coating makes welding a bear. You cannot wire brush the coat off, so I had to burn it off as I welded. Oh well.
NOW that is what I am talking about=== the way Keith came in with some news about originality and how John coolly accepted it, and we all got to see it. Please post your pictures Keith for all to see! I always enjoyed following your car as it was being built. Plus the car made a beautiful cover on the magazine.
Peace out steve
Peace out steve