
 Hey Guest!

 Hey - did you know if you click on the title of a thread it will take you to the first unread post since you last visited that thread?
 but were afraid to ask:
  STOP!! Never post your email address in open forums. Bots can "harvest" your email! If you must share your email use a Private Message or use the
  smilie in place of the real @
 Pretty Please - add it to our Events forum(s) and add to the calendar! >>

Offline
Today was a 1/2 Tunebuggery day, as I had a morning full of other errands to take care of. The afternoon was warm and sunny, but I successfully fought down the urge to take the Triumph out for a ride (even though it's supposed to snow for the next couple of days. So back in to the garage I went.
I took advantage of being down in Orem for a service on the Fit in the morning and stopped by Harbor Freight for a few odds and ends that I needed. One of those bits was a 4-1/2" angle grinder, needed for modifying the brake drums to fit with my later-style backing plates. Thanks to advice from the good folks here (especially spritenut) I knew that I needed to make the brake drums about 1/16" less deep. The method is to grab the handy grinder and grind away. I marked one Sharpie-width around the outside of the drum so I'd know when I'd gone far enough.
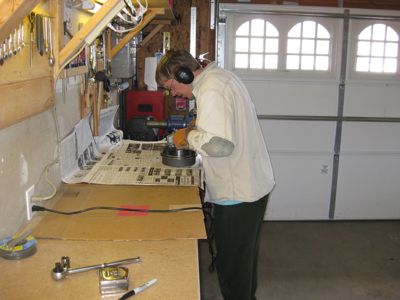
<span style="font-style: italic">Drew with a power tool, showing that drum who's boss</span>
This process proved to be relatively simple, although a bit messy. I did happen to have a test drum on hand -- one that I have modified a bit to use as a rear hub puller. I practiced on that one first to make sure I knew what I was doing.
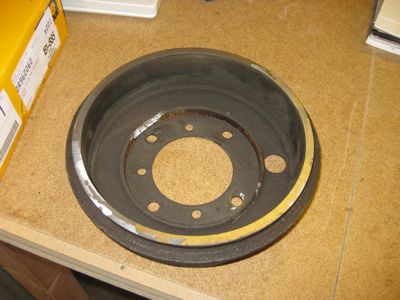
<span style="font-style: italic">Test brake drum, showing where I was grinding</span>
Once I had ground the Sharpie line away it was off to the car for a few test fits. I think I've ground enough off, but it's easy enough to pull the drum again and do a bit more if there is still rubbing once everything is fully assembled and adjusted.
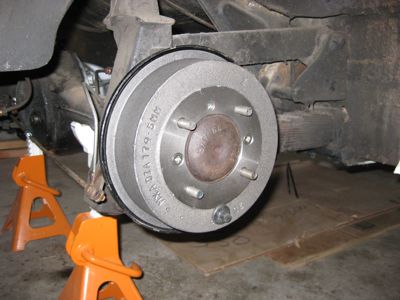
<span style="font-style: italic">New brake drum on and fit properly</span>
The last step was the most fun, as I finally got to put the rear wheels back on for the first time in many months, maybe as much as a year or so! The wheels were torqued up and seemed spin freely. They'll be off and on many more times as I get everything sorted out, but at least for one night the back of the car looks like a car again!

<span style="font-style: italic">If you squint a bit it looks like a car</span>
Tomorrow is all about putting in the new brake lines. I have a set of hard lines that just need to be bent into the proper shapes. I did one of the lines when I first bought the car, but still have all the rest to get to. I'll do a bit of cleanup around the lines as well while I'm at it, and will put in the soft lines as well. If there is time, I'll get the front A-arms and shocks installed, but that may wait until Wednesday depending on how fast the brake lines go.
Not bad for just 1/2 a day!
I took advantage of being down in Orem for a service on the Fit in the morning and stopped by Harbor Freight for a few odds and ends that I needed. One of those bits was a 4-1/2" angle grinder, needed for modifying the brake drums to fit with my later-style backing plates. Thanks to advice from the good folks here (especially spritenut) I knew that I needed to make the brake drums about 1/16" less deep. The method is to grab the handy grinder and grind away. I marked one Sharpie-width around the outside of the drum so I'd know when I'd gone far enough.
<span style="font-style: italic">Drew with a power tool, showing that drum who's boss</span>
This process proved to be relatively simple, although a bit messy. I did happen to have a test drum on hand -- one that I have modified a bit to use as a rear hub puller. I practiced on that one first to make sure I knew what I was doing.
<span style="font-style: italic">Test brake drum, showing where I was grinding</span>
Once I had ground the Sharpie line away it was off to the car for a few test fits. I think I've ground enough off, but it's easy enough to pull the drum again and do a bit more if there is still rubbing once everything is fully assembled and adjusted.
<span style="font-style: italic">New brake drum on and fit properly</span>
The last step was the most fun, as I finally got to put the rear wheels back on for the first time in many months, maybe as much as a year or so! The wheels were torqued up and seemed spin freely. They'll be off and on many more times as I get everything sorted out, but at least for one night the back of the car looks like a car again!
<span style="font-style: italic">If you squint a bit it looks like a car</span>
Tomorrow is all about putting in the new brake lines. I have a set of hard lines that just need to be bent into the proper shapes. I did one of the lines when I first bought the car, but still have all the rest to get to. I'll do a bit of cleanup around the lines as well while I'm at it, and will put in the soft lines as well. If there is time, I'll get the front A-arms and shocks installed, but that may wait until Wednesday depending on how fast the brake lines go.
Not bad for just 1/2 a day!


