• Hi Guest!
    If you appreciate British Car Forum and our 25 years of supporting British car enthusiasts with technical and anicdotal information, collected from our thousands of great members, please support us with a low-cost subscription. You can become a supporting member for less than the dues of most car clubs.

    There are some perks with a member upgrade!
    **Upgrade Now**
    (PS: Subscribers don't see this gawd-aweful banner
Tips
Tips

GT6 Triumph GT6, basic work estimates

Ok, took the the stupid float bowl off for the millionth time today. Float valve was stuck again. Took it off and let it soak in carb cleaner... ...again. Since it was off, I adjusted the bends on the newer float. Reassembled everything. And it works! Had to adjust a few things afterward, but the car starts up and runs fine. Haven’t driven it yet. Tomorrow’s supposed to rain, but maybe Thursday.
 
Congrats for you and it just takes lots of time when we make something work that was not designed for that purpose.
Not something we have to do all the time, but you might consider this next time a part is hard to get.
Don't be affair to put a part wanted on the classified adds. Lots of us have parts cars, even tho the early GT6 is a rare number. My Spit6 drive train is that.
Happy drive when it is not raining and let us know.
 
I hope the weather isn't wet for too long. You and your husband need to put some miles on the GT6. You deserve it after all the work you have put into it.
 
I am not trying to defend the shop but do wish to offer the following comment which MAY sounds like I am coming to their defense.

Your GT6 and ours are about the same age. A couple of years ago I went to start the car and it suddenly was pouring gas out of one carb. It turned out to be a failed float. One day it was fine, the next it sank to the bottom of the float bowl never to work again. My point is, until you look into the carb issue it may not be something the shop did wrong.

A totally valid point... except the shop rebuilt both carburetors. In this case, you're right, it was a leaking float. One that the shop had covered with some sort of epoxy in an effort to fix the sunk float. So yep, another thing they fixed that lasted just about long enough to get out the door.
 
We had an electric fuel pump on it before sending it to the shop. The original mechanical pump was installed for looks, but bypassed. In addition to rebuilding the original generator I had and replacing the aftermarket alternator with it, he replaced the electric fuel pump by making the mechanical one work again.

Trying to remember if these may be the only two things he touched that haven't failed yet. :smile:
 
I will not defend the shop regarding the floats. They should have notified you of the problem, the lack of available parts, and their proposed band-aid (epoxy).
 
I will not defend the shop regarding the floats. They should have notified you of the problem, the lack of available parts, and their proposed band-aid (epoxy).

I totally get where you're coming from, and I want to make sure I'm fair as well. I'm not trying to ascribe things to them that they wouldn't have seen or touched, etc. They actually did tell us about repairing the floats with epoxy. I just assumed since they were a well spoken of, professional shop, that they had done it before and that it would work.

I don't say this in any way to diminish my wife's accomplishment, totally the contrary, actually. But she has very little experience working on cars, and she solved it with help from the great people here, and the internet, with just a little time spent, and that solution is sustainable, because even if those floats fail, they're replaceable. And even having to go back and forth several times, and try different things, and literally learn how the carburetors do their thing... she spent less time on it than they charged me for. :p
 
Rain let up. Having a real outing with the car finally. Only took a decade. Let’s see if I can make it back despite my husband potentially jinxing me with the generator and fuel pump comment.

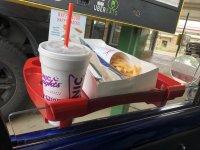
Antique machine does not have cup holders, but I found something that works just as well.

Next thing on the to do list is getting the heater and fuel gauge to work, because without it, I can’t really go that far. Unlike the speedometer, there’s not an app for that. ...at least, not for the Triumph. The fuel gauge never worked, as the float was stuck and corroded. That’s been replaced, but still doesn’t appear to work. The temperature gauge always worked, but has not since the rewiring kit I installed

Update: Stranded at Sonic. I foolishly left home without starter fluid, but thankfully there’s a Kwik Kar chain right next door that let me borrow theirs. I took the air box off and sprayed, something I am now quite experienced with. Only it didn’t catch. It usually cranks up, runs, the dies once it’s used up the fluid. It’s not doing that. It’s got air (removed airbox, choke open). It’s got fuel (starter fluid). All I can figure is it’s lacking spark. Richter12x2 is on his way, after picking up what will be it’s 3rd coil.
 

Attachments

  • AC21744C-73FD-47B1-8B72-18059B5475D2.jpg
    AC21744C-73FD-47B1-8B72-18059B5475D2.jpg
    63.5 KB · Views: 112
Last edited:
These distributors have a bad habit of the points closing up if not realllllly tight. If no spark, stick a screwdriver between the points and open them up a few time, if no spark that is your problem, no power to the area. Pull the middle lead out of the cap hold near the block, use a screwdriver to hold the lead or is will zap you. If spark you are good on that, needs to be blue for a good one, yellow will get it started but blue better.
Be careful of any fuel or fumes, don't need a fire.
 
To add to what Wayne said....

The points can slide closed if the screws are loose or they can very quickly wear closed if you don't put a small amount of grease on the 4-lobe cam that opens and closes the points (just below the rotor). I have also seen cars where the "wrong" coil has been installed. A '67 like yours and mine should have a "standard" 3-Ohm coil, not a ballast coil (1-2 Ohms). Using a ballast coil with the wiring in our cars can cause components in the ignition system to overheat and fail quickly. If you need guidance on how to check which coil you have just let us know.

It would be a good idea to start a new thread when you are ready to tackle the fuel gauge.

I assumed it was spark issue, and showed up with a cheap replacement coil from OReilly just in case. Turns out it was just that the carbs are way out of adjustment. Closing the choke I managed to get it started, but it idled at 2,500. That was enough to get it home though, and really gets the corrosion off the clutch. :D
 
Thanks for coming back with the problem solver, as much as it is. Not the first to have the choke stick even with it pushed in.
A small spring will take care of it, just finding a place to put the other end requires a "L" bracket off something.
 
What choke cable did you two finally use on this car? I remember there being problems with parts from Rimmer Bros. Sometime in the past I offered to look at and fix the broken Rimmer one. That offer still stands if you need a different cable.
 
Good memory. We’re using a universal one from an auto parts chain. It was doing well, except, at Sonic, when I was fiddling with all sorts of combinations, open/closed/middle, I tore it right out of the dash. Still functional, the backer simply went through the hole (previous owner made his own dash). It looks like the original pull can be removed, and possible swapped over with the wrong part rimmer bros sent, but I still can’t figure out how. I fear the use of glue, as I’m pretty violent and aggressive when it comes to vehicles. I tore my mustangs hood release right out of its socket under the dash. Metal bits and all.
 
I feel the same way about chokes. I seem to pull them harder than they were probably designed for. If you ever want me to look at the broken bits and see what can be made to work just let me know.
 
As you have the early carbs, I'm guessing you also have a single cable choke.
The solid line cables with curves in the running outer cable give much more resistance, so a multi strand one is much better. The location is a big thing. I know you don't want to tear up the dash, but right of the middle section at the top is a good place to run the cable with a "T" handle, which yours should have.
Also not a bad idea to take the cable off the carb and make sure it operated freely. It's aluminum and does build up a oxidation, even sticking to the point it doesn't move with the pull of the cable. Had to press out a couple over the years, now that's stuck.
Make sure they are lifting the piston also at a even amount. There is lots of things to adjust on these little suckers, but not everyone understands all the little screws and pulleys. Takes a bit of time, but I'm betting you can do it and will be in demand from other double carb British cars. The SU's are not near as complicated for the later Strombergs, not saying better, both do the job designed for these little engines.
 
I may have found a high idle problem for these early GT6 carbs.
There is a spacer (insulator) between the carbs and the manifold. On the later ones there is a notch for a vacuum port that needs to be in the correct orientation for them to work. On the early ones there is no slot but as they are the only ones available lots of people use them as a substitute, OK, that would be good except if you check it out really close the gasket supplied does not completely cover the gap. Vacuum leak that you would never find if you didn't know the insulator was incorrect, because you can't see if without close attention.
You do need the insulator, so what to do. Buy gasket material and make a bigger gasket for the area between carb and insulator, if you don't have the right gasket between insulator and manifold, make one for there also. The front one will work to cover all the holes, ust get it turned right.
Major problem I had on the rebuild was the coil springs to return throttle and choke, most were missing, so had to steal from old carbs.
Unfortunately you need break them loose from the manifold to check, easy to see if pulled back with nuts still on the stud and a flashlight.
Might be something to add to the Tech section.
 
Back
Top