• Hi Guest!
    You can help ensure that British Car Forum (BCF) continues to provide a great place to engage in the British car hobby! If you find BCF a beneficial community, please consider supporting our efforts with a subscription.

    There are some perks with a member upgrade!
    **Upgrade Now**
    (PS: Subscribers don't see this gawd-aweful banner
Tips
Tips

TR4/4A TR4A IRS-SC?!?!?!

Darrell_Walker

Jedi Knight
Offline
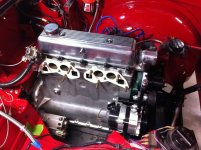
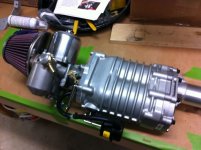
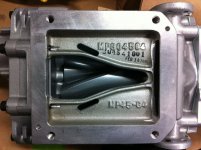
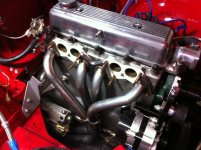
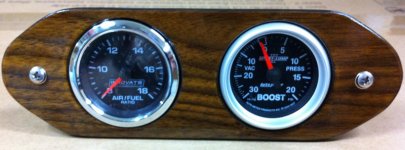
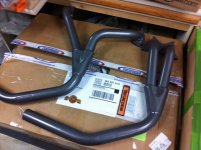
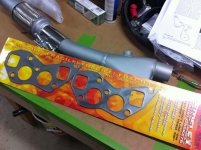
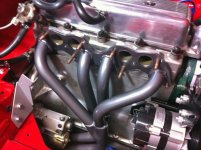
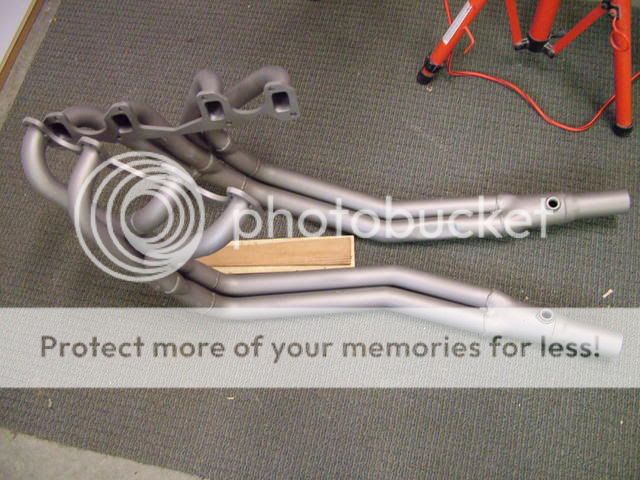
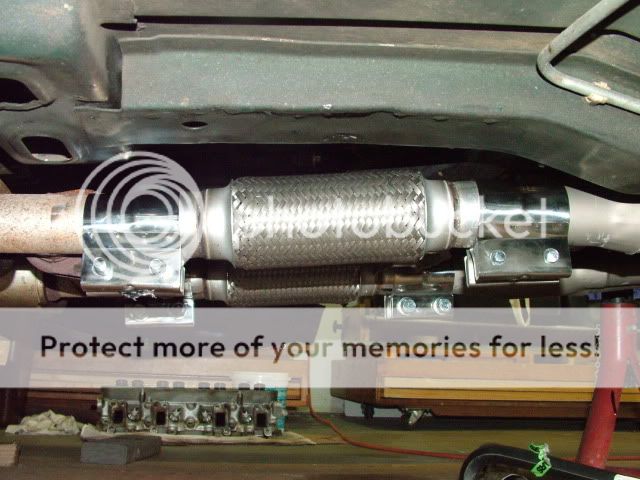
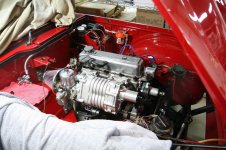
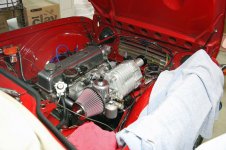
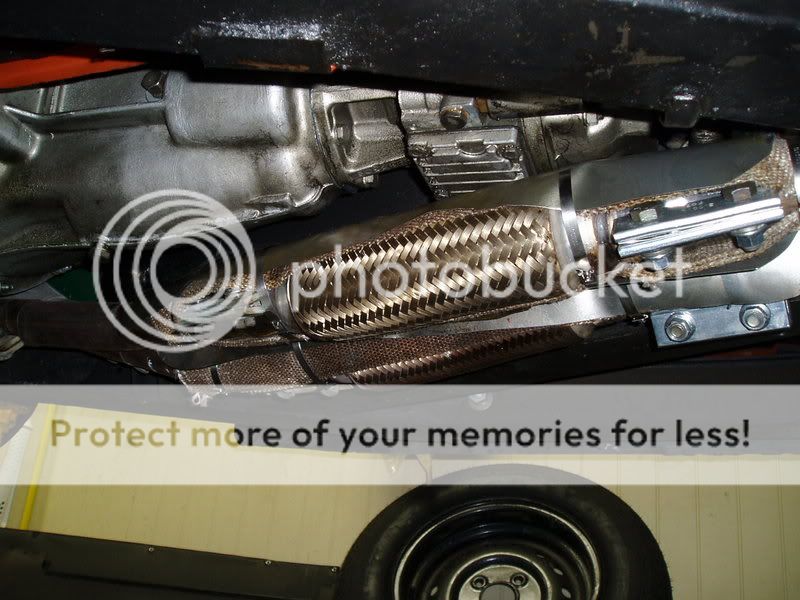
Well, I sold my Weber setup over Christmas, so I placed my order with Moss for my supercharger kit. I've had it for a couple of weeks now, been doing lots of test fitting and such. The guys at Moss have been great, as I'm the first install on a 4A, there were some differences. Perhaps the biggest was with the throttle cable bracket, there is a gusset in the 4A right across where the bracket was designed to go. Other than some other minor things, the kit is very complete and well thought-out. I've got to finish adjusting my headers, and send them out for ceramic coating before I can go much further. I'm also installing a wide-band O2 sensor, and a boost gauge.
 

Attachments

  • 23960.jpg
    23960.jpg
    69.2 KB · Views: 1,076
Here is the supercharger and carb.
 

Attachments

  • 23961.jpg
    23961.jpg
    52.8 KB · Views: 1,079
Inside the supercharger:
 

Attachments

  • 23962.jpg
    23962.jpg
    59.8 KB · Views: 1,067
A little man deep in your brain is saying

TBI,TBI,TBI
 
DNK said:
A little man deep in your brain is saying

TBI,TBI,TBI

Actually, not all that deep! May do that a year or two down the road. With the SU HD8, I could use one of Rick Patton's injector adapters. Though the adapter between the blower and carb is just a plate, so there might be better, off the shelf options.
 
Final fitting of the header after getting the flanges surfaced. Off to get ceramic coated next.
 

Attachments

  • 23975.jpg
    23975.jpg
    62 KB · Views: 993
Here is the intake manifold for the supercharger fitted.
 

Attachments

  • 23976.jpg
    23976.jpg
    59.8 KB · Views: 991
Darrell,

Nice looking engine. Can't see myself every installing one (keep it cheap and simple), but I like living vicariously through others, so keep the pictures coming and I can't wait to hear what you think of it.

Scott
 
Not too much happening this past week. My headers are out for ceramic coating, so I've been working on some fiddly bits like wiring up the new alternator, and pondering what I'm going to do about the crankcase ventilation (which I never got around to with my Webers). I mounted my new gauges, these will go in the radio cutout. They didn't match each other as well as I had hoped, it was hard to pick a good match from the online pictures. Mostly it is the trim ring that I wish matched better. These are replacing a narrow-band O2 sensor and oil temp gauge (the only reason I really had the oil temp gauge was that my allow sump had a hole for the sender and I had a space to put the gauge).
 

Attachments

  • 24080.jpg
    24080.jpg
    105 KB · Views: 900
Got my headers back yesterday. Had them done in a metallic dark gray, they came out very nice. Of course, when the intake manifold is in place, all you can see of the headers is the top bend. Also had the y-adapter and clamps coated. I cut it to include a flex section, thinking that if/when I change the exhaust system past that point, I'll have a good place to start.

I'm using Remflex gaskets, these are thick (1/8") graphite gaskets that compress when installed. They are supposed to seal up to 1/16" gaps. Even though I had the header surfaced flat, I decided to go the "belt and suspenders" (should that be "crimp and solder"?) route.

I've been debating what to do about crankcase ventilation, I think I'm going to retain the stock PCV valve, and vent it into the back plate of the air cleaner.
 

Attachments

  • 24138.jpg
    24138.jpg
    68.5 KB · Views: 840
  • 24139.jpg
    24139.jpg
    62.7 KB · Views: 834
  • 24140.jpg
    24140.jpg
    82.6 KB · Views: 838
  • 24141.jpg
    24141.jpg
    75.5 KB · Views: 843
Lookin OH SO NICE........ keep those photos coming. We all will want to know how that puppy performs once it fires up.
 
Performance does a great job. I did mine in Titanium and the clamps look familiar

DSCF4137.jpg


Actually the next pic isn't current. The Flex section was a different size so I had a adapter flange welded on
DSCF4902.jpg
 
Hi Don,

That titanium looks nice. I had a hard time deciding, especially without any samples to look at. My last headers where done in a light metallic blue that I really liked, but they don't offer that anymore.

I really like the band clamp, I hope it works as well as I think it will. I was really excited when I first discovered them, particularly the one for a lapped joint. Then I measured and found out they don't come in small enough sizes for most of the connections. It would be really nice to be able to use them on the header to y-pipe connection, but the header tube is 1-5/8" OD, and the smallest I could find was for fitting inside a 2" ID tube.
 
Even though I still have a lot to do before I bolt the supercharger in, I couldn't resist to see how it is going to all look. Even broke out the good camera (instead of just iPhone pictures).
 

Attachments

  • 24145.jpg
    24145.jpg
    119.3 KB · Views: 820
  • 24146.jpg
    24146.jpg
    106.3 KB · Views: 804
pipes1.jpg


Flex connectors work fine, actually allows you to rigid mount the rest of your exhaust if they are long enough. The band connectors from Stainless Specialties hold well if you line the joint with multiple layers of heavy-duty aluminum foil. The larger flex connectors will radiate a lot of heat, hence the fire-proof blanket and heat shield.
 
TR6BILL said:
Flex connectors work fine, actually allows you to rigid mount the rest of your exhaust if they are long enough. The band connectors from Stainless Specialties hold well if you line the joint with multiple layers of heavy-duty aluminum foil. The larger flex connectors will radiate a lot of heat, hence the fire-proof blanket and heat shield.

Thanks for the tip about the heat, I'll keep an eye on that.

I actually used a band of brass shim stock inside the band clamp, just to make sure it was good and tight. Good idea about the foil, I had considered copper tape, but was worried what would happen when the adhesive got hot.
 
Back
Top