• Hi Guest!
    If you enjoy and benefit from your participation at British Car Forum, please consider supporting our efforts with a subscription.

    There are some perks with a member upgrade!
    **Upgrade Now**
    (PS: Subscribers don't see this banner)
Tips
Tips

TR2/3/3A TR3 Water Temp Sensor Installation Problem

luke44

Jedi Warrior
Country flag
Offline
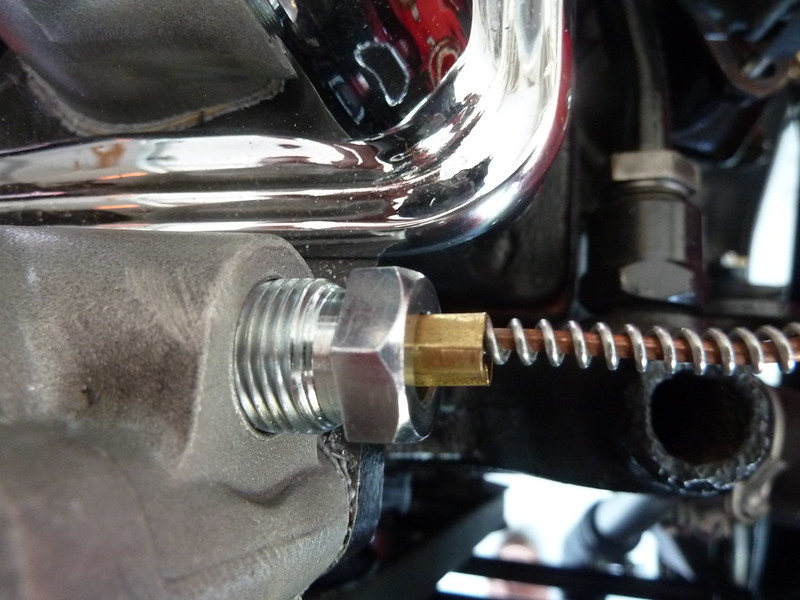
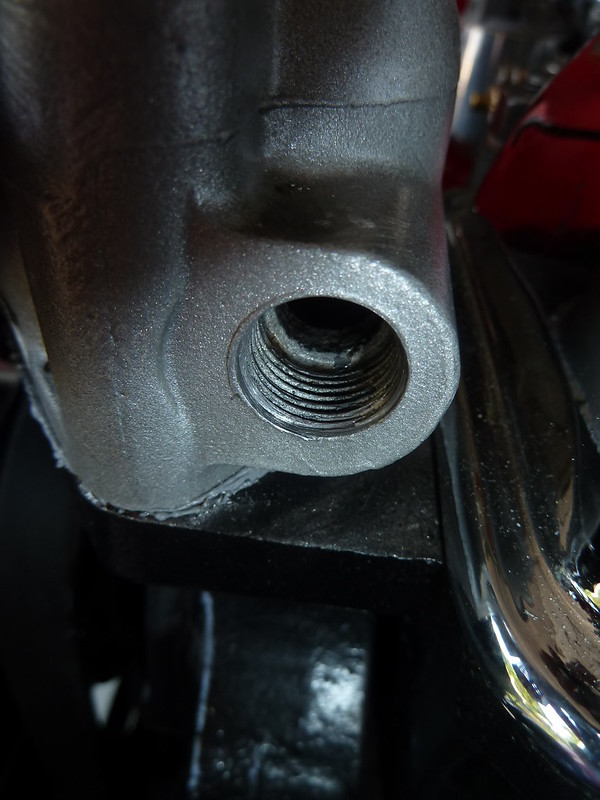
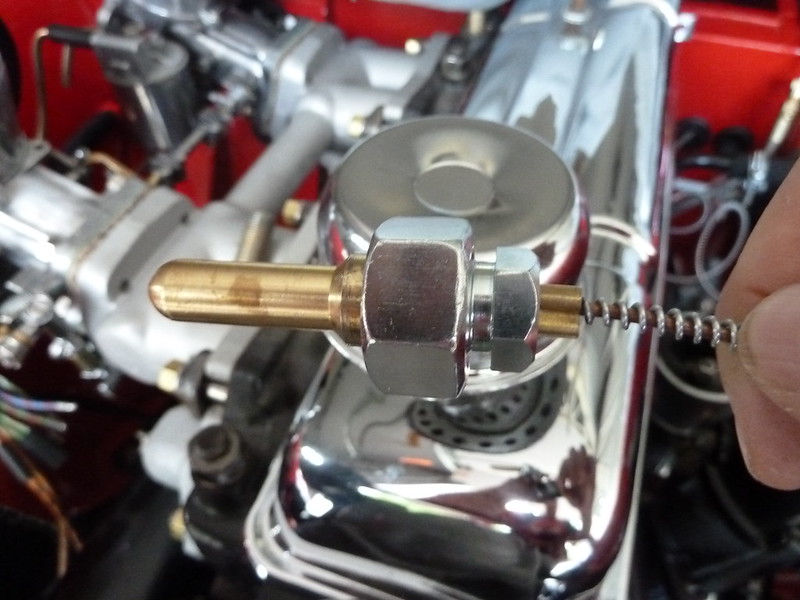
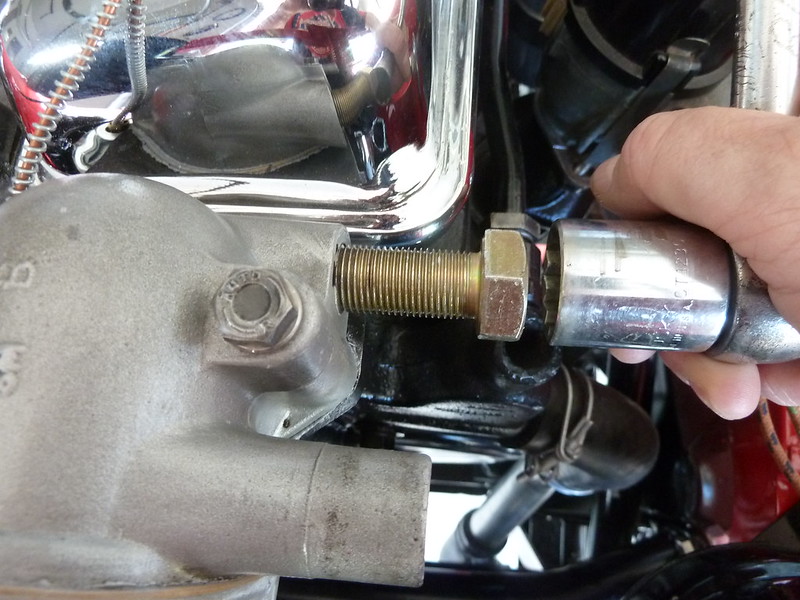
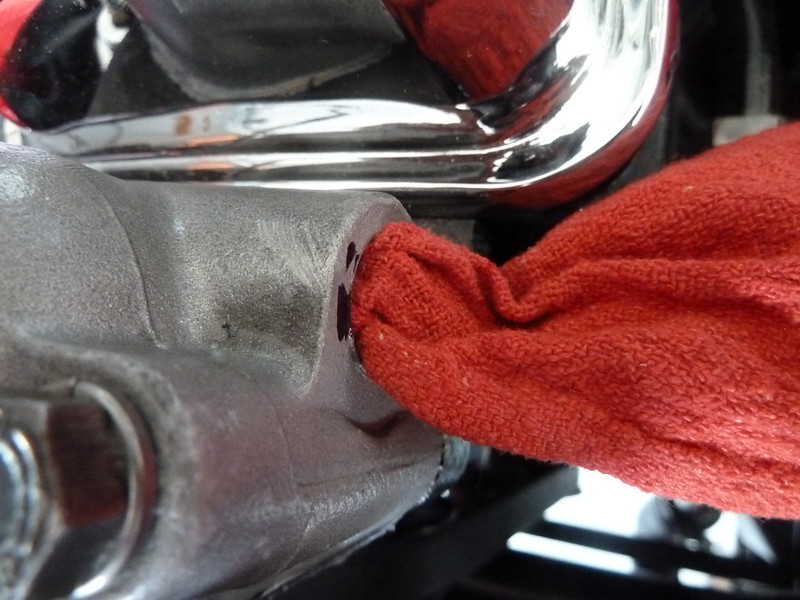
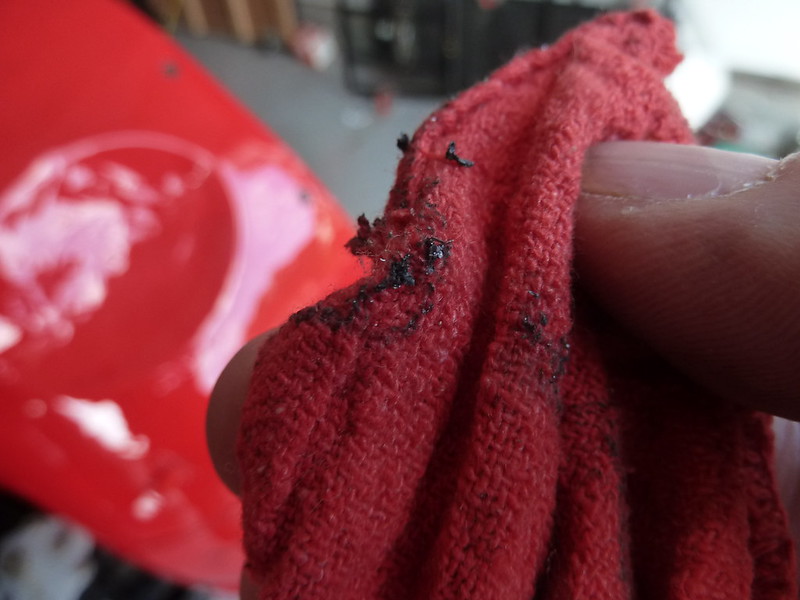
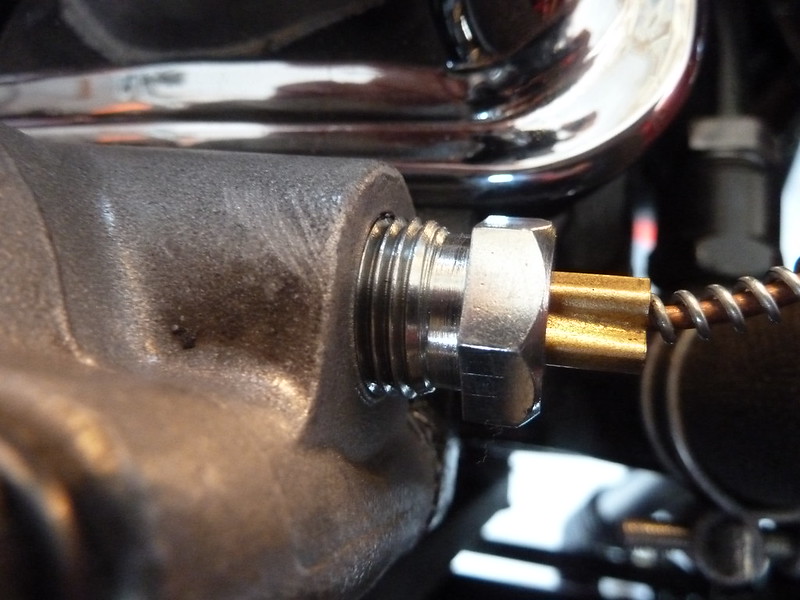
Has anyone run into a problem installing the sensor into the thermostat housing on the TR3? The threads just don't want to catch. Yet the threads are from a brand new/rebuilt gauge and seem fine. I’ve at least figured out it is 5/8 x 18 thread and not pipe thread, so, do I try a 5/8” x 18 bottoming tap which will cost me $26.00 to buy for a once in a lifetime use, or do I try a grade 8 bolt and may be cut a couple of slots in it with my die grinder and try to make a pseudo home made tap? Or a $49.00 new housing...Or, does anyone else have another other ideas? Frustrating. What should have been a 2 minute job to button it up has blown my whole afternoon :confuse: ... All comments welcome.

7290773824_c6d76f9d37_c.jpg


7290804198_38f6e4ddfd_c.jpg
 
Yeh your housing is screwy. You should be able to buy a cheap tap and chase it clean. I usually use grease when I fit something like that, but clean it out before you damage the gauge. Or yeh just run a bolt in there and see if you can clean it out.
 
You should be able to get a tap on ebay for around $3.00 plus freight. I just got one for the head water jacket plug 1"x 12 for $5.00 bucks. Or as mentioned above try a bolt to clean it out.
 
I thought there was an adapter that threaded into the housing and then you'd insert the temp probe into that adapter fitting. The new gauge that I bought came that way.
 
It depends on the gauge, probably. I've bought several aftermarket gauges that came with an assortment of adapters; but no adapter was needed for the TR.

TS13571LInstrumentPanelcropped.jpg
 
Looking at he picture,even if I had the correct tap on hand,I would clean that first cross thread area with a small scraper or pic.I have an assortment of little boring bar tool bits,but you could quickly make a good tool,out of even a bent over and groung file tang or screw driver.Start about 1 thread in and scrape , following the grove back to the begining.Should be easy in the soft housing.
Tom
 
Is the length of the expansion bulb for the new gauge the same as the one you are replacing? On A-series engines there is an adapter used to move the expansion bulb out further in the head casting. This same adapter is mentioned on Tegler's web site when you want to fit a mechanical temp gauge to a Spitfire. (Mini Mania part 11K2846).

If you are convinced that it is just that the threads need chasing, do not use a 5/16-18 bolt in your die grinder. Go to the hardware store (ACE or Tru-Value) and buy a 5/8-18 bolt. Use a cut-off wheel in your die grinder and cut some slots axially down the length of the threads. That will become a home made tap for the sole purpose of cleaning the old threads.
 
When I put mine back in (had soaked it in PBlaster everytime I was under the bonnet for about a year) I wrapped it with teflon tape. Not for the sealing effect but just to improve the chance of removing next time w/o fuss.
 
Thanks for the input guys. All fixed! First of all I went to my local Ace Hardware and bought a 5/8 X 18 nut and and a grade 8 bolt.

Step one was to check the fitting on the temp line - no problem there - spun on easily using fingers.
7298077202_1a2f383eed_c.jpg


Then I tried the grade 8 bolt in the casting - if this didn't work I was going to go to plan B and cut a few slots in it to make pseudo tap. (Plan C was a tap.) Anyway, the good news was the bolt, while a bit tight, did go...

7298076904_cf31498b5a_c.jpg


Then insert a rag and clean out the gunk...
7298076604_8d13db97a1_c.jpg


7298076292_3a5db2cb31_c.jpg


A light oiling of the fitting...by the way, I stayed away from teflon, as this is normally used with pipe thread (as George points out, it won't help with the sealing). What's interesting about this fitting, is it gets it's seal by compressing the tapered end of the brass fitting, not the threads themselves...

7298075724_7f5b73c41d_c.jpg


And voila! Good to go. It may not look like its in all the way, but she's tight. As long as the taper on the fitting is seated tight and being compressed, you get a seal.
7298075194_0d2e032ccf_c.jpg


Hopefully this posting helps those who come after. It was puzzler at first, because normally you <span style="font-style: italic">would</span> expect a pipe thread fitting here. Not the case though. And pipe thread also has +-18 threads per inch, but, completely different and not interchangeable.
 
BTW -- It looks like you don't have a lock tab (Moss p/n 838-560) on the bolt that holds the generator link:

LukesTR.jpg


I drove for years w/o one -- until the day the bolt fell out (somewhere in New Mexico).
 
Geo Hahn said:
I don't know how you work on that thing with all that blinding chrome and shiny clean metal.

Hah! It's funny you should say that - check out the posting 850518 I just made in this thread here. I keep telling myself if I keep at it, one of these days I may actually drive this beast.
 
Geo Hahn said:
BTW -- It looks like you don't have a lock tab (Moss p/n 838-560) on the bolt that holds the generator link:
I drove for years w/o one -- until the day the bolt fell out (somewhere in New Mexico).

You are probably right. My biggest problem was I inherited a disassembled and poorly labeled box of parts that had been started but abandoned - a big challenge when you don't do the disassembly. It has often felt like building a jig saw puzzle without the picture. Half the job was figuring out what I had, and what was what, let alone how it went together. This board has been invaluable - that's why I try to post my issues as they come up. I know others are coming along behind. I'll check out the lock tab. Thanks.
 
luke44 said:
Ouch! 838-560 - $7.75!!

My reaction too. I made one from a fender washer in a few minutes at the grinder. I had one on the other TR to look at -- I can send you a pic.

Later...

An original locktab:

LockTab1.jpg


And the one I made:

LockTab2.jpg


I see I also used a lockwasher, guess I didn't trust my own work.
 
luke44 said:
A light oiling of the fitting...by the way, I stayed away from teflon, as this is normally used with pipe thread (as George points out, it won't help with the sealing).
Right, won't help with sealing. But I use teflon paste on mine, because it DOES help with getting it apart next time. And I once ruined an otherwise working original gauge, trying to dig the sender bulb out of the Tstat housing. I smear the tapered section of the bulb with it, as well as the threads on the nut.
 
TR3driver said:
... And I once ruined an otherwise working original gauge, trying to dig the sender bulb out of the Tstat housing.

Had this problem once, and wound up removing the t-stat housing and gently tapped and pushed from the inside. Saved the bulb and gauge.
 
I'm glad you got this sorted and for only a small financial investment.

Geo mentioned Teflon tape to keep the threads from seizing. That's a good idea. I have always used anti-seize paste for that purpose but I think the Teflon tape would do a better job.

As for the thread type... for whatever reason 5/8-18 taps are on most LBC engines I have seen. It's a common size for almost every Smiths temperature sending unit, it is used on intake manifolds for barbed fittings, on A-series engines it was used for banjo bolts for external oil feed pipes. I'm not sure why that was chosen over pipe threads but I eventually broke down and bought both a tap and die in that size.
 
Where do you get the whole Temp line and sensor. I had the gauges restored at N.Hollywood Speedo but they didn't install the temp sensor or oil line.Help would be greatly appreciated. Jim
 
Similar threads
Thread starter Title Forum Replies Date
luke44 TR2/3/3A TR3 Water Temp Gauge Core Triumph 14
K For Sale Triumph TR3 Water Pumps for Rebuild Triumph Classifieds 0
D TR2/3/3A TR3 water pump question Triumph 4
K For Sale TR3 Water Pumps for Rebuild Triumph Classifieds 0
Gordon_Dedrick TR2/3/3A TR3 Water pump replacement Triumph 5
S TR2/3/3A rebuilding a tr3 water pump Triumph 22
S TR2/3/3A Lubing the water pump on a tr3 Triumph 1
T TR2/3/3A TR3 under water again Triumph 4
TR4nut TR2/3/3A TR3/4 Water Pumps - Anyone have the ebay rebuilder contact info? Triumph 5
S TR2/3/3A Bad fuel perhaps water tr3 miss Triumph 0
K TR2/3/3A TR3 water pumps again...DIY? Triumph 0
K TR4/4A TR3/4A Water Pump Housings? Triumph 10
K TR2/3/3A Removing the water pump on a TR3? Triumph 11
K TR2/3/3A TR3 Water pumps again.... Triumph 4
luke44 TR2/3/3A TR3 Water Pump Pully - Color Triumph 7
T TR2/3/3A thread pitch for TR3 water tap in block Triumph 4
M TR2/3/3A TR3 water pump housing question. Triumph 4
mountainman TR2/3/3A TR3 Block Water Tap Triumph 11
Tinkerman TR2/3/3A TR3 A Water Pump Housing Pipe Triumph 7
RedTR3 TR2/3/3A TR3 Uprated Water Pump? Triumph 11
Tinkerman TR2/3/3A TR3 Pipe, Water Pump Housing, Mounts Where? Triumph 15
newmexTR3 TR2/3/3A TR3 water pump / thermostat replacement Triumph 1
E TR2/3/3A tr3 water pump pulley Triumph 6
M TR2/3/3A TR3 water valve Triumph 4
Tinkerman TR2/3/3A Water pump studs TR3 need the size Triumph 3
M TR2/3/3A TR3 Water Pump Rebuild Triumph 6
H TR2/3/3A TR3 Water Pump Triumph 4
Tinkerman TR2/3/3A Water Pump post 60000 TR3 Triumph 4
Tinkerman TR2/3/3A TR3 post 60000, water pump Triumph 10
Tinkerman TR2/3/3A Water pump TR3 post 60000 Triumph 2
White79MGB TR2/3/3A New TR3 Owner, Water Pump Triumph 17
MGTF1250Dave TR2/3/3A TR3 Water Pump Triumph 7
mrv8q TR2/3/3A TR3 Water pump/Engine mount advice Triumph 2
jsneddon TR2/3/3A TR3 Water Pump Question Triumph 12
IdahoNuke For Sale Free TR3 Seats Triumph Classifieds 0
T Wanted Wanted TR3 rust free nut & bolt restoration Triumph Classifieds 7
R TR2/3/3A 1956 tr3 value? Triumph 7
cguild TR2/3/3A TR3 1991cc engine emits black soot from exhaust Triumph 13
D TR2/3/3A Black TR3 Triumph 20
K TR2/3/3A A TR3 plug check left to right 1234...do I lean out front carb a couple of flats?...turn down correct? Triumph 3
K TR2/3/3A The TR3 is up and running again.... Triumph 7
S TR2/3/3A Battery box for a triumph tr3 Triumph 5
J TR2/3/3A TR3 age Triumph 4
G For Sale TR3 original metal air filters Triumph Classifieds 0
G For Sale 1960 TR3 fitted black cover. Triumph Classifieds 0
S TR2/3/3A tr3 sat all winter Triumph 15
S For Sale FREE - TR3 engine and transmission Triumph Classifieds 3
W TR2/3/3A TR3 Seat Belts Triumph 10
R TR2/3/3A TR3 Timminge Triumph 11
J SOLD!! Triumph TR2 TR3 rocker panels, right and left Triumph Classifieds 0

Similar threads

Back
Top