• The Roadster Factory Recovery Fund - Friends, as you may have heard, The Roadster Factory, a respected British Car Parts business in PA, suffered a total loss in a fire on Christmas Day. Read about it, discuss or ask questions >> HERE. The Triumph Register of America is sponsoring a fund raiser to help TRF get back on their feet. If you can help, vist >> their GoFundMe page.
  • Hey there Guest!
    If you enjoy BCF and find our forum a useful resource, if you appreciate not having ads pop up all over the place and you want to ensure we can stay online - Please consider supporting with an "optional" low-cost annual subscription.
    **Upgrade Now**
    (PS: Subscribers don't see this UGLY banner)
Tips
Tips

Too much procrastination[maybe long winded]

fordtrucks4ever

Jedi Trainee
Country flag
Offline
For about the last ten years I have been making excuses for not getting the cob webs blown out and driving my Healey on occasion. Each year at the family Christmas gathering, my uncle asks me about it. He has owned a few in his day and has never even seen mine. I keep telling him, just needs the registration and its on the road again. Just cant wait to get on the road again.(melody) Maybe next year. So, last year I finally got motivated to follow thru and get it road worthy. So goes the story and I am sticking with it. Unfortunately I let it sit up too long without draining the old gas out. Fuel stabilizer does not work much past a couple of years. So the tank comes out and see the dark color of what was once fuel in much larger quantity, foul smell and full of chunks settled from dried gas varnish. Normally it has been accustomed to drinking AV gas to avoid such displeasure. I drained out the sludge, washed it best I could and mixed some phosphoric acid. Let it sit a few days, flushed and let dry. Most of the accumulated layer of dead varnish flaked off and left a bunch of cruddy chunks needing to be vacuumed out. Good enough for now I think. Replaced and filled it up. Flushed out the fuel lines to carbs and ready to fire up hopefully. Next problem occurred when the overflow lines started dumping out fuel out non stop when key was on. Front carb had fuel dumping out of float chamber around the jet assembly. I was surprised the fuel pump didnt fail to perform admirably. Since it was still completely original with diaphragm never even been replaced. After pulling the front carb off and knowing what I expected to see was indeed true, chose to just throw in the towel. The diaphragm or gasket, whatever its actually is on the main jet assembly was dried out, and crumbled to nothing. These were new replacements in 1995, but this great Obamagas is not like scotch or bourbon that gets better with age. The bowls in carbs had plenty of varnish in bottom, causing the floats to stick and clogging any orifices that metered fuel.

Fast forward to last week. I knew what parts were needed to correct the issues, so ordered everything before even bothering to tear everything down or other with anything else. I ordered new jet assemblies, needle and seats for floats, diaphragm for fuel pump and necessary gaskets. When tank was removed last year, I also noticed another benefit of this great gas we have the privilege to use. The fuel sending unit was just about completely disintegrated from too much alcohol consumption. What was is now just a pile of white powder. That was also on my parts list, but got back ordered. So when most of the parts arrived, I removed the other carb, cleaned everything out with plenty of lacquer thinner, replaced bad parts, readjusted and assembled. This was completely uneventful and everything went back together just fine. I also went thru the fuel pump, and glad I did. It was totally full of crusty sludge, if you can have both at the same time. I scrubbed and cleaned for a while. The old original diaphragm was not holding up so well. The outer Mylar layer was just about non-existent and rubber was turning to powder. BUT, the rest of pump was near perfect, in a British sort of way. I screwed the new diaphragm back in, adjusted accordingly then bolted all together. My first big relief was when I turned the key to cycle the fuel pump in question. I had a line dropped in gas can with fresh fuel to feed pump until the gas tank got cleaned out better this time. The pump came to life with its heart beating faster than someone overdosing on cocaine, picking up fresh gas and pushing the old out of line running up to the engine bay. After all of the air bubbles passed and fresh gas was flowing, I pinched off the fuel line and pump went thump-thump, then stopped. Insert :eagerness: here!

Bolted everything back together and ready to fire this beast up. Motor cranked over quite a while without even a pop. OK, most likey no fire, since the fuel issues are resolved. Pull cap and notice no spark across points when cranking. Pull plugs and no fire. First the simple light sanding with 1200 grit paper. Still nothing. Check voltage, connections blah blah blah, no difference. Start troubleshooting per the original workshop manual and nadda. Swap coil, change points, still nothing. No condenser to swap, so I am dead in the water for the moment.The manual gave diagnostics to verify if condenser was bad, but nothing made any difference. Now I pull out distributor and want to know why I am not getting any of the readings per the manual for diagnosing. Since distributor is out, I tear it down and clean to make sure advance is working. I noticed on the top points plate, one of the little nylon nubbins, for lack of a better description, is missing. The top plate swivels around for advancing the timing and plate is spaced up and rests on the two nylon nubs. So i chucked a piece of nylon in lathe, then machined one that matched the other. It fits in small hole thats been recessed on one side. Then you melt it to spread out so it is retained. After this is all finished, I remembered buying a Pertronix electronic module back when they first came out for positive ground stuff. So I parked all of the old points, condenser issues and installed it. But, when still troubleshooting the problem earlier, I managed to not seat the rotor down completely in distributor and broke it. Arrgh! On Saturday nite, most parts stores dont carry replacements. OUT with the epoxy and glue this beast back together. I used a small c-clamp to keep it snugged up while curing overnite. OK, fast track to Sunday nite. I install distributor, finagle the wires according to instructions, and everything seems to be in order.......I hope. The car was regularly driven thru 2002, parked and shortly again in 2006, with not very pleasent smelling gas. That should have been an obvious "heres your sign" moment. But alas, I will get to it next week. It sat again from 2006 until last year, still waiting for that next week job to get done. So now I am trying again to start it up. With the Pertronix module it now boasts a spark, any British car owner would be envious of. Well to cut to the current. I pulled the choke, since it always seemed to like a lot for starting in the past. Then turned the key and it fired right up, like it had been running all this time. Insert another ;) one here. So now its running and I am one step closer to driving it again. I readjusted the carbs to initial settings, so anyone have a semi-reliable fast track to tuning them??????????????? In the past I could never get these to really idle down much under 900 rpm, and always seemed a little sluggish on acceleration. I vowed the next time carbs were off I would resolve these issues if at all possible.

Just curious...I live in the DFW area and notice its snowing, but the temp is 70 degrees?
 

glemon

Yoda
Country flag
Offline
Enjoyed reading the story, never would have tried gluing a distributor cap or rotor back together, but good for you for making to work. Tune the carbs, set the timing, then check the brakes and fluids, and hopefully you have it back on the road soon. Seems to be snowing here on the forum too :chuncky:
 

Patrick67BJ8

Obi Wan
Silver
Country flag
Offline
For about the last ten years I have been making excuses for not getting the cob webs blown out and driving my Healey on occasion. Each year at the family Christmas gathering, my uncle asks me about it. He has owned a few in his day and has never even seen mine. I keep telling him, just needs the registration and its on the road again. Just cant wait to get on the road again.(melody) Maybe next year. So, last year I finally got motivated to follow thru and get it road worthy. So goes the story and I am sticking with it. Unfortunately I let it sit up too long without draining the old gas out. Fuel stabilizer does not work much past a couple of years. So the tank comes out and see the dark color of what was once fuel in much larger quantity, foul smell and full of chunks settled from dried gas varnish. Normally it has been accustomed to drinking AV gas to avoid such displeasure. I drained out the sludge, washed it best I could and mixed some phosphoric acid. Let it sit a few days, flushed and let dry. Most of the accumulated layer of dead varnish flaked off and left a bunch of cruddy chunks needing to be vacuumed out. Good enough for now I think. Replaced and filled it up. Flushed out the fuel lines to carbs and ready to fire up hopefully. Next problem occurred when the overflow lines started dumping out fuel out non stop when key was on. Front carb had fuel dumping out of float chamber around the jet assembly. I was surprised the fuel pump didnt fail to perform admirably. Since it was still completely original with diaphragm never even been replaced. After pulling the front carb off and knowing what I expected to see was indeed true, chose to just throw in the towel. The diaphragm or gasket, whatever its actually is on the main jet assembly was dried out, and crumbled to nothing. These were new replacements in 1995, but this great Obamagas is not like scotch or bourbon that gets better with age. The bowls in carbs had plenty of varnish in bottom, causing the floats to stick and clogging any orifices that metered fuel.

Fast forward to last week. I knew what parts were needed to correct the issues, so ordered everything before even bothering to tear everything down or other with anything else. I ordered new jet assemblies, needle and seats for floats, diaphragm for fuel pump and necessary gaskets. When tank was removed last year, I also noticed another benefit of this great gas we have the privilege to use. The fuel sending unit was just about completely disintegrated from too much alcohol consumption. What was is now just a pile of white powder. That was also on my parts list, but got back ordered. So when most of the parts arrived, I removed the other carb, cleaned everything out with plenty of lacquer thinner, replaced bad parts, readjusted and assembled. This was completely uneventful and everything went back together just fine. I also went thru the fuel pump, and glad I did. It was totally full of crusty sludge, if you can have both at the same time. I scrubbed and cleaned for a while. The old original diaphragm was not holding up so well. The outer Mylar layer was just about non-existent and rubber was turning to powder. BUT, the rest of pump was near perfect, in a British sort of way. I screwed the new diaphragm back in, adjusted accordingly then bolted all together. My first big relief was when I turned the key to cycle the fuel pump in question. I had a line dropped in gas can with fresh fuel to feed pump until the gas tank got cleaned out better this time. The pump came to life with its heart beating faster than someone overdosing on cocaine, picking up fresh gas and pushing the old out of line running up to the engine bay. After all of the air bubbles passed and fresh gas was flowing, I pinched off the fuel line and pump went thump-thump, then stopped. Insert :eagerness: here!

Bolted everything back together and ready to fire this beast up. Motor cranked over quite a while without even a pop. OK, most likey no fire, since the fuel issues are resolved. Pull cap and notice no spark across points when cranking. Pull plugs and no fire. First the simple light sanding with 1200 grit paper. Still nothing. Check voltage, connections blah blah blah, no difference. Start troubleshooting per the original workshop manual and nadda. Swap coil, change points, still nothing. No condenser to swap, so I am dead in the water for the moment.The manual gave diagnostics to verify if condenser was bad, but nothing made any difference. Now I pull out distributor and want to know why I am not getting any of the readings per the manual for diagnosing. Since distributor is out, I tear it down and clean to make sure advance is working. I noticed on the top points plate, one of the little nylon nubbins, for lack of a better description, is missing. The top plate swivels around for advancing the timing and plate is spaced up and rests on the two nylon nubs. So i chucked a piece of nylon in lathe, then machined one that matched the other. It fits in small hole thats been recessed on one side. Then you melt it to spread out so it is retained. After this is all finished, I remembered buying a Pertronix electronic module back when they first came out for positive ground stuff. So I parked all of the old points, condenser issues and installed it. But, when still troubleshooting the problem earlier, I managed to not seat the rotor down completely in distributor and broke it. Arrgh! On Saturday nite, most parts stores dont carry replacements. OUT with the epoxy and glue this beast back together. I used a small c-clamp to keep it snugged up while curing overnite. OK, fast track to Sunday nite. I install distributor, finagle the wires according to instructions, and everything seems to be in order.......I hope. The car was regularly driven thru 2002, parked and shortly again in 2006, with not very pleasent smelling gas. That should have been an obvious "heres your sign" moment. But alas, I will get to it next week. It sat again from 2006 until last year, still waiting for that next week job to get done. So now I am trying again to start it up. With the Pertronix module it now boasts a spark, any British car owner would be envious of. Well to cut to the current. I pulled the choke, since it always seemed to like a lot for starting in the past. Then turned the key and it fired right up, like it had been running all this time. Insert another ;) one here. So now its running and I am one step closer to driving it again. I readjusted the carbs to initial settings, so anyone have a semi-reliable fast track to tuning them??????????????? In the past I could never get these to really idle down much under 900 rpm, and always seemed a little sluggish on acceleration. I vowed the next time carbs were off I would resolve these issues if at all possible.

Just curious...I live in the DFW area and notice its snowing, but the temp is 70 degrees?
Just about everyone in the local North Texas club has a spare rotor(I have 4 brand new ones). Give us a shout next time. Glad to hear you got it back running again!
 
OP
F

fordtrucks4ever

Jedi Trainee
Country flag
Offline
Steve, after first posting, I took some time to catch up on reading posts. I found your easy tuning procedure. I then realized after after reading it and the factory SU manual for HD8 specific carbs, both were basically identical. One small difference is yours is just a paragraph, and the factory one takes like five full pages to explain the same thing.

Gee Patrick, for the past several years I have been trying to just drop by and say hello or even get to a workday. I would feel very guilty to finally look you or a local member up just to mooch some parts.


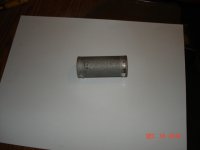
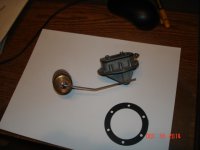
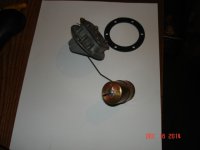
Continuing on...Since the fuel sending unit was on back order, I decided to see if the old one was even salvageable. Originally it appeared to be eaten up from the alcohol in modern gas. I should have taken a before pic. The best description I can visualize is it looked just like a bright white corral reef from the amount of growth all over the unit. I expected to see it completely eaten up after cleaning. The float is made of steel and was covered with rusty varnish pustules. With nothing to loose but spare time, I decided to sand blast, sorry that would be glass beads, not sand, to find out how bad it really was. VERY BIG SURPRISE! It actually cleaned up extremely well. The surface exposed to the old gas was textured, but almost no real loss of metal. It is just good now as was before the long time sitting as gas went south and farther south. Now the float is a little different story. It was still full of old gas, from 2004 and 5 gallons added in 2006, but sitting out of tank for a year now. It wasnt dribbling or leaking at the moment, but decided to blast it as is. After being hit with media, the old gas started trickling out. I know, not a smart thing to sand blast gasoline. I washed out the remaining old gas and finished blasting to see how bad it was. The float is pelted full of rusty pin holes that had varnished over. My first thought was to solder over the whole float. But I never had much success with getting it to flow very well on porous raw pitted steel. Then considered mixing the infamous JB Weld up and smear a layer over the float and cover with a piece of foil. After washing off the remnants of media, I used a heat gun to dry it out. Then the solder started dripping off float, so I came up with a better idea. I ended up using a stock Ford float that has been manufactured since 1953 and the last time I looked still had the old part number from back then. It fits just about every Ford thru the 90's. Anyway I chucked it up in a lathe and drilled a 0.079" hole in both ends. Then slid it over the end of existing float arm. Soldered both holes up and now works just like the original was supposed to.

DSC02704.JPG

The old float blasted clean. All of the dark specs are pin holes. They are all the way around it.


DSC02699.JPG
DSC02702.JPG

I removed the top cover and was relieved to see the coil had not bee affected at all or showed any signs of damage. It also ohmed(is that a word) out thru the full swing of arm. So now all back together and ready to install in tank when finished being cleaned out.


After all of this I was ready to bolt everything together, warm up engine and finally tune the carbs. Then for the test drive to find out what else needs to addressed. BUT I noticed the radiator was very low. Much lower than when I changed the water pump a few year ago, yet another attempt to getting it road worthy. So I started looking everything over and found out a freeze plug has rusted thru. Its the rear one under exhaust manifold. So I dug thru my spare parts pile and did find a complete gasket set. No freeze plugs yet, but I expect to find some around here somewhere. Otherwise I have to go shopping. This time tho, they will be brass.
 

BJ8Healeys

Jedi Warrior
Country flag
Offline
Steve, after first posting, I took some time to catch up on reading posts. I found your easy tuning procedure. I then realized after after reading it and the factory SU manual for HD8 specific carbs, both were basically identical. One small difference is yours is just a paragraph, and the factory one takes like five full pages to explain the same thing.

Well, Terry, the reason that I put together the HD8 tuning procedure in the first place (for my own use, primarily) was that I thought the various manuals that covered it (factory workshop, SU, Glenn's, and Chilton's) were too confusing because they use the same nomenclature for different parts, or different nomenclature for the same part in different places, describe tuning a single carb and then and refer you to a section for tuning dual carbs that do not apply to HD8s. They also don't have enough illustrating photographs or drawings to make clear what they are talking about.
 
Country flag
Offline
Can't tell for sure from the photos, but it appears your sender has a somewhat common problem: The base of the sender--where the screws that attach it to the tank go through--is somewhat warped, probably from someone torquing down the screws to try to stop leakage. We have the same problem on our 100M, and the repo tank doesn't have a perfectly flat surface where the sender mates up. We tried all kinds of gaskets and sealers, but the only thing that worked was a cork gasket my dad made. All the parts houses only stock the rubber type you appear to have, and it didn't work for us, neither did the hard plastic gasket the tank fabricator supplied. I'm leery of cork with gasoline, but Dad says they've used it for years with no problems.
 

RAC68

Darth Vader
Offline
Steve, I agree and your doc is one I carry in my Healey.

Terry, I enjoyed your saga and can easily relate ... as most British car folks can. I too find it impossible to have a good idle on my BJ8 below 900 RPMs and have experienced this for the past 50 years. I often wondered how my car differed from others that were able and, although my compression is a little higher then standard, have not found a good answer. However, I do not find this condition that objective either so I live happily with it.

Enjoy,
Ray (64BJ8P1)
 
Similar threads
Thread starter Title Forum Replies Date
DrEntropy MGB Differential with too much lash MG 5
S TR2/3/3A Too much fast idle, not enough choke? Triumph 0
TomMull Air Compressors, how much is too much? Restoration & Tools 7
Trevor Jessie Waaaay too much body roll Spridgets 14
T TR2/3/3A Is 5.5 lbs too much fuel pressure? Triumph 9
Martinld123 Why too much valve clearance after adjustment? Austin Healey 2
DornTRoriginal General Tech The Devil is in the Details! Am I asking too much? Triumph 21
M Broken off dip stick plastic tube, stuck oil pan, and I think too much... Spridgets 10
J New engines burning oil, Too much fuel? Triumph 14
V TR2/3/3A TR3A Brake Pedal - Too Much Travel Triumph 6
CZ_Dave One is too much, a hundred isn't enough MG 4
Got_All_4 TR2/3/3A TR3 leans too much to the right Triumph 10
M Is 4K too much for an engine rebuild? Triumph 29
DNK Too Much Time. MG 0
RobT TR5/TR250 TR 250 Compression Ratio - is 10.4:1 too much? Triumph 9
6 too much oil pressure??? Triumph 25
smaceng Too much candy-What to do? Spridgets 26
P IS $500.00 Too Much? Triumph 15
lbc_newbie How much is too much? Spridgets 4
jlaird Too much Spridgets 5
Bob Claffie Too much fuel pressure Austin Healey 9
G Next time you think parts 4 the LBC cost too much Other Cars 4
Steve1970 TR6 TR6 -- clutch pedal has too much play Triumph 9
John Moore Am I Paying Too Much? Spridgets 14
D Too Much Excitement for One Day Triumph 11
guzzul Differential gear 'slop'....how much is too much? Triumph 9
WidespreadPanic Floorpan surface rust - how much is too much? Triumph 13
SCguy TR6 Too much time on my hands, TR6 pictures Triumph 6
Andy Blackley High Oil Pressure: Too much of a good thing? Triumph 11
Steve_S Too much truck? Other Cars 14
R Where to go to evaluate: too much rust to fix Austin Healey 10
Basil Twin Webers too much Triumph 15
J TR4/4A Exhaust a tad too loud... Triumph 2
jfarris Message too long error FORUM Navigation Questions 8
mctriumph TR2/3/3A The concept of too many Triumph 8
B For Sale Too many Healeys - BN2, BN4, BT6, BJ7 For Sale Austin Healey Classifieds 0
KVH General Tech Flywheel Bolts Too Long For Main Seal Triumph 13
R For Sale Conundrum - Too Many Bugeyes Spridgets Classified 1
Popeye TR4/4A Slave rod seems too long but is not Triumph 7
K TR2/3/3A Front wheel bearing felt seals too large? Triumph 9
M TR6 76 TR6 Brakes too tight Triumph 10
B TR4/4A Too Many Wires? Wiper Motor Triumph 9
S TR2/3/3A Exhaust system - It hangs too low no matter what I do Triumph 15
M 1275 too high? Spridgets 2
Dnickels Spitfire Spitfire mk2 front suspension too soft Triumph 2
JPSmit Pre-War Is it too early to write Santa? 1933 MG J1 MG 13
CJD General TR Too Rude Triumph 13
AUSMHLY 64 front end too high Austin Healey 14
S TR2/3/3A OMG problem—the doors are too tight Triumph 12
T TR2/3/3A Turn Signals Blinking too fast Triumph 2

Similar threads

Top