• Hi Guest!
    You can help ensure that British Car Forum (BCF) continues to provide a great place to engage in the British car hobby! If you find BCF a beneficial community, please consider supporting our efforts with a subscription.

    There are some perks with a member upgrade!
    **Upgrade Now**
    (PS: Subscribers don't see this gawd-aweful banner
Tips
Tips

Spring Clamps needed for 1/4 Elliptics

Time for cleanup and paint. Floorpan arrives early next week I am told.
 
Spring Clamp Pics. Second attempt bent properly. Just need to allow space for the clamp to bend at 90 degrees.

Need some thoughts on fastening rivet to clamp.

1) Cut Off Rivet and peen over
2) Thread it and add a nut to hold it on - likely can't thread it close enough with a die
3) Simply tack weld to the top of the clamp after painting the Spring leaf, Grind down the weld and then paint the rest of the clamp and leaf assembly.

Next to calculate where to dill the holes for the spacer underneath. I'll use the still assembled other spring and measure from there. See there was a reason why I didn't take it apart yet.
 
IMG_2650.jpgIMG_2651.jpgIMG_2652.jpg
 
Cut the rivet close and heat it close to melting and swage it like they did making bridges and ship before they started welding them.

PHASA--Heat-staking--Process.jpg
 
Well first attempt to fit drilled holes for bottom spacer too close, not enough clearance with rivet in place. Time to bend up and refab the bracket. Might need to get out a couple of pieces of angle iron to act as a brake to make the bend straight. Jaws of my vise are about 1/2-5/8" Deep and strap is 1" wide. Just a little more practice and I can get this right.
 
Btdt.
 
Center Clamp needs to be 2.5"+ deep. No one makes anything that deep.
 
I'm with Bluemax on the rivet. Although it needs to have the head swaged into a countersunk shape. If you are not confident about doing it on the spring I would make up a similar countersunk hole in a piece of scrap and hot swage it into that. Rivets do exist with that head on them though I couldn't guess where to find just one now days. If I was doing it I would just use a rod and hot swage a head on it.

Kurt.
 
Is there a spring shop you could take this to? I love the idea of doing it all ourselves but, sometimes it is easier and quicker to just job it out.
 
Tried that too JP. All they stock is standard quick clips that won't work for the Center of the Stack. The clamps I need are really simple to fabricate with 1" W x 1/8" Flat Bar Stock. Found the spacers I needed from McMaster Carr. I just need t omeasure better once I put the Spring Stack togather and not drill holes in the right place for the spring Clamps. A learning process for me. Evidently these springs aren't standard as they have steel strapping holding things together which can move back and forth and is not secured to the spring. Everyone who responded to me indicated their springs were a strap, attached to the leaf via a rivet, and a metal spacer under the spring. The Moss Catalog shows the original design but it is also a nla part. For the clamp in the middle if was not tight and could easily move out of place. Simply trying to get rear springs back to the way they came from the factory. If this doesn't work I have a set of 10 Leaf 1/4 Elliptics that are new. Trying to avoid the 2-3" jacked up back end those springs cause.
 
OK, in that case is there a blacksmith in the area? apparently earlier technology might be called for. :smile:
 
Jim--in case this does not work out for you were you aware of the spring wedges that NAPA makes, which can be used to lower the rear of a Bugeye when fitted with the new 10-leaf springs? There was quite a lengthy writeup on it on Spritespot a few years ago> https://www.spritespot.com/phpBB3/viewtopic.php?f=38&t=4537

Quote:

[h=3]1/4 Eliptic Spring Wedges[/h]by HAN5L778 » Tue Jan 26, 2010 3:52 pm
As many of us have found, when you buy new rear springs from Moss or Vicky they have too much arch which raises the back of the car up. This just doesn't look right. I have heard, and tried, several different solutions, most of which are either time consuming or dangerous. Yes, I have de-arched these springs by putting them between 2 blocks then hitting each leaf individually with a sledge hammer. Wow, do they bounce around the garage when you do that.
Anyway, I have found a solution to lower the rear of the car without a lot of work. You can buy Leaf Spring Caster Wedges from your local NAPA store. I actually used these on my Bugeye for 3 or 4 years without any problems.
The wedges are 4 3/8" long and are for 1 3/4" or 2" wide springs. You will need to file or grind the sides to clear the u-bolt, and the narrow end to clear the 2 bolts that go through the front ot the spring.
These are zinc alloy shims and have a breakaway groove so you could just break it off and it will be narrow enough to fit without grinding for the u-bolt. Their part numbers are:
264-4100 - 1/2 degree
264-4101 - 1 degree
264-4102 - 1 1/2 degree
264-4103 - 2 degree
264-4104 - 2 1/2 degree
264-4105 - 3 degree
264-4106 - 3 1/2 degree
264-4107 - 4 degree
264-4108 - 5 degree
264-4109 - 6 degree

I used the 3 degree wedge and is seemed just about right for my car, but I was also using the 340# springs on the front which lowered the front of the car by about 1". You don't need to modify or change the stock mounting bolts or the u-bolt for these to work. The price I got from NAPA's website was $11.00 per set.

End quote


I remember this one about wedges at NAPA and will bookmark it to save the part numbers. I think I've got this under control. Just need time on the weekend. My dog Harry a 16 y.o. Peekapoo gets upset when I go out into the garage from the basement and after a few minutes is barking at the door. He doesn't like me giving attention to Bugsy he wants me back inside keeping him company. Now if he barks early on the weekend, he wakes up Colleen and then there goes the weekend. If I bring him in the garage then he wants inside. My dog Harry, jealous about Bugsy.
 
IMG_2656.jpgIMG_2654.jpgFinally Some Progress on Springs today. All Clamps bent up and fitted. Drilled on top for rivet, need to wait for final assembly to drill for bottom Spacer Bolt. Didn't have any issues drilling hole for the 4th from bottom leaf for Rivet. Springs are Hardened Steel but I found the right type of bit. All leaves on one side are now wire brushed and painted. Will flip over in the AM paint the other side. Will flip over again and coat with graphite paint similar to Slip Plate on both sides and then on Wednesday assemble the stack. Next week I'll do it all over again with the other spring but in that case Spring Clamps are already bent ip and drilled and painted. Other than drilling one Spring Leaf for a rivet, that side will go much faster to get done.

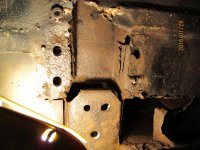
Then on to fix this mess called PS Floor Pan, and area by PS Bulkhead. Lots of Drilling about to start to remove the Floorpan. Slow Progress but Progress ever onward.
 
Springs are looking good, Jim. The other....well,um.....

Kurt.
 
Well at this trying to finish one thing beforeI move on to something else. Spring box on that side is sound. I will need to cut out floor pan and then add a little bit of repair to the bottom of the bulkhead a. Piece looking like this \__ that runs across the bottom of the bulkhead. Floor pan can then be reattached to the bulkhead. Still need to get old floor pan out and get a closer look So I can put a step by step plan is place to get the rusty area out. DS is all sound, new floor pan was installed there. Once I get this floor pan fixed no other metal work to be done.
 
I'll let you know for sure once I get them reassembled. Waiting to drill holes for the clamps on the sides until I have the stack together. Tomorrow heating and pounding rivets flat. Coming along nicely.
 
Back
Top