• Hi Guest!
    You can help ensure that British Car Forum (BCF) continues to provide a great place to engage in the British car hobby! If you find BCF a beneficial community, please consider supporting our efforts with a subscription.

    There are some perks with a member upgrade!
    **Upgrade Now**
    (PS: Subscribers don't see this gawd-aweful banner
Tips
Tips

Painting Wheels

Nunyas

Yoda
Country flag
Offline
WARNING! Long post ahead! /bcforum/images/%%GRAEMLIN_URL%%/smile.gif

I not too long ago acquired a set of the much sought after Saab Shelby wheels. For those of you unfamiliar with these wheels they have the same bolt pattern as an MGB (4X4.5) and the car the came off of was a Saab that used the same wheel stud size as the MGB (1/2" - 20). If I'm not mistaken these wheels were a stock option on the Saab 99 which ceased production in the mid to late 80s. The wheels themselves are very light weight (~15lbs each) and are 15" x 5.5" wide, which makes for a nice "plus 1" upgrade in wheel diameter (better performance tire selections!) and reduction in unsprung weight.

The condition of the wheels when I got them was less than ... new. That's ok though, I didn't expect 20 - 25 year old rims to be in "new" condition anyways. More tragically however, upon receipt of my wheels I discovered at least one of them had very serious "curb rash" ( 1 to 2 inch section missing for the edge of the lip ).

So, I sent my wheels out to have them repaired. While talking to the wheel repair shop I inquired about the price of completely reconditioning the wheels to like new status (i.e. strip all the old paint, fix all damage, paint in my desired color, and machine or polish the lip) and the quote came back at a whopping $150/wheel. That price plus the amount I'd already spent on these wheels was too rich for my bank account. I could have easily gotten a set of ~new~ high performance light weight wheels for the cost it was going to take to do what I wanted. End result, I had the wheels stripped and repaired.

I got the wheels back and was very pleased with the repair work, and even pleased with the bead blasted appearance of the wheels. However, being the lazy car washing person that I am, I decided that leaving the wheels as raw aluminum would result in more effort than I wanted to provide in keeping them looking good.

So, I had to paint them. I've only painted two so far, and at 5 hours for each wheel I feel this initial time investment to make the wheels easier to care for in the future a well worth investment.

The following is the chronology of me prepping and painting an aluminum wheel. It goes without saying (or should anyways) that many, if not all, of the techniques, theories, and ideologies also apply to painting anything (from body panels to your living room walls).

Without further ado here's the chronology with many pictures and comments thrown in throughout.
 
First things first, I neglected to take any pictures of me polishing the wheels' lip prior to starting the prep process chronicled here. That part of the process took me an hour to do. I highly suspect I had to do this because the wheel repair shop used a course media to strip my wheels, and I also highly suspect that if I had them 'soda blasted' the polishing of the lip would not be as involved. I'll probably make a different thread for the polishing process.

Now that's out of the way. Let's get started!

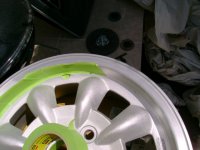
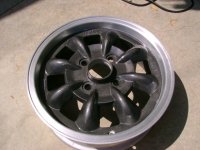
Here's the wheel we'll be painting.
5976-Mask-prep.JPG


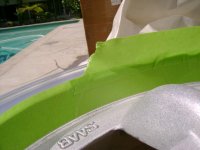
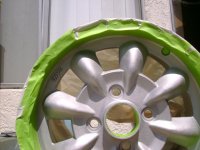
The first thing I did was wipe down all of the surfaces that I intend to paint with paint thinner. After that dried, I began making off the areas I did not want to paint. Here, we see me masking off the lip of the wheel in 3 to 4 inch sections at a time. I did it this way because the shape of the lip makes it impossible to run a single piece all the way around. Also note that the tape over laps a section of the wheel I want to paint. I did this so I can trim the mask to get a nice sharp edge where the pain meets the lip.
5975-Masking-Detail.JPG


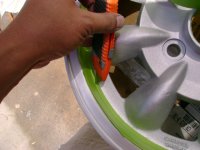
Once I have masked all the way around the wheel, I went back with a utility knife (an 'exacto' knife will work too) and trimmed the excess.
5977-Mask-Trimming.JPG


Next, I added more masking tape to the first layer, extending it out of the wheel. This is done to give the paper I used to mask of the rest of the wheel something to stick too.
5978-Add-More-Tape.JPG


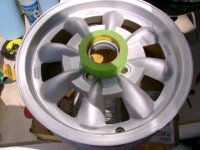
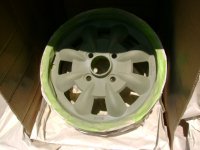
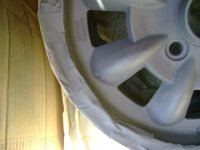
After I wrapped the paper around the wheel and stuck it to the tape, I went back and made sure there were no gaps left behind and filled them with even more tape.
5979-paper-wrapped.JPG


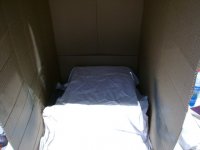
Now that the masking is done, I prepped my "paint booth", if you will. I'm on a tight budget so my booth is a large card board box with a smaller box inside to prop the wheel against. I covered the interior floor with paper to try in reduce reflected over spray from behind the wheel. I believe if I wet the paper down I would have reduced over spray even more. I'll try that with the next to wheels to see.
5980-Paint-Booth.JPG


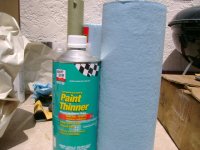
With the wheel in the booth, I wiped it down again with thinner to remove any oil I my have left behind from handling the wheel.
5981-Thinner.JPG


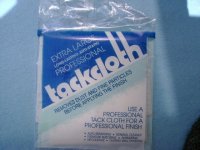
I followed that up by wiping down the wheel with tack cloth.
5982-Tack-Cloth.JPG


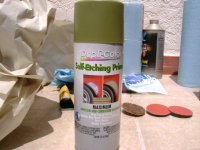
Finally, I started applying etching primer.
5983-Etching-Primer.JPG


4 coats is what I applied. Here's why: A wheel is much more 3 dimensional than a normal body panel or wall. So, I sprayed on a thin coat, rotated the wheel 180 deg, sprayed a second light coat. Then I rotated the wheel 90 deg and sprayed a medium coat, and rotated the wheel another 180 and sprayed a final medium coat. Here's the result:
5984-etch-Primed.JPG


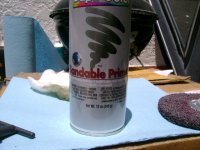
Next I sprayed 'sandable' primer on the wheel. This may or may not be skipped (I'm not a pro), but since the color I want to spray is a dark grey, I figured I should have a dark grey primer behind it to help the color stay true.
5985-sandable-primer.JPG


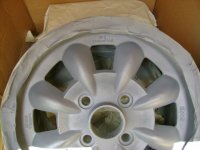
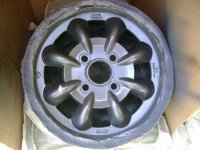
Again, I layed 4 coats using in the same manner that I sprayed the etching primer. And here's the wheel completely primed.
5986-Primed-again.JPG


Next, I went over the primer surface with 400 grit wet dry paper. I did this to help smooth out bumps in the surface, and remove any potential primer over spray. I believe it helps give the color coat a better surface to adhere to. After sanding I wiped it down with a tack cloth again.
5987-scuffed.JPG


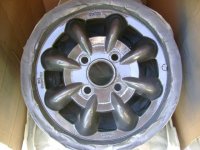
Next I started laying on color. 4 coats again applied the same way as the etching primer was. The color I selected is Dupli-Color "High Performance" wheel coating "Graphite" metallic paint.
5988-Color.JPG


After waiting an hour, I sprayed on the clear coat. Another 4 coats sprayed the same way the etching primer was.
5989-Clear.JPG


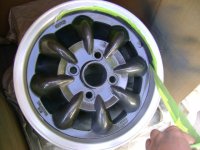
Another hour later, and the paint had set up enough to allow me to remove the masking.
5990-peal.JPG


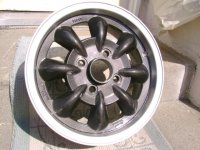
And viola! the finished product!
5991-finished2.JPG

5992-Paint-detail.JPG

5993-Finished.JPG
 

Attachments

  • 5975-Masking-Detail.JPG
    5975-Masking-Detail.JPG
    70.1 KB · Views: 535
  • 5976-Mask-prep.JPG
    5976-Mask-prep.JPG
    80.6 KB · Views: 538
  • 5977-Mask-Trimming.JPG
    5977-Mask-Trimming.JPG
    74.9 KB · Views: 554
  • 5978-Add-More-Tape.JPG
    5978-Add-More-Tape.JPG
    66.6 KB · Views: 538
  • 5979-paper-wrapped.JPG
    5979-paper-wrapped.JPG
    76.7 KB · Views: 530
  • 5980-Paint-Booth.JPG
    5980-Paint-Booth.JPG
    50.8 KB · Views: 519
  • 5981-Thinner.JPG
    5981-Thinner.JPG
    87.9 KB · Views: 559
  • 5982-Tack-Cloth.JPG
    5982-Tack-Cloth.JPG
    77.5 KB · Views: 534
  • 5983-Etching-Primer.JPG
    5983-Etching-Primer.JPG
    78.6 KB · Views: 532
  • 5984-etch-Primed.JPG
    5984-etch-Primed.JPG
    63.9 KB · Views: 523
  • 5985-sandable-primer.JPG
    5985-sandable-primer.JPG
    81.7 KB · Views: 531
  • 5986-Primed-again.JPG
    5986-Primed-again.JPG
    63.9 KB · Views: 525
  • 5987-scuffed.JPG
    5987-scuffed.JPG
    58.3 KB · Views: 513
  • 5988-Color.JPG
    5988-Color.JPG
    80.1 KB · Views: 530
  • 5989-Clear.JPG
    5989-Clear.JPG
    85 KB · Views: 522
  • 5990-peal.JPG
    5990-peal.JPG
    79 KB · Views: 516
  • 5991-finished2.JPG
    5991-finished2.JPG
    83.8 KB · Views: 519
  • 5992-Paint-detail.JPG
    5992-Paint-detail.JPG
    91.9 KB · Views: 524
  • 5993-Finished.JPG
    5993-Finished.JPG
    93.3 KB · Views: 550
I AM IMPRESSED. I really really like that SAAB wheel, will have to try & figure if it will fit the SP...except I do not have the patience to put as much careful resto time into wheels as you. Well Done.
 
To say I had the patience to do this in the beginning would be a lie. My wallet found the patience for me. /bcforum/images/%%GRAEMLIN_URL%%/grin.gif Like I stated in the pre-amble, the shop that repaired these wheels quoted me $150/wheel to completely refinish the wheels, which would was to paint and polish them the way I just did. At that price, I could have bought a set of new SuperLites or Panasports (if I add in my initial wheel acquisition investment).

I am lazy by nature, but this is one case where my wallet over-ruled my nature /bcforum/images/%%GRAEMLIN_URL%%/wink.gif
 
nice masking job! I used to have a 1979 Saab 900 Turbo with the "Turbo" wheels. The Saab 99 lasted until 1978, then came the 900 in 1979 which lasted many years. The wheels you have were optional "Sport" equipment in their accessories catalog, they were not stock in any 99 or 900 model, so yes, those are special wheels. I think those wheels were also sold by a company called IPD in Oregon, they specialize in Volvo and Saab.

What a Saab coincidence, I was going through my garage/storage a few weeks ago, and found some Saab parts, like an original 900 Tool Kit/box, (no tools), power window switch assembly, and 16 black anonized Saab wheel locknuts from around 1980.

Ex
 
ah! thanks for the corrections to my incorrect assumptions! It's good to know the correct information /bcforum/images/%%GRAEMLIN_URL%%/laugh.gif
 
what colour paint did you use?
 
Very nice...& i know what you went through...I did one set of mine without taking to media blaster! the next set, I'm doing your way...
 
Very nice job. I may be inspired now to tackle the Minitors I am going to put on my wife's 77 Spitfire.
 
Congratulations; they look very nice.

I just finished sanding/polishing/painting a set of period Apollo rims for my wife's Spitfire. As you say, the final result was worth the effort.
 
Really nice job on those rims Rob!! They look great!! The only question I have is about the choice of wheels. Since the Saab is FWD and the B is RWD, isn't the off-set of the wheels going to be a problem? Not trying to be "smart", just curious!
 
Hi Mike,
I don't think Rob stops in here much anymore. So it may be a while for an answer. He doesn't have the B anymore. If I recall, someone ran into it and it was totaled.
 
Back
Top