• Hi Guest!
    You can help ensure that British Car Forum (BCF) continues to provide a great place to engage in the British car hobby! If you find BCF a beneficial community, please consider supporting our efforts with a subscription.

    There are some perks with a member upgrade!
    **Upgrade Now**
    (PS: Subscribers don't see this gawd-aweful banner
Tips
Tips

TR5/TR250 New TR250

I have spare Rostyle hubcaps and rims. Both the TR250 rims and early TR6 wheels. Pm if interested. Won't be cheap but won't be crazy $$$ price either.

Marv
 
Tony the vin is CD 835 It is a early one off the line. Thanks for the compliment Gil, I really want to get this car up and running and very dependable for my Wife. When I got home from work tonight all the work area under and around the 250 was spotless clean, She is a great Wife.
 
I need a wife like that. My wife never gets excited about my TR finds (or most any thing else). Maybe we can get TR Terry to rub my Mary Lou's head!
 
Tinman
How about a pic looking from the front with the hood up? The reason I ask is there is always controversy about the shape of the stripe on a TR250. The argument is if there should be a point in the center of the stripe. Some say yes others say none and yet others say just a slight rounding point like the front edge of the hood. (That's what I did). If you have an unmolested original factory paint job that should but an end to the argument.
 
There seem's to have a slight "point" to the stripe. It is not a radius.

IMG_8776.jpg

IMG_8775.jpg

IMG_8774.jpg
 
What are the dimensions of the stripes? How far back from the lead edge does it start? I have always wanted to put the same style stripe on the nose of our Mini wagon! :smile:
 
At the center of the bonnett the stripe starts at 5" at the center of the headlight the stripe starts at 5 1/4" Then 7/16", 7/16", 2 9/16", 7/16", then 7/16". Hope that helps.

IMG_8793.jpg

Center of Bonnett
IMG_8782.jpg

Center of headlight.
 
Hey Dan, Car looks great!

I know that the grill has been mentioned. Your front bumper seems to sit lower than mine...might just be the picture.

Cheers
Tush
 
Thanks for posting that!:smile:
 
Quick update!!
Suspension all removed and cleaned, Head removed and at the machine shop for new seats. Patterns made for the new battery and drivers area. Friday I get the second shipment from Moss 65 parts. OH BOY!! Hurry up big brown truck.
 
Well it has been awhile since I last posted. Things have been pretty busy and have had not much time for the 250. But we did get the body off the frame (only a foot or so) it is loose and ready for media blasting.
Something is wrong with photobucket. I can't down load the floating 250 body. I will as soon as I can.
 
The Tr250 is off to the media blaster. It will take about three weeks to get it back.
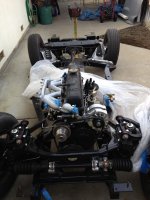
In the mean time the frame will be stripped and off to the powder coater.....

IMG_9239.jpg

IMG_9235.jpg


IMG_9247.jpg

IMG_9246.jpg
 
Nice!

Cheers,
Tush
 
The frame is back and being reassembled. I got the diff. mounted and have been fighting with the universal joints. Brake lines are cleaned and painted. We are using the suplex road springs from Moss. Has any body used them yet? The body will be picked up from media blasting on Saturday. Next thing is rebuilding the motor...... etc..etc.....


'
'
 
Moving right along! Look forward to the next series of pix.

Cheers
M. Pied Lourd
 
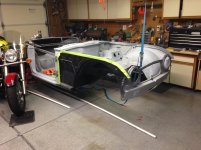
The Frame is almost ready for the body. We picked up the body on Saturday and it looks great. A new floor pan on the drivers side and a little metal around the battery box and some other minor work and then paint... Things are a ltiile tight in the garage.

.IMG_9338.jpg
IMG_9302.jpgIMG_9340.jpg
 
The Frame work is done. Now to the body.IMG_9428.jpgIMG_9432.jpg
 
You're going to have my dream garage components: TR3 and TR250! looking great!
 
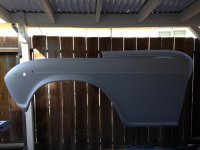
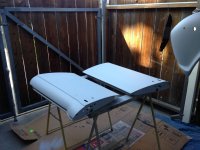
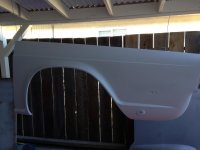
It has been a while since I have updated on the 250. Engine and drive train is all done. I just primed the panels for the last time today. ( I HOPE) Lot's of guide coat and sanding. Them do it again.................. I hope to have color on by next week. Thank You Pat Galvin for the motivation to get it done. I have most of the parts to put it back together already purchased or cleaned and powder coated. Reassembly should go quick...
IMG_0232.jpgIMG_0227.jpgIMG_0228.jpgIMG_0229.jpgIMG_0222.jpg
 
Back
Top