• Hi Guest!
    You can help ensure that British Car Forum (BCF) continues to provide a great place to engage in the British car hobby! If you find BCF a beneficial community, please consider supporting our efforts with a subscription.

    There are some perks with a member upgrade!
    **Upgrade Now**
    (PS: Subscribers don't see this gawd-aweful banner
Tips
Tips

MG Midget in distress.

I suffer from self criticism. I think it is the only way you improve.
When I make pizza my wife says "That is great" I am thinking the dough could have had a bit more salt or the crust is too thick or too thin. I still enjoy it though.

On the other Midget forum I got some welding guidance that I will try. My go to was lower the amps if it is burning through. The advice for plug welds was increase the amps so you get in and out quicker.
I will give it a try.
I am backing up some areas with a piece of copper to try to stop the welds blowing through.

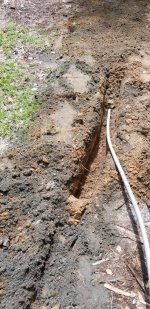
I have removed the caved in plate between the frame members under the front of the engine and am replacing it with a new piece. I think the PO was jacking it up using that area as a jacking point or they went off road with the Midget.
I am using 16 gauge plate to replace the 18 gauge that was on there.

David
Old frame plate s.jpg
New frame plate s.jpg
 
I had the same caved in "front jacking point" on mine though not quite as bad. Repaired it the same way except I didn't have a MIG at the time so used gas.
 
The patch is in and the advice on turning up the welding voltage seems to work. I reproduced the factory welds to the frame rails. 3 on one side and 1 on the other. The plate is flat it is just the swirls from the wire brush that make it look wavy.

The Pizza turned out very well tonight. Still working on the dough recipe. The Pizza photo is for Doc.

David
Welds s.jpg
plate welded in s.jpg
Pizza Friday night s.jpg
 
Thanks, David... I think.

The welds look great, the pizza is a terrible tease! I can SMELL it from here. :D
 
Dang, you're making me hungry and I just finished a big breakfast. Yeah the plug welds look great.
 
Well done -- on welds and pizza!
 
Thank you on both front.

That advice has made a big difference to the plug welds.
Getting in to do the welds on the angled firewall was fun. Having my head right over the weld along with my light. I did a couple of welds then let the smoke clear before I went in to do two more. I am seeing good weld penetration.

David
Weld underside s.jpg
 
Getting ready to do the drivers side floor pan. There are several holes that need to be added along with the oval reinforced hole at the front edge of the pan. I also need to weld in the nuts for the accelerator pedal hinge. When I was marking out the holes I notice that the depression in the floor pan is not offset to the left as the original one is so there is no flat area to mount the accelerator hinge. It can not be moved to the right as it will hit the transmission tunnel. Anyone else had this issue? It is an Ashley Hinton pressing. I will be contacting him to let him know about the issue. It may not be an issue on a RH drive car.
I will probable make a plate to mount the hinge.

The first photo shows the location of the hinge screw holes. 13 1/8" and 13 3/4" aprox.
The second one shows the location of the depression in the floor pan.

David
Screw hole location s.jpg

Floor pan depression s.jpg
 
The floor on the drivers side has been removed now. I continue to be amazed by the condition of the inner structure of this car. Having seen people working on cars with major parts just rusted away.
This is a photo of the space between the firewall and angled toe board and the inner sill where I removed the floor pan.
I have to make a couple of small patches and get the floor fitted.

David
Drivers side firewall insides s.jpg
Inner sill to floor joint s.jpg
 
Remarkable you've found one with so little corrosion damage. Are you treating the "hidden" areas with some sort of inhibitor?
 
That is amazingly clean. The firewall side of mine on both sides was almost completely rusted away from the inside. Interestingly though the floors were not too bad.
 
The guy I bought it from said he was told that it was a California car. Must have had the carpets soaked and left wet as the majority of the rust is on the floor inside. On the seams in the rear fender wells there is a play dough like sealant wrapped around the seams. The same stuff was along the floor to inner sill on the outside.
I am using POR15 Metal prep then some primer in the hidden areas. It will probable never get wet inside again but I am amazed by the condensation we get on the car in the garage when we get a temperature and humidity swing.

David
 
Ditch digging is a young persons job. As I don't have a young person handy I had to do it myself. I have air in my shop now. It was only 130 feet of ditch and only 12" deep.

David
 

Attachments

  • Ditch diging for the airline s.jpg
    Ditch diging for the airline s.jpg
    439.5 KB · Views: 85
I have a couple of rust holes in the "A" post on both sides. Just a bit bigger than pin holes. I made some small round patch pieces and opened up the holes with a step drill. Then welded in the patch. Seems to be working well.
I noticed the hole in my patch after I took the photo. Went back and got it filled up.

David
A post hole drivers side s.jpg
Drivers side A post hole s.jpg
Patch in place s.jpg
Patch tacked s.jpg
Hole welded up s.jpg
Hole gone s.jpg
3 more holes to patch s.jpg
 
Welding the second floor pan in today. Trying a different approach this time. No weld through primer and very clean mating surfaces. Going better so far.
Having sand blasted the drivers side firewall etc. before I welded the floor in as it was easier to reach all the corners. Getting rid of the sand is a task.
I did apply POR 15 to the sand blasted areas and the first floor panel because in the Georgia humidity clean metal flash rusts in no time.
David
 
Back
Top