• Hi Guest!
    You can help ensure that British Car Forum (BCF) continues to provide a great place to engage in the British car hobby! If you find BCF a beneficial community, please consider supporting our efforts with a subscription.

    There are some perks with a member upgrade!
    **Upgrade Now**
    (PS: Subscribers don't see this gawd-aweful banner
Tips
Tips

TR2/3/3A lower small brass bushing

sp53

Yoda
Country flag
Offline
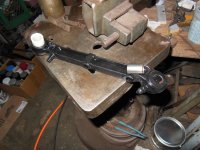
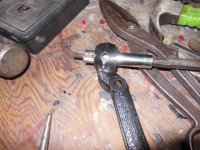
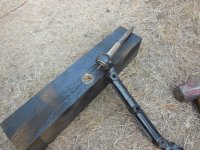
Well I have sent those little brass bushing out to be pressed and honed in the past. This time I thought I would try myself. Would I need a press? Should I push one out as I try pushing the new bush in place? Anybody have any luck with DIY method.

Thanks Steve
 

Attachments

  • DSCN0427.JPG
    DSCN0427.JPG
    3.3 MB · Views: 112
Never try to drive a piece of soft metal with another piece of equal softness. New piece will be destroyed. You have to take care to get the grease hole in the bush lined up with the grease hole in the wishbone. The bushes are slotted, so no real effort is needed to move them. Flat tip punch to get them out and a wood block should get the new ones in.
Bob
 
Wood block and a good vise or press.
 
I tapped out with a long socket that matched up. A slightly larger socket was fine to tap in. Of course, if you have a press, that makes it a bit easier.

I have always reamed to size...9/16", if I remember right. I've always been told honing bronze leaves grit in the bushing that is hard on the pin.
 
Bronze tends to "chunk" when cut with reaming, a stone hone is a bit better to use. But it takes a long time.
 
The consensus in the machining world is that reaming or boring bronze to size is preferred. Honing closes the pores that make the bronze self lubricating, and will leave abrasives on the bearing surface. Even the Moss site for the bearing says to "ream":


Honing is usually reserved for iron or steel parts, like cylinders and iron valve guides.
I sit corrected.

We've always used a brake cylinder hone on problem pilot bushings, haven't had any issue. 🤷
 
The perfect driver would be a steel rod with a step, so the step goes into the bushing and protects it while the larger step drives it in.

Assuming you don't have a driver like that, you will need a steel driver (like the back side of a socket), that you can place on the bushing and makes full contact...then either press to tap into place. The danger is if the bushing gets cocked at an angle, it will wedge and jam, so further tapping will distort and ruin it. Start straight and always keep the driver in full contact, but tap on the side of the driver that is higher as you go. Once the bushing is far enough in that cocking is no longer an issue, then you can tap a bit harder...but never BFH hard!

There is a chance that, without the perfect tool, the edge you tap may develop a burr. So long as the burr is not into the steel shell, you can ream it out afterwards.
 
Last edited:
Who knows, Doc. Like I said, it's the consensus now to ream...but someone may eventually prove that honing is better, LOL.
 
I've a number of shouldered steel drifts, some had to be turned on a lathe for particular uses. Some brass ones as well. Also a "collection" of bearing inner and outer races, ground on I.D. or O.D to use as drifts for pressing the same diameter ones into or out of place. Sockets have been used as well. All's fair, whatever works!

Assuming you don't have a driver like that, you will need a steel driver (like the back side of a socket), that you can place on the bushing and makes full contact...then either press to tap into place. The danger is if the bushing gets cocked at an angle, it will wedge and jam, so further tapping will distort and ruin it. Start straight and always keep the driver in full contact, but tap on the side of the driver that is higher as you go. Once the bushing is far enough in that cocking is no longer an issue, then you can tap a bit harder...but never BFH hard!

Best advice for the task.
 
I used a deep well 10mm socket that had a beveled edge that hit the bushing edge, but nothing is moving. I was able to hit the socket with strong force. I thinking I might need a 90 edge to sit right on top of the bushing 90 degree edge flat. The 10mm socket has a beveled edge and as the socket hits bushing perhaps the energy force is being push to the side and not straight down.

I looked around on line for a tool with a 90 edge but no luck. I probably do not know the correct name for the tool. Anyone have a pic.

steve
 
For going in, you want a flat surface to contact the bushing, so go with a little larger socket and turn it around so the flat side fully contacts the bushing. You will drive it in until the bushing edge is even with the arm edge. The bevel will distort the bushing...flat is best for driving. I often even use a flat plate of aluminum to start the driving, to prevent distorting the bushing during the critical start.
 
I pounded the bushings out. I got one to come out just by smacking into a hole I drilled in 4x4 using a beefy punch and 13 mm socket. The others were more difficult there I made some relief cuts with a hacksaw blade, and then took a long punch and drove the punch through zerk fitting hole and split and cracked the bushing.

Now I need to get the new bushings installed. Perhaps pull them in with a bolt and socket.

steve
 

Attachments

  • DSCN0437.JPG
    DSCN0437.JPG
    3.4 MB · Views: 85
  • DSCN0433.JPG
    DSCN0433.JPG
    3.3 MB · Views: 95
  • DSCN0436.JPG
    DSCN0436.JPG
    3.3 MB · Views: 88
Back
Top