Hey Guest!

 Hey - did you know if you click on the title of a thread it will take you to the first unread post since you last visited that thread?
 but were afraid to ask:
  STOP!! Never post your email address in open forums. Bots can "harvest" your email! If you must share your email use a Private Message or use the
  smilie in place of the real @
 Pretty Please - add it to our Events forum(s) and add to the calendar! >>
Assembly of the BN4 is coming along well, with a list of odds and ends left to do. Installing a new folding top is on that list.
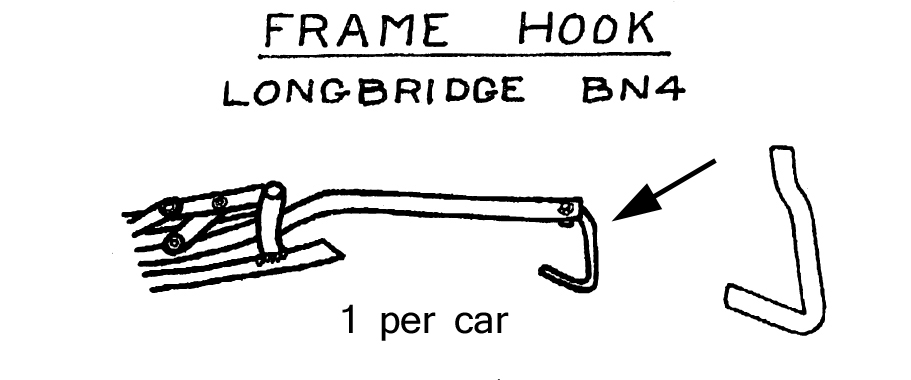
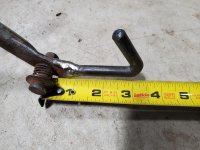
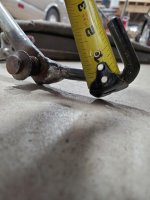
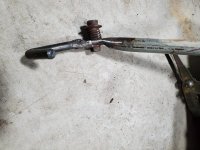
I have a Longbridge top frame that appears more or less complete, except that it is missing the L shaped piece that is attached to one of the main top bows and extends below the left side pivot point and fits into the rubber block when the top is erected. I have the rubber block and the metal piece that the rubber block fits into. But the piece that fits into it is missing. I hope that explanation is clear enough; Longbridge owners likely will know what I'm talking about.
Does anyone out there have a Longbridge top with the missing piece still intact? If so, a few pictures - ideally with measurements of the piece would help immensely. Knowing the correct dimensions should make it possible to fabricate and weld the missing piece into place.