• Hey Guest!
    British Car Forum has been supporting enthusiasts for over 25 years by providing a great place to share our love for British cars. You can support our efforts by upgrading your membership for less than the dues of most car clubs. There are some perks with a member upgrade!

    **Upgrade Now**
    (PS: Upgraded members don't see this banner, nor will you see the Google ads that appear on the site.)
Tips
Tips

TR4/4A Interior Install...and other random questions.

ghawk16

Jedi Trainee
Country flag
Offline
First off...with the post I just read about Herman I'm typing this with a VERY heavy heart. As a car guy that started with air and watercooled VW's. Then Audis. And now my built 4Runner and restoring my Triumph I truly appreciated his love for cars as a whole and just an all around GREAT guy to have met. Not to mention his love for beer. I was really looking forward to taking him some beer this next year when I drove my Triumph down to show him. Ugh...RIP Herman.

Sooooo....today I started the install of the interior on my TR4. A couple of questions:
1. The kick panel boards...how are those attached? The Moss carpet kit I got has two holes in weird locations.
2. Anyone else used the TRF interior panel hardware kit? I'm having a hard time finding out where all those bolts go and what they are for. I may have to email them and see if they can tell me.
3. Someone replaced the channels the door seals go into and decided to rivet them in. Well...that's great and all, but then you can't slide the seal in. On the passenger side it was only a VERY small piece so I JB Welded it. But the drivers side is a majority of the bottom area. Any reason I can't JB Weld a larger piece. Why I didn't catch that OR WHY the shop that did my body work didn't catch that.
4. Where are all the snaps supposed to go for the carpet. Moss gave me a TON, but I can only see 6. Two on each pass and dr floor and two on the tunnel. Guess they gave me like 15 extra?
5. And to confirm...and I know this...but the rear leaf that has the extra plate goes on the drivers side, correct? I know this and for some reason I STILL put it on the passenger side. It's there so when you sit in the car it's level. Luckily it seems the leafs are easy to swap.

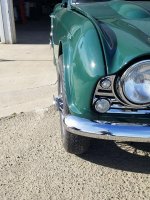
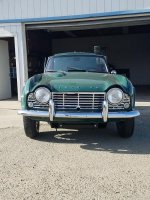
Sorry for the long winded post. Here are some pics from yesterday and today. And yes, know the wipers are wrong. Working on getting them corrected.

20171210_104711.jpg20171209_111722.jpg20171209_112737.jpg20171209_112643.jpg
 
I used the TRF carpet kit and later had to replace it with the Moss kit - so I have two memories though I do not recall much comflict re attachment.

1. Mine are secured by screws and of course the dipper switch base.

2. Not sure what bolts you refer to.

3. I suppose there is no harm in gluing in the cannel seal but JBWeld may not be the best choice as it sets up rather brittle. Maybe Gorilla Glue (what I used on the boot seal) would be better.

4. I will dig out some pictures of snap locations, though you may still have some left over (I do not recall 21 of them being needed).

5. Extra leaf is for the passenger side so you are okay. It is counter-intuitive but because the frame is under=slung adding that leaf raises the axle relative to the body so the net effect is to lower the body.
 
I used the TRF carpet kit and later had to replace it with the Moss kit - so I have two memories though I do not recall much comflict re attachment.

1. Mine are secured by screws and of course the dipper switch base. Yeah, there are two diagonal holes on the back side but they don't seem to go to anything on the sheetmetal, so I'm kind of confused

2. Not sure what bolts you refer to. Well, kind of all of them that came with the kit. There are some weird plastic washers that these tiny screws go into. Then about 16 cup washers and screws. Those look to go back to the rear board in front of the gas tank. But I saw in someones post two snaps go there too. Those weren't included in the kit which is weird.

3. I suppose there is no harm in gluing in the cannel seal but JBWeld may not be the best choice as it sets up rather brittle. Maybe Gorilla Glue (what I used on the boot seal) would be better. OK. I'll try a couple of different things. I was thinking since it's metal on metal it would be better for JB Weld.

4. I will dig out some pictures of snap locations, though you may still have some left over (I do not recall 21 of them being needed). Thank you!

5. Extra leaf is for the passenger side so you are okay. It is counter-intuitive but because the frame is under=slung adding that leaf raises the axle relative to the body so the net effect is to lower the body. OK...so I do have it right then? So maybe someone or you can chime in as to why my front passenger wheel is 1/2-3/4 higher and the camber seems way off? I measured at the little groove in the tower to the bottom of the aluminum spacer and both were the same. So all I could think of is I put the rear leaf incorrectly causing it to be higher on that side which in turn caused the front to be higher. But then I would have the same issue on the drivers side if I swapped them out. Not sure what else could cause it. See pic.

See the two pictures attached. You can see the difference and the camber is out of whack.
 

Attachments

  • 20171209_112625.jpg
    20171209_112625.jpg
    65 KB · Views: 161
  • 20171209_112606.jpg
    20171209_112606.jpg
    57.1 KB · Views: 158
Here are some snap/carpet photos:

Those blood-sucking clips:

yr7jydG.png


Drivers side snaps:

vuL6OdA.jpg


Passenger side:

85h41Yx.png


ZFru4BO.png


Location of Veltex snaps (marked in tape because the outer ring is nearly invisible):

MKFUVxF.png


M7xssLg.png


About a half dozen snaps in the rear for the sticks (bows) cover. If you have lots of snaps (sounds like you do) maybe they included the fittings for the tonneau or hood (top). Also a couple of snaps in the boot (spare tire board).

Hard to judge camber in those photos but I wonder -- did someone fit spacers to the hubs to adapt steel-wheel studs to use with wires? Okay to do that (I do) it just looked like there might be an extra bit of track.
 
3. I suppose there is no harm in gluing in the cannel seal but JBWeld may not be the best choice as it sets up rather brittle. Maybe Gorilla Glue (what I used on the boot seal) would be better. OK. I'll try a couple of different things. I was thinking since it's metal on metal it would be better for JB Weld.

I misunderstood, I thought you were gluing the seal in place. Yes, JBWeld would be better suited to metal to metal but may or may not be up to this.
 
Gary,
For the side kick panels I used three small upholstery screws at the rear ( toward the door)edge of the kick board panel and originally used some upholstery glue forward of the screws. I just had to replace the door restricter strap and when I put the panel back in with only the three screws.

I did use the TRF carpet kit on two TR4s. The only snaps that I used were 2 just in front of each seat on the front mats, one on each side near the front of the tranny tunnel, then four on the tunnel piece over the driveline. That was a total of 10.
One problem I had was the length of the front floor carpet pieces. They were about 2-3" to long so went up the firewall over the top of "those blood sucking clips". I wound up cutting a slice in the carpet to fit the front part of the clip through the carpet. I likely should have moved those clips from their original positions to a higher location.
Charley
 
Here are some snap/carpet photos:

Those blood-sucking clips:

yr7jydG.png


Drivers side snaps:

vuL6OdA.jpg


Passenger side:

85h41Yx.png


ZFru4BO.png


Location of Veltex snaps (marked in tape because the outer ring is nearly invisible):

MKFUVxF.png


M7xssLg.png


About a half dozen snaps in the rear for the sticks (bows) cover. If you have lots of snaps (sounds like you do) maybe they included the fittings for the tonneau or hood (top). Also a couple of snaps in the boot (spare tire board).

Hard to judge camber in those photos but I wonder -- did someone fit spacers to the hubs to adapt steel-wheel studs to use with wires? Okay to do that (I do) it just looked like there might be an extra bit of track.

OK...these pics help! I think they just gave me extras, LOTS of extras. It's the 6 on the tunnel that I couldn't account for. The 4 in front of the seats and the 2 on the rear tunnel I knew about. Thanks I'm using a Moss carpet kit, but the interior kit of the TRF doesn't have the male snaps for the B-post/wheel well covers. I will have to look at my originals to see if the snaps were mounted to the board, or if the board was mounted to the car and then the snaps were put in with rivets to the metal.

Also...should have got my parking brake chromed. Yours looks so nice.
 
Hard to judge camber in those photos but I wonder -- did someone fit spacers to the hubs to adapt steel-wheel studs to use with wires? Okay to do that (I do) it just looked like there might be an extra bit of track.

No spacers or anything was added. I rebuilt the whole suspension and the rubber spacers are seated as I had a heck of a time trying to get them to seat correctly. And the spacer makes sense. I'm so used to lifting trucks that a spacer "lift" lifts the truck. But I get what you're saying above. But just can't see why it's this way. Front springs different sizes? I swear I measured them and they were the same. Hmmmm, when I put it back up on jack stands I'll have to measure some things and compare.
 
Gary,
For the side kick panels I used three small upholstery screws at the rear ( toward the door)edge of the kick board panel and originally used some upholstery glue forward of the screws. I just had to replace the door restricter strap and when I put the panel back in with only the three screws.
I did use the TRF carpet kit on two TR4s. The only snaps that I used were 2 just in front of each seat on the front mats, one on each side near the front of the tranny tunnel, then four on the tunnel piece over the driveline. That was a total of 10.
One problem I had was the length of the front floor carpet pieces. They were about 2-3" to long so went up the firewall over the top of "those blood sucking clips". I wound up cutting a slice in the carpet to fit the front part of the clip through the carpet. I likely should have moved those clips from their original positions to a higher location.
Charley

Anyone have a photo of "those blood sucking clips" and how many needed for kick panels my interior is gutted so no idea if i have them or what they look like.
Also saw these kick panels on moss, do you need a left and a right? Maybe the same?
Is there a better place to buy the snaps, not cheap at the big vendors i looked at?
 
TRTYME
George Hahn's first photo shows the "blood sucking clips". They go on the firewall to hold the front of the floor mats NOT on the kick panels. You need four of them. If they have been removed then you would still likely find the screw holes in the firewall where they were previously mounted.

The kick panels are each carpeted and are different as first the carpet is on the inside and I believe the items like the voltage stabilizer found on the passenger side require the kick panel to be a different shape. But I could be wrong on that part.
I have found parts such as snaps at a local upholstery shop in my town. Yes, prices are usually cheaper that way. If you have one of what ever you want or maybe just a picture you could give that a try to get a better price.
 
Back
Top