
-
 Hey Guest!
British Car Forum has been supporting enthusiasts for over 25 years by providing a great place to share our love for British cars. You can support our efforts by upgrading your membership for less than the dues of most car clubs. There are some perks with a member upgrade!**Upgrade Now**
(PS: Upgraded members don't see this banner, nor will you see the Google ads that appear on the site.)

Tips
- We have a special forum called "Member Articles" where you can submit actual articles for consideration for publication. Learn More
- Don't have an Avatar? If not, your avatar will default to the 1st character in your username. Go into "Account Details" to change your Avatar.
- Some basic forum navigation info: click
 Hey - did you know if you click on the title of a thread it will take you to the first unread post since you last visited that thread?
- Hey Guest - Is your British Car Club in our Clubs database? If not, send me a PM - Basil

- Looking for a local club? Click the "Clubs" tab above and browse hundreds of clubs world-wide.
- Add Android or iPhone APP: click
- Did you know - any picture or video you add in your posts in any marque-specific forum will also get added to the Media Gallery automatically.
- A few more tips about posting and replying: click
- Hey there Guest - be sure to keep your profile page up to date with interesting info about yourself: learn more
- More tips and tricks on Posting and Replying: click
 but were afraid to ask:
  STOP!! Never post your email address in open forums. Bots can "harvest" your email! If you must share your email use a Private Message or use the
  smilie in place of the real @
- Want to mention another member in a post & get their attention? WATCH THIS

- So, you created a "Group" here at BCF and would like to invite other members to join? Watch this!
- Hey Guest - A post a day keeps Basil from visiting you in the small hours and putting a bat up your nightdress!
- Hey Guest - do you know of an upcoming British car event?
 Pretty Please - add it to our Events forum(s) and add to the calendar! >> Here's How <<
- Hey Guest - you be stylin' Change the look and feel of the forum to fit your taste. Check it out
- If you run across an inappropriate post, for example a post that breaks our rules or looks like it might be spam, you can report the post to the moderators: Learn More
- If you would like to try some different "looks" or styles for the site, scroll to the very bottom, on the left and click the Style Selector.
You are using an out of date browser. It may not display this or other websites correctly.
You should upgrade or use an alternative browser.
You should upgrade or use an alternative browser.
TR2/3/3A Horn rebuild service
- Thread starter 2long
- Start date
mgedit
Jedi Knight
Offline
Dan, I can't recommend a rebuild service, but it is something you could tackle yourself if so inclined. I cleaned and painted mine. The key it to add a drop of oil as shown below. One horn would just not work and was drawing lots of extra current. Drop of 3 in 1 oil sorted it out and its been fine for 4 years now. This article may also be helpful (https://www.vintagemg.com/articlepdfs/thorns1-2.pdf).
Cheers, Mike


Cheers, Mike
CJD
Yoda
Offline
This is how it looks if you have a real boat anchor:
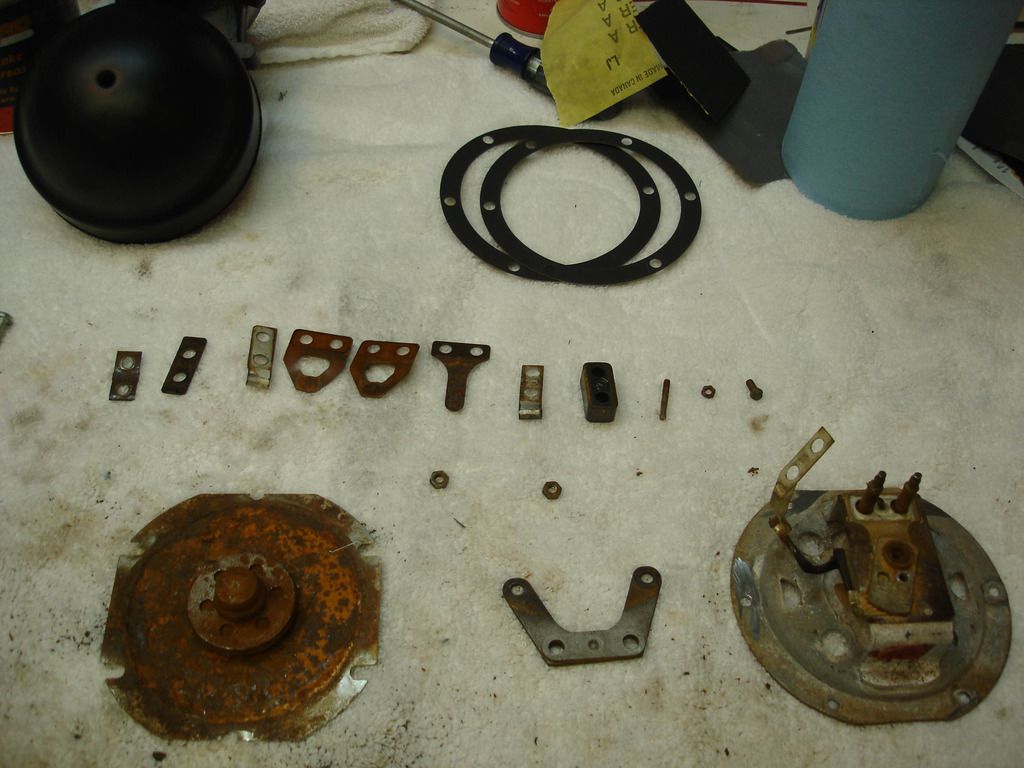
The older horns are bolted together, so just removing the bolts separates the diaphram from the trumpet. The newer ones are riveted, but you can either bolt them back together or even get the same style rivets the factory used from Ace Hardware in their odd parts isle.
Before rebuilding, check the continuity of the coil. As long as the coil is not shorted or broken, the rest of the rebuild is just a matter of cleaning and reassembling.
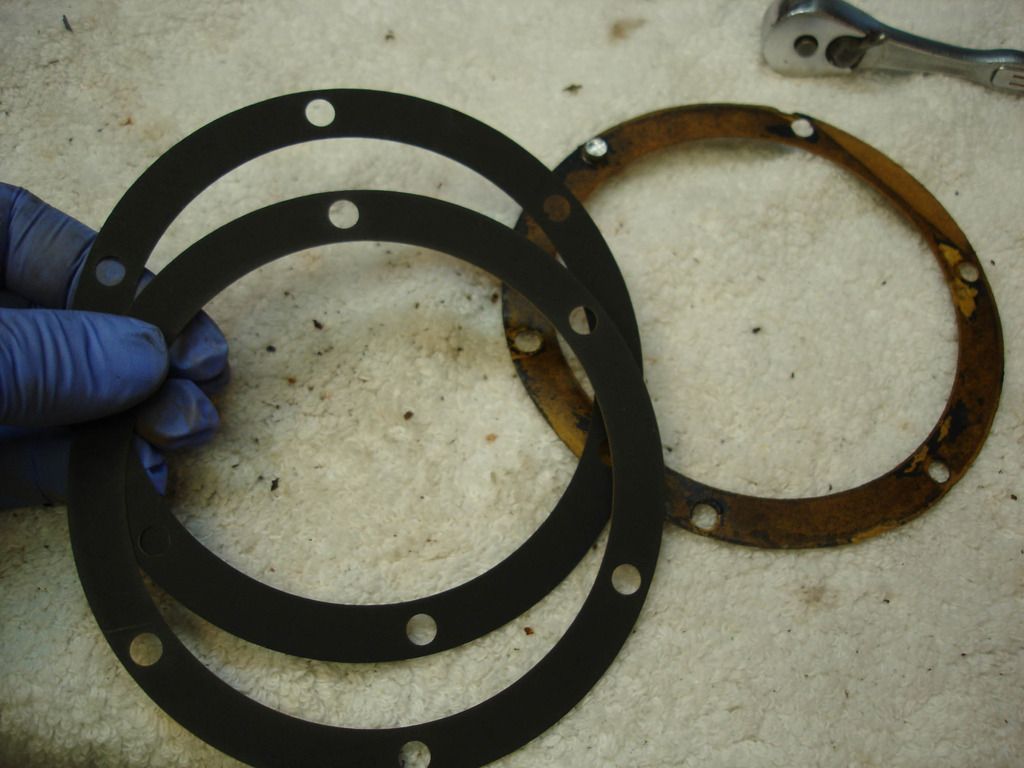
These are some gaskets that go between the trumpet, diaphram, and back plates. I cut these on a laser, and still have the pattern if you decide to rebuild yourself I can cut you out a set.
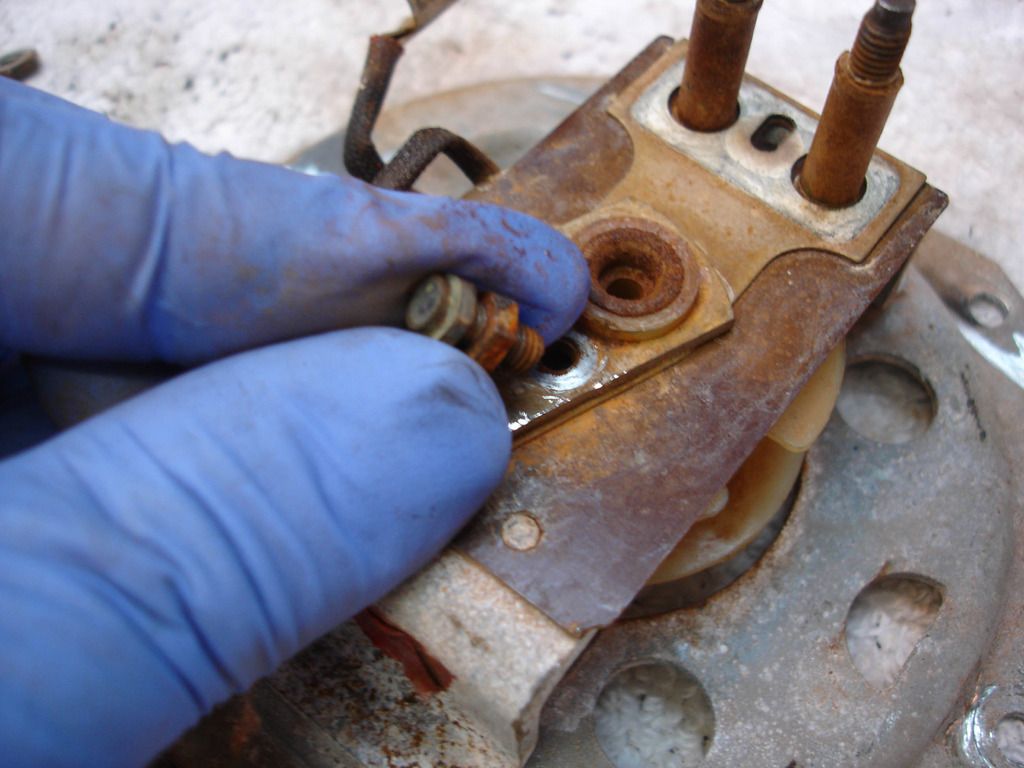
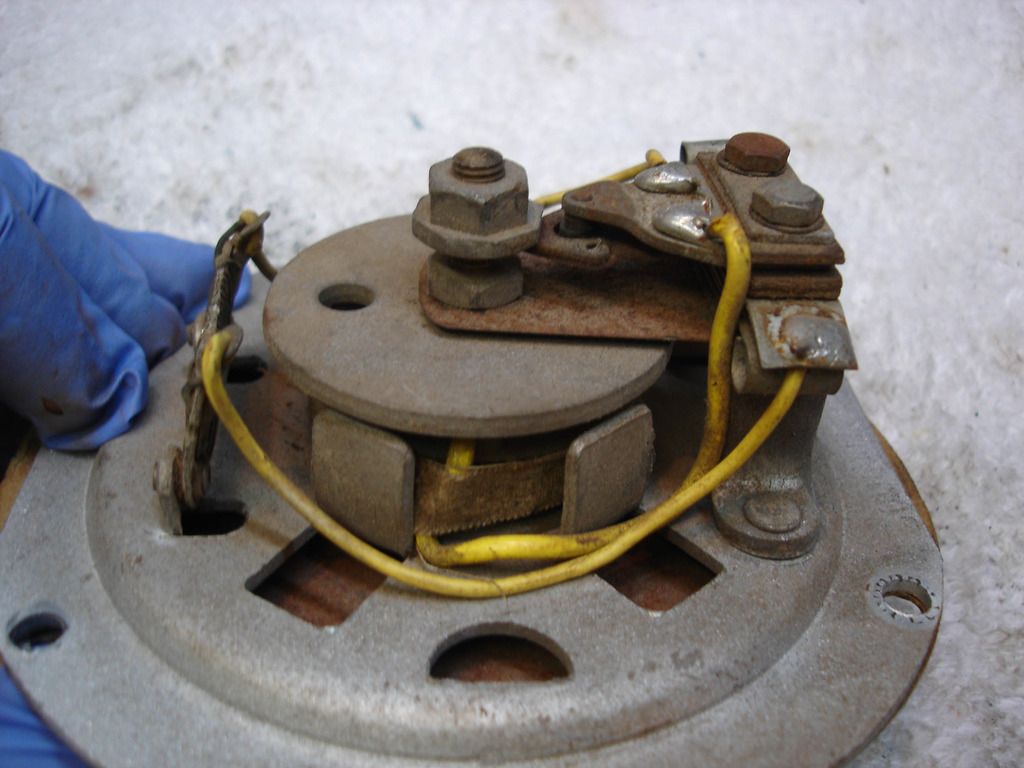
The way they work is really simple. Here I am removing the contact that energizes the coil to pull the diaphram. Notice it has a thread and lock nut. That is how you adjust the horn for the most sound with least power draw.
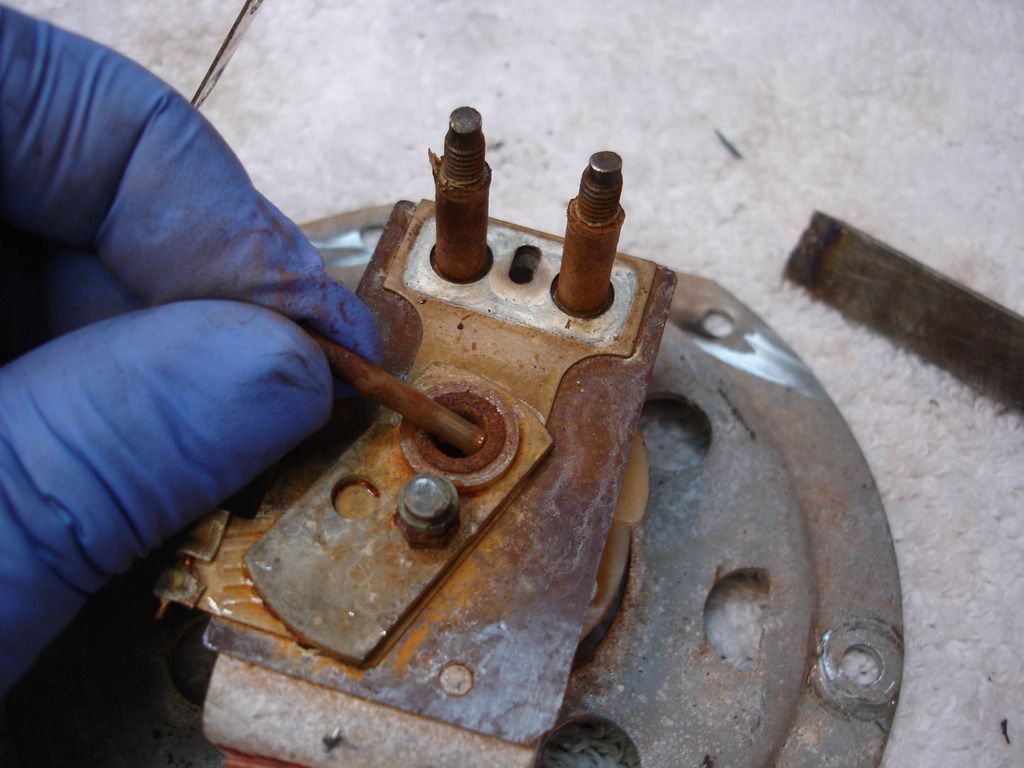
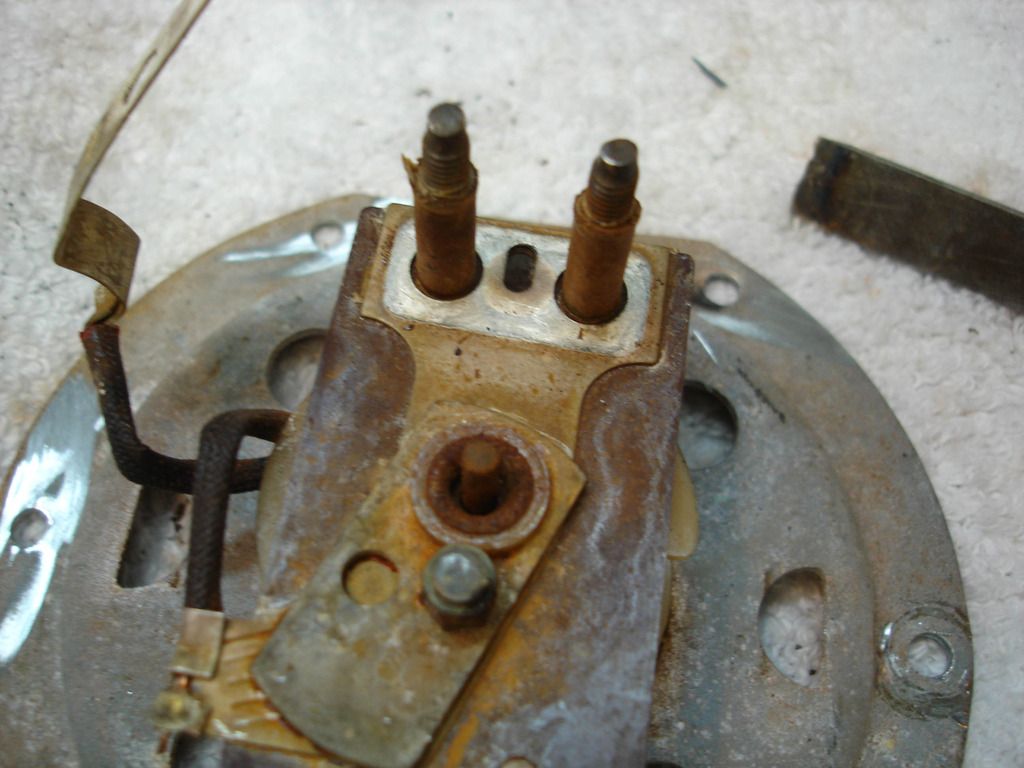
This is the rod that Mike was referring to, and even the manual tells you to routinely put a drop of oil on it. When the coil energizes, it pulls the diaphram upward. As the diaphram pulls up, it pushes this rod up with it.
The rod hits this contactor, which then breaks the circuit that was energizing the coil. Once broken, the diaphram springs back, the rod drops, and the contact contacts again...so the process starts all over.
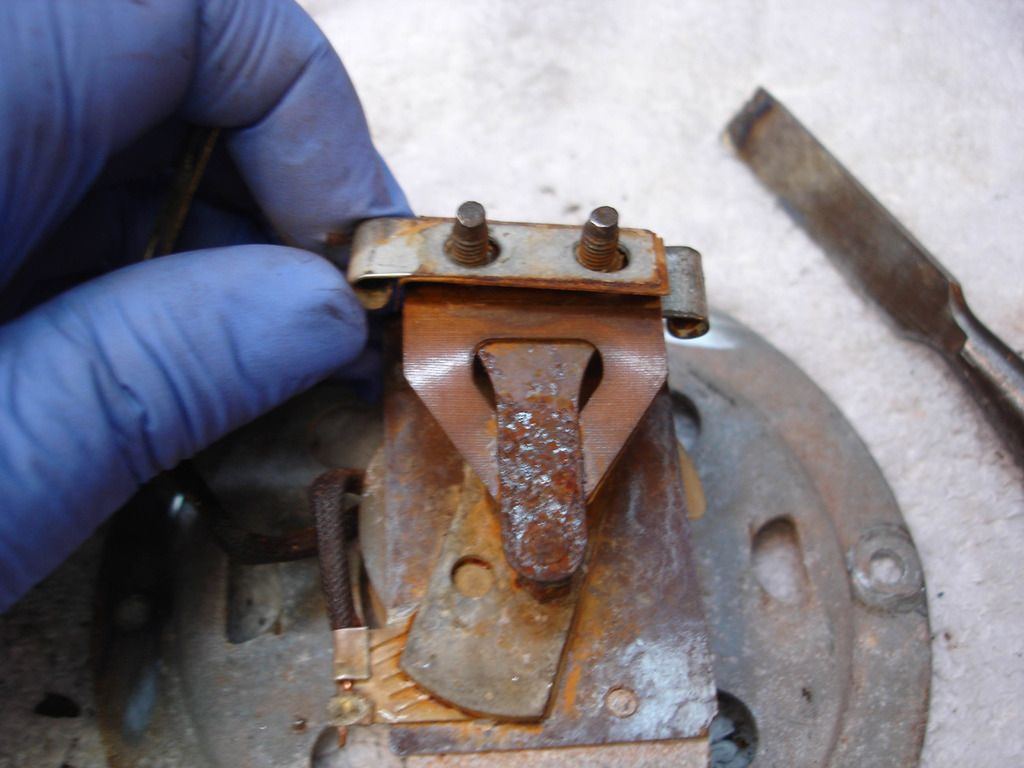
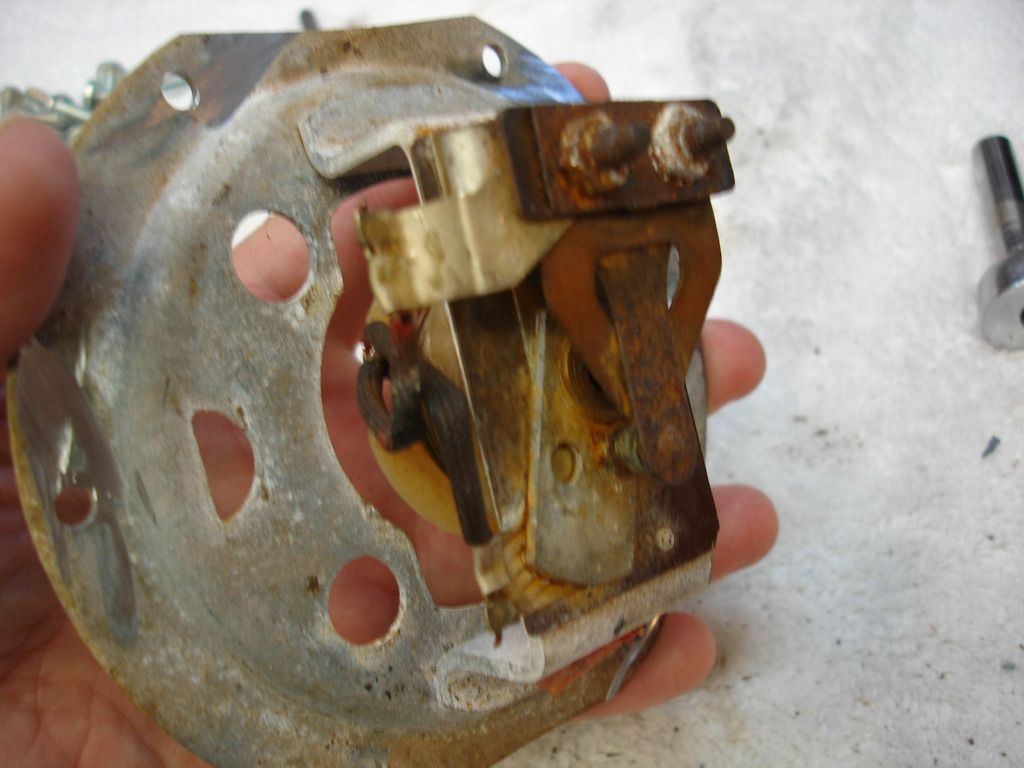
With just 2 nuts, the entire contact plate comes right off. All the parts can be bead blasted...and clear coated if you want to go all out.
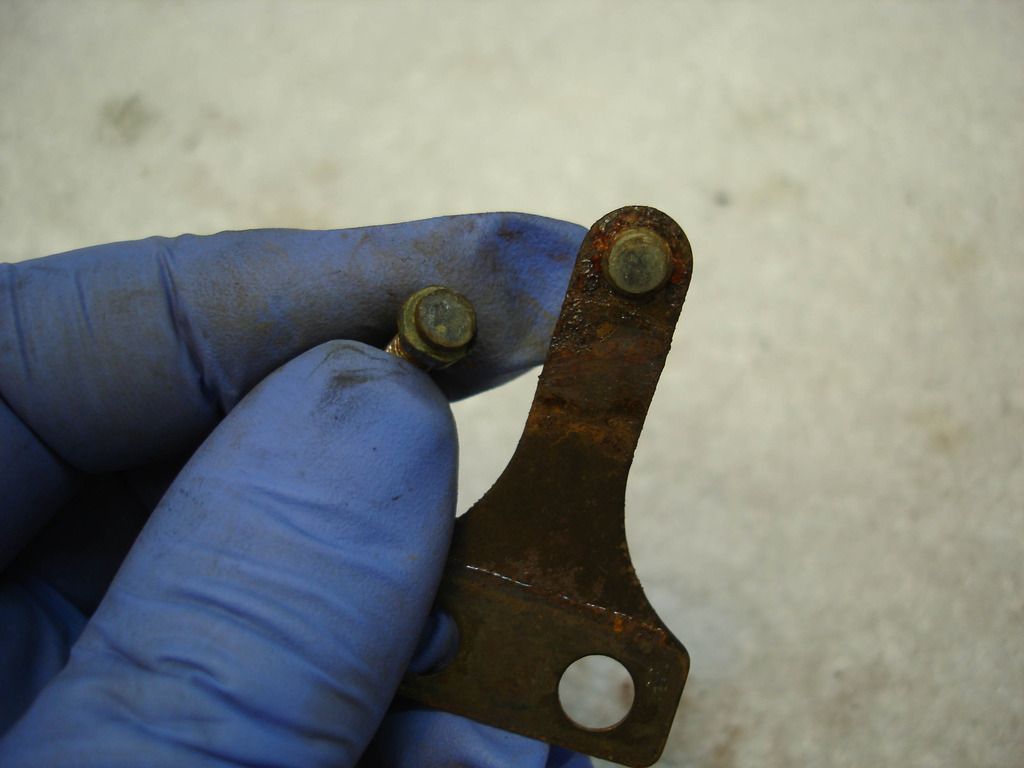
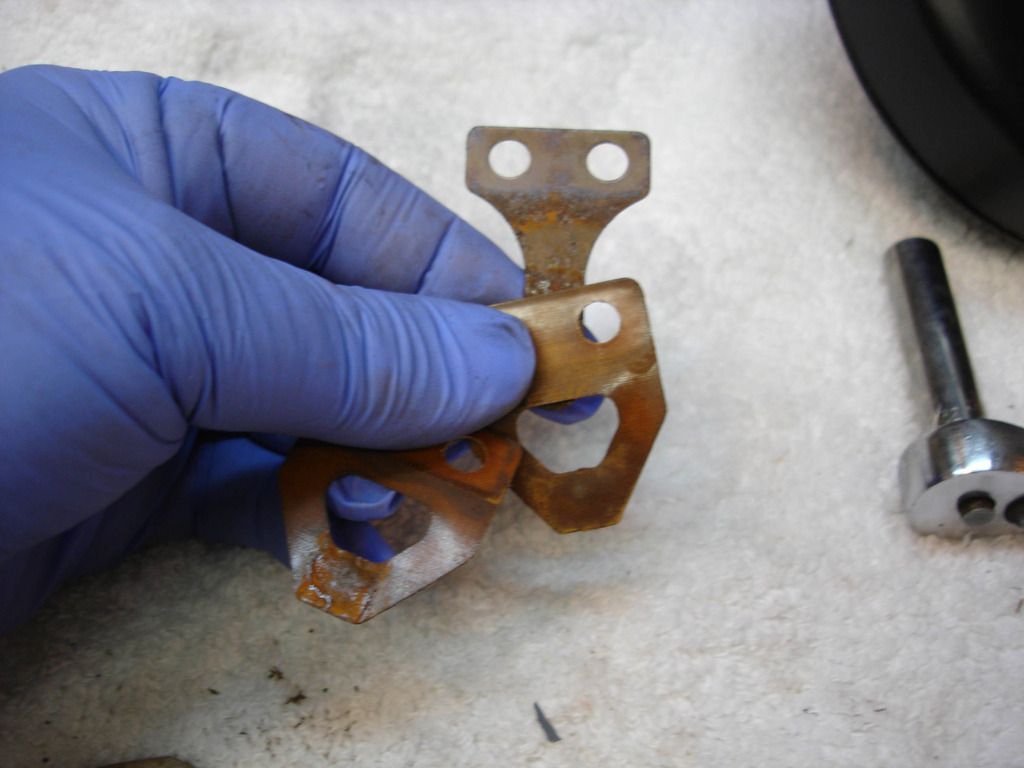
The only parts that are critical are the coil and these 2 contacts. They can be filed to s shiny state, and put back for another 50 years of service!
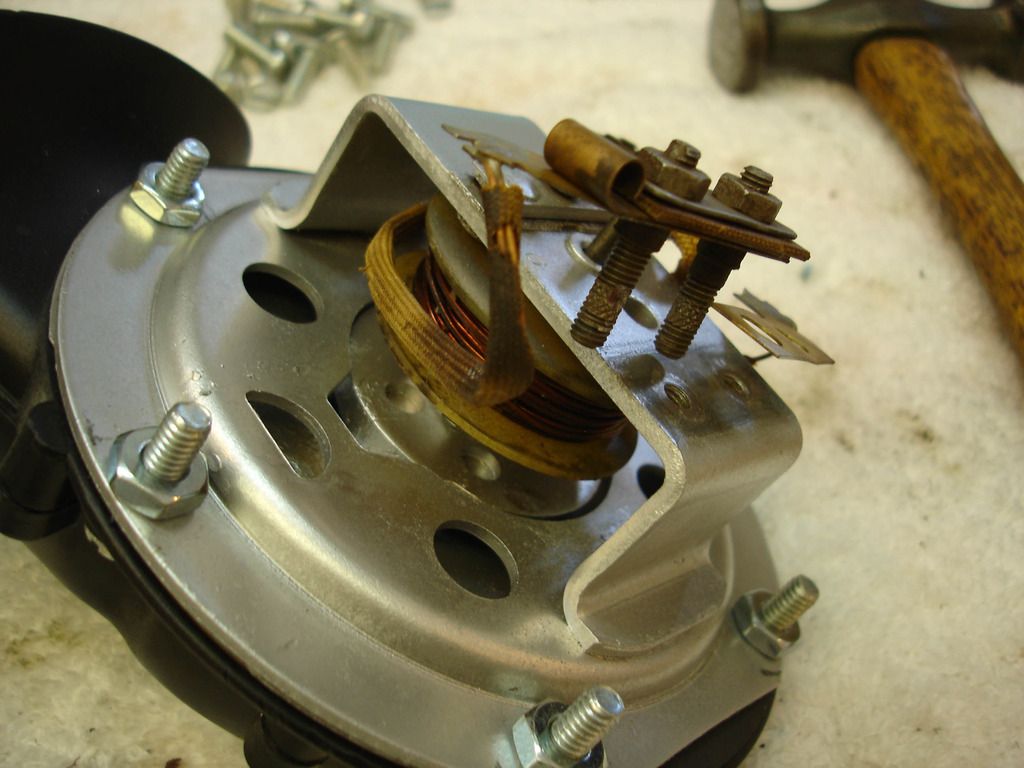
This is a TR4 variation. The contactor is attached to the diaphram on this one...so no rod.
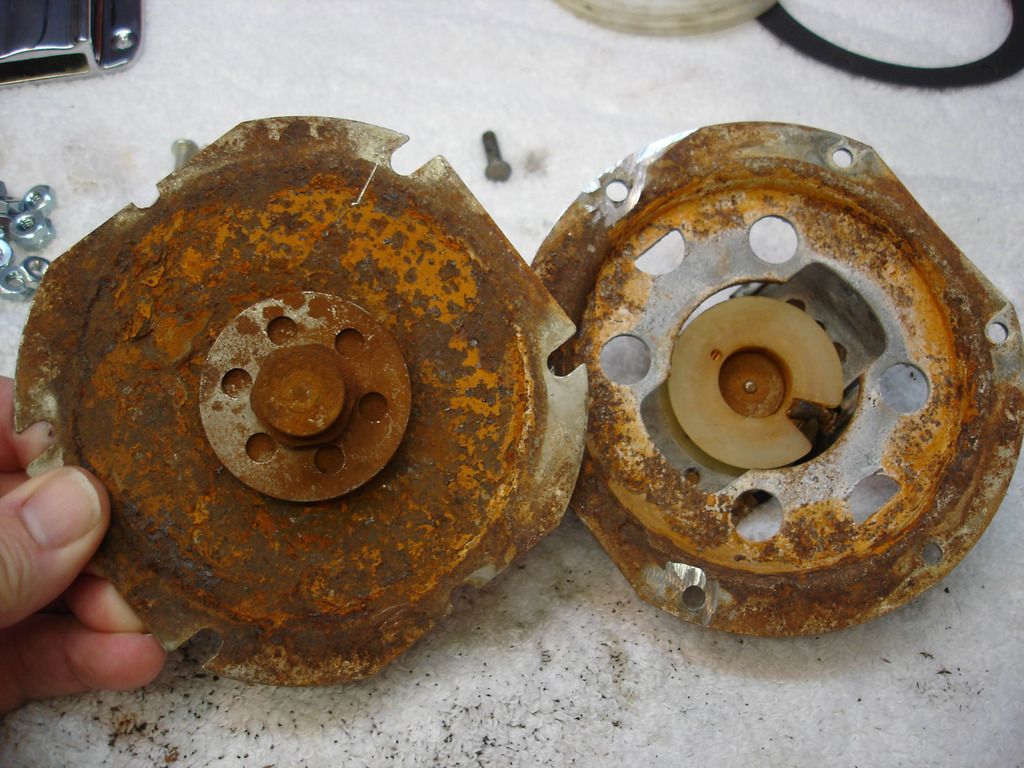
This is the diaphram and back plate separated. As bad as they looked...

A good bead blast it is ready to go back in.
Before shot
After shot.
Once it is together, you adjust the contactor in/out until the tone is steady, loud, and minimum current. If to far out, the horn will skip its note. If in to far, the horn gets a muted sound, like someone has their hand over the trumpet...and the current goes way high.
I know...TMI. But at least this should give you an idea of what it takes.

The older horns are bolted together, so just removing the bolts separates the diaphram from the trumpet. The newer ones are riveted, but you can either bolt them back together or even get the same style rivets the factory used from Ace Hardware in their odd parts isle.
Before rebuilding, check the continuity of the coil. As long as the coil is not shorted or broken, the rest of the rebuild is just a matter of cleaning and reassembling.

These are some gaskets that go between the trumpet, diaphram, and back plates. I cut these on a laser, and still have the pattern if you decide to rebuild yourself I can cut you out a set.

The way they work is really simple. Here I am removing the contact that energizes the coil to pull the diaphram. Notice it has a thread and lock nut. That is how you adjust the horn for the most sound with least power draw.


This is the rod that Mike was referring to, and even the manual tells you to routinely put a drop of oil on it. When the coil energizes, it pulls the diaphram upward. As the diaphram pulls up, it pushes this rod up with it.

The rod hits this contactor, which then breaks the circuit that was energizing the coil. Once broken, the diaphram springs back, the rod drops, and the contact contacts again...so the process starts all over.

With just 2 nuts, the entire contact plate comes right off. All the parts can be bead blasted...and clear coated if you want to go all out.

The only parts that are critical are the coil and these 2 contacts. They can be filed to s shiny state, and put back for another 50 years of service!

This is a TR4 variation. The contactor is attached to the diaphram on this one...so no rod.

This is the diaphram and back plate separated. As bad as they looked...

A good bead blast it is ready to go back in.

Before shot

After shot.
Once it is together, you adjust the contactor in/out until the tone is steady, loud, and minimum current. If to far out, the horn will skip its note. If in to far, the horn gets a muted sound, like someone has their hand over the trumpet...and the current goes way high.
I know...TMI. But at least this should give you an idea of what it takes.

PatGalvin
Jedi Warrior
Offline
Excellent info John. My horns sound sickly, like someone has their hand partially over the trumpet. They were both frozen and it took quite a bit of oil to get them freed up and vibrating. I'm thinking that I probably should go ahead and disassemble them and rebuild. People laugh when I toot them, it sounds so sickly. Maybe I'll record it for your collective amusement!
Pat
Pat
CJD
Yoda
Offline
The first time I adjusted a TR3 horn I tried to set the contact tension to the minimum it would still "honk" with. I mistakenly thought min contact tension would be min force for the coil...like that would be a "good" thing. It's not! The manual has a section on mx and adjusting the horns...and when I finally re-read it closely, I decided I had done it wrong.
The diaphram has a resonant frequency, so when set correctly it bounces back and forth fully and at the same frequency that the contacts operate. If set too tight, the coil tries to pull it faster than its natural frequency, so the coil fights the diaphram and draws more current. Picture what happens when you push your kids on a swing set. If you push at the right time, it only takes a little push to keep the swing going. Push too soon and you have to push hard and the swing slows down instead of going higher. Same thing with the horns.
I finally realized that I could use the 10amp ohm meter on my multimeter in series with the horn...and then you can visually see when the contact gap is set for min current. And, best of all, the horn sounds the best and operates the most reliably when set correctly. The amperage is significant, like 3 amps on a good setting to almost 10 amps on a bad.
Last edited: