• Hi Guest!
    You can help ensure that British Car Forum (BCF) continues to provide a great place to engage in the British car hobby! If you find BCF a beneficial community, please consider supporting our efforts with a subscription.

    There are some perks with a member upgrade!
    **Upgrade Now**
    (PS: Subscribers don't see this gawd-aweful banner
Tips
Tips

Help with fender bead

Rob Glasgow

Jedi Knight
Country flag
Offline
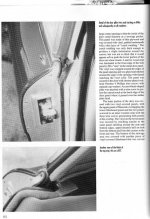
Does anyone have any tips about how to bend the stainless steel fender beading to match the contour of the fenders? New one come straight and they look like they will kink when bent to match the rear fender.
 
Rob, I've never done new ones, but obviously they will bend very carefully. I wonder if a quality brake/fuel pipe bending tool would help to facilitate the bends. I'm thinking of a tool that has radius dies not just one that looks like pliers.
 
I found that if you space the tabs out so they are a little closer together where the bead curves the most, insert them between the wing and the shroud, barely snug the bolts so if you pull GENTLY on the tabs (they can be pulled out if your are too rough) and work your way along, that before long it starts to fit. When you get to where you need to be snug the bolts. You can press on the top of the bead a little as you pull the tab but they are easy to dent and you are most correct, they will kink if you try to bend them to severely On the other hand I think I've seen rear ones that were pre-curved even if they were not shaped exactly.
 
All Good replies:

Also put masking tape over the tabs to prevent scratching the paint.
 
Since we're on the topic, does anyone know or have a picture of how/where the stainless beading meets up with the rear cockpit surround on a BN2?

I am messing with replacing the shut face finishers and in process attempted to test fit the rear cockpit surround to see how that met up with the finisher. The body and paint shop has the stainless bead extending almost all the way to the end of the fender. Hence the cockpit surround would not sit down on the body as it was hitting/resting on top of the bead. Am I hosed?
 
Walt, here are two pics of a BN6 from the Restoration Guide by Roger Moment and Gary Anderson. I think the earlier cars were done the same way.
 

Attachments

  • img310.jpg
    img310.jpg
    48.7 KB · Views: 167
  • img311.jpg
    img311.jpg
    51.2 KB · Views: 160
Thanks vette, but the bead on the 4 cylinder cars goes under the cockpit surround trim near the end of the curve. One can find some decent pictures of that area but they all seem to have the tonneau on folded behind the seats or the hood up, both situations cover that transition where the bead meets up with the surround trim.
 
What I did at the point where the bead meets the surround and where the front bead meets the headlight lamp ring was take an old piece of bead and play around with it until I found some combination of cutting and shaping that was acceptable. The cutting is easy. The shaping can be difficult unless you are less ham handed than I am. I did it before I trimmed the the end and did in fact have to try several times to get that shape and I was afraid I'd shorten the bead to the point where it was unusable. I managed to shape the front bead end but I have also seen them "tucked in". I will probably make some folks cringe but I made a small groove in the bottom of the surround where the bead goes underneath. There was no way I could have had the surround sit flat without doing that.


20160403_083338_resized.jpg20160403_083429_resized.jpg
 
Awesome, thanks Jon! I was thinking about crushing it down some at the joint, then relieving a little groove in the bottom of the surround trim to help clear it. My rear surround piece is in pretty bad shape underneath due to corrosion and the cosmetic side is gouged to heck so the plan was to fill and paint them anyway.
 
Hey Rob,
Who did you get yours from ? Sets I have got from UK all had the rear trims with the curve in them so you do not have to bend them yourself. I might have got a set from Moss before and seem to recall it came pre bent for the rear also. Like others have said, put masking tape on the soft metal tabs to keep them from scratching your paint and grow an extra set of arms to help prevent that problem - or get a friend who does not mind swear words as you install the bloody buggers !
Regards
Mike
 
Keep in mind dissimilar metal corrosion in particular from tabs that go all the way down against steel and aluminum making a pretty good electrical circuit. The main body of trim sits up top usually on good paint.
Jay, ''65 3000T
 
These also caulking in between the fenders and shroud but it doesn't run the entire length of the fender/shroud. I think unrestricted drainage is a good thing.
 
I'm sure you guys will find this outrageous, but i found them to be so contrary and so ill advised in that they will do nothing but help to induce trapping water and crud and causing corrosion that at the last minute I decided not to put them back in. i have to admit that it was an after thought and if I would have planned it from the start I would have finished my edges to the shrouds and fenders a little better. But the dang things are just bling intended to dazzle the uninitiated. Real Sports Cars Don't Need Them. :smile:
 

Attachments

  • DSCF2602.JPG
    DSCF2602.JPG
    51 KB · Views: 146
... the dang things are just bling intended to dazzle the uninitiated. Real Sports Cars Don't Need Them. :smile:

I've always assumed they were to hide gaps between the shroud and wings. If your edges have no gaps you are either the best panel beater on the planet or extremely lucky.
 
I have always been under the impression that the tabs were plated with a material that is for sacrificial corrosion . Hardware is often cadmium or zinc plated so that it will corrode on the surface rather than allow the base metal to corrode. It does work well although it doesn't look to spiffy. The key to avoiding dissimilar metals corrosion is to have all panels electrically bonded so there is no (or at least reduced) electrical potential across the panels. Isolating them with caulking might be counter productive if they are in contact anywhere (Like via the bolts) and certainly does trap water. We all now keeping everything dry and free of dirt that contains salts that turn into electrolytes when damp is also key. Of course you all wash your rides with de-ionized or at least distilled water, right? Entropy, it's not your friend.
 
Water softeners, at least ion-exchange types, remove calcium, magnesium and phosphorus from water and replace it with sodium. The sodium is more compatible with soaps etc and most people like softened water for household things rather than hard water with calcium. So yeah, I'm not sure "softened" water is better. I think it does result in fewer water spots if it is allowed to dry on a surface as opposed to hard water, but I don't know why.
 
Back
Top