• Hi Guest!
    You can help ensure that British Car Forum (BCF) continues to provide a great place to engage in the British car hobby! If you find BCF a beneficial community, please consider supporting our efforts with a subscription.

    There are some perks with a member upgrade!
    **Upgrade Now**
    (PS: Subscribers don't see this gawd-aweful banner
Tips
Tips

Carpet snap details needed

healeyblue

Jedi Warrior
Country flag
Offline
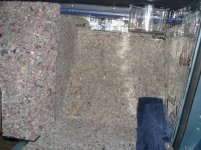
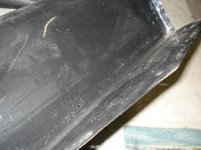
All right guys, I am progressing to the installation of the carpeting now and while test fitting I was wondering about the correct location for the carpet snaps. Where are they located and how many per location. I read that the trans tunnel carpet is snapped in place, and the front floor pieces are snapped in. Other than those places are there any more pieces that will be snapped in place as apposed to glued in place. I seem to recall that the front floor pieces should have 4 snaps, is that correct? Where would these be? close to the 4 corners or more inboard? For the trans. tunnel I count 7 hole along the bottom of the tunnel on one side and 8 along the bottom of the other side. Would these be for the tunnel carpeting? It sounds like a lot but I would think it would take a lot to hole the tunnel carpet in place due to its shape and not being a flat piece. I have layed down dynamat over the entire interior prior to the jute padding. I have to put some on the tunnel sheet metal next but was wanting some input from the forum before I get too far. I will work on the side kick panels and furflex in the mean time.

JIM
 

Attachments

  • 2013-01-04 002.jpg
    2013-01-04 002.jpg
    98.7 KB · Views: 645
  • 2013-01-04 007.jpg
    2013-01-04 007.jpg
    98.5 KB · Views: 347
  • 2013-01-04 013.jpg
    2013-01-04 013.jpg
    97.6 KB · Views: 349
The row of holes in your tunnel aren't original. There are four male snaps on the tunnel, I think I see one original hole in the pic, it is higher up than the others. The underfelt glues to the carpet on the trans tunnel and has large semi-circle cutouts around the snaps. I did my carpet a couple of weeks ago and found that leaving it draped over the tunnel for a month prior allowed the carpet to set much better to the shape of the tunnel. Still took half a dozen repositionings of the female snaps to get it looking right.

There are two snaps on the forward part of the armrest that go into the rear tunnel metal and the two at the back go into the carpet (I believe, haven't got that far yet). Also got two under the Austin heal pad under the drivers feet.

There's some info on page 107 of the restoration guide about carpet snaps

Andy.
 
Well, If you have your original floor pans they should have the old male snaps still there! or at least a mark where they once where! I have installed a new carpet set in my BJ8 and never got around to putting the snaps in yet! Between the center console and rubber floor mats my carpet seems to stay in place and look neat without the snaps installed. Last time i checked my carpets where still there!:smile-new:
 
Andy,
Thanks, could you show a pic of where your trans cover snaps are located (or describe with measurements) There are other holes in the cover so the correct holes should be there, I just have to mark them. Yes I too put the carpet on the cover about 3-4 weeks ago. Regarding the arm rest I was under the impression it used tenax snaps and not regular snaps. I had tenax studs on the rear fixed tunnel when I took the car apart. My carpet set from Moss came with 22 snaps total. 4 on each side floor panels and 4 on the trans cover only is 12. Where would the other 10 go?

drambuie,
I wish my old floors had the snaps in them. They were not rusted out but were a little thin and heavily rust pitted so I just changed them out because they are so easy to change. A prior owner had put in some shag carpet and held it down with screws and finish washers all over the place so I would not have know what was original or not any ways with all the screw holes.
 
I think you are right about the arm rest having Tenax.

All four tunnel snaps are a bit under 2" above the base flange. The rears are about 4.25" from the rear edge and the fronts are a bit under 2" from the front flange. Hope that makes sense.

My car has two snaps on each side (I'm pretty sure it does) under the firewall box section/air channel so that would make six per front carpet, four for the tunnel and another four for the rear carpets. Couple of spares maybe?

Did you read this article? https://www.healey6.com/Technical/Werner/Carpet Installation.pdf
 
Yes my son couldn't believe it was in and running.
 

Attachments

  • 2012-10-02 003.jpg
    2012-10-02 003.jpg
    97.4 KB · Views: 268
  • Photo08171740.jpg
    Photo08171740.jpg
    93.8 KB · Views: 254
  • Photo08171740_3.jpg
    Photo08171740_3.jpg
    90.7 KB · Views: 254
Looks like you are really doing a great job with your Healey, I always have to smile when we restore our chassis with such care and detail, Really a work of art! Now look at the original factory product fit and finish! But i guess they where in the business of turning a profit.59austin082206 006.jpg
 
Cute; does he take an interest in the cars yet?

Picture #2: we lift engines the same way, though I didn't have the foresight to paint mine the factory color ;)

Yes he likes to come hang out while I am working. He's only 4 so he has time until he goes hands on. Of course we lift engines the same way... you left that on when you sent the motor back. Do you want it back?

Jim
 
Andy
thanks for the tips on the trans cover. I did find all 4 of the original holes so now I am sure where those snaps go. I was looking at the Moss catalog and I think maybe they just have a universal snap set they include with all their carpet sets regardless how many you may actually need. My rear carpets on the floor should not snap in place because it would not make sense anyways as they are bolted through with the seats (pass side is non adjustable). The rear tunnel portion is not snapped in but the arm rest on top of it is(tenax snaps). The bellhousing cover should be glued I would think. And that posed another question. Should I glue it in place after it is screwed to the car to hide the screws or should the screws be visible so they can be easily accessed for removal in the future? The toeboard to side trans housing pieces most definitely should be glued in. So that only leaves the front floor pieces. With 4 per side and 4 for the trans cover that only uses up 12 snaps. I will have 10 left over. Would there be any harm in using 6 per floor board to help ensure they don't move around? I know it would not be original but you really can't see the snaps once installed anyways. That link you provided (Andy) was helpful in explaining the process, there just seems to be quite a few differences in the details for a Longbridge car.
Thanks for all the help so far everyone
JIM
 
If you're not committed to using snaps, or are unsure of location you might want to consider using velcro. It comes sticky-sided, you cut little swatches and it will stick quite well to both the floorpan and to the underside of your carpeting. Some may see this as perhaps a little tacky, but you don't have to drill holes, and all mistakes are fixable (a big consideration, in my case). I did this several years ago and it's still intact. Just a thought.

DB
 
Unless you want it to be 'original', I would recommend using velcro as suggested by David B. I installed my carpet set 30 years ago using strips of velcro and they stay in place perfectly. Also it's easier to get the transmission carpet to form to the tunnel using velcro.
 
Looks like you are really doing a great job with your Healey, I always have to smile when we restore our chassis with such care and detail, Really a work of art! Now look at the original factory product fit and finish! But i guess they where in the business of turning a profit.

Yes the factory would be loosing money if I were doing their work. Now a company like Rolls Royce might have been a nice place to work at to get fit and finish like we expect today. They were not worried about profit, they just charged what they needed to charge.
 
David and Rob,
thanks for the recommendation for the velcro. I would like it to look some what original, maybe a combination of the two for looks AND performance.
JIM
 
Hi JIM
The carpet, is my next step on my car. so I am very interested on this discussion, my contribution can be marginal due the fact that I haven't beginning
the real work.
My proposal is: to complete the Rich Chrisler Carpet installation instruction - with photos for Longbridge and BT7 cars- that is very similar -
With your contribution I can made one Google Album with the photos refereed at the single step of Rich Instructions- this can be a demonstration that we never forget Rich .

I have finished my Arm rest but forghet to make photos
Here I have find A template of the my armrest NOTE for Longbridge car Arm rest is in two version Early and Last- but change date are not know
for my 1957 car I have prefered the Early
https://www.healeysix.net/LongbridgeInt.htm
A good photo of the armrest
https://www.healeysix.net/Teal Blue.htm
Cheers
 
Jim,
Nice progress!!! I noted in your pictures that the front X (in front of the radiator) is blue. Don't forget to paint it black before you place the shroud.
I'll be very interested in the carpet installation when you are done. Mine is being shipped from England next week.
Best,
Rich
 
Nice job Jim. I have a suggestion that'l make your task a little easier. The original Jute and carpet were thinner and of course didn't have Dynamat so they could use smaller length screws to fasten the male snaps. Now-a-days we've added thickness so the original length screws won't snap in place. So what do you do? I just bought longer screws and added a washer so the male snap sits up a bit. Makes for a smoother finish on the carpet.
 
Johnny,
Yes true, I have already been thinking that senario over. For the trans cover I will also be replacing the screws with machine screws. The original holes I found for the snaps appear to have been for machine screws and not sheet metal screws. I will try and document this with some pictures too and post them here and I will also probably add some pics to the longbridge interior thread also for future restorers to reference.

Thanks for all the tips guys....keep them coming

Jim
 
Johnny,
For the trans cover I will also be replacing the screws with machine screws. The original holes I found for the snaps appear to have been for machine screws and not sheet metal screws.
Jim

Yep, originally 4BA phillips head countersunk 1/2" long zinc with a plain internal-teeth star washer and hex nut on the inside. I think they may be the same as the screws that hold the ashtray in.
 
Back
Top