
-
 Hey Guest!
British Car Forum has been supporting enthusiasts for over 25 years by providing a great place to share our love for British cars. You can support our efforts by upgrading your membership for less than the dues of most car clubs. There are some perks with a member upgrade!**Upgrade Now**
(PS: Upgraded members don't see this banner, nor will you see the Google ads that appear on the site.)
You are using an out of date browser. It may not display this or other websites correctly.
You should upgrade or use an alternative browser.
You should upgrade or use an alternative browser.
TR2/3/3A Beginning the TR2 Bodywork
- Thread starter CJD
- Start date
")
Brinkerhoff
Jedi Knight
Offline
Yes it was a great write up on hammer and dolly work. The straightedge idea works great across the door gaps too. I found spraying a light black rattle can lacquer guide coat before block sanding is the best to really straighten a panel. I've seen a lot of guys trying to feel bodywork with just their fingers , use your whole hand. There in nothing more satisfying than doing your own body and paint work.

Attachments
OP
CJD
Yoda
Offline
Week 4 update...
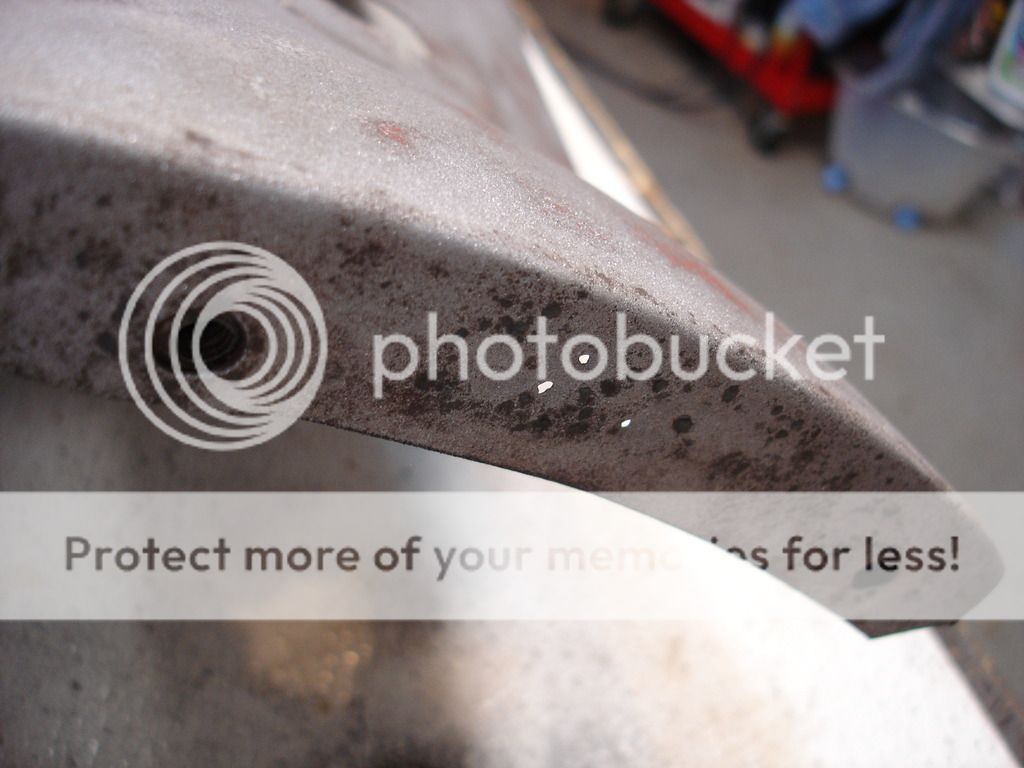
The aluminum edge trim got sand blasted and straightened. This took a lot more effort than I was expecting. Because of the very wide inside edge, curving the top requires stretching or shrinking that inside edge metal to conform to the curve. I had to do a good bit of metal shrinking on the rails to get them to fit...but I'll cover more on shrinking later. In the mean time here are the finished top rails.
I would much prefer NOT to sand blast aluminum, as it leaves a very rough surface. These rails get covered in contact cement, which dries like concrete, so sandblasting saves days over chemical stripping. The added bonus is that the entire rail is covered, so the rough surface will not be seen and it will help the future covering to adhere permanently.
The aluminum edge trim got sand blasted and straightened. This took a lot more effort than I was expecting. Because of the very wide inside edge, curving the top requires stretching or shrinking that inside edge metal to conform to the curve. I had to do a good bit of metal shrinking on the rails to get them to fit...but I'll cover more on shrinking later. In the mean time here are the finished top rails.


I would much prefer NOT to sand blast aluminum, as it leaves a very rough surface. These rails get covered in contact cement, which dries like concrete, so sandblasting saves days over chemical stripping. The added bonus is that the entire rail is covered, so the rough surface will not be seen and it will help the future covering to adhere permanently.
Last edited:
OP
CJD
Yoda
Offline
WELDING
This is slated as an easy week, since all I am working on is the spare tire cover. I decided it would be a good time to get a few small projects off the bench that have been waiting. I am including pics, as there are some good lessons.
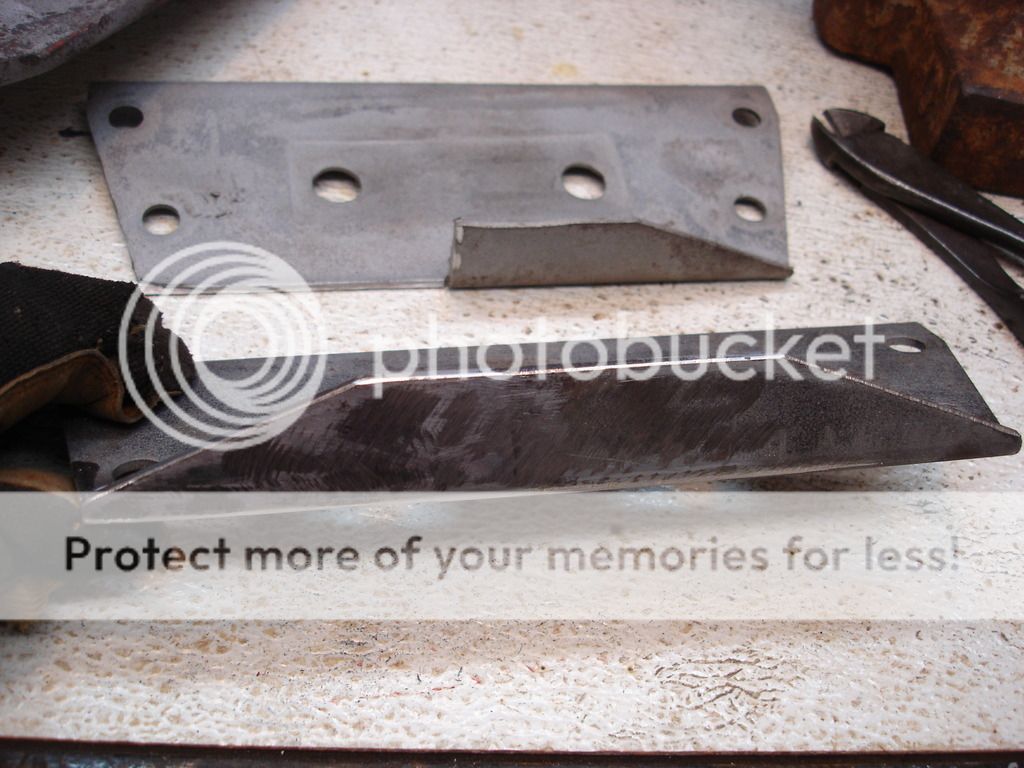
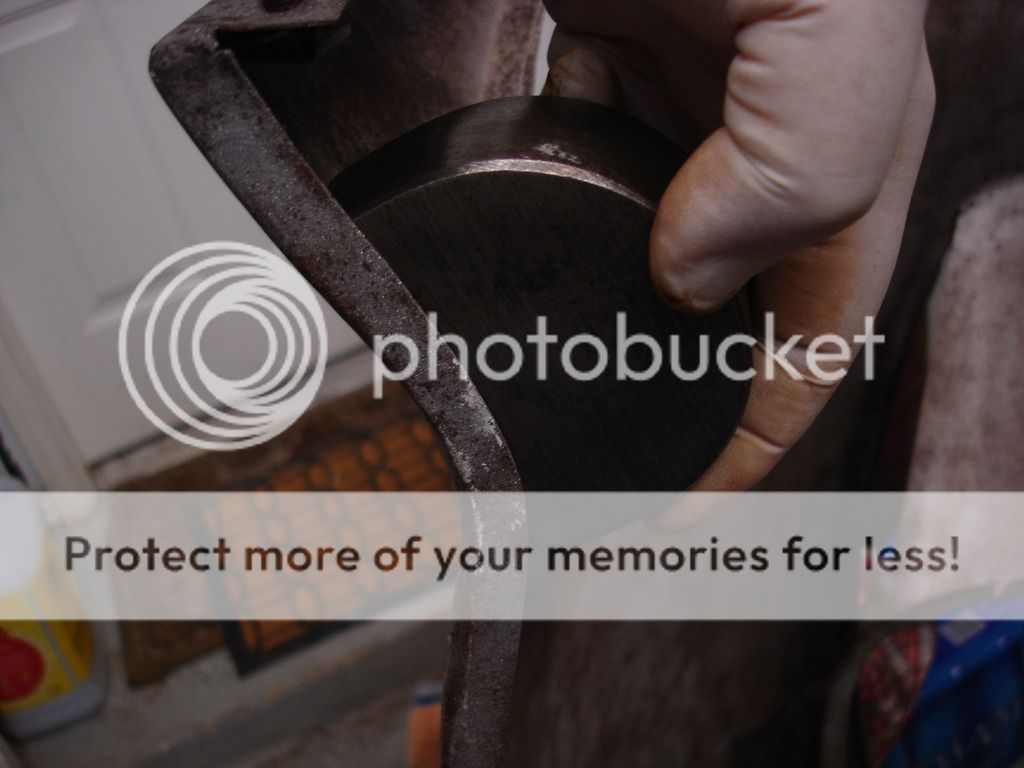
Tranny mount. This is the tranny mount that came with the car. I have absolutely no idea what the purpose was for torching a section out of it. I considered just using it as-is, but then one popped up on Ebay. Cool!
I bought it for $10, but as you can see, the Ebay plate is longer than the TR2 plate. Bummer! It was advertised as TR2-TR4. I don't have any idea when the plates changed, but somewhere in that range they did. All is not lost, though. With the new plate, I obtained the material to repair the original. So here goes welding 101.
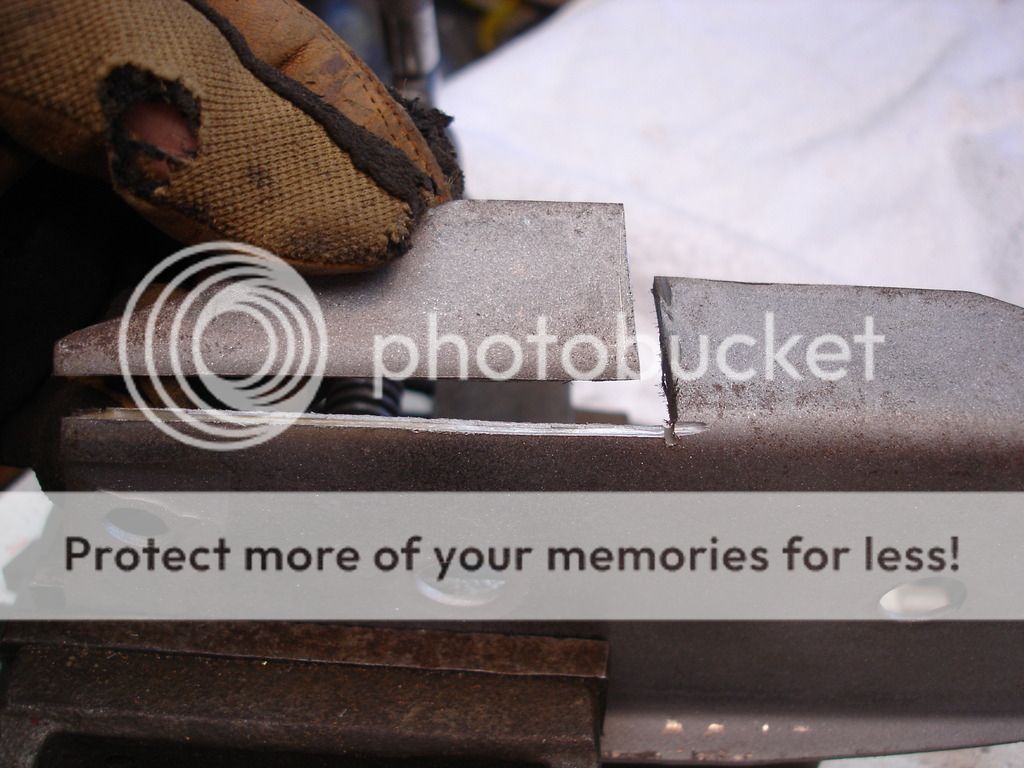
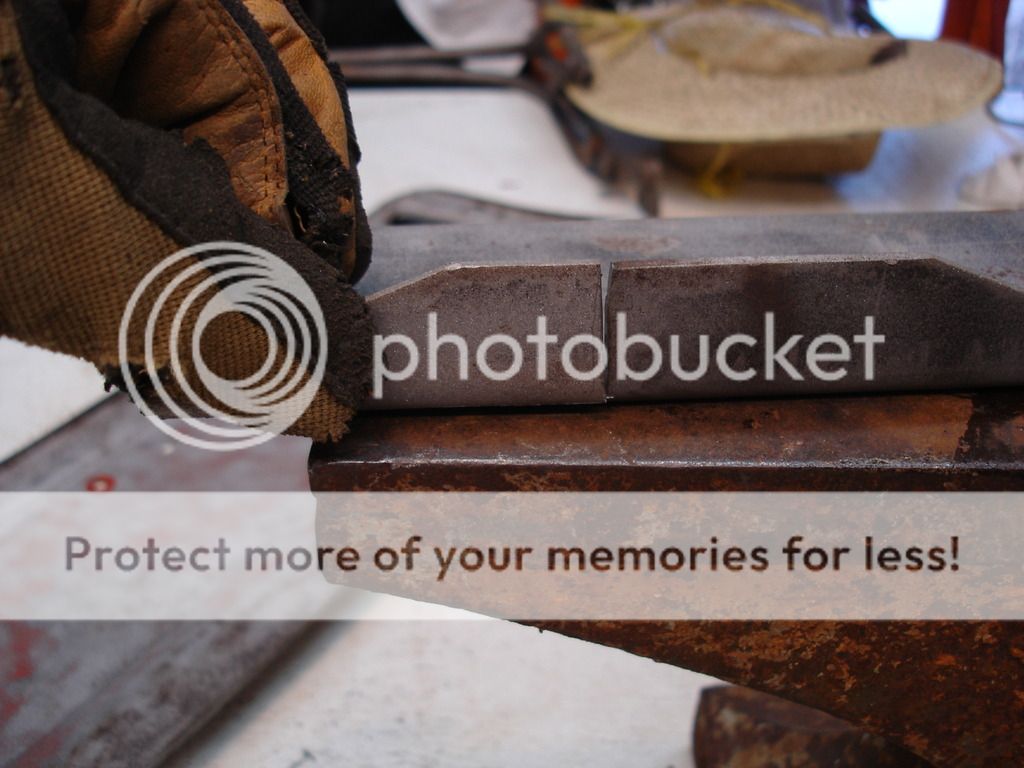
First, I cut out a section of the Ebay plate corresponding to the damage on the TR2 plate, using a cut-off disc.

Now, just for demonstration, here is my Miller setting I have been using for the 18 gage body work. It is the very lowest setting on the machine, with the minimum wire feed it takes to prevent burn through. Even then, body welding is accomplished using about 1 second bursts, with 2-3 second cooling between bursts.
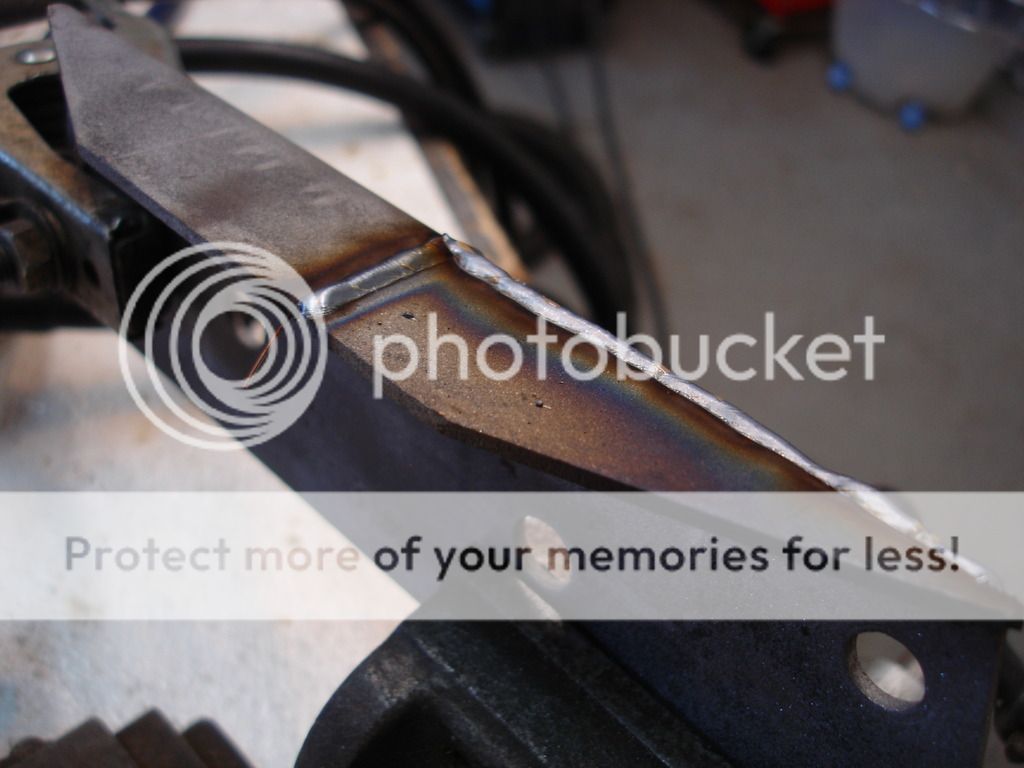
And, using this lowest setting on 1/8" steel, this is the result. Ooooooh, Aaaaah right? Nope.
Although the bead is beautiful, note it is riding very high for the wire feed I was using. That means that the weld is barely into the surface. Here is the back side:
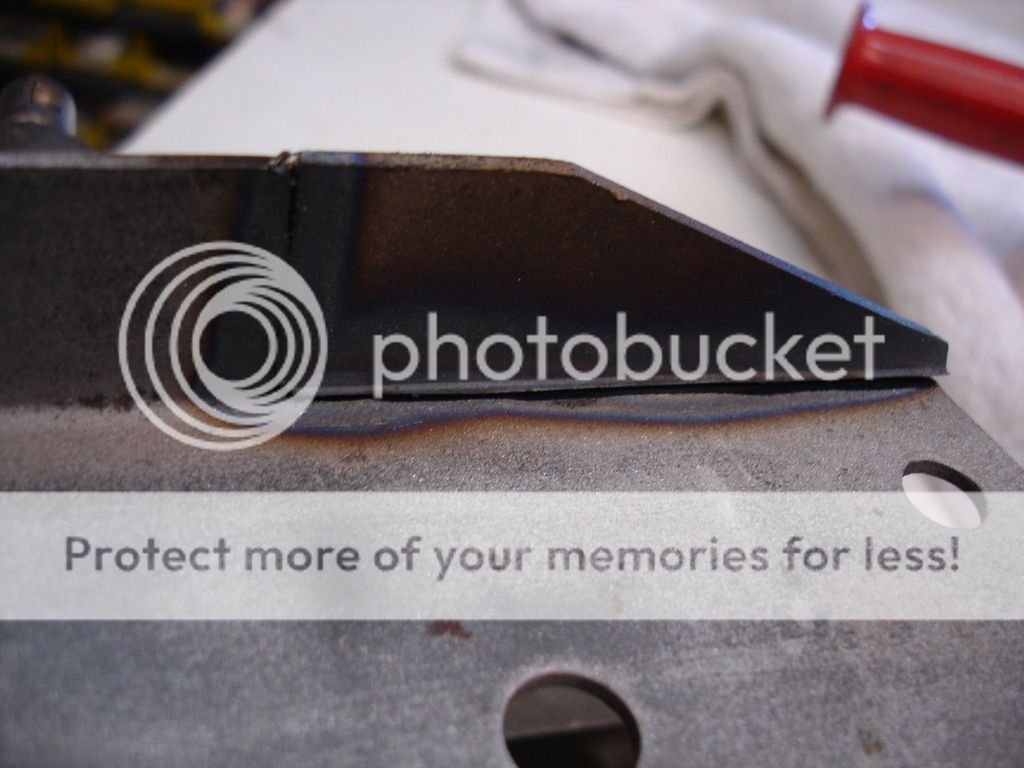

Now we are going to put the machine where it belongs for 1/8" steel...at least 2 on the power. I would even go higher, say to 3, but I am too lazy to change the .023" wire size to the larger .035", so I just upped the feed speed from 40 fpm to 60. I then ran the inside of the weld.
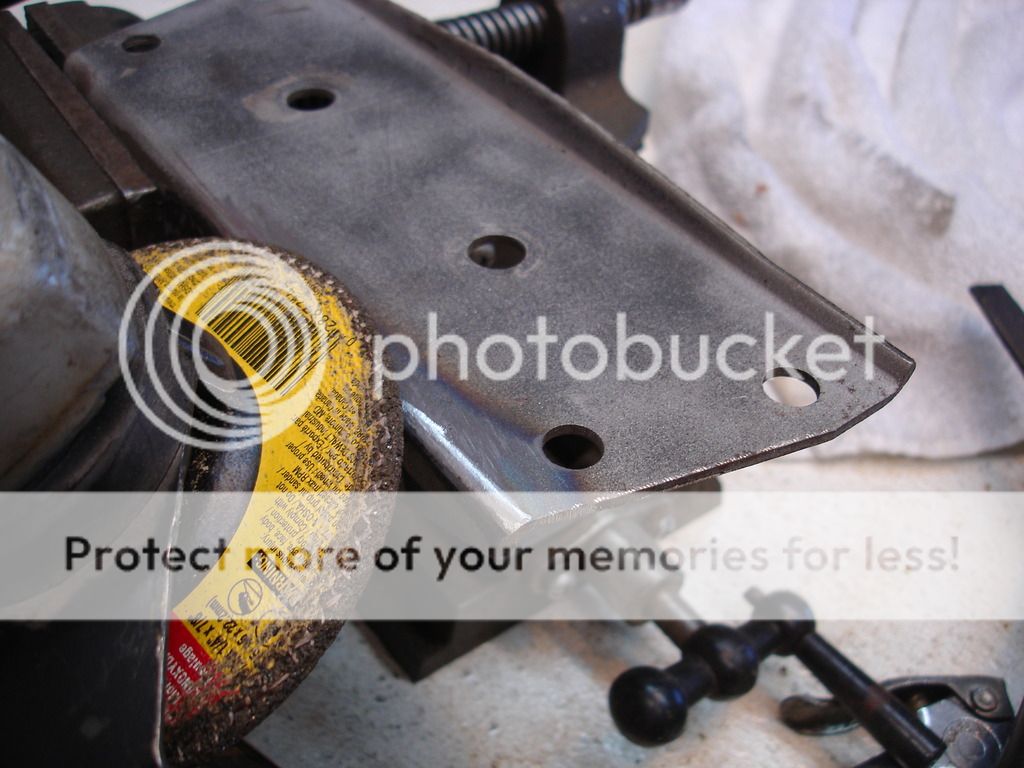
Clean up with a body grinder on both sides of the work.
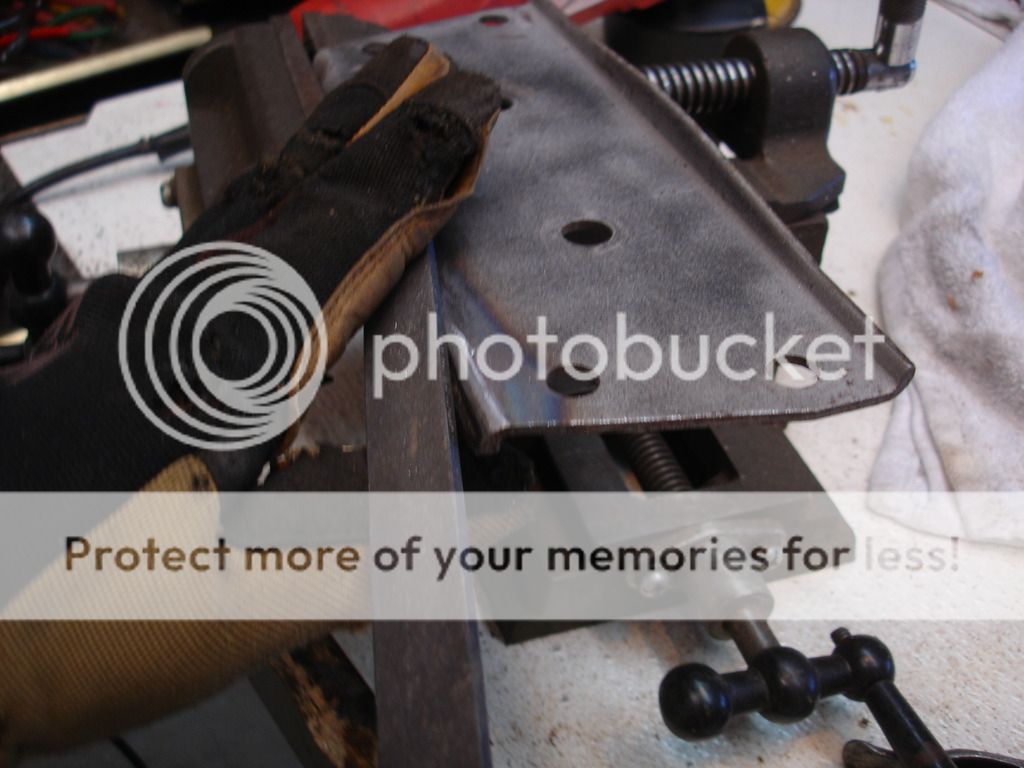
To really make the work "pop", finish with a file and nobody will ever know it was hacked by the PO's mechanic.
This is slated as an easy week, since all I am working on is the spare tire cover. I decided it would be a good time to get a few small projects off the bench that have been waiting. I am including pics, as there are some good lessons.

Tranny mount. This is the tranny mount that came with the car. I have absolutely no idea what the purpose was for torching a section out of it. I considered just using it as-is, but then one popped up on Ebay. Cool!

I bought it for $10, but as you can see, the Ebay plate is longer than the TR2 plate. Bummer! It was advertised as TR2-TR4. I don't have any idea when the plates changed, but somewhere in that range they did. All is not lost, though. With the new plate, I obtained the material to repair the original. So here goes welding 101.


First, I cut out a section of the Ebay plate corresponding to the damage on the TR2 plate, using a cut-off disc.

Now, just for demonstration, here is my Miller setting I have been using for the 18 gage body work. It is the very lowest setting on the machine, with the minimum wire feed it takes to prevent burn through. Even then, body welding is accomplished using about 1 second bursts, with 2-3 second cooling between bursts.

And, using this lowest setting on 1/8" steel, this is the result. Ooooooh, Aaaaah right? Nope.
Although the bead is beautiful, note it is riding very high for the wire feed I was using. That means that the weld is barely into the surface. Here is the back side:


Now we are going to put the machine where it belongs for 1/8" steel...at least 2 on the power. I would even go higher, say to 3, but I am too lazy to change the .023" wire size to the larger .035", so I just upped the feed speed from 40 fpm to 60. I then ran the inside of the weld.

Clean up with a body grinder on both sides of the work.


To really make the work "pop", finish with a file and nobody will ever know it was hacked by the PO's mechanic.
Last edited:
OP
CJD
Yoda
Offline
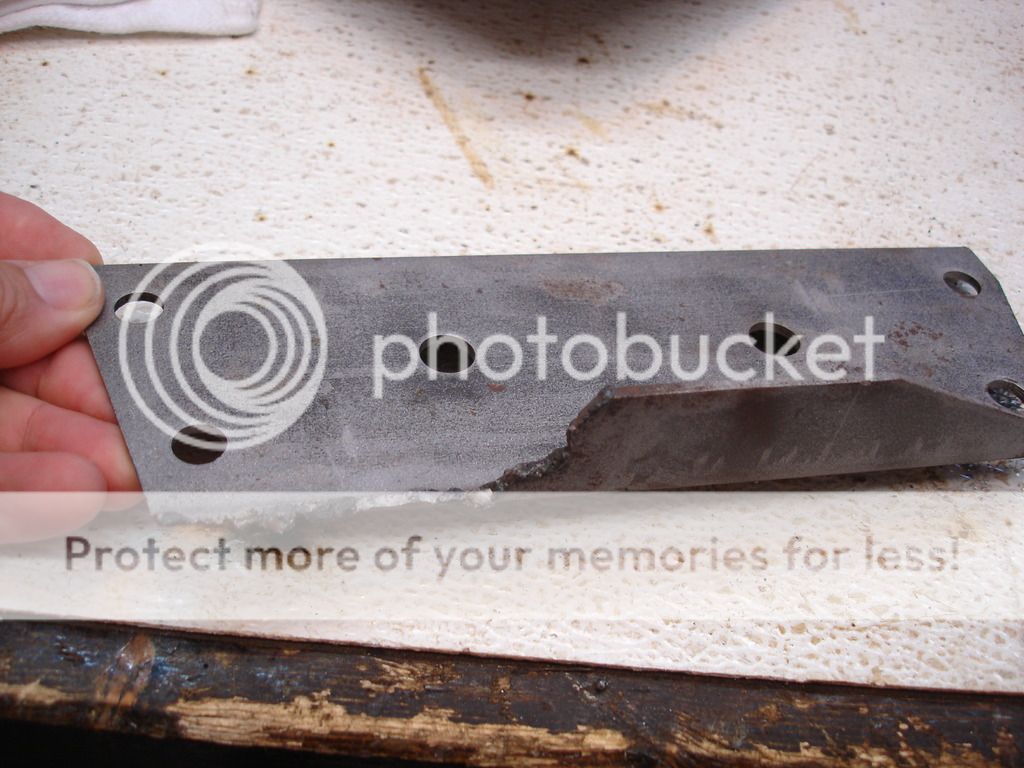
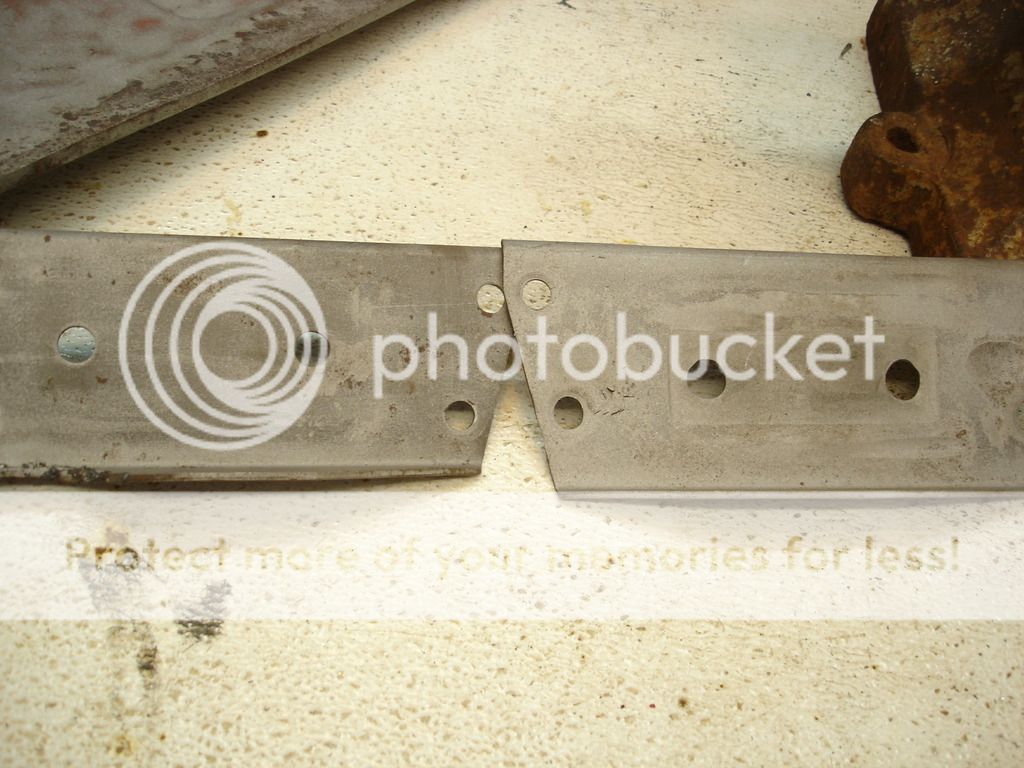
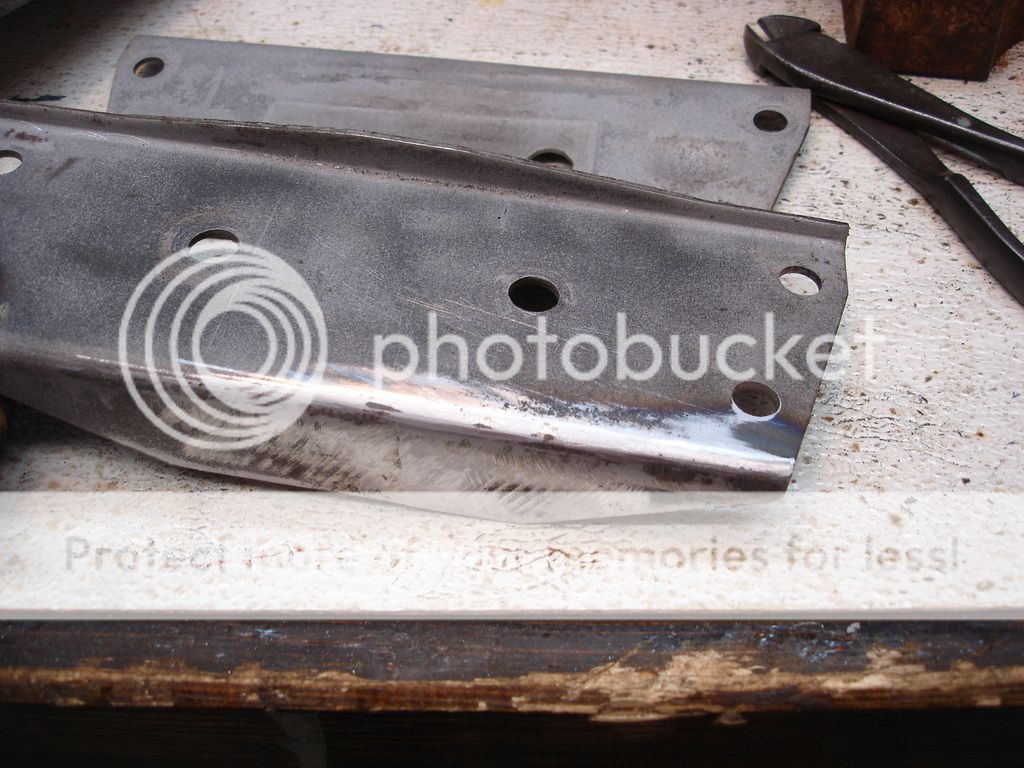
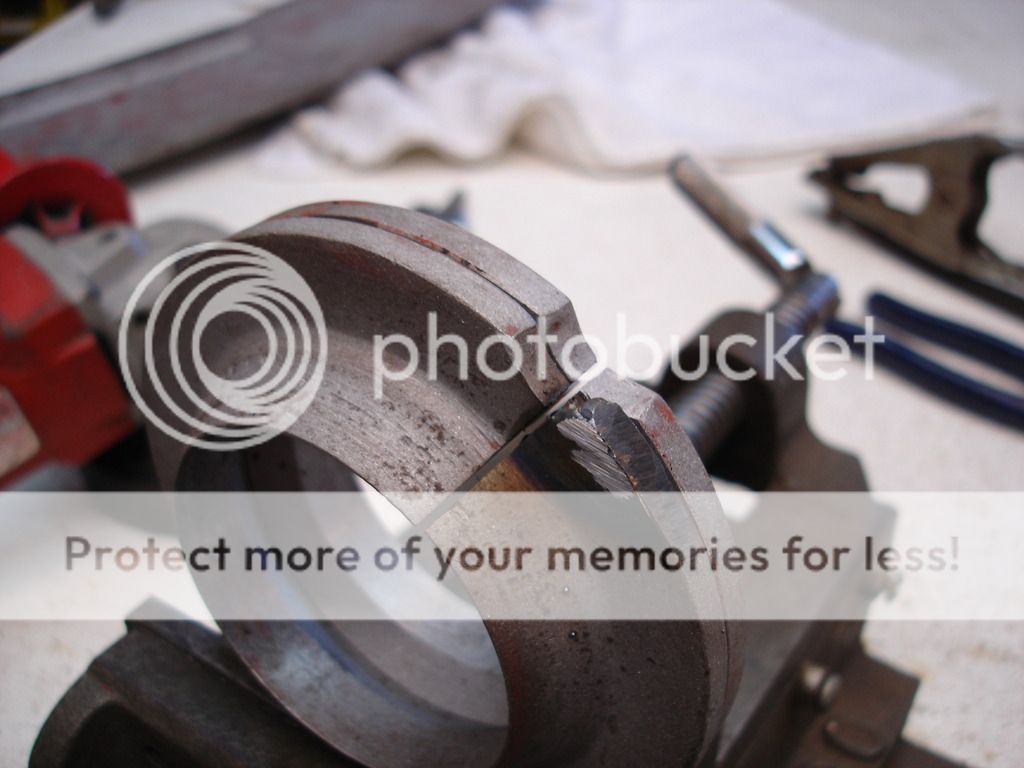
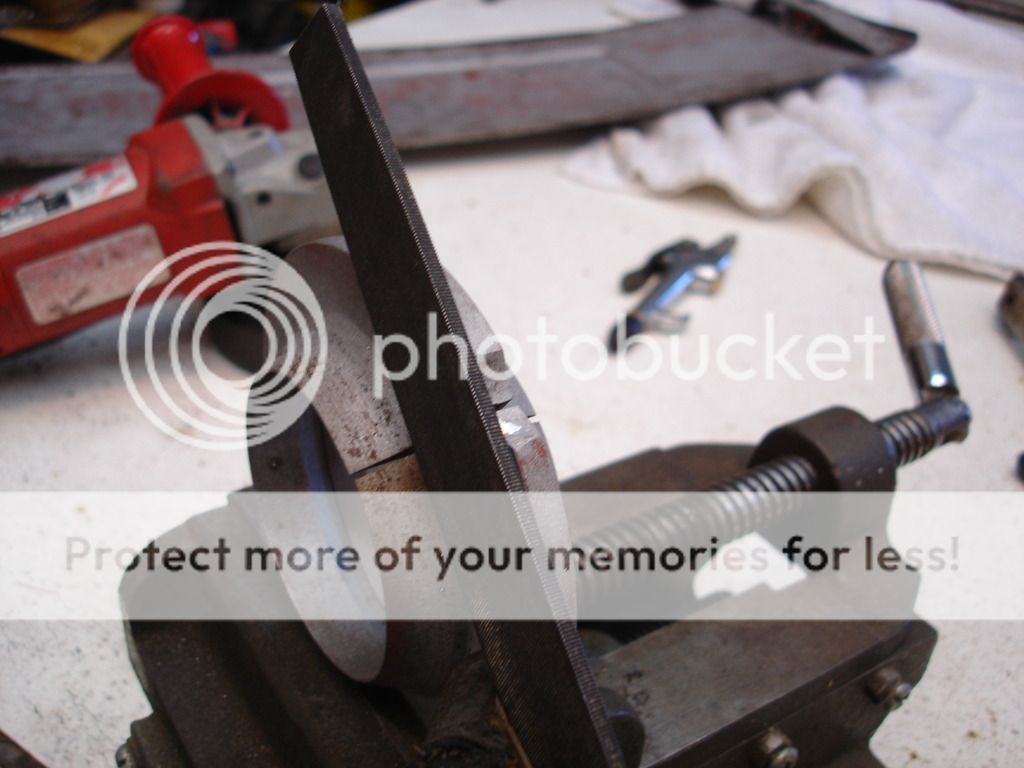
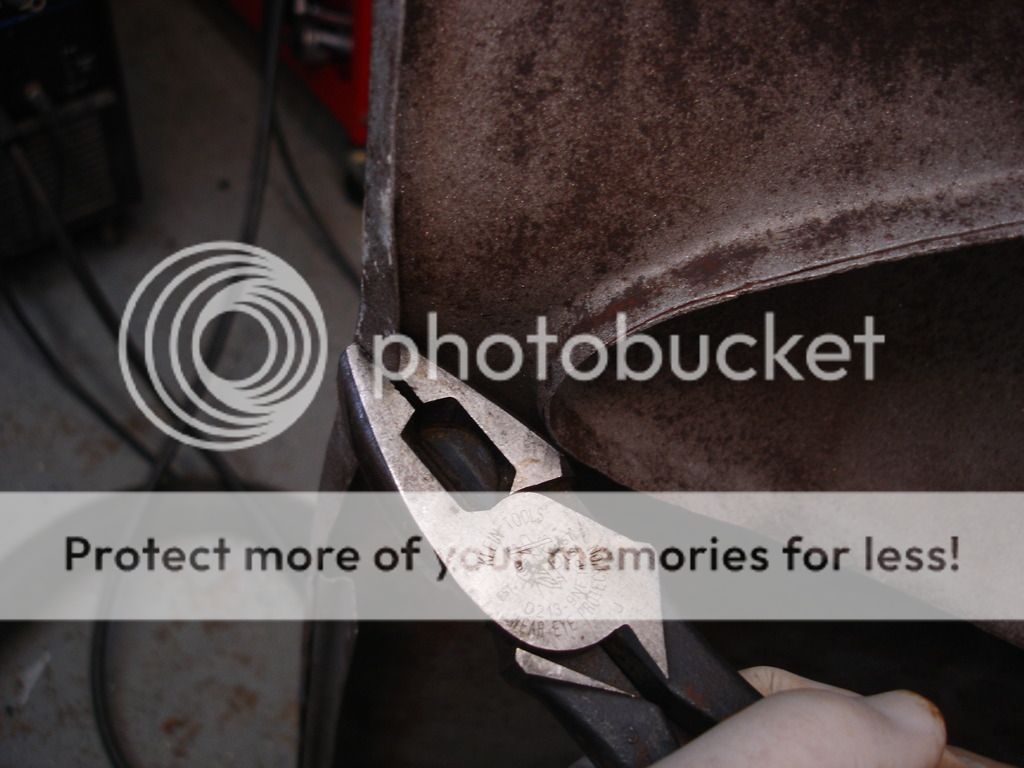
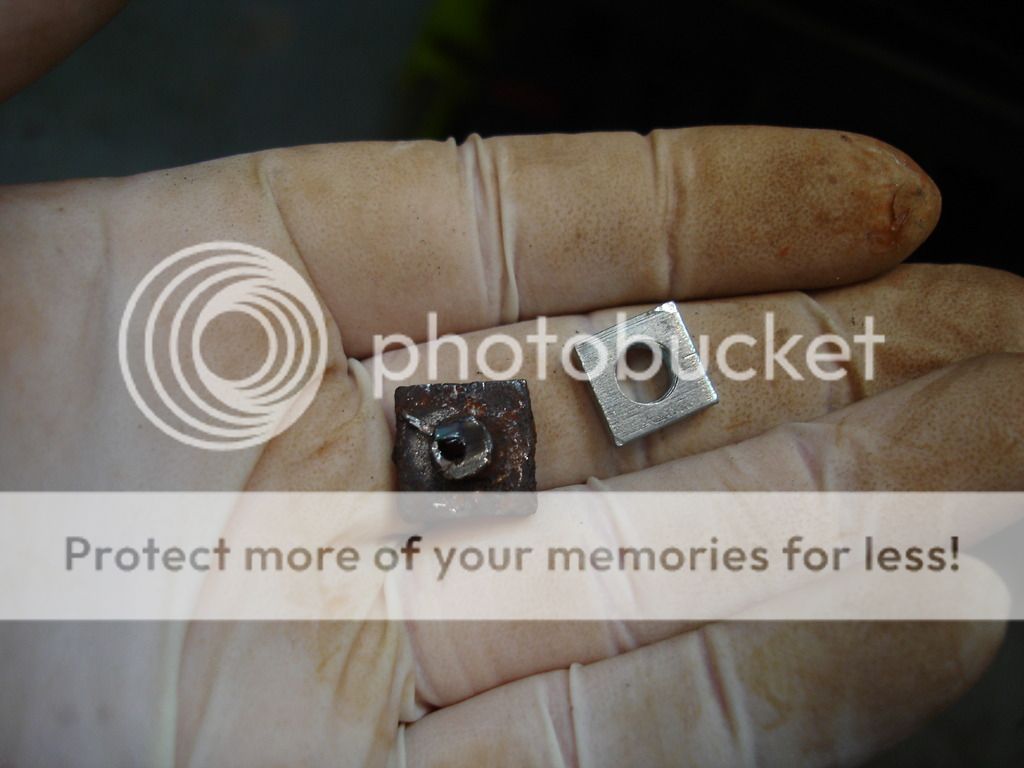
Next up...those very rough second hand collets I purchased from the UK. These are the collets used on the early "inetegral" wire wheel hubs.
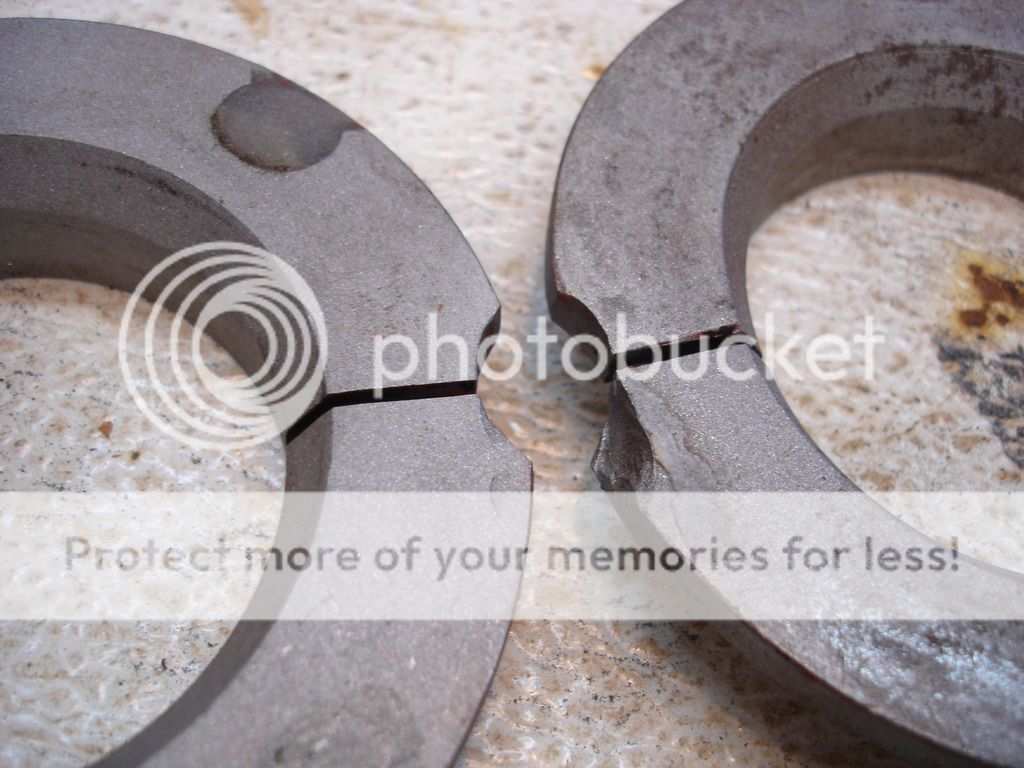
Rimmer Bros. told me these are the last they have. I'm thinking they are the last collets in the UK...I know they are the last here stateside. So, the problem is the one collet has a gouge out of it by the split. A pin sticks out of the hub and holds the collet from spinning. Some Bozo did not get the pin located correctly...or ran the wire wheel loose, and buggared up the slot.
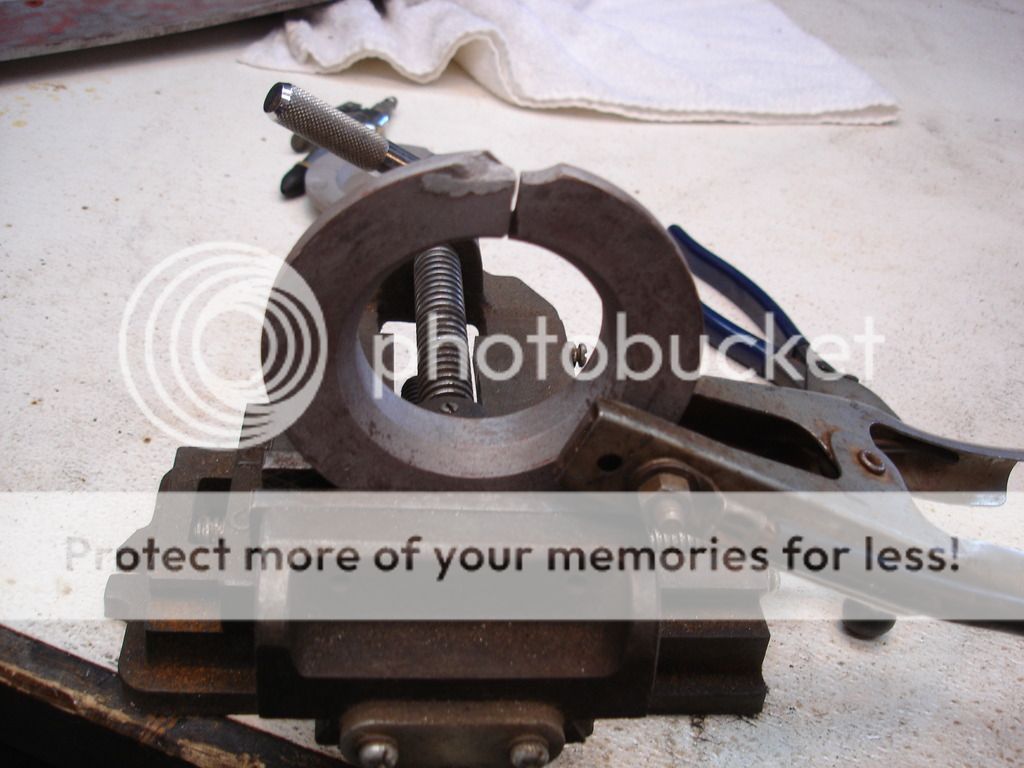
The plan is to build up a weld where the metal was gouged, and then grind it flush. Note the light colored metal to the left of the slot on the collet. I thought this was just old paint...but instead some poor soul actually tried to fill the original gouge with lead. Really? Lead?

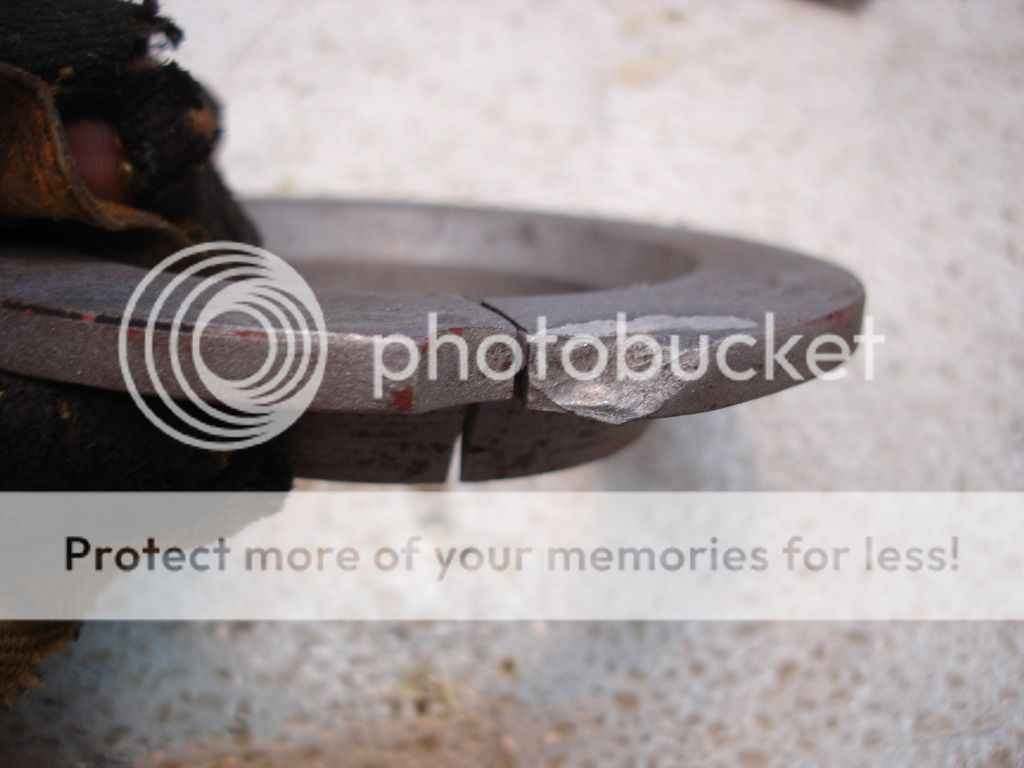
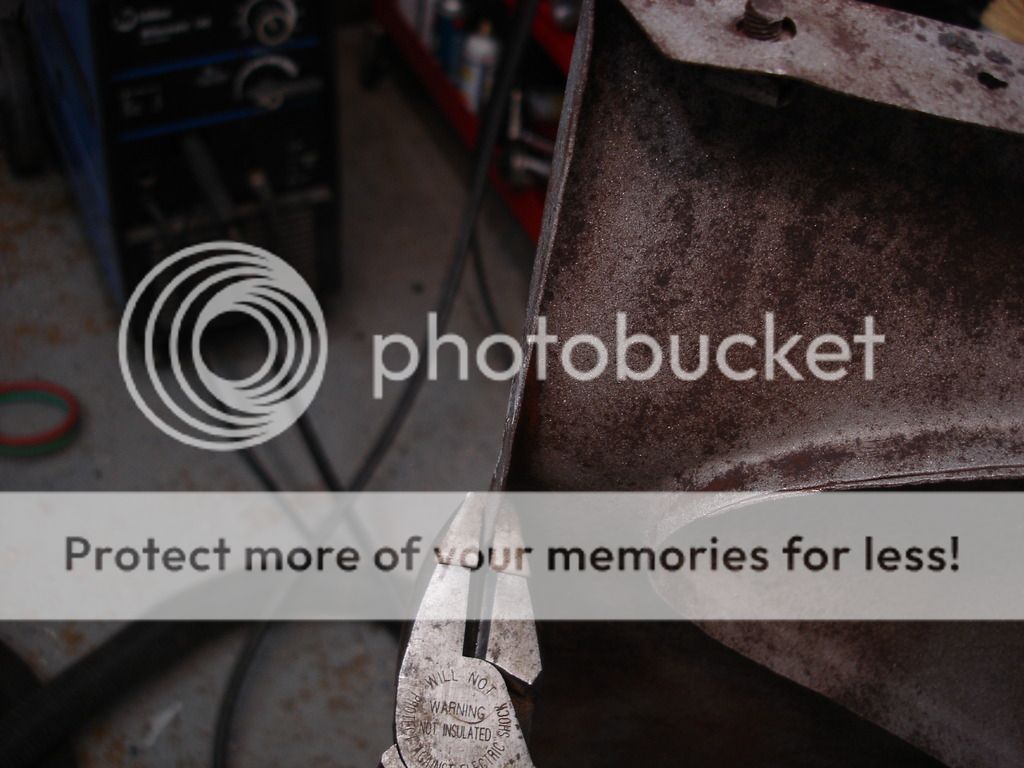
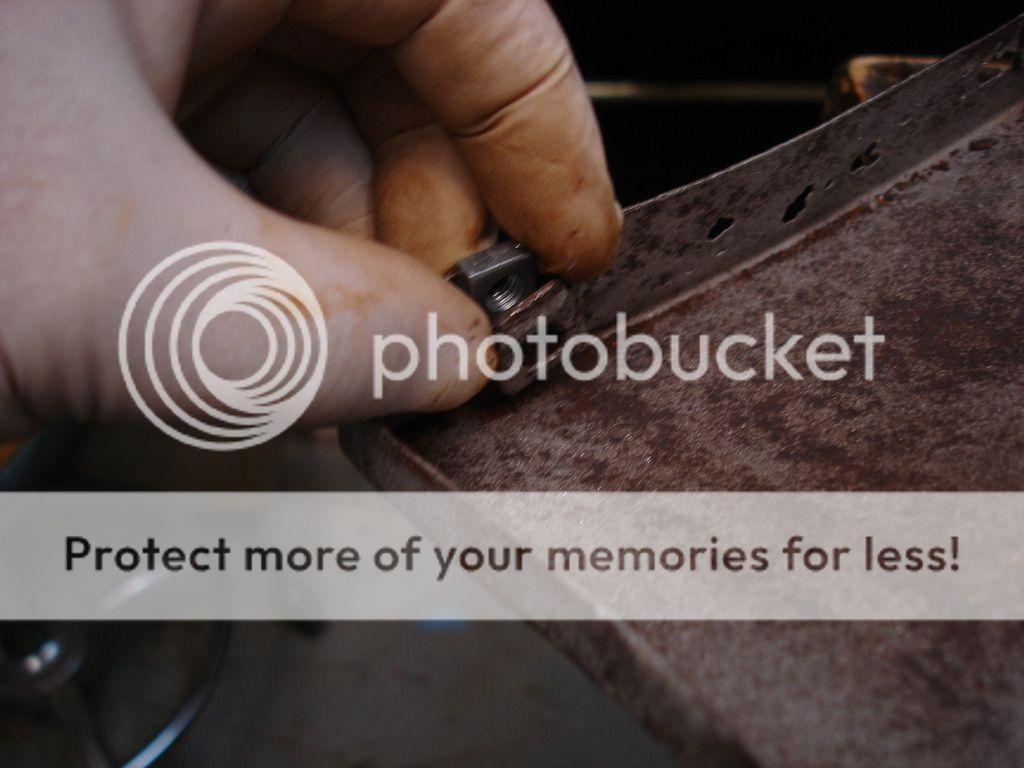
Setting on the machine is 2, with the wire feed backed off a bit from the tranny plate, since I want good, deep penetration of the weld.
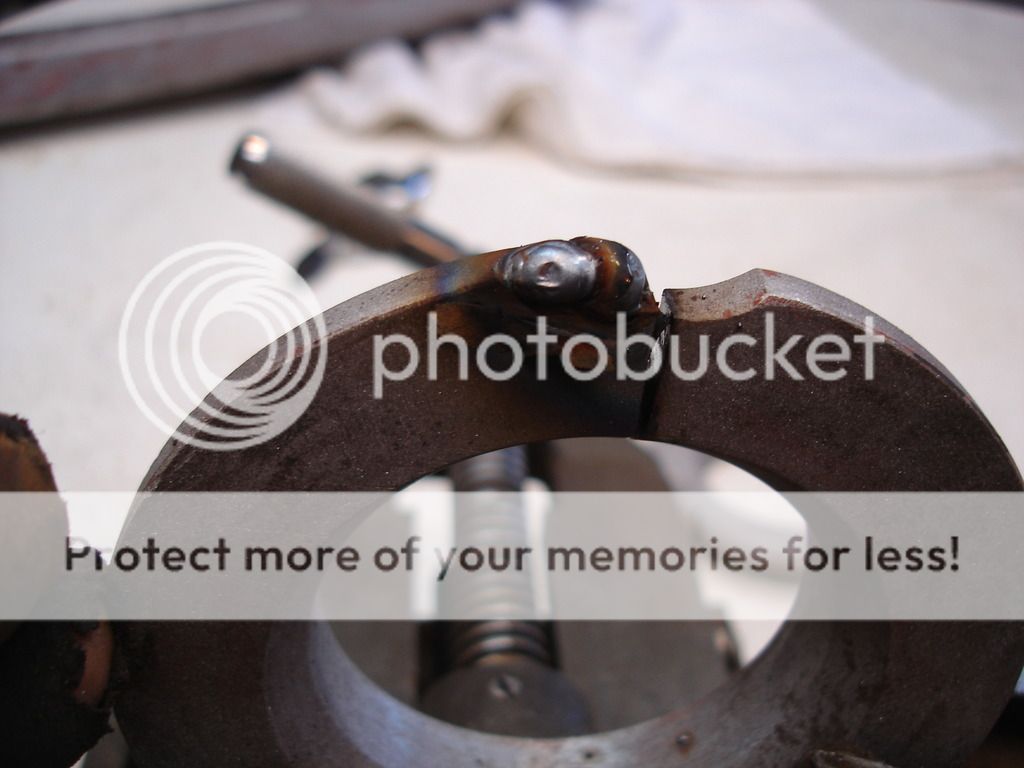
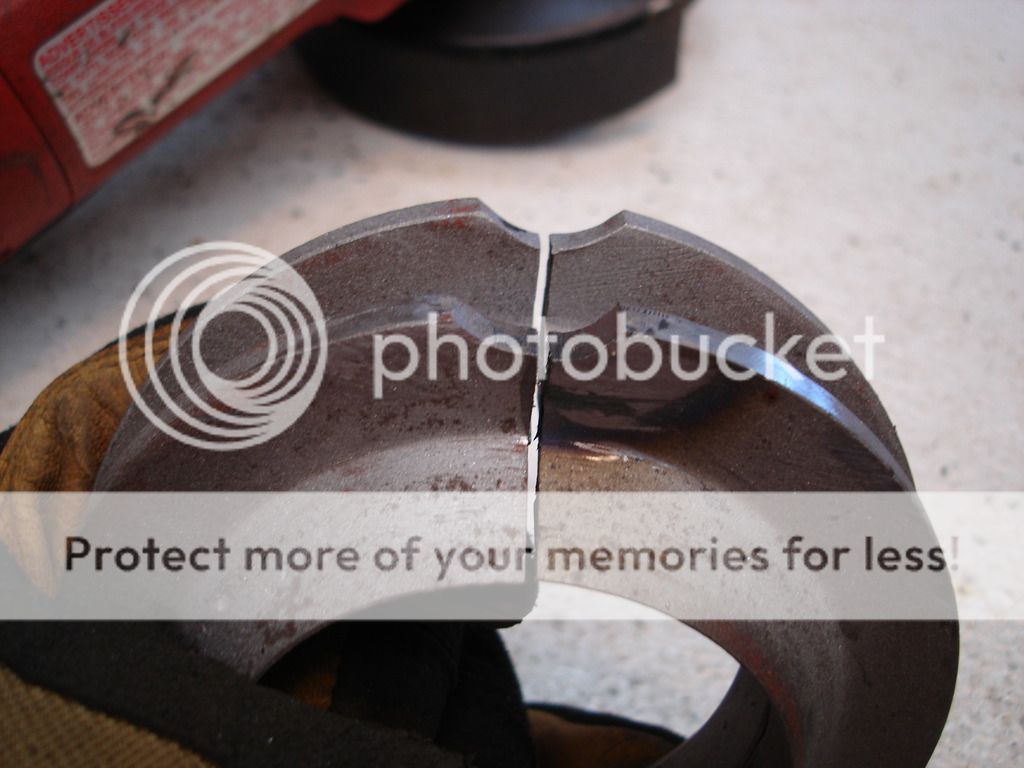
The key is to build the bead with several passes, until you are certain all parts are well above the level you need.
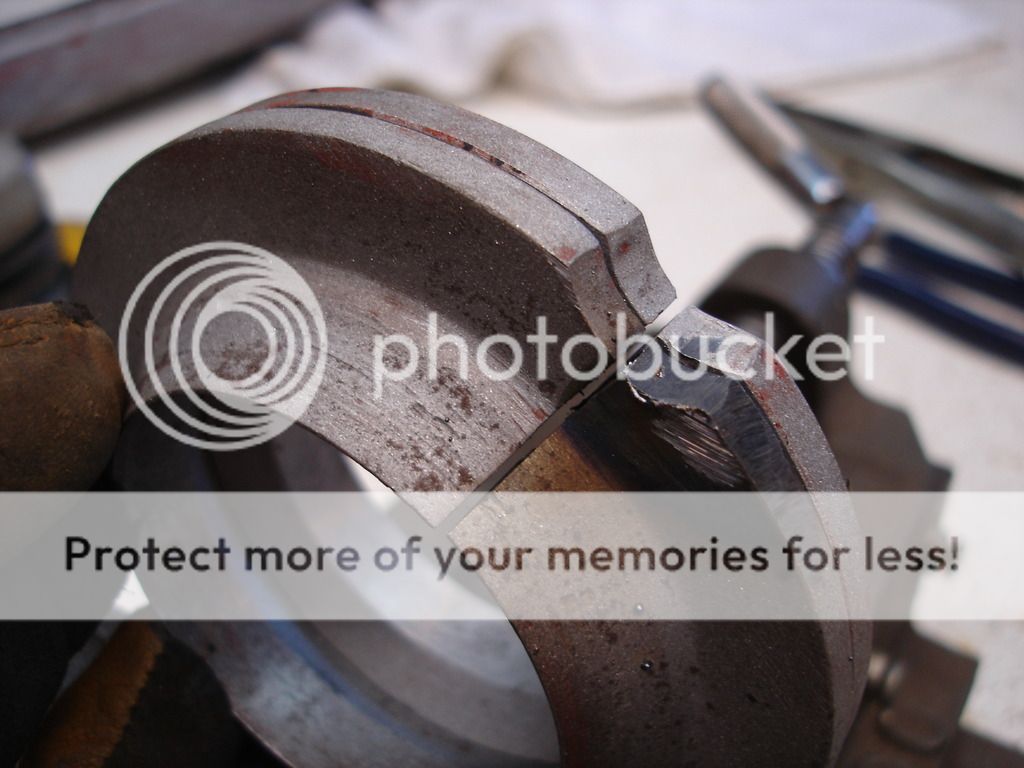
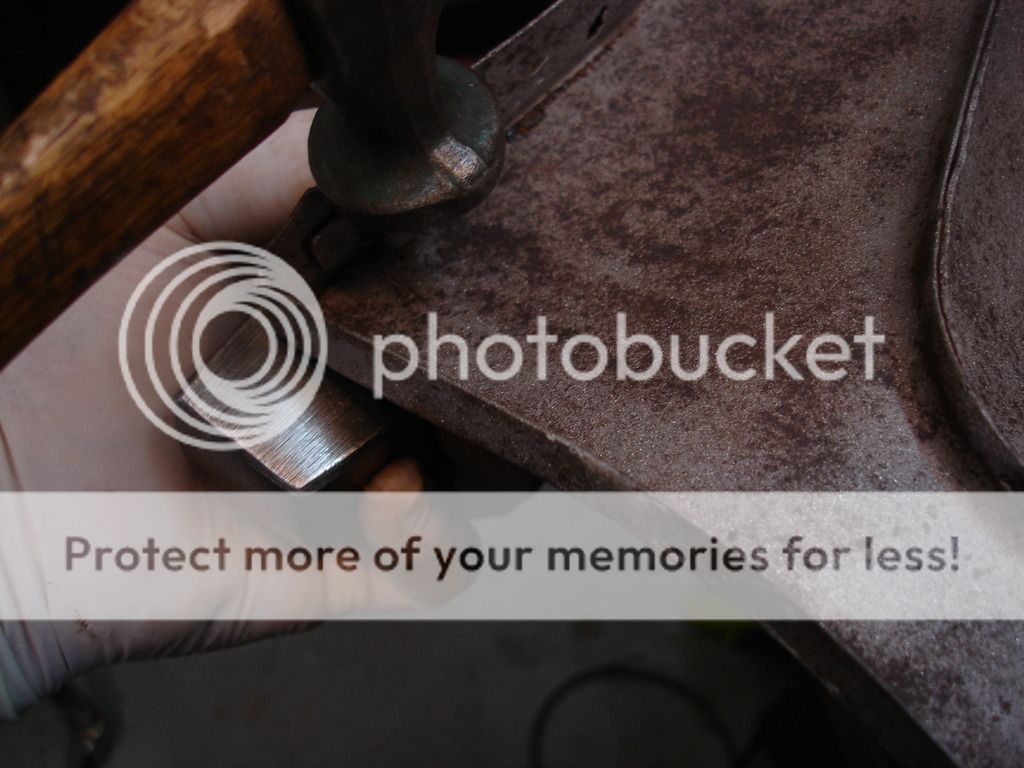
Once again...ground with a body grinder (welders best friend) and filed for the final shaping.
And that ends the workbench odds. Nice to get them off my work space after almost a year!


Rimmer Bros. told me these are the last they have. I'm thinking they are the last collets in the UK...I know they are the last here stateside. So, the problem is the one collet has a gouge out of it by the split. A pin sticks out of the hub and holds the collet from spinning. Some Bozo did not get the pin located correctly...or ran the wire wheel loose, and buggared up the slot.

The plan is to build up a weld where the metal was gouged, and then grind it flush. Note the light colored metal to the left of the slot on the collet. I thought this was just old paint...but instead some poor soul actually tried to fill the original gouge with lead. Really? Lead?

Setting on the machine is 2, with the wire feed backed off a bit from the tranny plate, since I want good, deep penetration of the weld.

The key is to build the bead with several passes, until you are certain all parts are well above the level you need.


Once again...ground with a body grinder (welders best friend) and filed for the final shaping.

And that ends the workbench odds. Nice to get them off my work space after almost a year!
OP
CJD
Yoda
Offline
On to the weeks work, the spare tire cover.
SHRINKING METAL
So, frequently in body work you run into stretched metal. You know the panel is stretched when you cannot get a high spot down where it belongs. Frequently you tap a high spot, and it moves over a few inches. You tap the "new" high spot, and it moves over again. After making a fool of you for several tries, you finally realize there is too much metal to lay flat! Bummer!
This is common since when you are in an accident, another car or something smacks your body very hard. You then try to straighten it out with a hammer, and somewhere along the way the metal gets stretched. Another symptom of a stretched panel is the infamous "oil canning". This is when you press a panel and it goes "pop", and sticks inward. You push from behind, and it once again goes "pop' and comes back out. It is stretched out of shape and must be shrunk back to proper size and shape.
My tire cover was stretched, and provides a great lesson on shrinking metal.

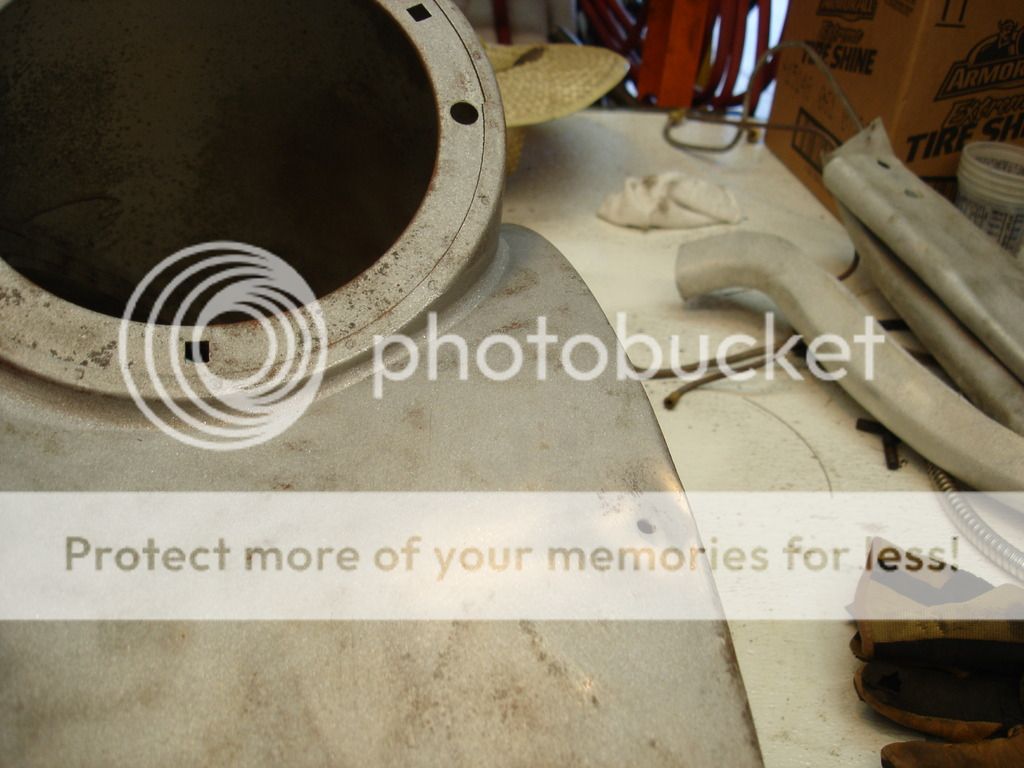
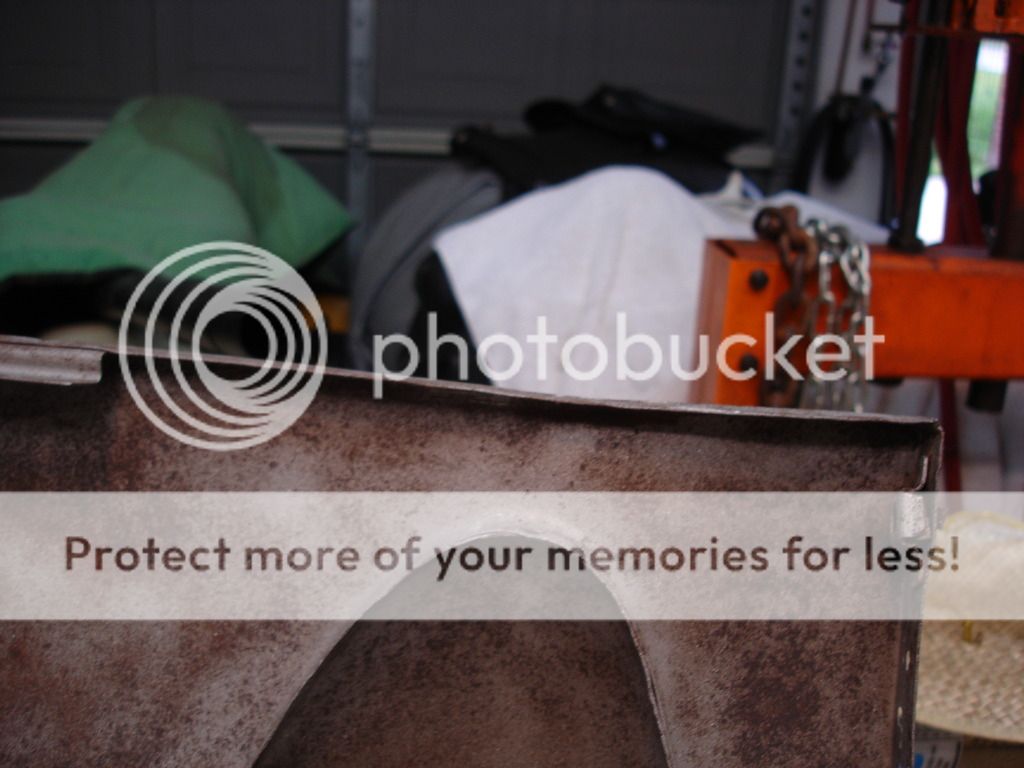
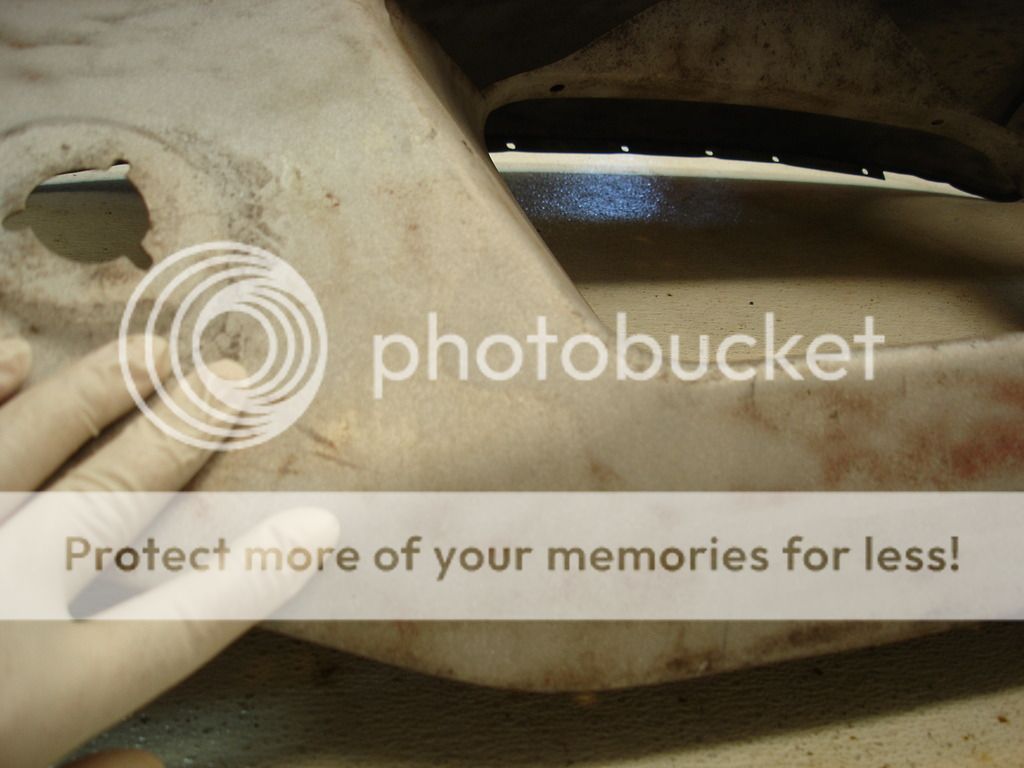
This view shows my original tire cover after sand blasting. Amazingly, there was not a single through hole prior to the blasting. Isn't it phenomenal what paint can cover!?! I considered using Marv's spare car cover for material to weld into the bad area...but it was just too extensive. I will have to use the spare TR3 cover for my base.

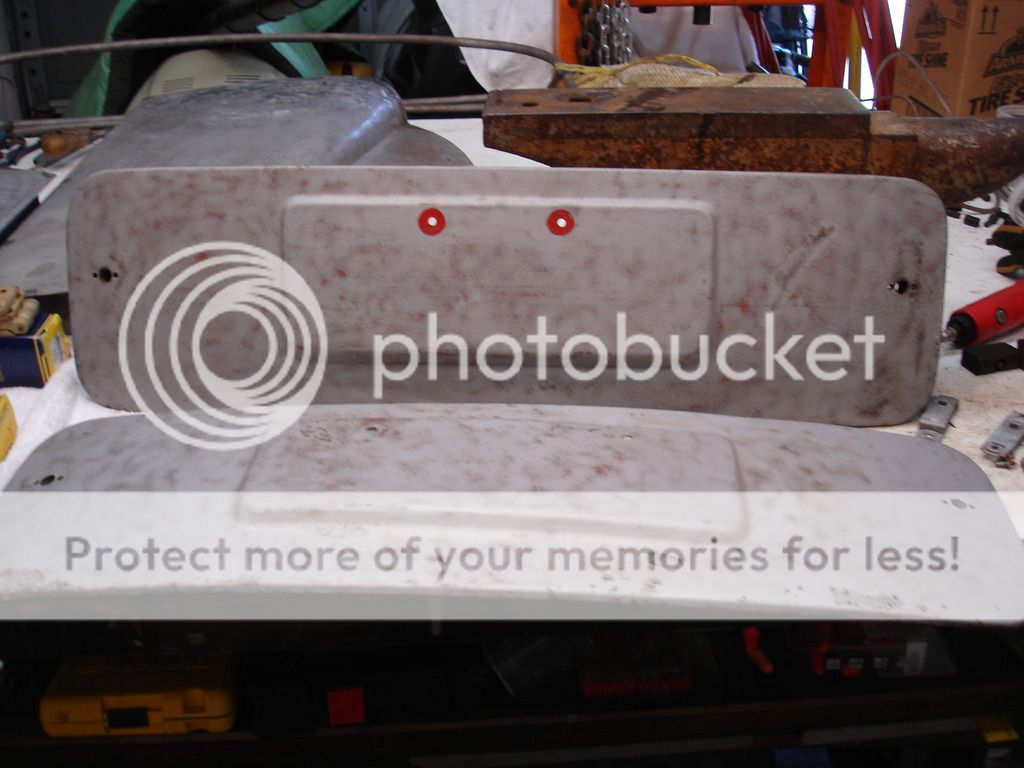
The TR2 cover is lower in the pic. Although the shape of the covers is identical, the holes for the license plate are different. I will have to re-drill the cover and fill the TR3 located holes.
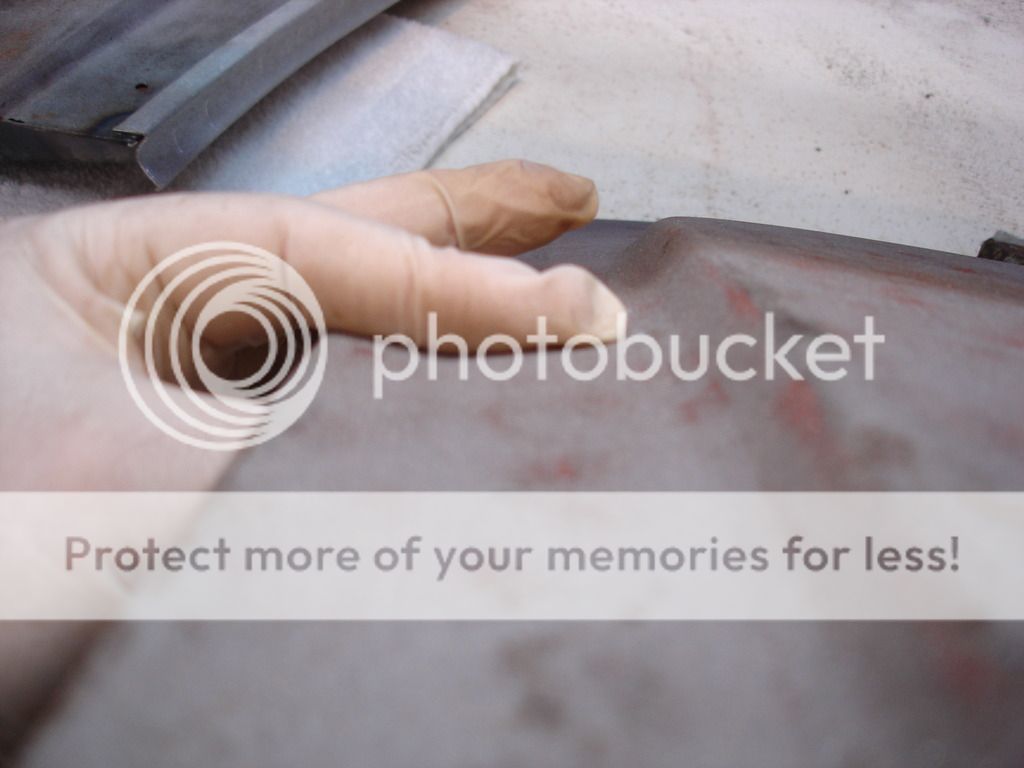
The upper edge of the newer cover is dented in, so that will have to be worked up.
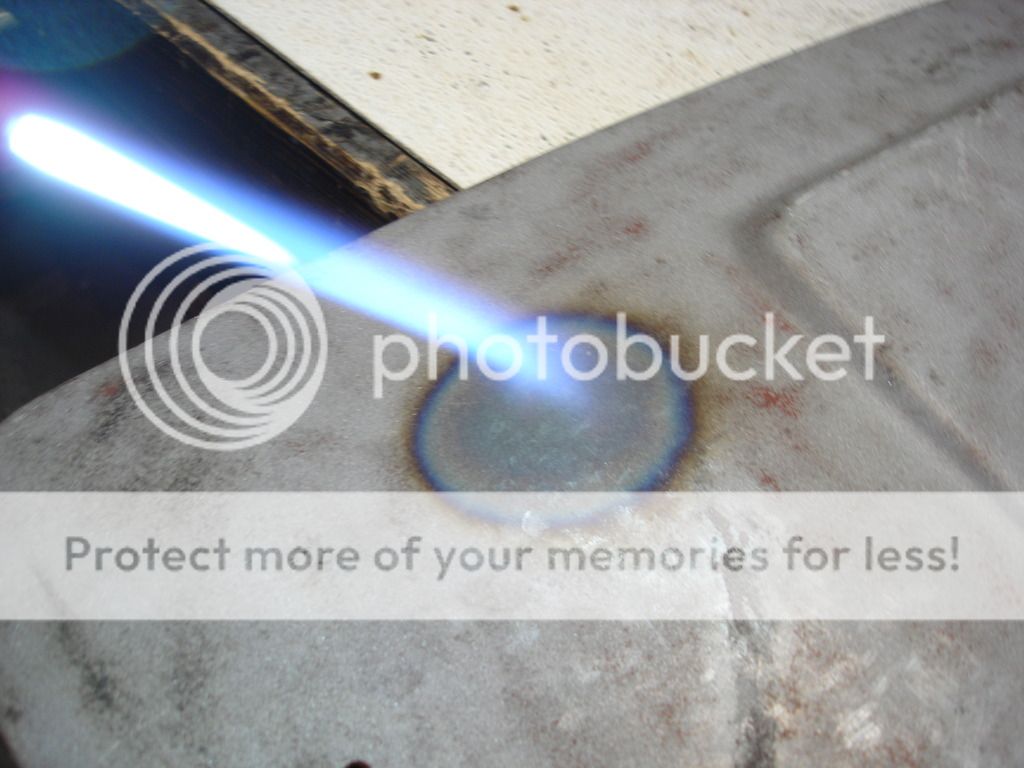
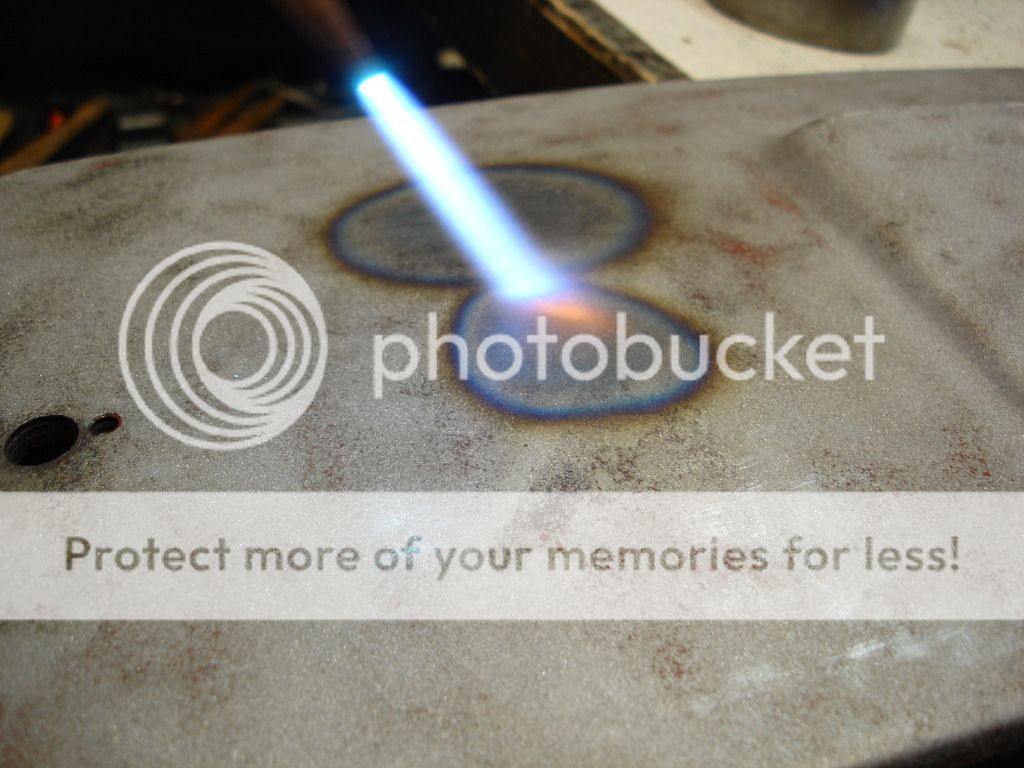
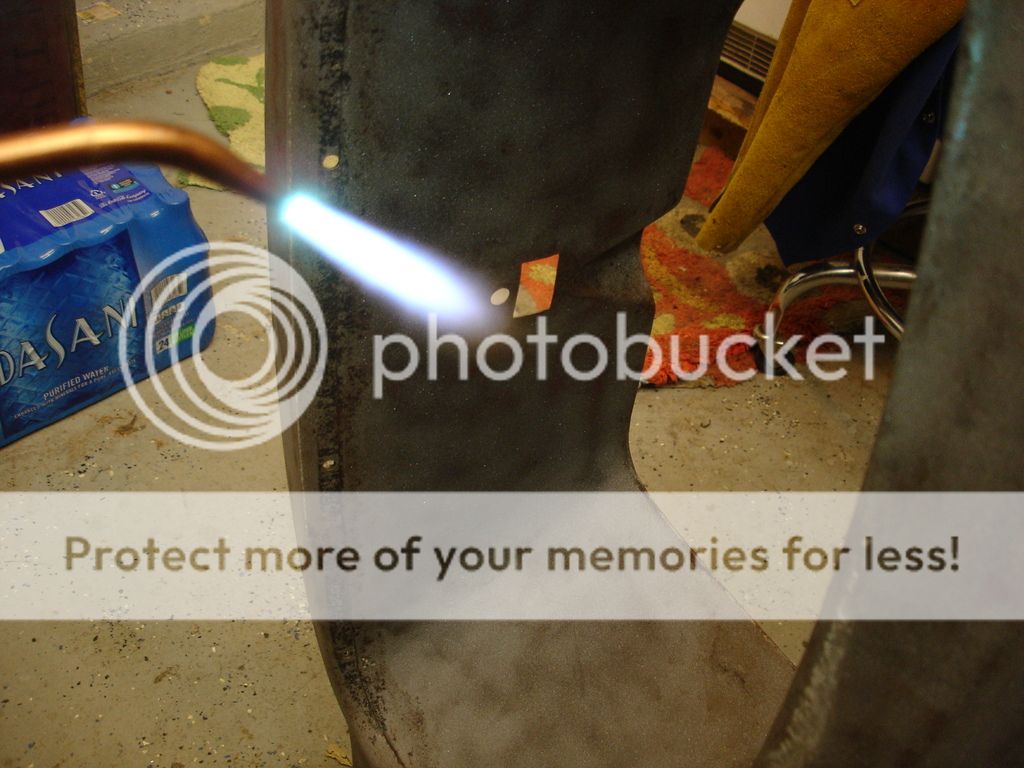
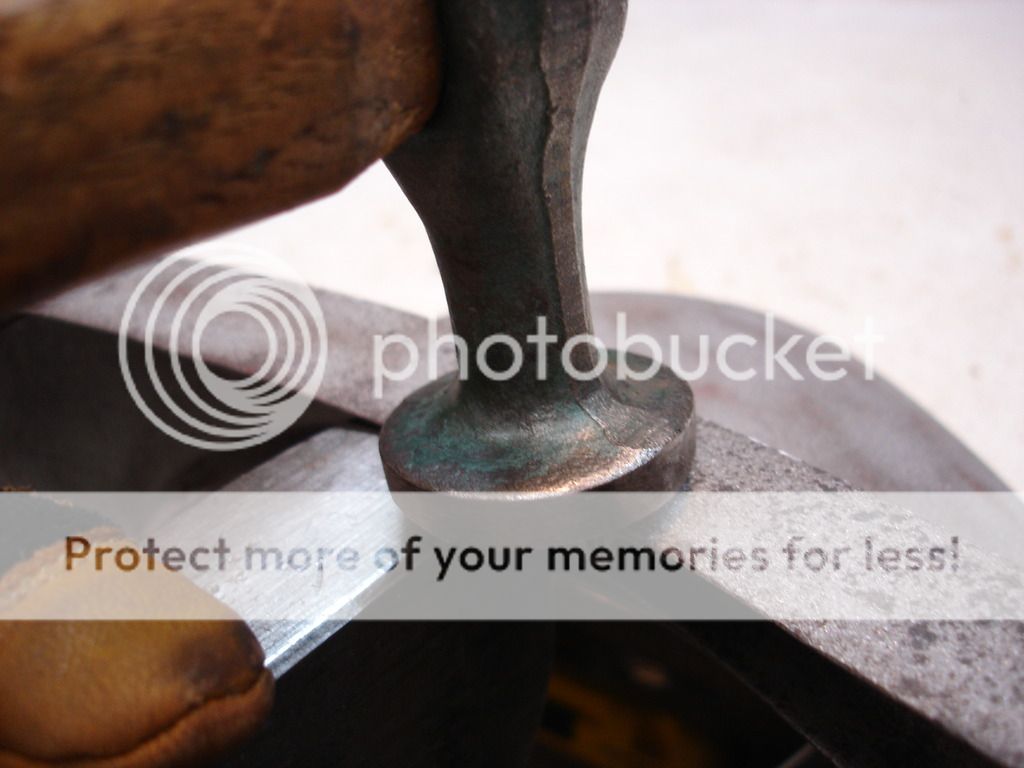
When I worked the dent up, there was one area that did not fit back into place, so here is the process I used to shrink the metal. First, I locate the center of the high spot using my hand as a detector. Then, I heat the spot red hot with a torch. I am using Oxy-acetylene, but even a propane torch gets hot enough for this work. When you heat, it is frightening how much the heat expands the metal in one spot and causes a bump to form!
Then quickly, while the steel is still glowing red, use your hammer and dolly to gently tap the "bump" back flat. The tapping while it is red hot is "jamming" the steel against itself, so it forces it to shape. Once it cools, the "bump" will actually shrink enough to become a flat surface.
So, the process is heat the metal red hot to form a red hot bump. Flatten the bump to near flat using a hammer and dolly, so now you have a red hot, very small, bump. Allow to cool. Then finish shaping with the hammer and dolly. That's it.
If you plan to work the metal more, let it air cool. That keeps the panel relatively soft and ductile. If you have a problem area, that needs a lot of shrinking and possibly several iterations of this procedure...or it oil cans still...use a wet rag to rapid cool the spot. That hardens the metal to prevent oil canning later.
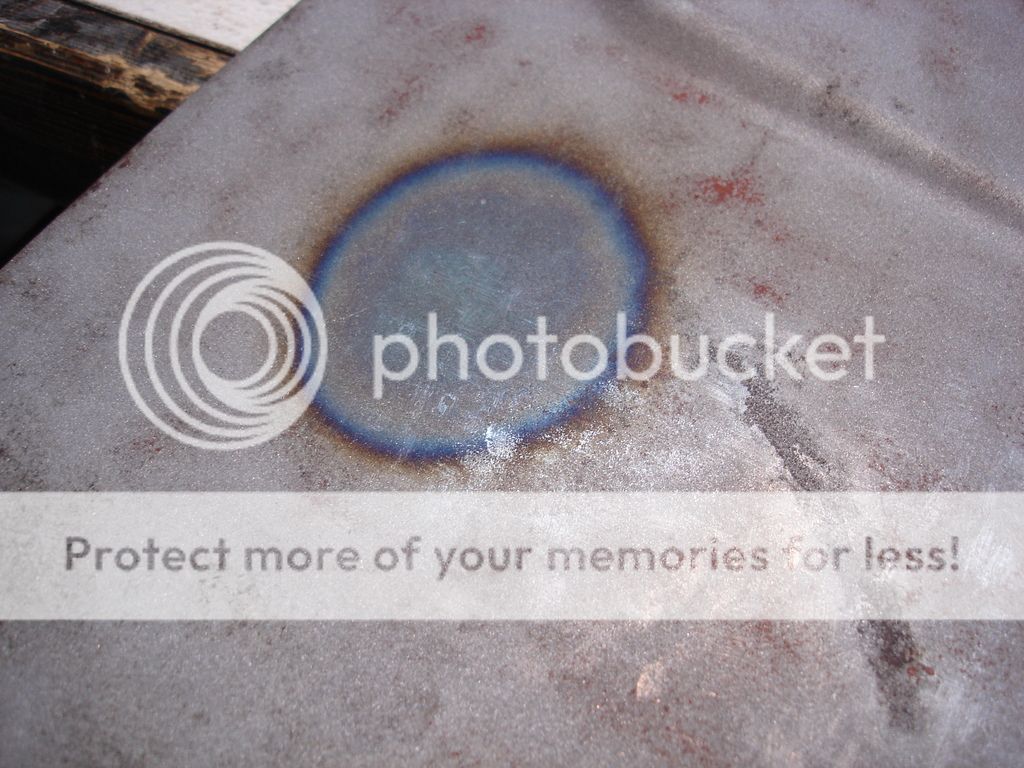
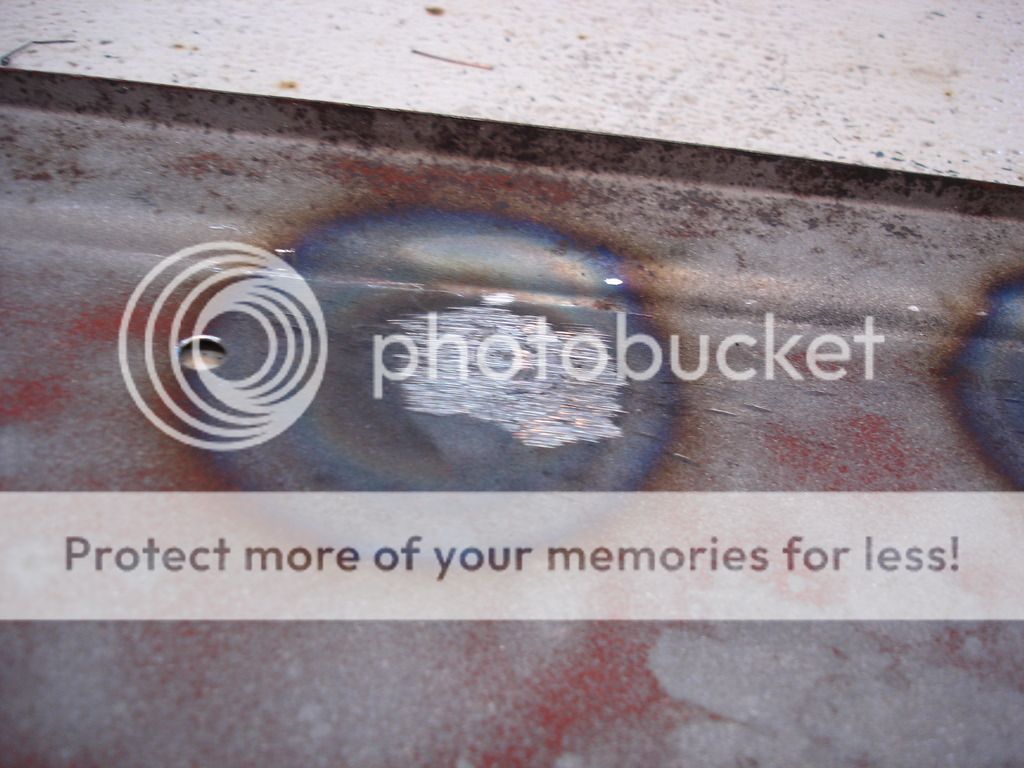
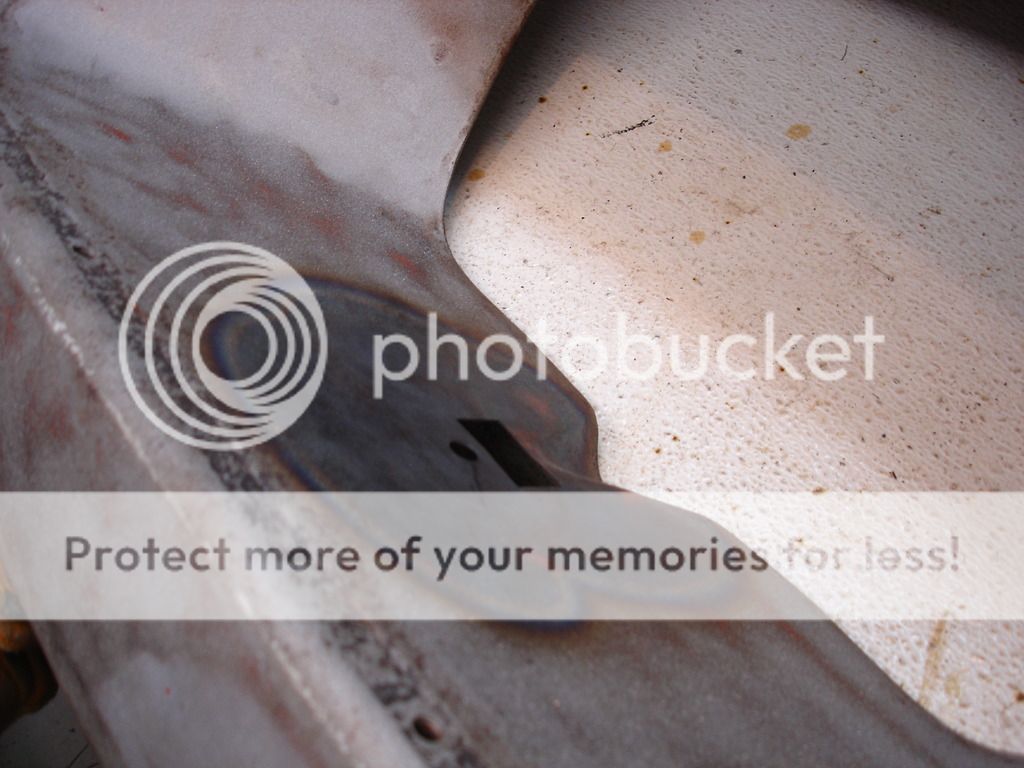
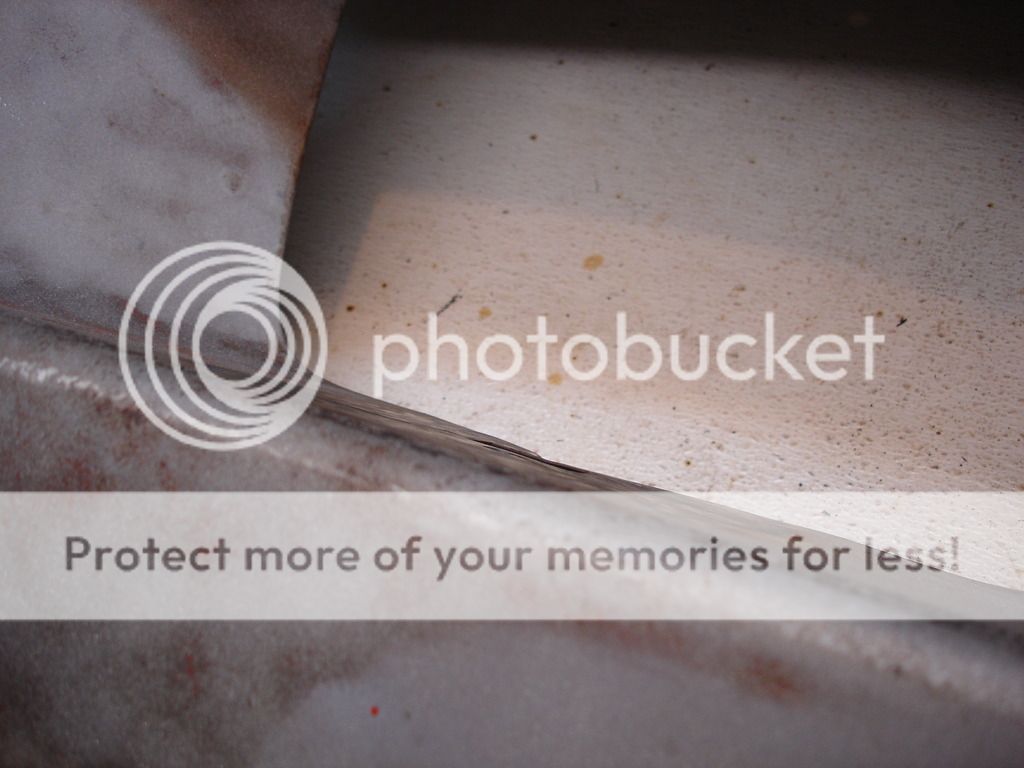
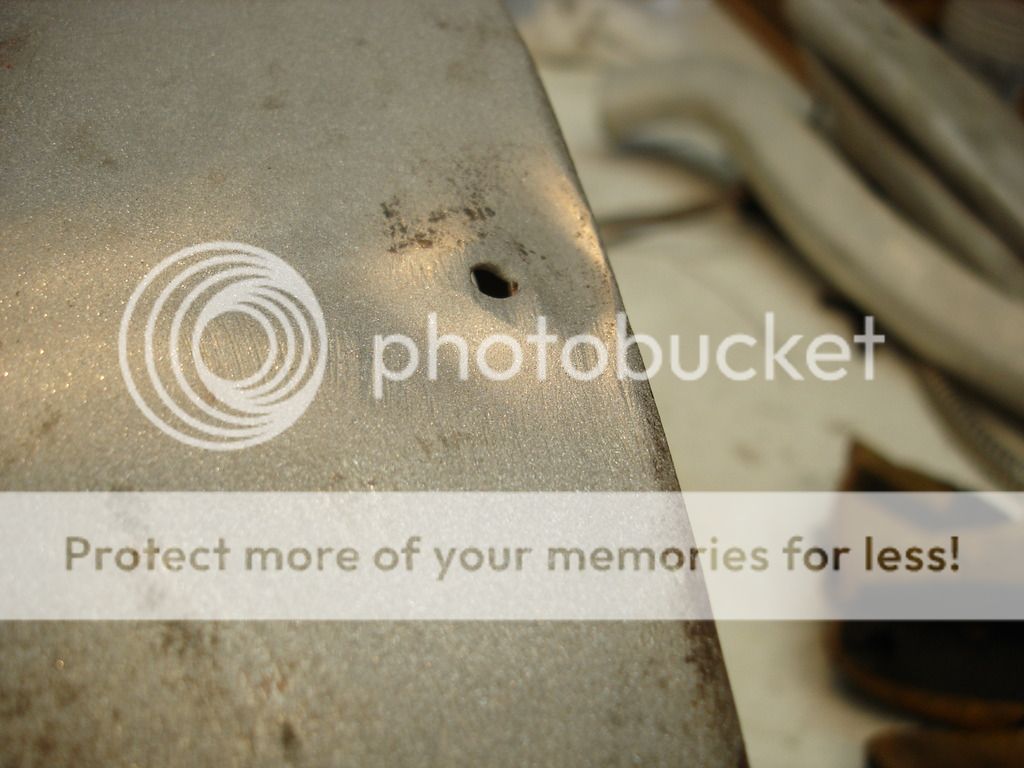
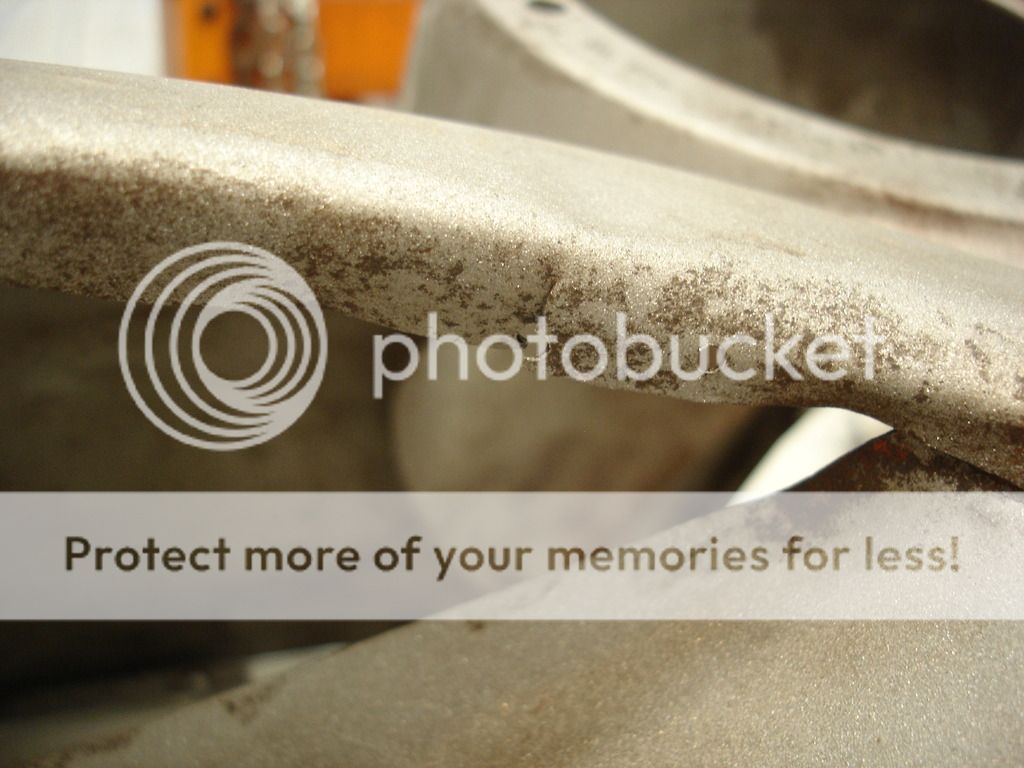
This is an edge pic of the spot after air cooling. The bump is gone, and the panel is actually too flat now. That just takes work with a hammer and dolly to stretch it back out the correct amount. Stretching is easy...shrinking is not.
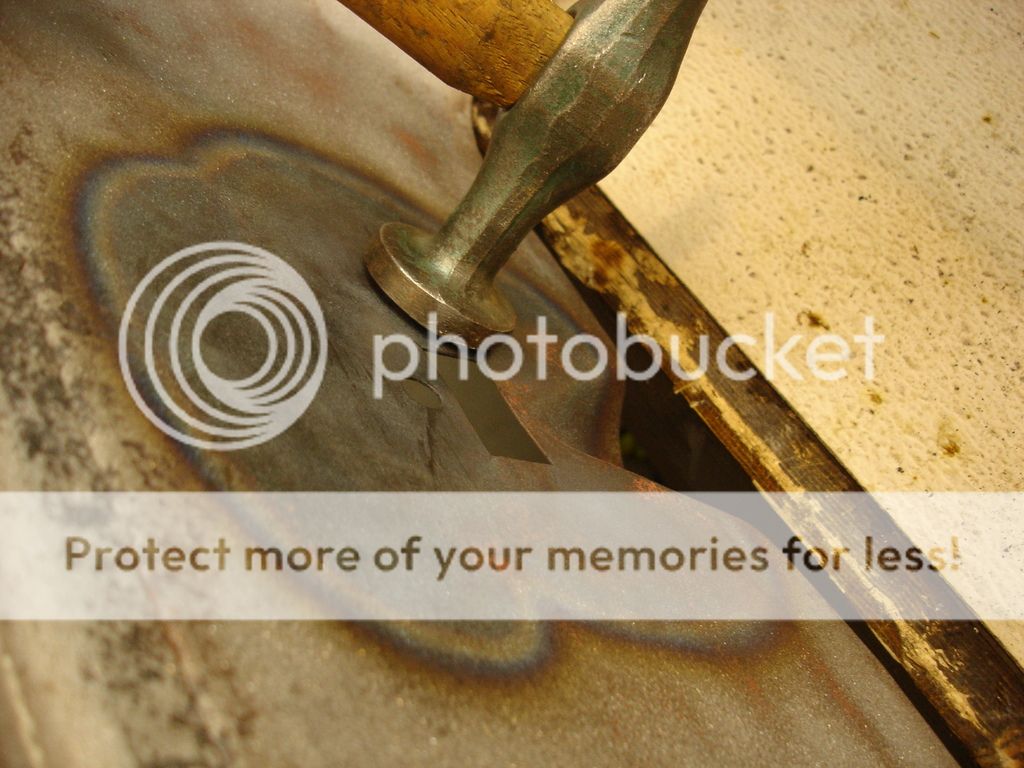
Worth noting...as you can see, after heating the metal red hot, it retains that "blue" discoloration, even after the cooling. You have to learn to entirely ignore the color as you work the metal. I frequently get distracted by the different shading, so I close my eyes as I pass my hand over the area to look for high and low spots. You learn to believe your hand and ignore the visual cues. If the discoloration bothers you a lot, you can always run the sand blaster back over it it to remove the discoloration. I don't bother, as long as I know the shape is true.
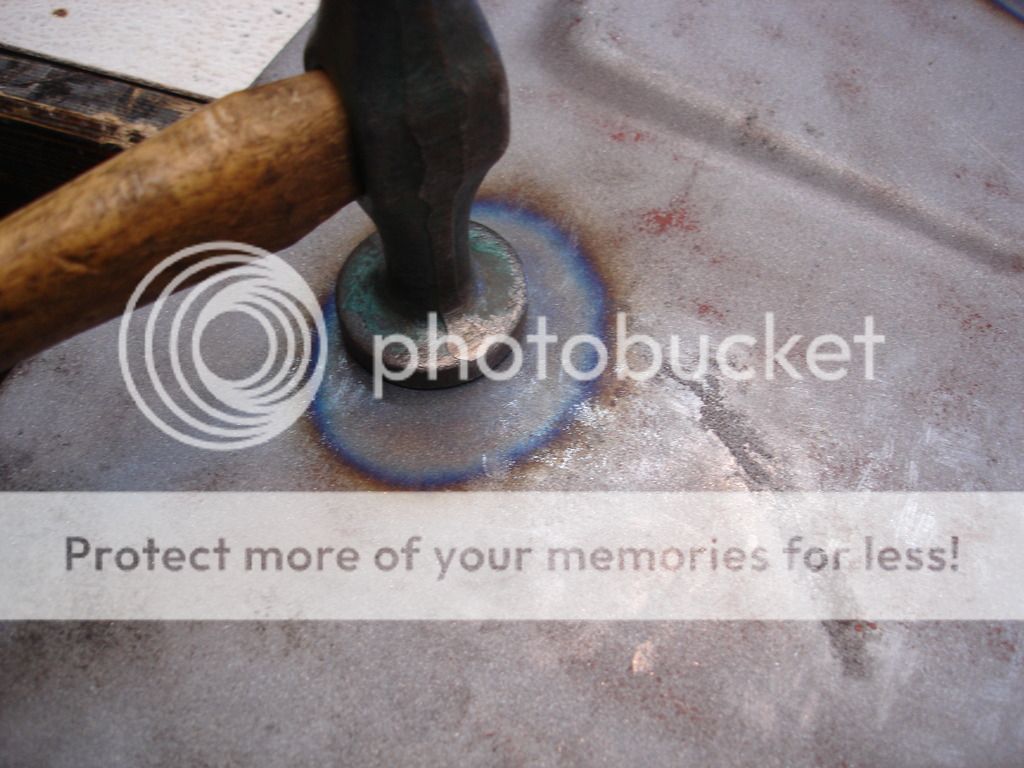
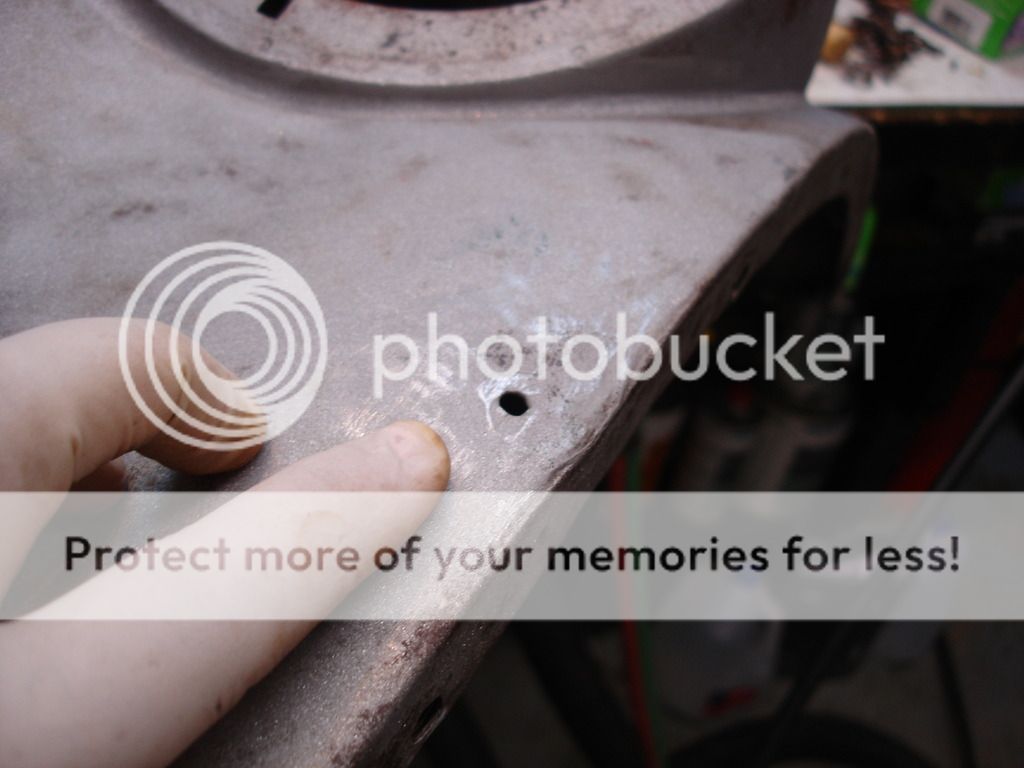
Don't be afraid to do the same thing anywhere you have high spots that won't work out. Here the adjacent area is still to stretched. It is best to work in several smaller areas, rather than trying to do the entire panel at once.
And that is shrinking...101.
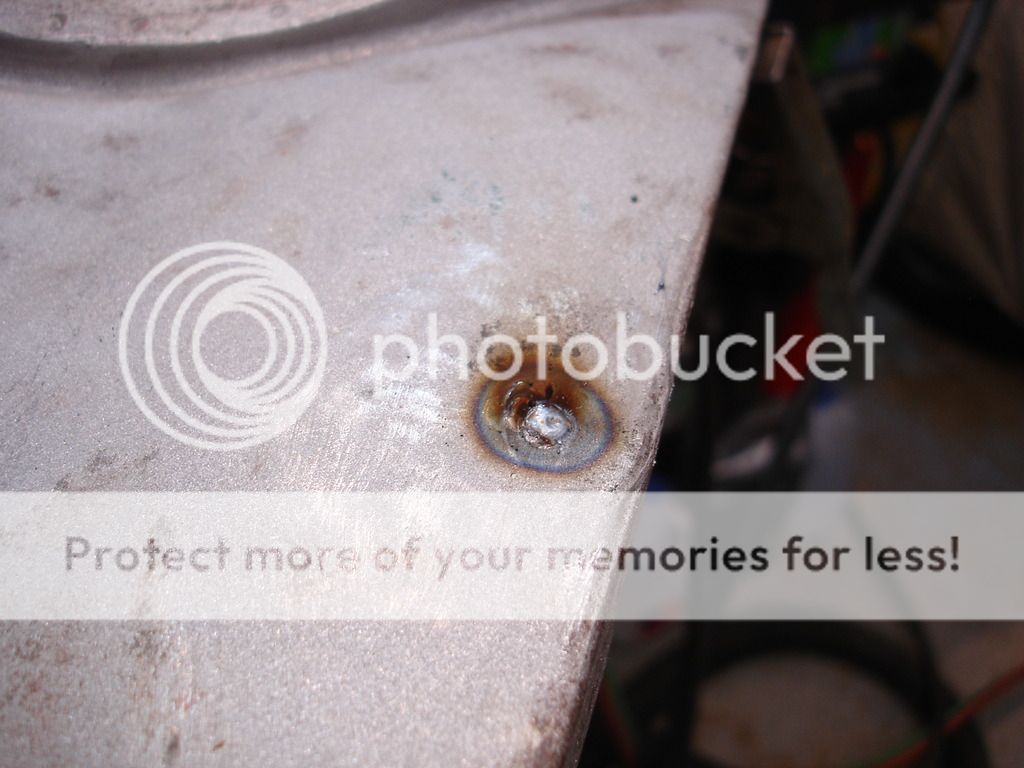
Here is a quick tip using a body grinder. The license plate holes that were filled with weld were ground down, hammered flat, and here I am checking the final surface by using the body grinder to just skim the area with the disc held very flat. It immediately tells you if and where the high and low spots are. This hole looks perfect and is done.
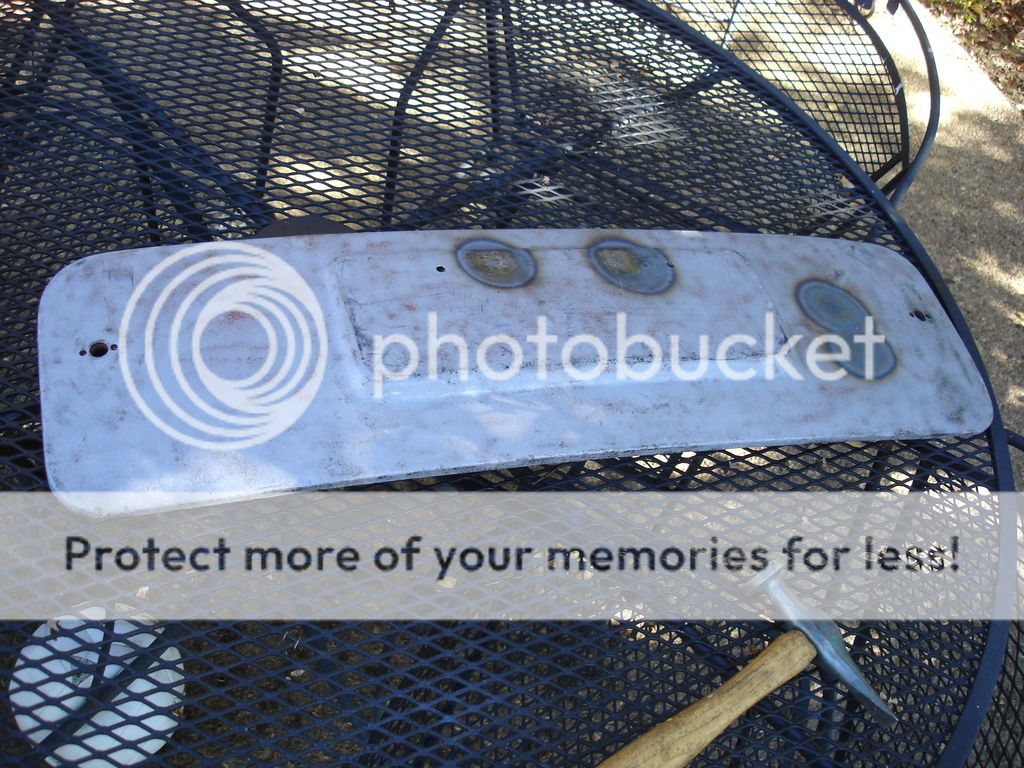
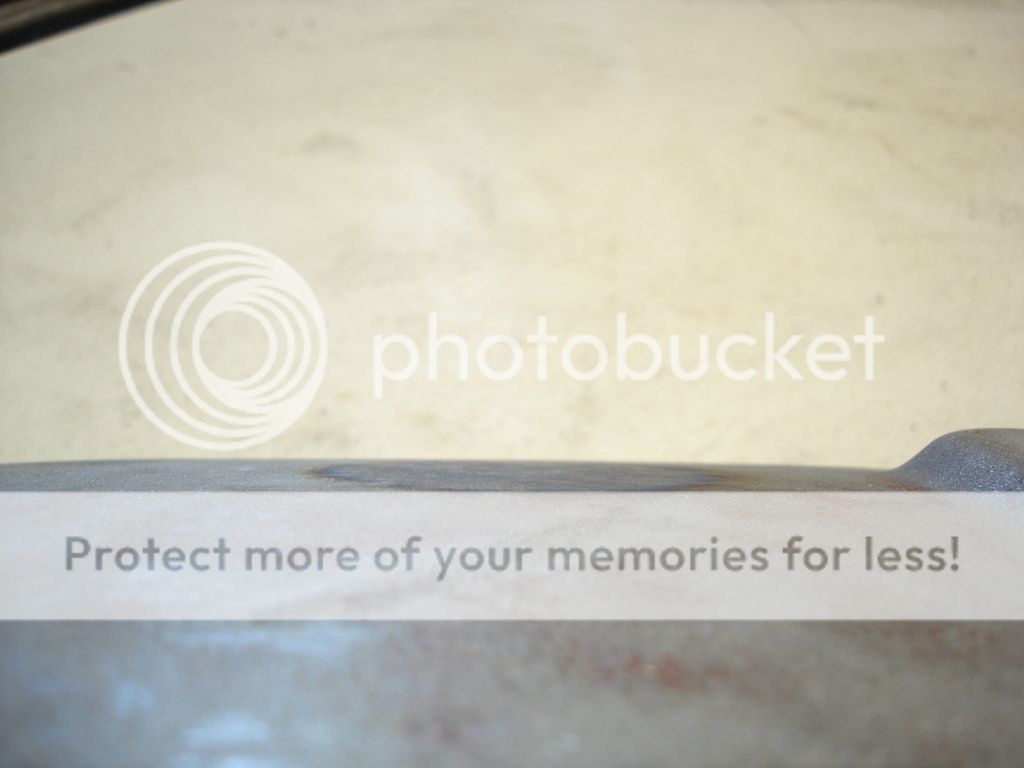
And the final cover, ready for fitting.
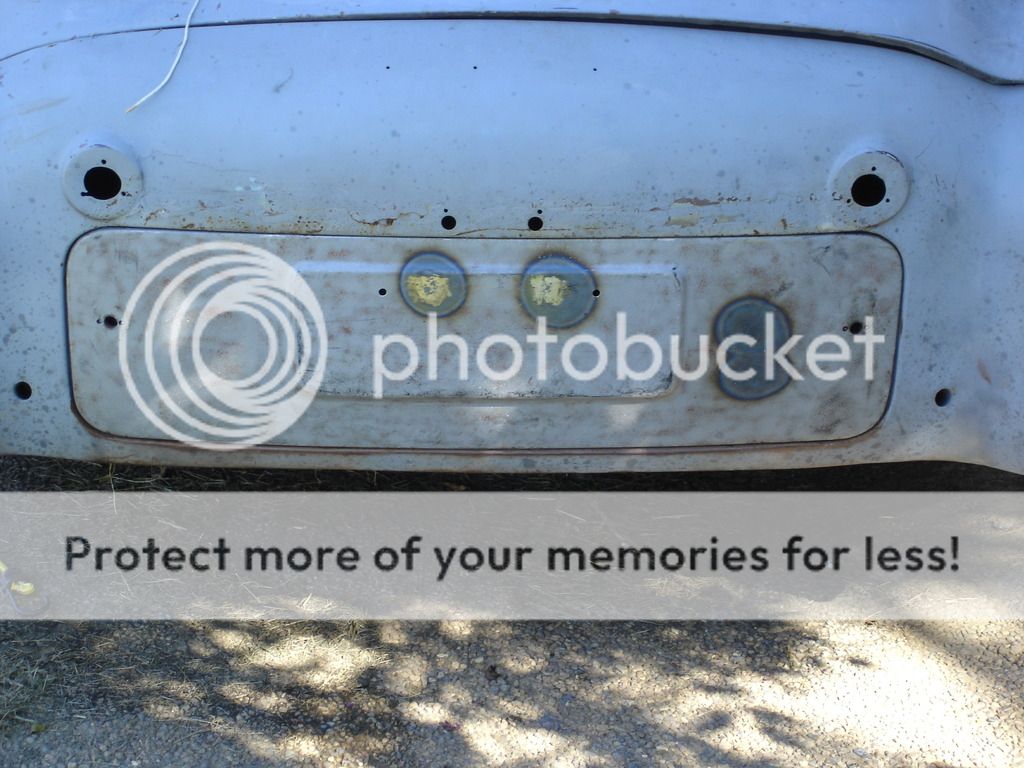
It looks like it fit perfectly. I assure that was not the case initially. This pic is after I spent another 2 hours carefully massaging the final curvature to get it to perfectly fit the rear valence. Normally I would fully test the latches and weatherstrip at this point. As you can see, I have to remove the TR3 turn lights from the rear valence, so it would be a waste at this point to get the fit too perfect. That will come later.
And that ends week 4...
Cheers!
SHRINKING METAL
So, frequently in body work you run into stretched metal. You know the panel is stretched when you cannot get a high spot down where it belongs. Frequently you tap a high spot, and it moves over a few inches. You tap the "new" high spot, and it moves over again. After making a fool of you for several tries, you finally realize there is too much metal to lay flat! Bummer!
This is common since when you are in an accident, another car or something smacks your body very hard. You then try to straighten it out with a hammer, and somewhere along the way the metal gets stretched. Another symptom of a stretched panel is the infamous "oil canning". This is when you press a panel and it goes "pop", and sticks inward. You push from behind, and it once again goes "pop' and comes back out. It is stretched out of shape and must be shrunk back to proper size and shape.
My tire cover was stretched, and provides a great lesson on shrinking metal.

This view shows my original tire cover after sand blasting. Amazingly, there was not a single through hole prior to the blasting. Isn't it phenomenal what paint can cover!?! I considered using Marv's spare car cover for material to weld into the bad area...but it was just too extensive. I will have to use the spare TR3 cover for my base.


The TR2 cover is lower in the pic. Although the shape of the covers is identical, the holes for the license plate are different. I will have to re-drill the cover and fill the TR3 located holes.

The upper edge of the newer cover is dented in, so that will have to be worked up.

When I worked the dent up, there was one area that did not fit back into place, so here is the process I used to shrink the metal. First, I locate the center of the high spot using my hand as a detector. Then, I heat the spot red hot with a torch. I am using Oxy-acetylene, but even a propane torch gets hot enough for this work. When you heat, it is frightening how much the heat expands the metal in one spot and causes a bump to form!


Then quickly, while the steel is still glowing red, use your hammer and dolly to gently tap the "bump" back flat. The tapping while it is red hot is "jamming" the steel against itself, so it forces it to shape. Once it cools, the "bump" will actually shrink enough to become a flat surface.
So, the process is heat the metal red hot to form a red hot bump. Flatten the bump to near flat using a hammer and dolly, so now you have a red hot, very small, bump. Allow to cool. Then finish shaping with the hammer and dolly. That's it.
If you plan to work the metal more, let it air cool. That keeps the panel relatively soft and ductile. If you have a problem area, that needs a lot of shrinking and possibly several iterations of this procedure...or it oil cans still...use a wet rag to rapid cool the spot. That hardens the metal to prevent oil canning later.

This is an edge pic of the spot after air cooling. The bump is gone, and the panel is actually too flat now. That just takes work with a hammer and dolly to stretch it back out the correct amount. Stretching is easy...shrinking is not.
Worth noting...as you can see, after heating the metal red hot, it retains that "blue" discoloration, even after the cooling. You have to learn to entirely ignore the color as you work the metal. I frequently get distracted by the different shading, so I close my eyes as I pass my hand over the area to look for high and low spots. You learn to believe your hand and ignore the visual cues. If the discoloration bothers you a lot, you can always run the sand blaster back over it it to remove the discoloration. I don't bother, as long as I know the shape is true.

Don't be afraid to do the same thing anywhere you have high spots that won't work out. Here the adjacent area is still to stretched. It is best to work in several smaller areas, rather than trying to do the entire panel at once.
And that is shrinking...101.

Here is a quick tip using a body grinder. The license plate holes that were filled with weld were ground down, hammered flat, and here I am checking the final surface by using the body grinder to just skim the area with the disc held very flat. It immediately tells you if and where the high and low spots are. This hole looks perfect and is done.

And the final cover, ready for fitting.


It looks like it fit perfectly. I assure that was not the case initially. This pic is after I spent another 2 hours carefully massaging the final curvature to get it to perfectly fit the rear valence. Normally I would fully test the latches and weatherstrip at this point. As you can see, I have to remove the TR3 turn lights from the rear valence, so it would be a waste at this point to get the fit too perfect. That will come later.
And that ends week 4...
Cheers!
SteveBones
Jedi Trainee
Offline
John,
Thanks for sharing all the work you are doing with your TR2. I am very impressed with the results. I also really enjoy reading about the work you have done.
My first restoration on my TR4 is what I will call a "California" restoration. Meaning the body was really straight including all panels and no rust.
My TR3 restoration involves repairing body damage in multiple areas. I have been working on the rear section for quite a while. Lots of work with the hammer and dolly work involved. I am past the half way point and really happy with the results so far. I think it has helped with gain a little more patience (or maybe it is just old age). It is good to have your reference info available.
I still need to (and want to) rebuild the transmission so what you have shared prior during your rebuild is great and much appreciated.
Regarding my TR3, after completing the rear section body work, I will need to start the MIG welding process which will be new to me. What you have shared will help me greatly. I will need to replace the floors, likely the boot floor, and the typical rust areas on the front fenders.
Thanks again for sharing…….I really enjoyed seeing your work and also reading your recommended how to comments.
I was hopeful that you would share your work, but did not want to be a pest or ask in case you would prefer not to. I am glad you have shared all that you have.
OP
CJD
Yoda
Offline
I learned my lesson rebuilding the rear end last year. I quit documenting midway through when it seemed there was no interest. Later I got a lotta messages wondering where to go from where I left off. I decided that even if it seems there is no interest, somebody out there is interested, even if they aren't commenting.
Bodywork is all time. Any owner can do a better job than a professional shop, because the owner is willing to devote a lot more time than a shop can afford to devote on a project. It does take just basic metalworking knowledge, but that is easy to learn with practice!!
Be sure to post pics as you go with your TR3, Steve.
SteveBones
Jedi Trainee
Offline
Yeh - I am one of those who will need to rebuild my rear end. It leaks way too much 90 weight oil even when just sitting in the garage.
I completely agree that the body work can be done right when done by the owner AND also with all the help and info sharing providing by all the folks on the forum. I can not say enough on how much this helps.
Thanks again for sharing.
I completely agree that the body work can be done right when done by the owner AND also with all the help and info sharing providing by all the folks on the forum. I can not say enough on how much this helps.
Thanks again for sharing.
I learned my lesson rebuilding the rear end last year. I quit documenting midway through when it seemed there was no interest. Later I got a lotta messages wondering where to go from where I left off. I decided that even if it seems there is no interest, somebody out there is interested, even if they aren't commenting.
Bodywork is all time. Any owner can do a better job than a professional shop, because the owner is willing to devote a lot more time than a shop can afford to devote on a project. It does take just basic metalworking knowledge, but that is easy to learn with practice!!
Be sure to post pics as you go with your TR3, Steve.
OP
CJD
Yoda
Offline
Week 5
This week was bogged down by the kid's Home coming, family visits and getting stuck in Minneapollis with the weather. I did pull the front apron out of the shed...thinking it was in the best shape of all the body parts. Well, if it is, I am in trouble! It's relatively straight, but has some rust through spots and minor bad previous body work to fix.
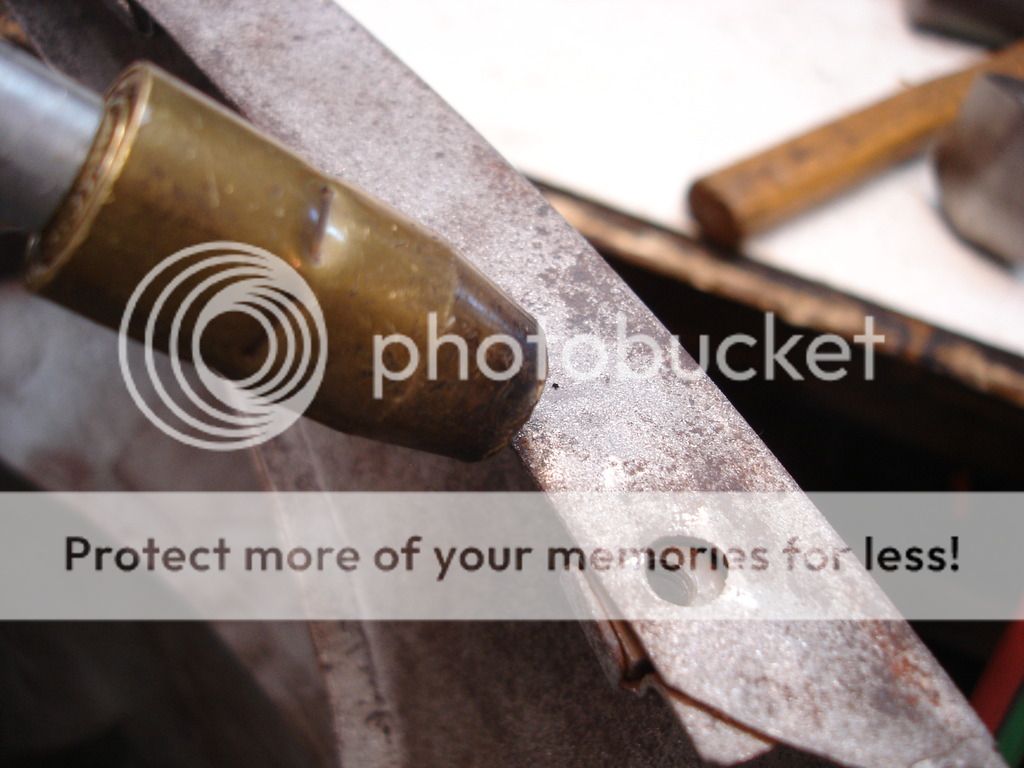
I spent 2-1/2 hours with the sand blaster to get to bare metal. With the hoses and equipment out, I took the op to blast last weeks collet and tranny mount. Here's how they look without the heat coloring:
With a little paint one would be hard pressed to tell how bad they were.
So, on to the specifics on the apron.
This week was bogged down by the kid's Home coming, family visits and getting stuck in Minneapollis with the weather. I did pull the front apron out of the shed...thinking it was in the best shape of all the body parts. Well, if it is, I am in trouble! It's relatively straight, but has some rust through spots and minor bad previous body work to fix.

I spent 2-1/2 hours with the sand blaster to get to bare metal. With the hoses and equipment out, I took the op to blast last weeks collet and tranny mount. Here's how they look without the heat coloring:


With a little paint one would be hard pressed to tell how bad they were.
So, on to the specifics on the apron.
OP
CJD
Yoda
Offline
Oil Canning
So, first on the apron was that the crank mount had stretched the bottom of the mouth so it oil-canned horribly.
Oil can up...
And oil can down.
This is about as bad as an oil can gets, as the bottom of the mouth is absolutely flat, and the "canning" is almost a full inch. So let's get started:
So, this is the classic case of needing to shrink the metal. Out with the torch. Working on small spots at a time.
This is a good shot of how many times I had to use the torch to fully shrink the area. I start from the worst high spot, and then work a circle outward, hammering flat on each spot before the metal stops glowing red.
Once the shrinking is completed, then you finish with hammer and dolly to get all of the high spots out, then flip the work over and work the high spots out of the other side. And this is the end result. The area is perfectly straight across. There is no longer any tendency to oil can at all.

So, first on the apron was that the crank mount had stretched the bottom of the mouth so it oil-canned horribly.

Oil can up...

And oil can down.
This is about as bad as an oil can gets, as the bottom of the mouth is absolutely flat, and the "canning" is almost a full inch. So let's get started:

So, this is the classic case of needing to shrink the metal. Out with the torch. Working on small spots at a time.


This is a good shot of how many times I had to use the torch to fully shrink the area. I start from the worst high spot, and then work a circle outward, hammering flat on each spot before the metal stops glowing red.

Once the shrinking is completed, then you finish with hammer and dolly to get all of the high spots out, then flip the work over and work the high spots out of the other side. And this is the end result. The area is perfectly straight across. There is no longer any tendency to oil can at all.
OP
CJD
Yoda
Offline
Old Holes
This is a small spot on the left side where the apron meets the fender. It was previously dented, and the shop drilled a hole to pull it up, and then just bondoed.
Here the area has been hammer/dollied out most of the way. No need to work on it too hard, yet, as it will warp when the hole is filled.
Like this. This is actually several small "tacks" to keep from burning through the 18 gage metal. The Mig was set at "1", with feed at 40fpm.
Finish with a grinder to bring down the bump, and then finish the area with hammer/dolly work. Not a great pic, but this is the finished dimple.


This is a small spot on the left side where the apron meets the fender. It was previously dented, and the shop drilled a hole to pull it up, and then just bondoed.

Here the area has been hammer/dollied out most of the way. No need to work on it too hard, yet, as it will warp when the hole is filled.

Like this. This is actually several small "tacks" to keep from burning through the 18 gage metal. The Mig was set at "1", with feed at 40fpm.

Finish with a grinder to bring down the bump, and then finish the area with hammer/dolly work. Not a great pic, but this is the finished dimple.
OP
CJD
Yoda
Offline
Bolt Holes
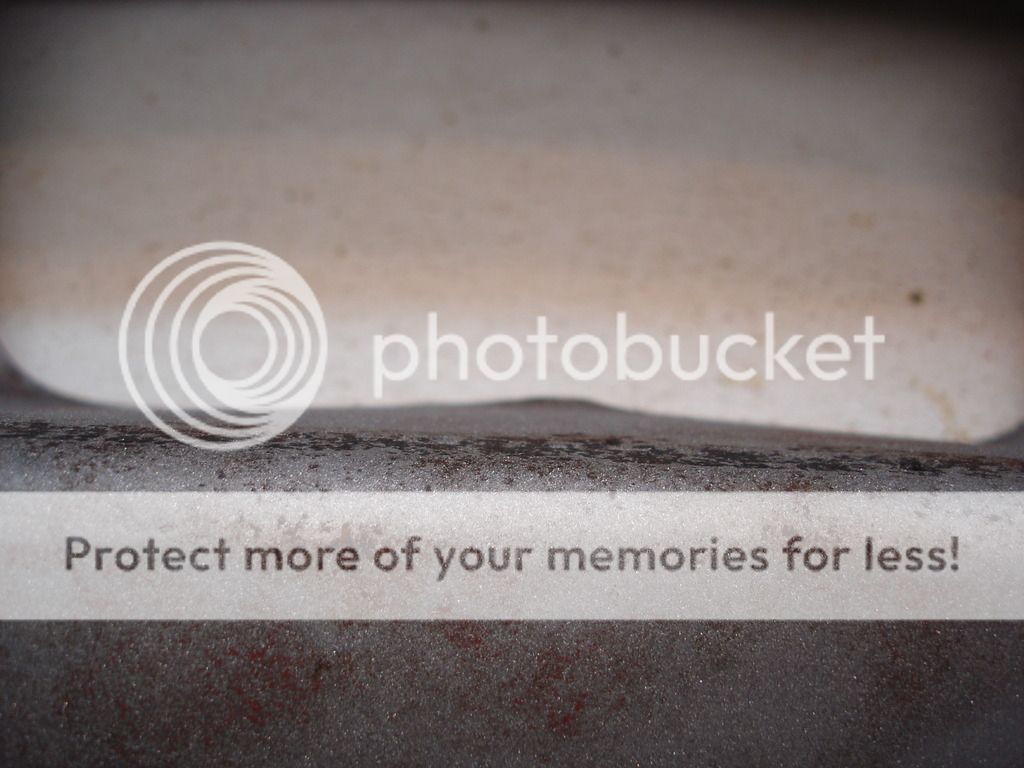
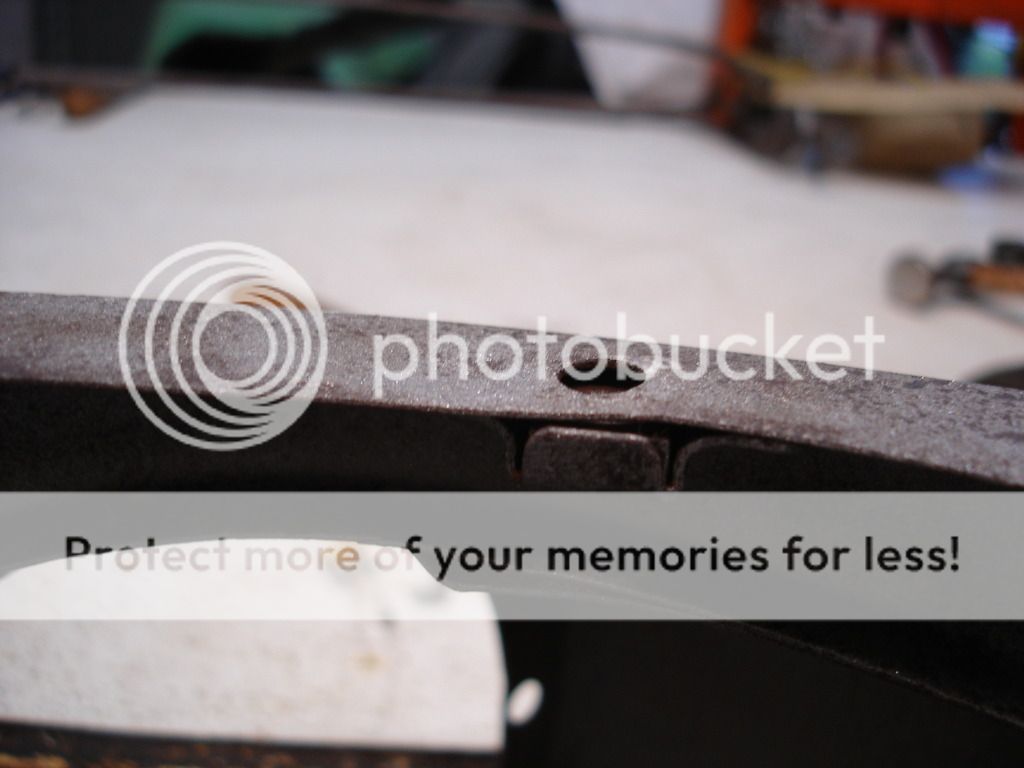
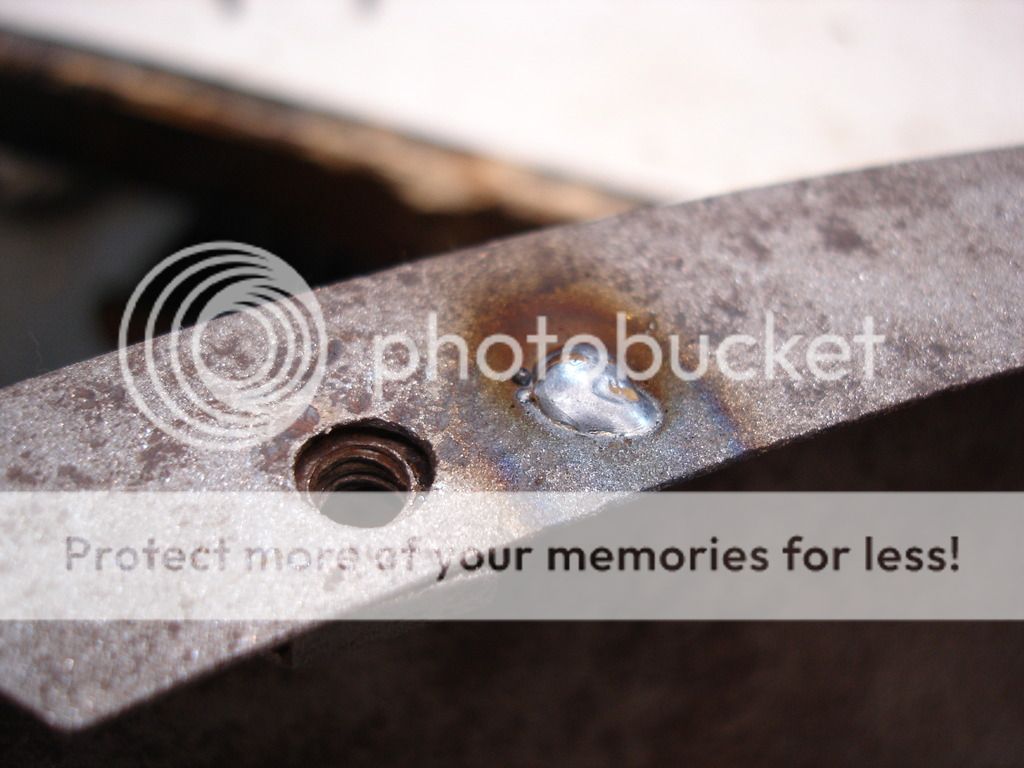
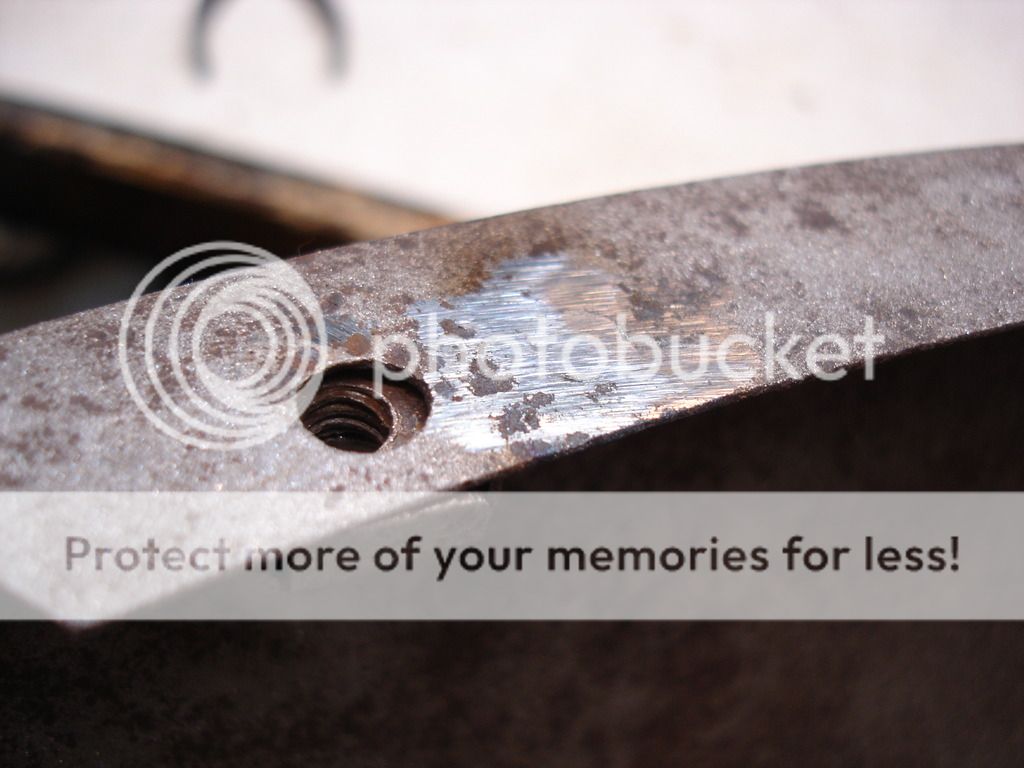
So, every time you tighten a bolt to clamp 18 gage steel, the steel deforms. Here is the edge of the top bow, where the aluminum bar screws down.
As body work goes, this is very simple. Just find a flat dolly and go to work, tapping both sides until you are happy with the result.

And the end result.
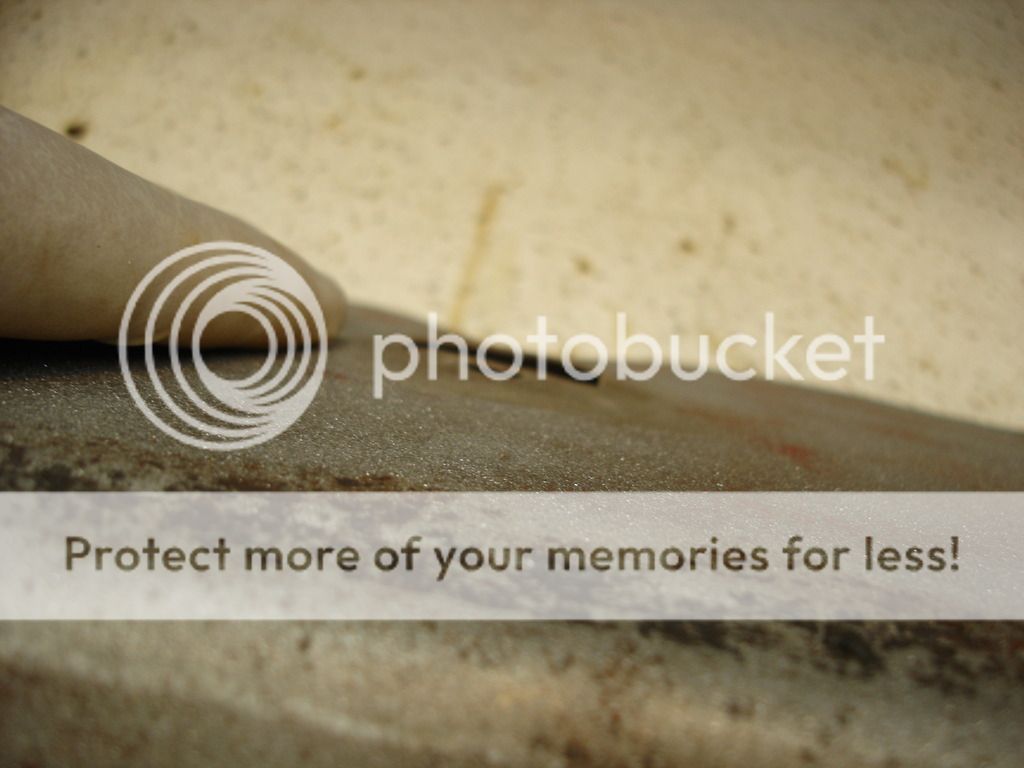
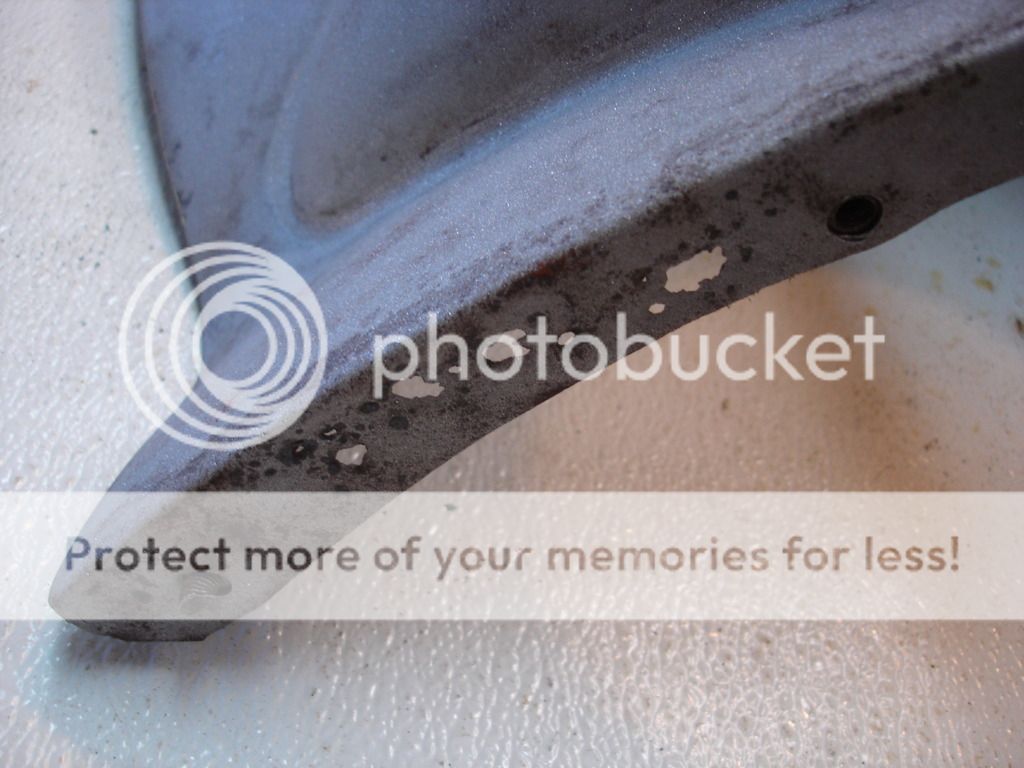
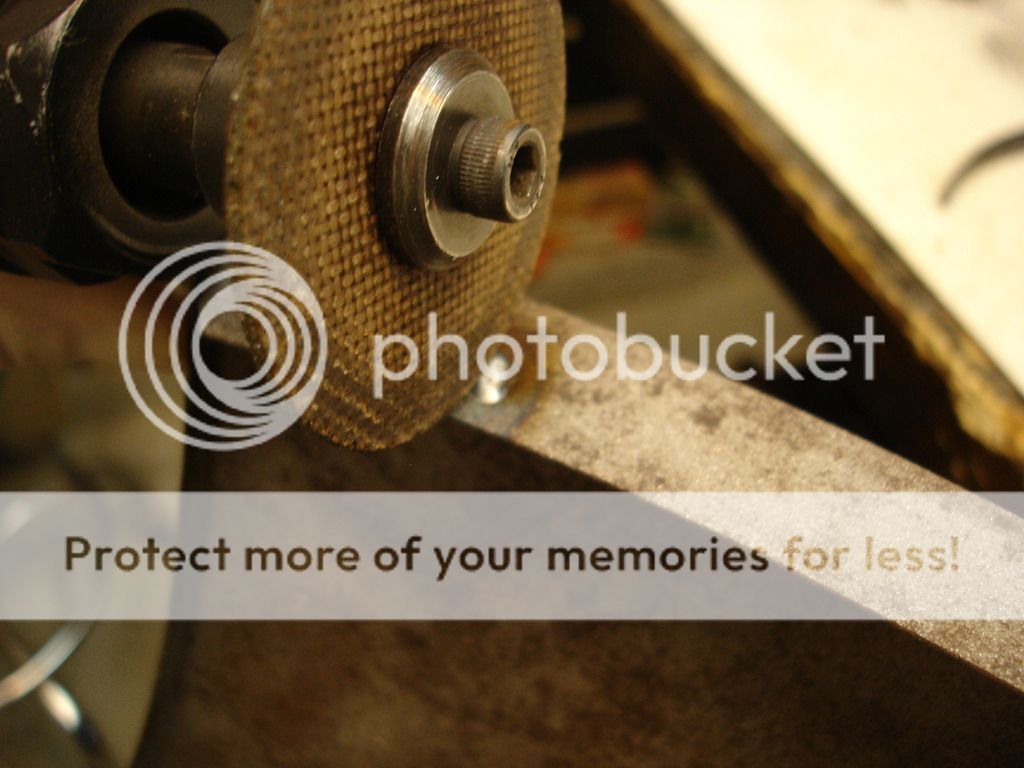
This is the edge outside of the rear bow rail. It has to straighten also.
The lesson here is to use whatever you have to do body work. My hammers would not fit in the position I needed to tap this rim outward. So, I grabbed a set of pliers and gently bent the rim farther outward than it needed to go. The reason I go farther is so I have room to put a dolly behind it and tap it flat.
Like so.
And the finished rim.
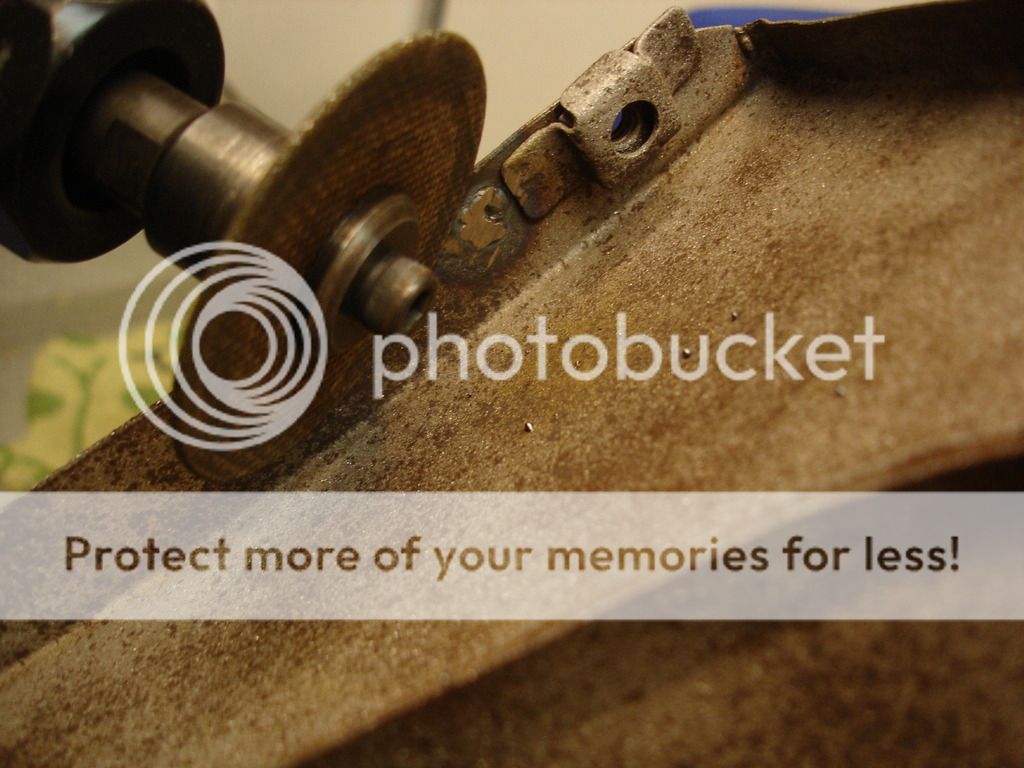
And finally there are the caged nuts to straighten out.
Start with the dolly on one side of the cage...

And finish with the dolly on the other side.
So, every time you tighten a bolt to clamp 18 gage steel, the steel deforms. Here is the edge of the top bow, where the aluminum bar screws down.

As body work goes, this is very simple. Just find a flat dolly and go to work, tapping both sides until you are happy with the result.


And the end result.

This is the edge outside of the rear bow rail. It has to straighten also.


The lesson here is to use whatever you have to do body work. My hammers would not fit in the position I needed to tap this rim outward. So, I grabbed a set of pliers and gently bent the rim farther outward than it needed to go. The reason I go farther is so I have room to put a dolly behind it and tap it flat.

Like so.

And the finished rim.

And finally there are the caged nuts to straighten out.

Start with the dolly on one side of the cage...

And finish with the dolly on the other side.
OP
CJD
Yoda
Offline
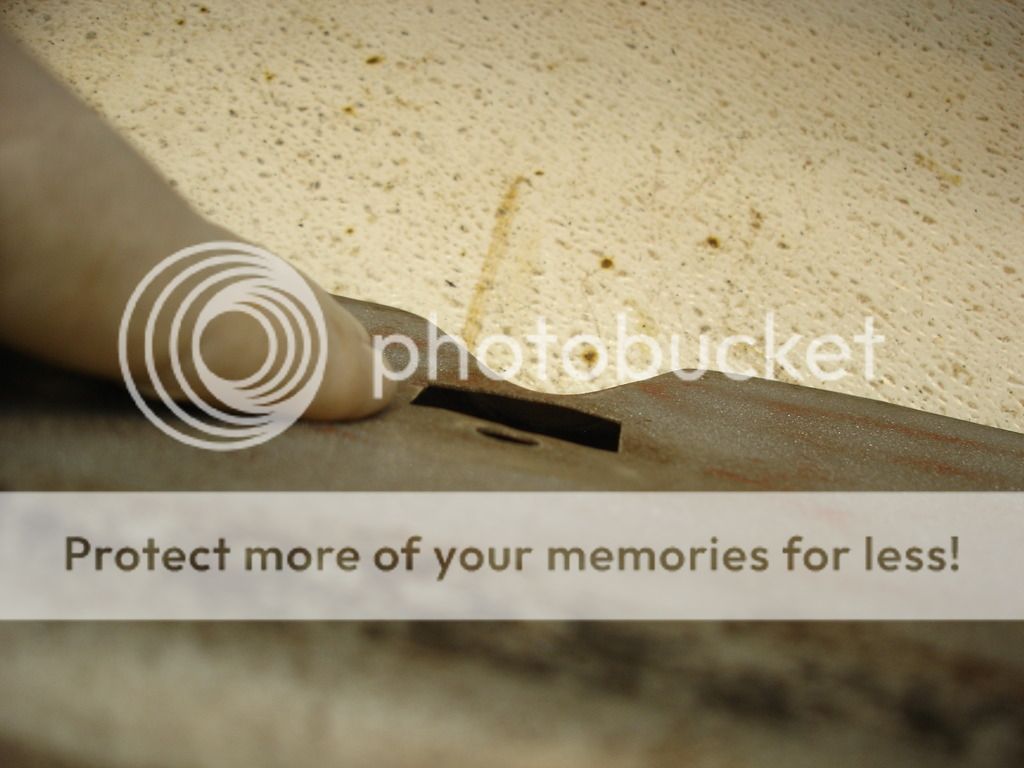
Snapped Bolts
The bolts have a bad tendency to snap off when your car has been sitting outside several decades. Fortunately, I only had one snap on the apron removal.
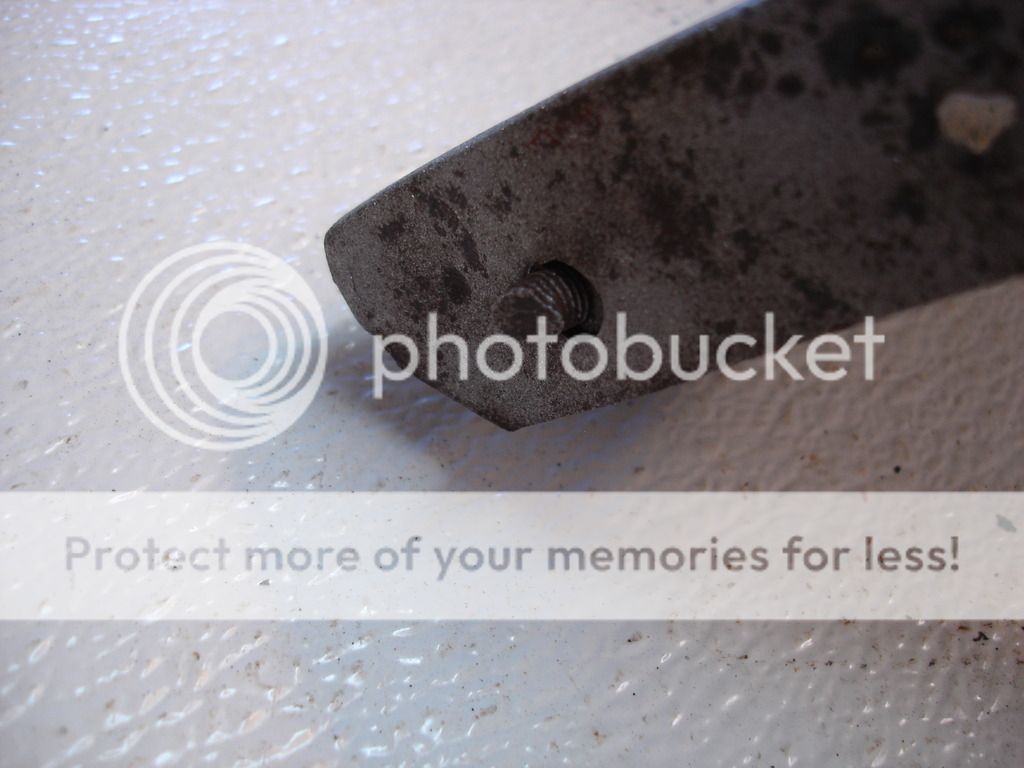
Over the years I have learned to tackle these by starting with the minimum effort, and working my way up to full replacement of the nut and cage. Here is the start of this process on my apron:
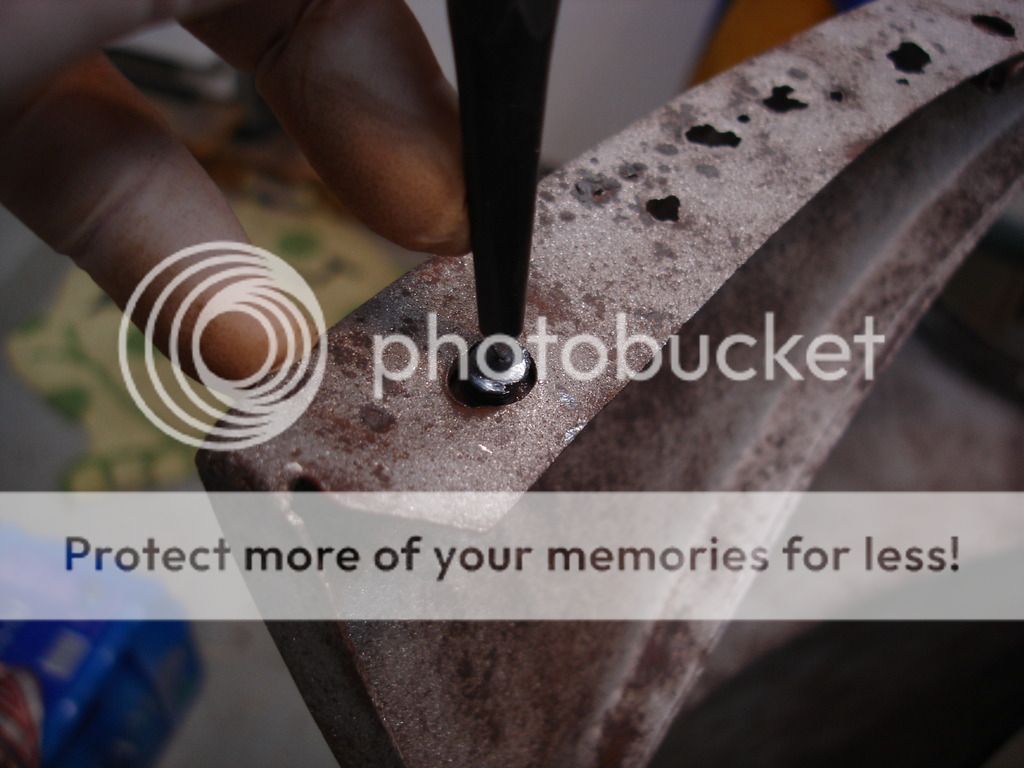
The very simplest way to deal with the broken bolt is to attempt to drill it out. To do this, start by grinding the broken end flat and flush with the fender. Then punch a starting point in the center to pilot the drill.
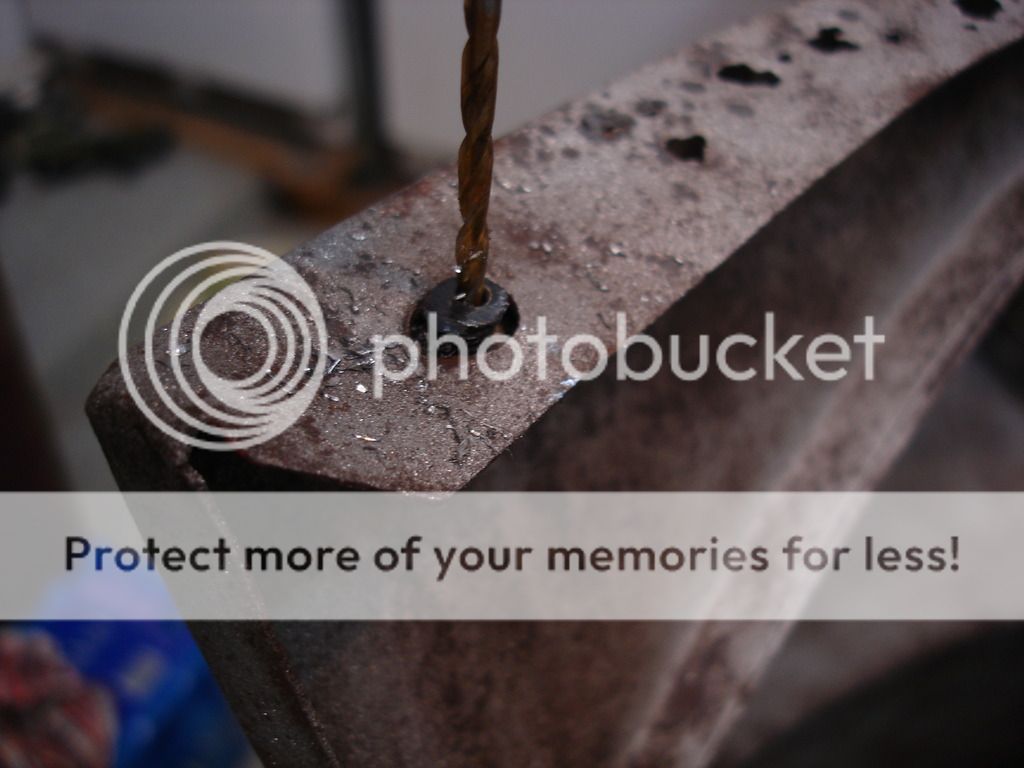
Start with a very tiny drill, to help keep the hole on center.
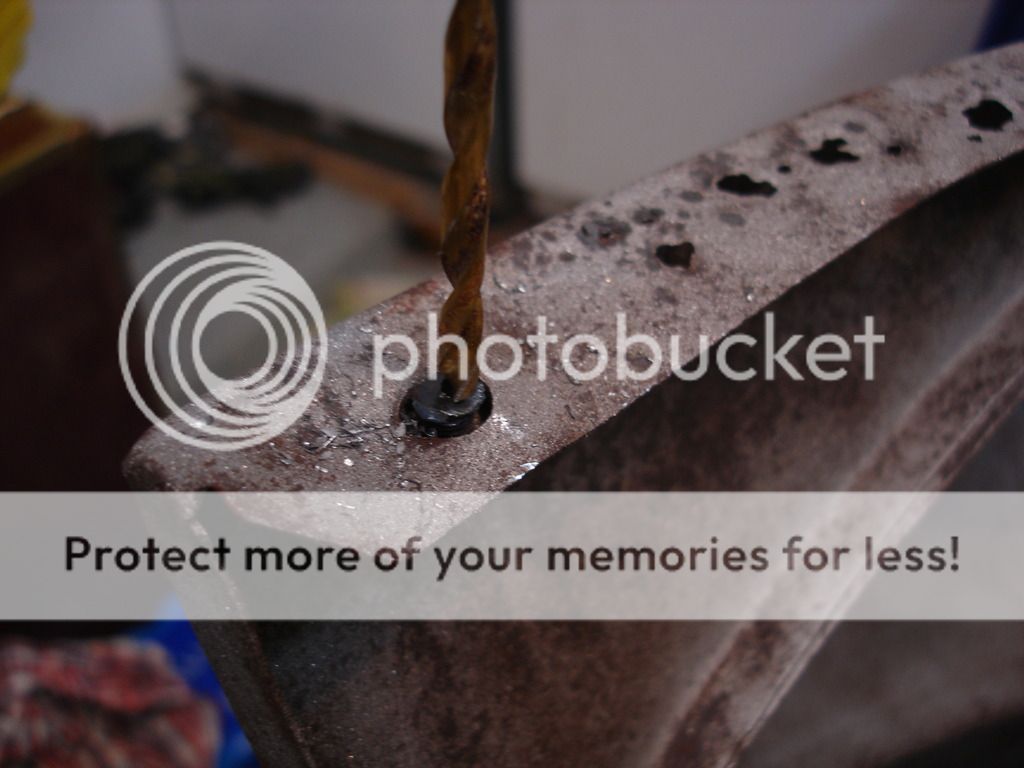
And step up to a larger drill. With luck, the hole will stay centered, and you can remove the remains with a 1/4-28 tap.

I was not lucky on this particular bolt. So...Step 2 is to open up the cage to remove the bad nut/bolt. The previous grinding aides with this step, so the previous step was not totally in vain!
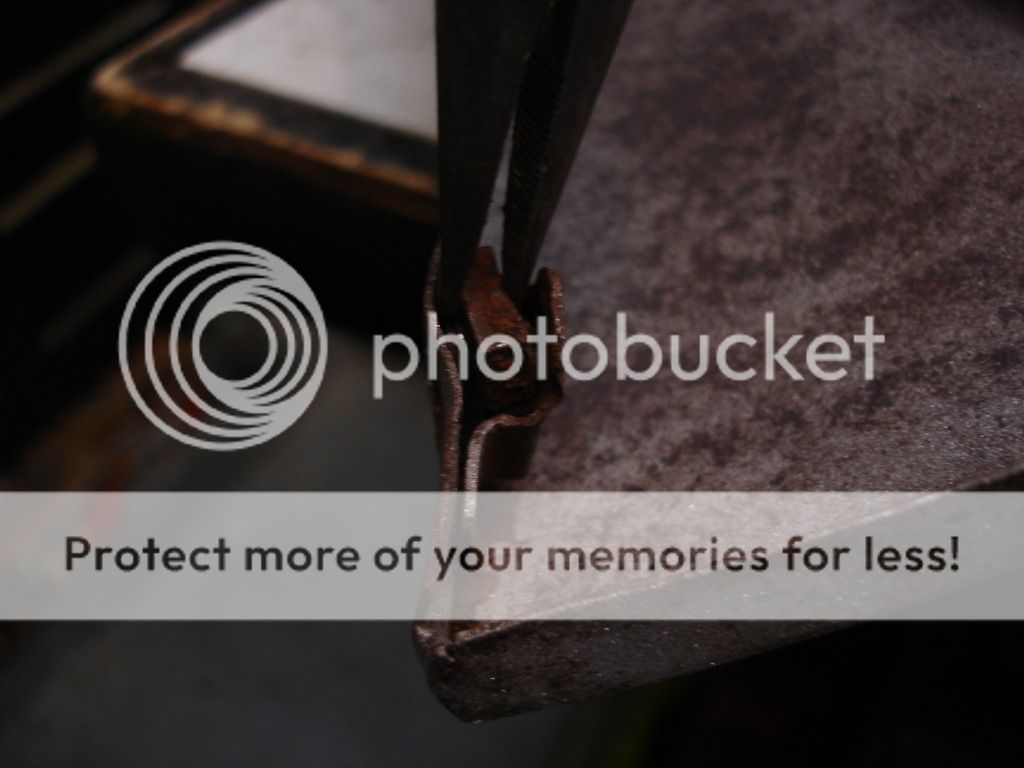
Pull out the old.
And stick in the new.
Finish by using your hammer to tap the cage closed. Notice that even for this operation I have a dolly to prevent warping the fender as I tap.
Now, that is as far as I had to go with this broken bolt. Step 3 would be to drill the cage out and replace both the cage and nut. I am certain I'll get to show step 3 as I go along with the body work!
The bolts have a bad tendency to snap off when your car has been sitting outside several decades. Fortunately, I only had one snap on the apron removal.


Over the years I have learned to tackle these by starting with the minimum effort, and working my way up to full replacement of the nut and cage. Here is the start of this process on my apron:

The very simplest way to deal with the broken bolt is to attempt to drill it out. To do this, start by grinding the broken end flat and flush with the fender. Then punch a starting point in the center to pilot the drill.

Start with a very tiny drill, to help keep the hole on center.

And step up to a larger drill. With luck, the hole will stay centered, and you can remove the remains with a 1/4-28 tap.

I was not lucky on this particular bolt. So...Step 2 is to open up the cage to remove the bad nut/bolt. The previous grinding aides with this step, so the previous step was not totally in vain!


Pull out the old.

And stick in the new.

Finish by using your hammer to tap the cage closed. Notice that even for this operation I have a dolly to prevent warping the fender as I tap.
Now, that is as far as I had to go with this broken bolt. Step 3 would be to drill the cage out and replace both the cage and nut. I am certain I'll get to show step 3 as I go along with the body work!

OP
CJD
Yoda
Offline
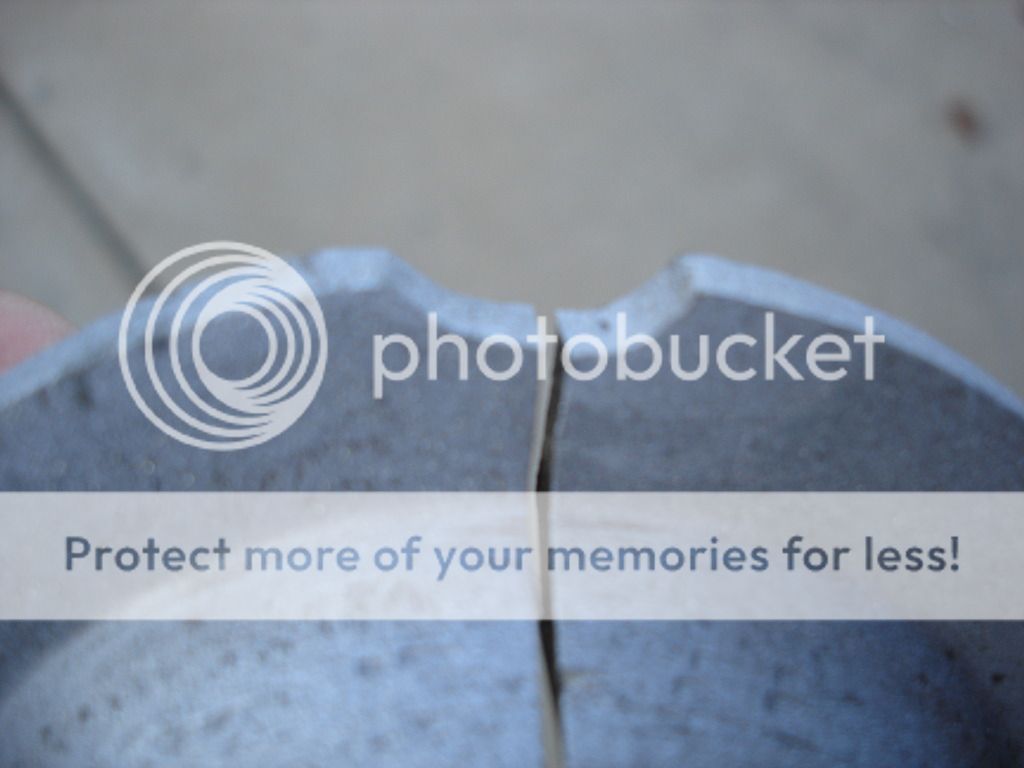
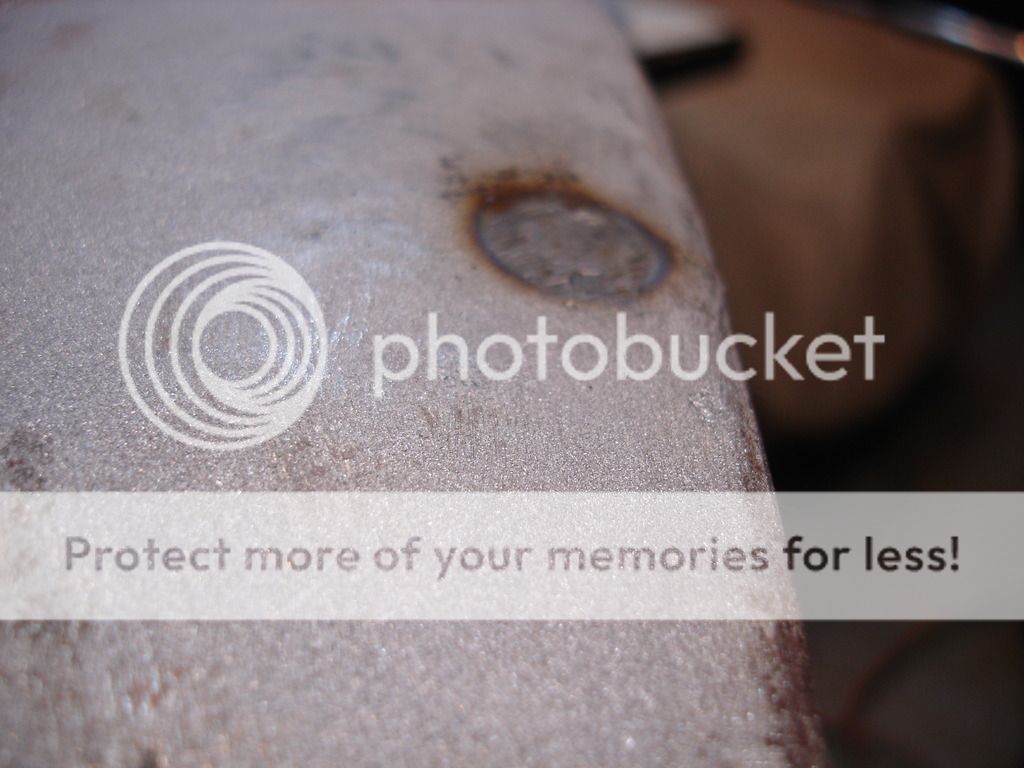
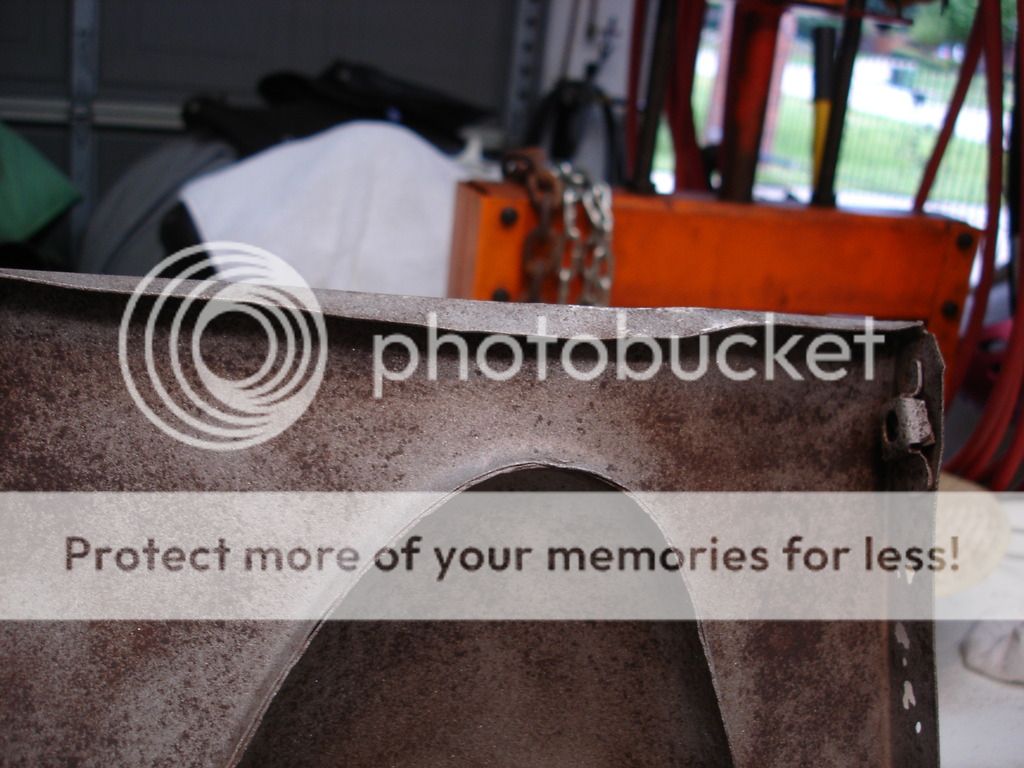
Rust Pin Holes
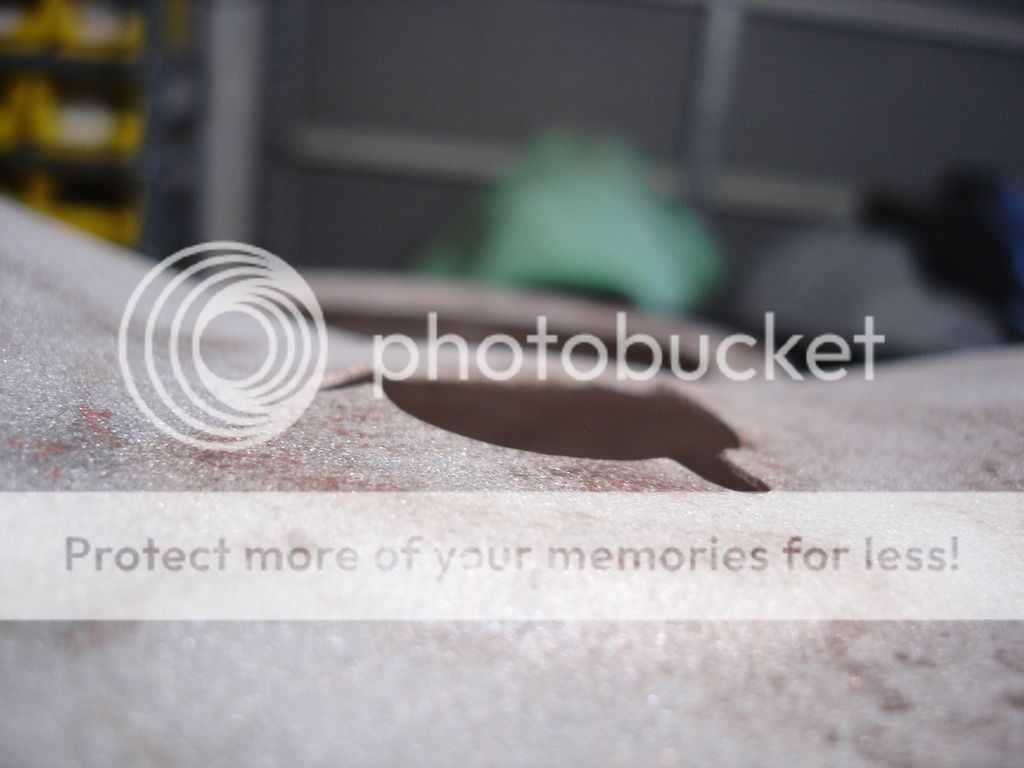
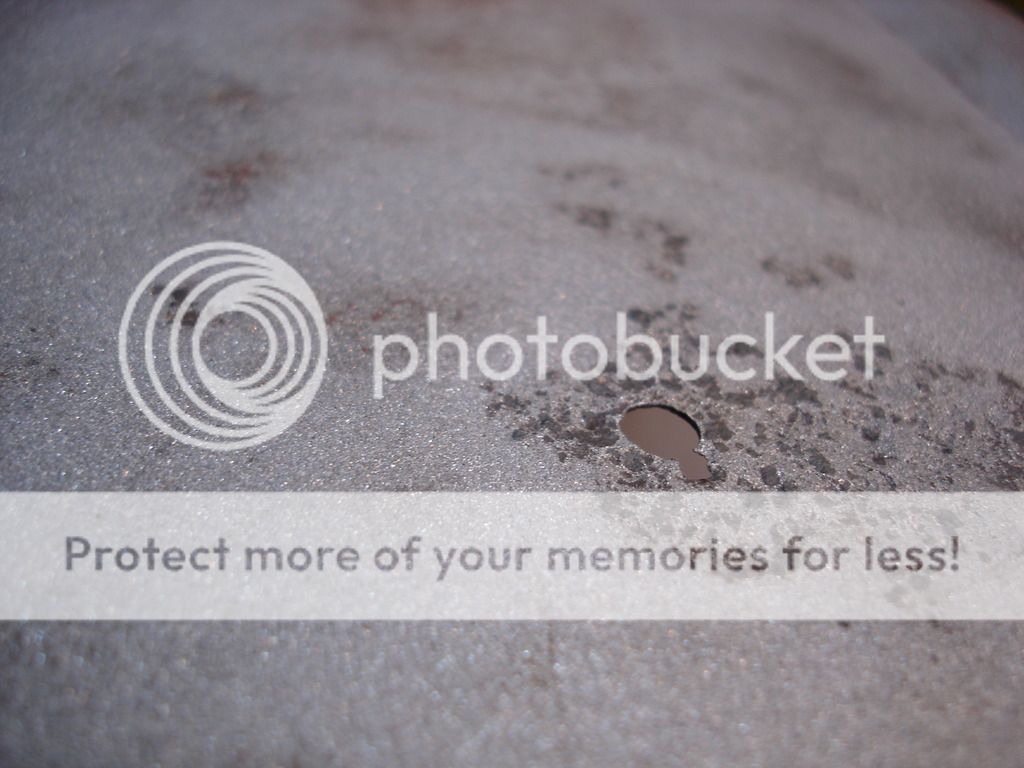
I classify rust holes into 2 categories. There are the simple pin holes, like this:

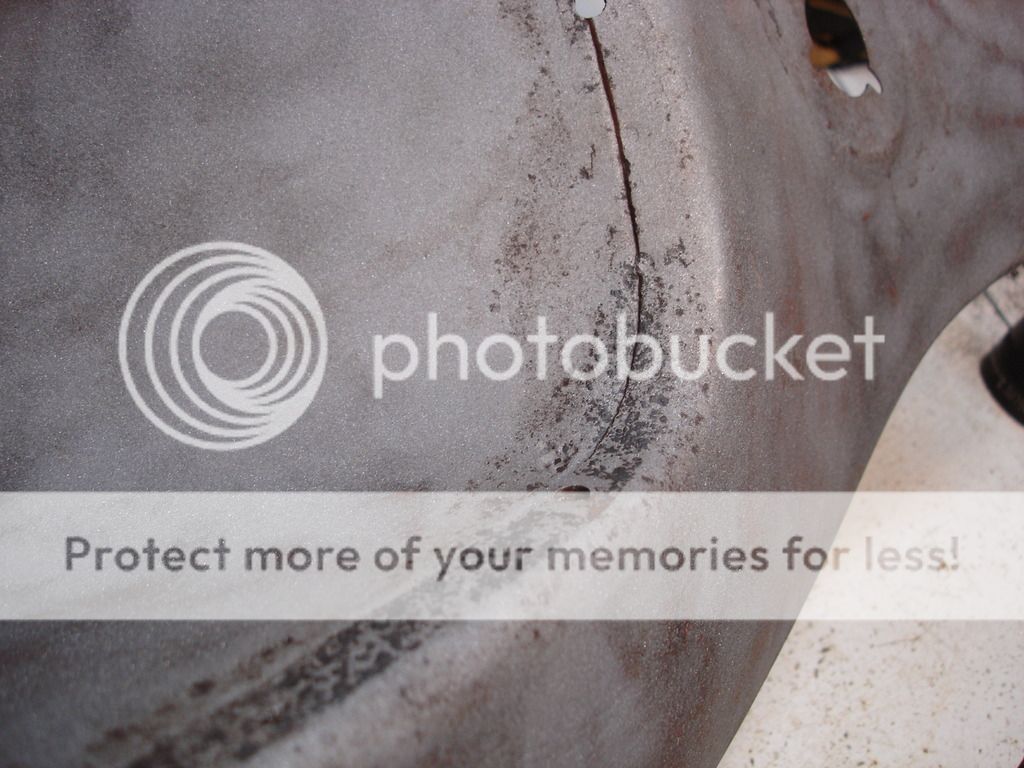
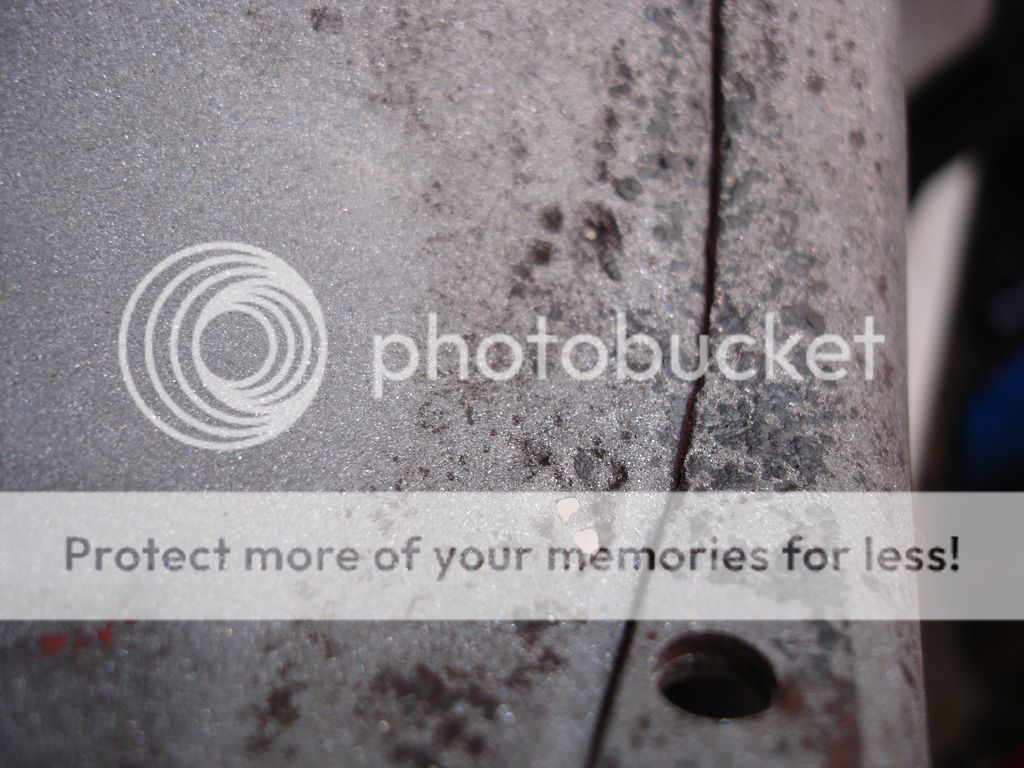
This one is so tiny it can only barely be seen in a picture. And then there are total rust outs, like this edge:
The total rust outs are not repairable, and the entire area must be cut out and replaced. I ran out of time to repair this bad section this week...but it's on next week's agenda. But, here is the pin-hole repair procedure.
First of all, to qualify as a pin-hole, look carefully at both sides of the metal. Frequently what looks like a pinhole on one side is really just paper thin on the back side. Paper thin has to be cut out. If it is, however, just a tiny hole...we can plug it.
Start with small tacks using your MIG on lowest setting and medium feed (1 and 40fps for mine). Fill the hole completely in. You may have some blow through in the thin area surrounding the hole, but keep working on it until you get all the blow outs filled. Use very short bursts with the MIG...like only a half second at a burst, allowing the metal to stop glowing before adding the next tack. So something like: Tack...thousand one, thousand two...tack...thousand one, thousand two...etc. If it gets too bad...change the class to a rust out and come back to it later!
Note how far I had to go for this tiny looking hole.
Grind level on the front...
And back
And that hole is gone. You will likely have to true up the metal with your hammer/dolly work.
Now, some other parts of my apron, and what they will entail...
The front turn light mounting pad. The tabs are pulled up from the light screws. Simple hammer and dolly will lay this back flat.
The area of the mouth that was under the trim ring is pretty rough. Most can be smoothed with glazing compound before priming, but...
These holes cannot. These are a bit larger than what I would classify as pinholes, BUT, their location makes cutting out the area very difficult. I will take the time to fill these with weld, and NOT cut the area out.
Under the badge has a thin spot. I will likely attempt to weld it up...but may end up cutting it out if that gets too ugly.
This area is easy to get to, unlike the mouth holes. I will probably cut this out and weld in a new strip.
If you look carefully at the are I am pointing to, and the way the light falls on it, you will see that the lower part of the mouth is bent to the rear. I actually pushed this back forward using a large rubber mallet. The mallet is good when you have to move a large area without making the dents that a normal hammer would make. I did still use a long straight dolly along the bend line to make sure the metal bent straight where I wanted it to bend. Without the dolly, the area could possibly end up with an "S" shaped bend in it. The reason is that any time you bend metal, you work harden it. If you try to bend it back straight, it doesn't want to bend at the hardened area...but would rather bend adjacent to the hardened area, where the metal is still dead soft. Think of a paper clip. Bend it once and you get a smooth bend. Try to straighten it with the same , only opposite motion, and it ends up with an "S" shape. The dolly "encourages" the metal to bend at the work hardened area that you want it too.
I did have to finalize it with normal hammer and dolly work.
A corner of the upper lip is both dented and torn. I hammered it straight, and then welded the tear. Finally finishing with grinding and hammer/dolly work.
And to end the week....here is a look at my work table. I clean everything up at the end of the day, so what you see is only what I used today. As you can tell, it takes quite a few hammer and dolly selections to reach all the odd corners you are confronted with. This is not including the torch, grinders and MIG.
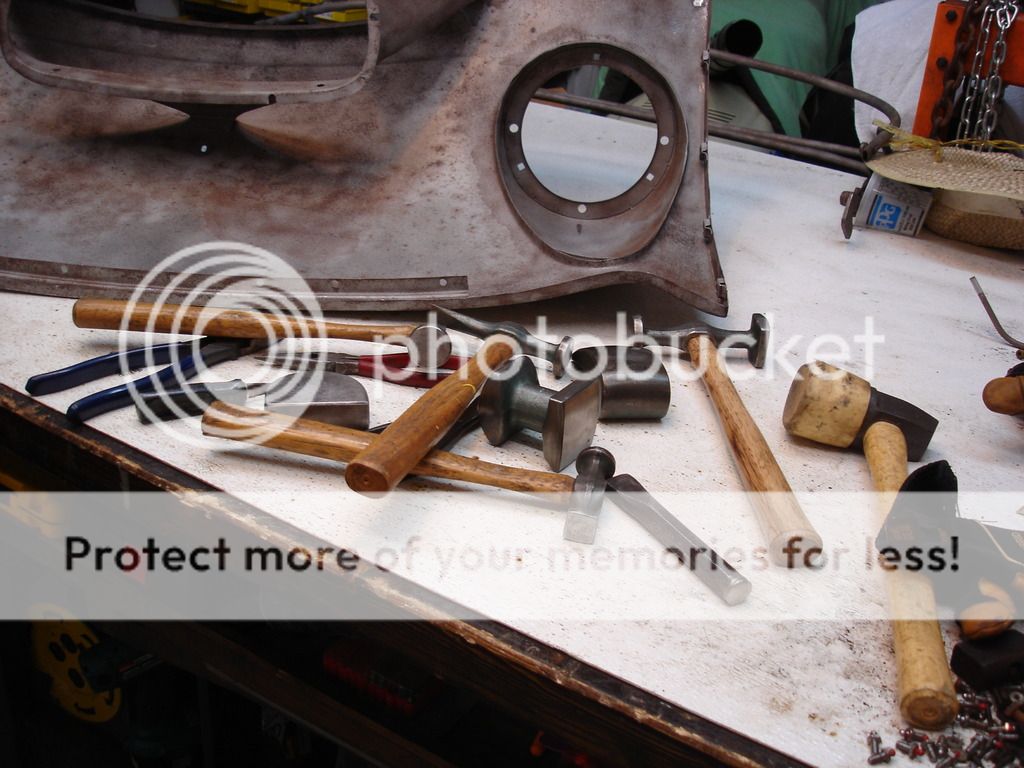
I did think of one more VERY nice piece of equipment. The auto-shading welding helmet is a miracle, and well worth spending on when you purchase your welding equipment. With the old helmets having just a dark window, you can never see what you are doing until AFTER you strike the arc. The old pros weld enough that this is not that bad...they line up the work and flick their head to lower the helmet just an instant before they strike the arc. Well, that's an old pro.
Imagine trying to tack a dozen welds and not being able to see what you are doing before you strike. Not easy. Luckily, the auto-shade helmets have come down from over $500 when I bought mine, to under $100 if you shop around. They are worth the $500!! You can see what you are doing with the helmet down, and as soon as the arc strikes, the helmet window darkens instantaneously to protect your eyes. A fraction of a second after the tack is done...the window lightens back up, ready for the lining up the next tack.
Plan to purchase an auto shade welding helmet, and you will never regret it!
Until next week!
I classify rust holes into 2 categories. There are the simple pin holes, like this:

This one is so tiny it can only barely be seen in a picture. And then there are total rust outs, like this edge:
The total rust outs are not repairable, and the entire area must be cut out and replaced. I ran out of time to repair this bad section this week...but it's on next week's agenda. But, here is the pin-hole repair procedure.
First of all, to qualify as a pin-hole, look carefully at both sides of the metal. Frequently what looks like a pinhole on one side is really just paper thin on the back side. Paper thin has to be cut out. If it is, however, just a tiny hole...we can plug it.

Start with small tacks using your MIG on lowest setting and medium feed (1 and 40fps for mine). Fill the hole completely in. You may have some blow through in the thin area surrounding the hole, but keep working on it until you get all the blow outs filled. Use very short bursts with the MIG...like only a half second at a burst, allowing the metal to stop glowing before adding the next tack. So something like: Tack...thousand one, thousand two...tack...thousand one, thousand two...etc. If it gets too bad...change the class to a rust out and come back to it later!

Note how far I had to go for this tiny looking hole.

Grind level on the front...

And back

And that hole is gone. You will likely have to true up the metal with your hammer/dolly work.
Now, some other parts of my apron, and what they will entail...

The front turn light mounting pad. The tabs are pulled up from the light screws. Simple hammer and dolly will lay this back flat.

The area of the mouth that was under the trim ring is pretty rough. Most can be smoothed with glazing compound before priming, but...

These holes cannot. These are a bit larger than what I would classify as pinholes, BUT, their location makes cutting out the area very difficult. I will take the time to fill these with weld, and NOT cut the area out.

Under the badge has a thin spot. I will likely attempt to weld it up...but may end up cutting it out if that gets too ugly.

This area is easy to get to, unlike the mouth holes. I will probably cut this out and weld in a new strip.

If you look carefully at the are I am pointing to, and the way the light falls on it, you will see that the lower part of the mouth is bent to the rear. I actually pushed this back forward using a large rubber mallet. The mallet is good when you have to move a large area without making the dents that a normal hammer would make. I did still use a long straight dolly along the bend line to make sure the metal bent straight where I wanted it to bend. Without the dolly, the area could possibly end up with an "S" shaped bend in it. The reason is that any time you bend metal, you work harden it. If you try to bend it back straight, it doesn't want to bend at the hardened area...but would rather bend adjacent to the hardened area, where the metal is still dead soft. Think of a paper clip. Bend it once and you get a smooth bend. Try to straighten it with the same , only opposite motion, and it ends up with an "S" shape. The dolly "encourages" the metal to bend at the work hardened area that you want it too.
I did have to finalize it with normal hammer and dolly work.

A corner of the upper lip is both dented and torn. I hammered it straight, and then welded the tear. Finally finishing with grinding and hammer/dolly work.
And to end the week....here is a look at my work table. I clean everything up at the end of the day, so what you see is only what I used today. As you can tell, it takes quite a few hammer and dolly selections to reach all the odd corners you are confronted with. This is not including the torch, grinders and MIG.

I did think of one more VERY nice piece of equipment. The auto-shading welding helmet is a miracle, and well worth spending on when you purchase your welding equipment. With the old helmets having just a dark window, you can never see what you are doing until AFTER you strike the arc. The old pros weld enough that this is not that bad...they line up the work and flick their head to lower the helmet just an instant before they strike the arc. Well, that's an old pro.
Imagine trying to tack a dozen welds and not being able to see what you are doing before you strike. Not easy. Luckily, the auto-shade helmets have come down from over $500 when I bought mine, to under $100 if you shop around. They are worth the $500!! You can see what you are doing with the helmet down, and as soon as the arc strikes, the helmet window darkens instantaneously to protect your eyes. A fraction of a second after the tack is done...the window lightens back up, ready for the lining up the next tack.
Plan to purchase an auto shade welding helmet, and you will never regret it!
Until next week!
Last edited:
M_Pied_Lourd
Darth Vader
Offline
John,
Very nice documentation.
For the oil canning, do you quench the heated area after with a wet rag?
Cheers
Tush
Very nice documentation.
For the oil canning, do you quench the heated area after with a wet rag?
Cheers
Tush
OP
CJD
Yoda
Offline
Hey Tush...
I have used the quench technique, and it does work very well to stop oil canning. The thing to remember is that rapid quenching from red hot hardens the metal, which will make it harder to shape afterwards. The slower cooling keeps the metal more ductile...so less strength but easier to work. So, you can use the quenching to obtain the properties you want.
For example, the parts I've done so far I preferred to be able to work the metal after I shrunk it, so I wanted a slow cool. But, if I have a panel with a large area with a gentle curve...like say the middle of the bonnet or trunk lid...that after being shaped perfectly still has a tendency to oil can, I would quench that area from red hot with a wet rag. In that case you need more strength, by hardening the metal, to make it harder to press-in and oil can.
I guess a good example is when your buddies in high school sat on your hood and popped it in. If you noticed, you could pop it back out, so the shape was perfect, but after that it was very easy to pop in. It wasn't a matter of being stretched...it was more a matter of they gave the panel a new memory, so it wanted to return to the popped shape. That is a great candidate for wet quenching. The quenching will harden the metal and essentially "reset" the memory.
M_Pied_Lourd
Darth Vader
Offline
Excellent John. Thanks for the info.
Cheers
Tush
Cheers
Tush
Totally cool John. I did a couple of pin holes before I saw your post and I did them with that method; there must a collective consciousness with the forum. Anyways keep up all the other good work so can I learn from it; we are all standing on someone’s shoulders to get that better view.