• Hey Guest!
    British Car Forum has been supporting enthusiasts for over 25 years by providing a great place to share our love for British cars. You can support our efforts by upgrading your membership for less than the dues of most car clubs. There are some perks with a member upgrade!

    **Upgrade Now**
    (PS: Upgraded members don't see this banner, nor will you see the Google ads that appear on the site.)
Tips
Tips

Aluminum Help Please

DNK

Great Pumpkin
Country flag
Offline
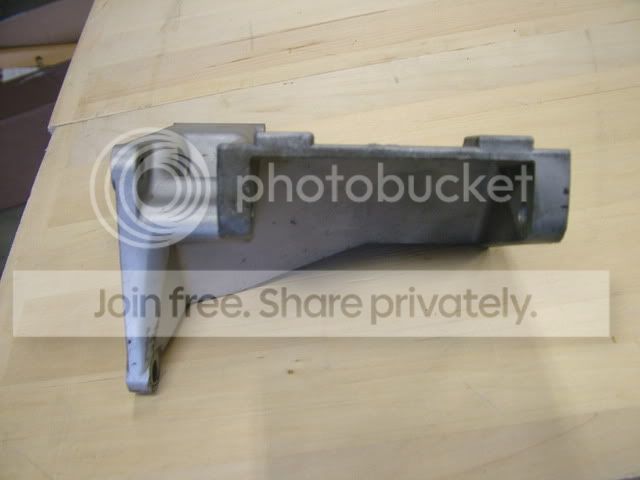
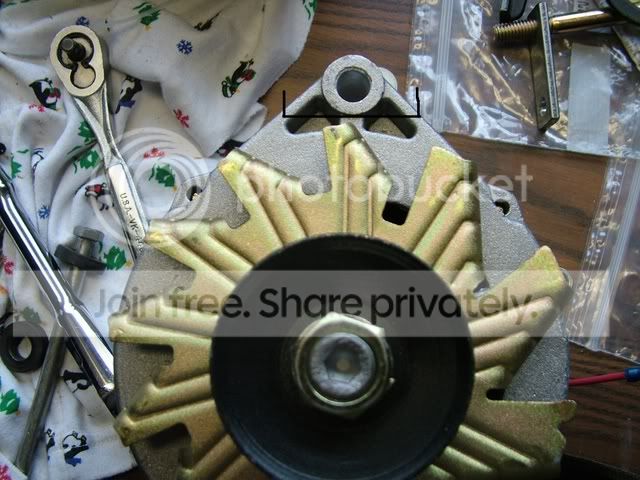
I purchased Ted's modified alternator kit and I am not quite happy with how it mounts. I think I can use a combination of things and make it work better for me.
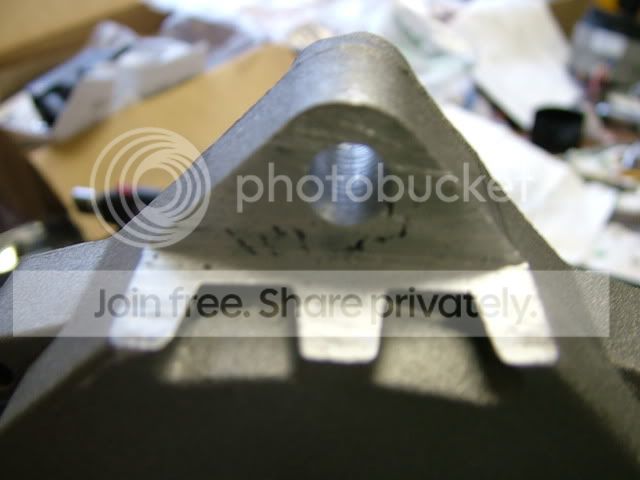
My decision was to take away some of the metal on the front of the mount.
My question is .What is the best way to cut away the aluminum?

TSIAlT2.jpg


TSIALTFront.jpg
 
Best way to cut it will be with a grinder and a very thin cutting wheel. There must be a better way than cutting back that mounting point. There will be alot of stress on that point. If it's not right, call Ted. He likes to go on and on about how good his stuff is.
 
Ted supplies 2 mounting brackets
1. 3/4 by 4.5 by 5/32
2. 3/4 by 2.25 by 5/32
I will use 1 of those to anchor the back of the alt. to the alt bracket
 
Here is a tip for Grinding/Sanding Aluminum:
A bit of bees wax on the grinding/sanding disk will keep the Aluminum from cloging the Grinding/Sanding disk.

{if you are going to weld after grinding/sanding, bees wax is a must}

{Heat repels it away from the weldment thus avoiding contamination}

Although I recomend thouroughly cleaning the area to be welded anyway.

I have used lubricants such as WD 40, parafane wax, hand cleaner, bar soap, ECT., ECT. for this same purpose and it does work. Some are somewhat messy though.
 
Good tip. Use it on my Aluminum miter saw blade.Never even thought of it for the disk.
 
a hack saw will work fine, fine tooth blade and then you can file it smooth, files tend to load up when filing aluminum, then use a small round file and file the junction of the L to a small radius so you dont have a stress riser or you could develope a crack there
 
bandsaw.
 
Was thinking about using my Dremel tool for smoothing and shaping
 
I did the rough grinding on mine with a bench grinder, and finished off by hand with a rasp. I did it in stages to be sure I didn't take too much off.

This may be obvious, but do be sure to take the alternator apart before grinding so that the shavings can all be safely removed.
 
Thanks for the intro to that advise. Is the nut that is on an alt. regular threads or are they left handed?
 
There are aluminum grinding wheels on the market. They have a cotton base that keeps them from clogging up. There are also aluminum burs. Should you try a metal carbide bur and clog it up, according to Kas, grinding on some scrap cast iron will clean it up.
 
DNK said:
Is the nut that is on an alt. regular threads or are they left handed?
Mine have all been right-handed, even the Lucas ones. Can't think of any reason they should be left-handed, since the alternator turns CCW.
 
TR3driver said:
DNK said:
Is the nut that is on an alt. regular threads or are they left handed?
Mine have all been right-handed, even the Lucas ones. Can't think of any reason they should be left-handed, since the alternator turns CCW.

Popping it with an air impact wrench makes removal a snap (no pun).
 
Don
I would not modify the alternator. Figure out a way to make a change to the bracket. Other wise every time you change and alternator, (hopefully not that often) you would have to modify it.
This is the top mount correct, with the slide adjustment?
You are able to the one of the lower mounts and get straight belt alignment?

If so the top on should be able to have a distance piece or cut and welded to allow it to bolt to the engine via the water pump mounting bolt( on stock) and allow the Alternator to bolt to it.
mine has a Delco and it aligns ok and the top mount has a minor s bend in it.
Call if you want.
 
A hacksaw would make quick work of the job.

But I don't think you'll be very happy with the results. What you're proposing to cut is the part that keeps the pulley square with the belt. You're going to cut it almost in half, and the alternator is going to twist under belt tension. At best, it'll be noisy. At worse, it'll fling the belt off easily and frequently.
 
I'd revisit the mounting bracket before I ever cut an alternator case up.

That's why I went to the 1980 Fiesta alternator as a bolt on replacement. 55 amp and no issues, including mounting and wiring harness direct plug in.
 
This is for my TR8. It has a completely different bracket than the 6. On the stock alt. it is mounted to the front of the bracket. On the Delco that can't happen so I will cut away the bracket to equal the Lucas one.
Anyone know the answer to the thread on the front nut?

DSCF2515.jpg


Foxtrapper Please look back to my second post about the brackets. Should be steadier than Ted's way. The 2 brackets was how it was suppose to be remotely mounted.
I'll try to do a photo story along the way.
 
Well I cut the excess aluminum off
DSCF2520.jpg


My problem now,when I split the case the guts came out of the bottom and now when I tighten the 2 halves the armiture doesn't spin freely. Any ideas??
 
Be sure the brushes are back in their holders. You can put them in place, then put toothpicks thru the holes in the case to hold them in until the armiture is back in.
 
Back
Top