
-
 Hey Guest!
British Car Forum has been supporting enthusiasts for over 25 years by providing a great place to share our love for British cars. You can support our efforts by upgrading your membership for less than the dues of most car clubs. There are some perks with a member upgrade!**Upgrade Now**
(PS: Upgraded members don't see this banner, nor will you see the Google ads that appear on the site.)

Tips
- We have a special forum called "Member Articles" where you can submit actual articles for consideration for publication. Learn More
- Don't have an Avatar? If not, your avatar will default to the 1st character in your username. Go into "Account Details" to change your Avatar.
- Some basic forum navigation info: click
 Hey - did you know if you click on the title of a thread it will take you to the first unread post since you last visited that thread?
- Hey Guest - Is your British Car Club in our Clubs database? If not, send me a PM - Basil

- Looking for a local club? Click the "Clubs" tab above and browse hundreds of clubs world-wide.
- Add Android or iPhone APP: click
- Did you know - any picture or video you add in your posts in any marque-specific forum will also get added to the Media Gallery automatically.
- A few more tips about posting and replying: click
- Hey there Guest - be sure to keep your profile page up to date with interesting info about yourself: learn more
- More tips and tricks on Posting and Replying: click
 but were afraid to ask:
  STOP!! Never post your email address in open forums. Bots can "harvest" your email! If you must share your email use a Private Message or use the
  smilie in place of the real @
- Want to mention another member in a post & get their attention? WATCH THIS

- So, you created a "Group" here at BCF and would like to invite other members to join? Watch this!
- Hey Guest - A post a day keeps Basil from visiting you in the small hours and putting a bat up your nightdress!
- Hey Guest - do you know of an upcoming British car event?
 Pretty Please - add it to our Events forum(s) and add to the calendar! >> Here's How <<
- Hey Guest - you be stylin' Change the look and feel of the forum to fit your taste. Check it out
- If you run across an inappropriate post, for example a post that breaks our rules or looks like it might be spam, you can report the post to the moderators: Learn More
- If you would like to try some different "looks" or styles for the site, scroll to the very bottom, on the left and click the Style Selector.
You are using an out of date browser. It may not display this or other websites correctly.
You should upgrade or use an alternative browser.
You should upgrade or use an alternative browser.
A-type overdrive / gearbox trouble shooting
- Thread starter tdskip
- Start date
TR3driver
Great Pumpkin - R.I.P
Offline
Looks like a lug nut from another car, to me. Er, you do realize that's why there are two sets of holes in the puller arms, right? (I have the same one)
Using a hammer to get it apart is OK, since you are no doubt going to replace those bearings anyway. I'd suggest putting something over the end of the shaft to protect it, though. Some folks even put them together with hammers, but I'd suggest rigging a press of some sort or finding one to use. Many years ago I had a 'press' that was nothing more than some scrap iron welded into a frame, and a hydraulic jack.
Many times, the local auto parts/machine shop will let you use their press for little or nothing; if you also buy parts there.
T
TRDejaVu
Guest
Guest
Offline
How are the 2 pistons? I had a devil of a time getting them out on the one I bought.
TR3driver said:Looks like a lug nut from another car, to me. Er, you do realize that's why there are two sets of holes in the puller arms, right? (I have the same one)
Nope - never occurred to me Randall. Seems kind of obvious now....LOL. And bingo on the lug nut (1971 TR6 to be specific)
OK - hammer it is with a nut on the end to protect the shaft.
Ian - I haven't tried to fuss with those yet. I'm expecting they'll be, um, interesting to get out.
OK - got the annulus out.

There are a lot of bigger clumps in the casing where the annulus goes, so I'm thinking that something broke up and likely jammed the rear bearing?
The rear bearing is locked-up tight and won't turn at all.
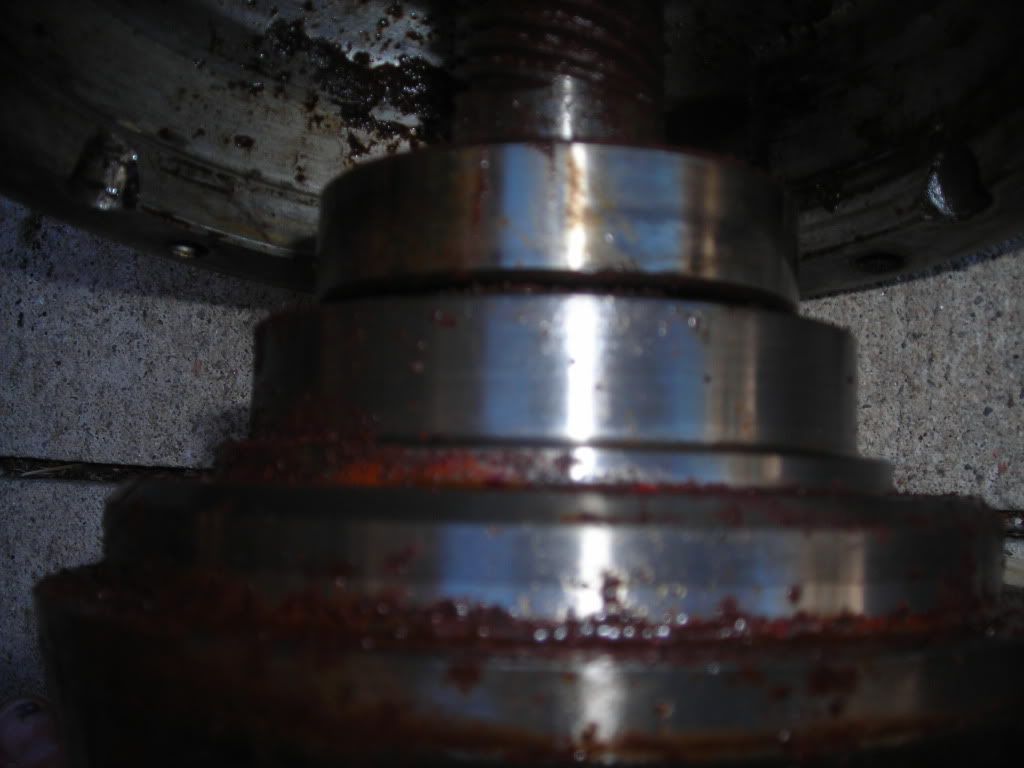
Do you guys think the rear annulus will clean up OK and be reusable?
Thanks again for all of the help!
There are a lot of bigger clumps in the casing where the annulus goes, so I'm thinking that something broke up and likely jammed the rear bearing?
The rear bearing is locked-up tight and won't turn at all.
Do you guys think the rear annulus will clean up OK and be reusable?
Thanks again for all of the help!
TR3driver
Great Pumpkin - R.I.P
Offline
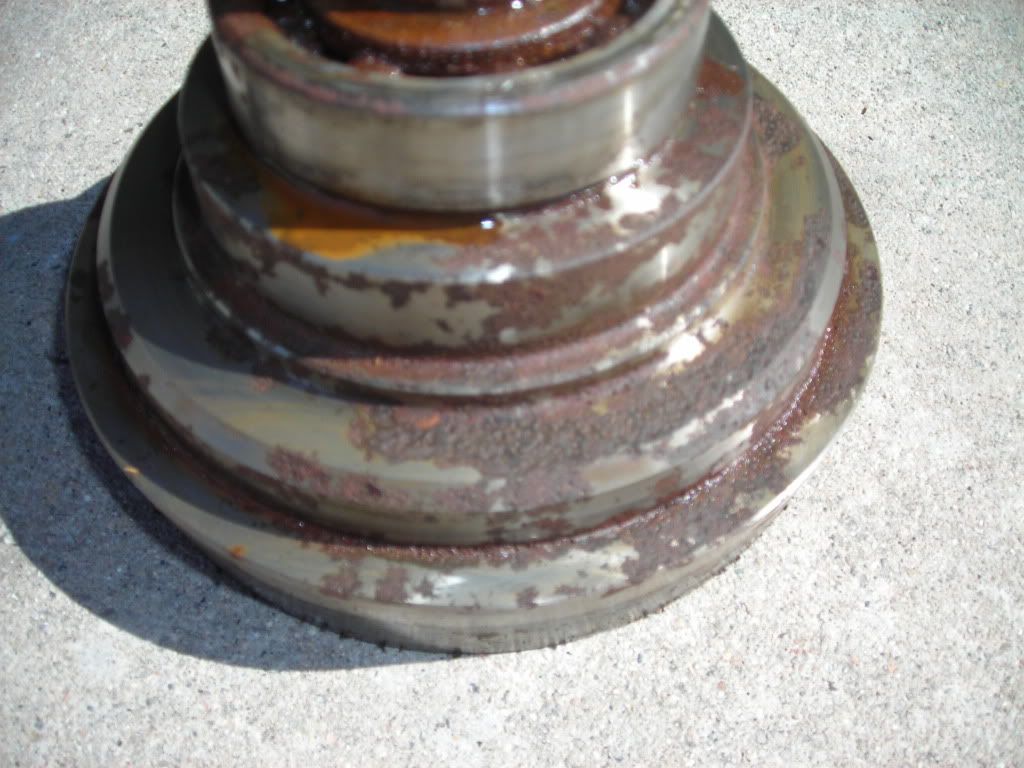
From what I can see, I'd say it's usable. The gear teeth & sprag clutch race look good, while rust pits on the clutch surface and speedo drive teeth won't hurt anything. You might want to use a chemical approach to cleaning the rust though (like electrolysis or Naval Jelly) instead of wire brush or sandpaper.
It's interesting that you have orange spots on the aluminum housing ... this thing must have been full of water at some point! Maybe someone removed it and left it standing on it's nose ... come to think of it, there is a (non-OD) Stag gearbox standing that way in my backyard that is probably full of water now.
I'd better go rescue it.
TR4nut
Yoda
Offline
TR3driver said:You might want to use a chemical approach to cleaning the rust though (like electrolysis or Naval Jelly) instead of wire brush or sandpaper.
And for an even gentler approach, I've been very impressed with Evaporust. Amazing stuff.
TR3driver
Great Pumpkin - R.I.P
Offline
The backside of the annulus does basically nothing (no idea why they machined it so nicely) so it still looks like a 'go' to me. Obviously you'll be replacing all the ball bearings, and checking clearances and so on, but it looks eminently rebuildable to me (assuming the operating piston & accumulator bores are serviceable).
If the accumulator bore is bad, you may be able to convert to the later accumulator piston (which runs in a replaceable sleeve instead of directly in the housing body).
If the accumulator bore is bad, you may be able to convert to the later accumulator piston (which runs in a replaceable sleeve instead of directly in the housing body).
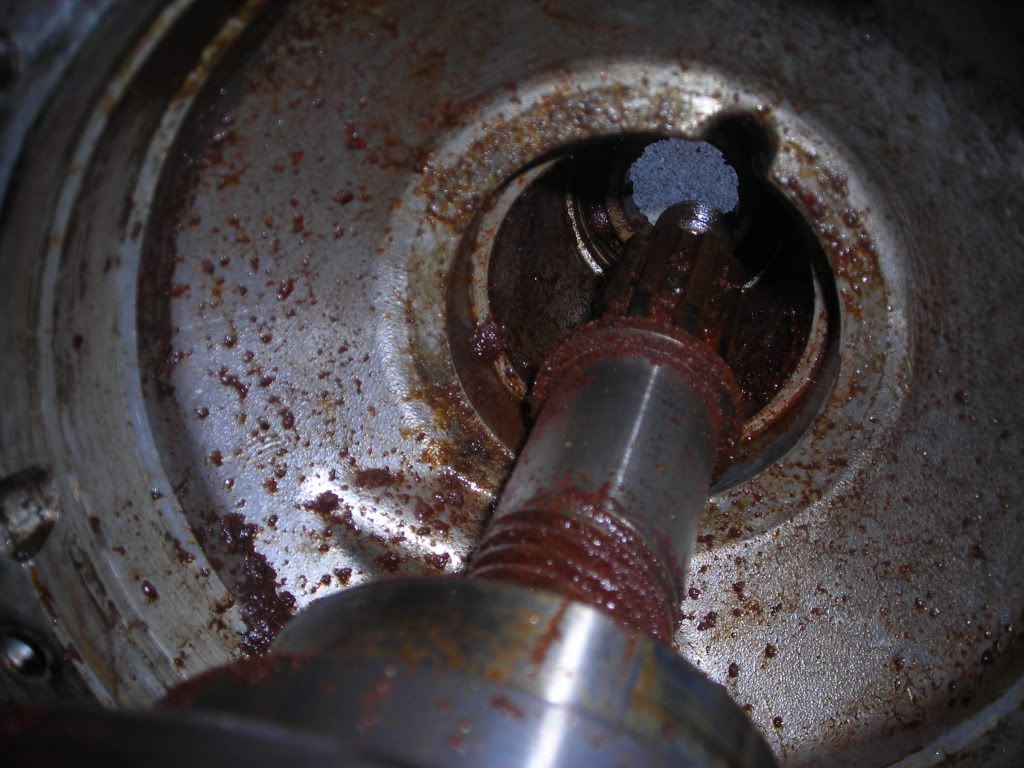
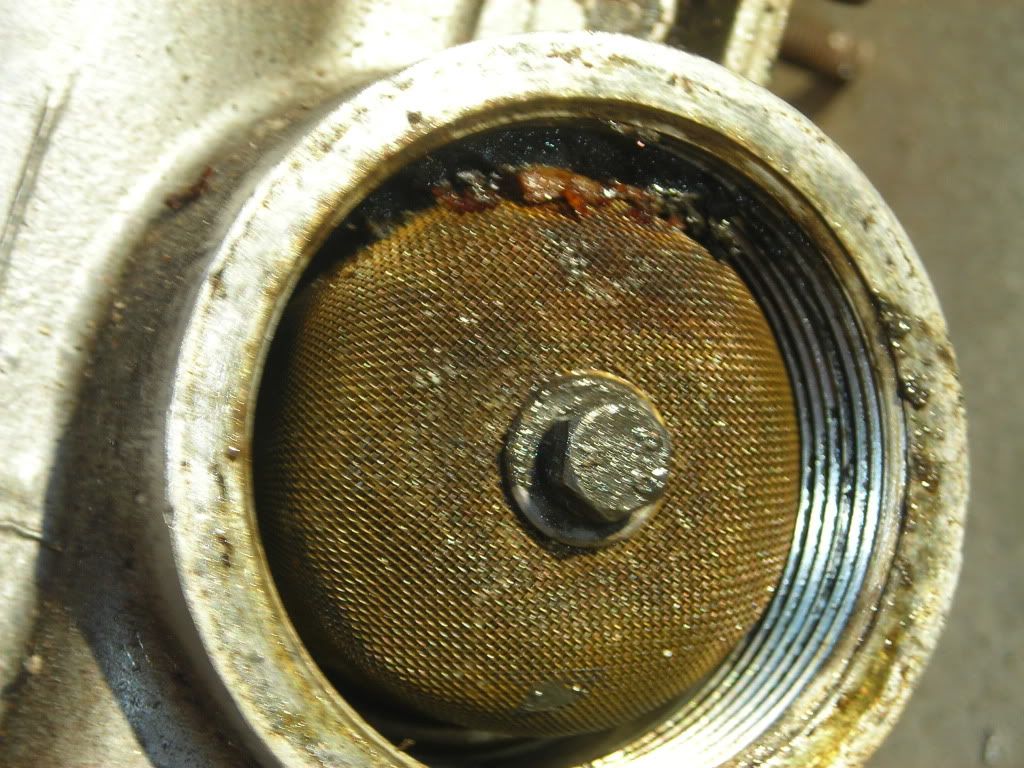
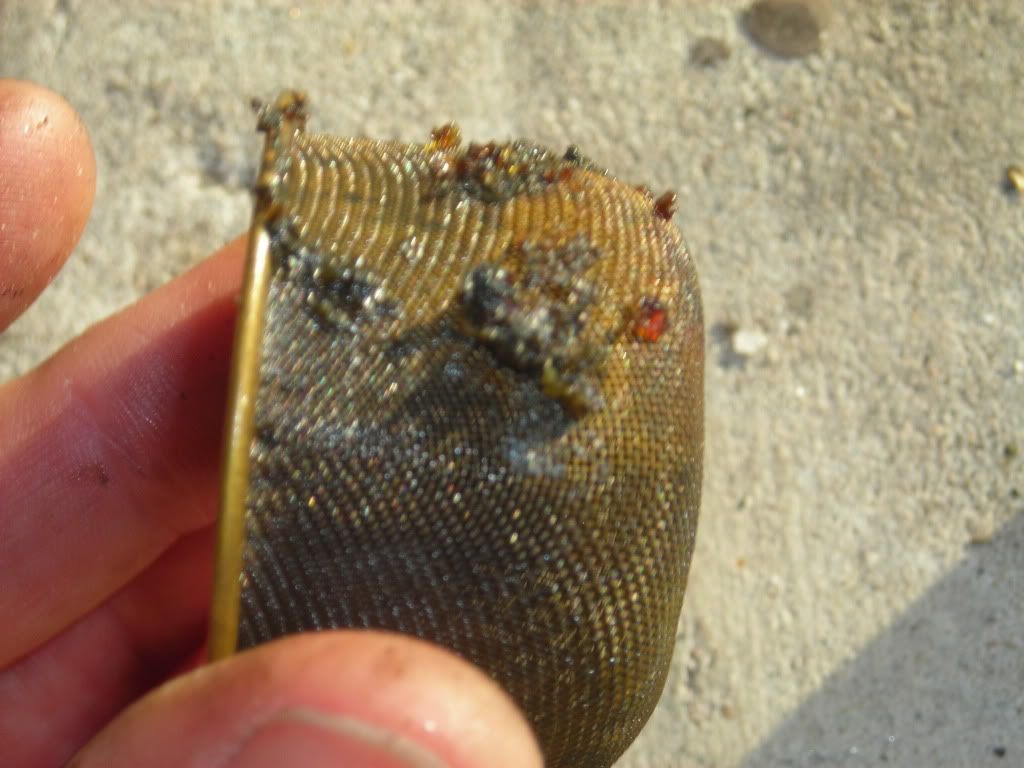
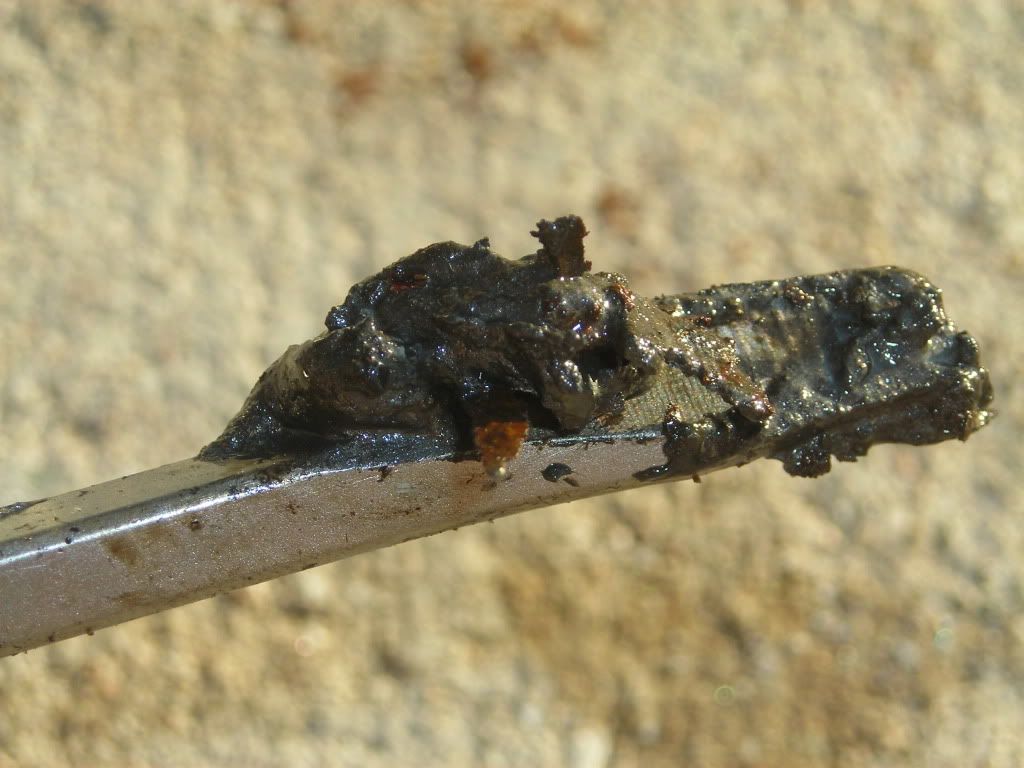
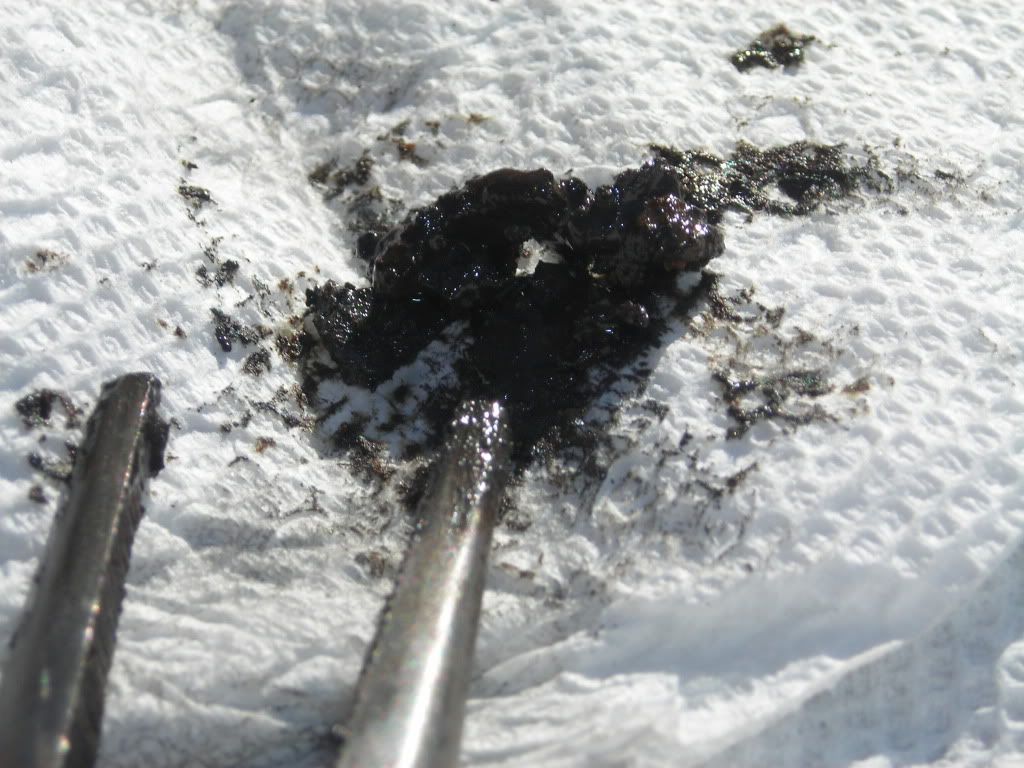
OK - got the filter off and there was some nastiness inside there;
My unit doesn't look quite the same as the TRF assembly diagrams, so I'm not sure if I'm missing a magnet here or not (I think so).
Out with the springs. There were two, but no inner casing or tubes that the fit inside;
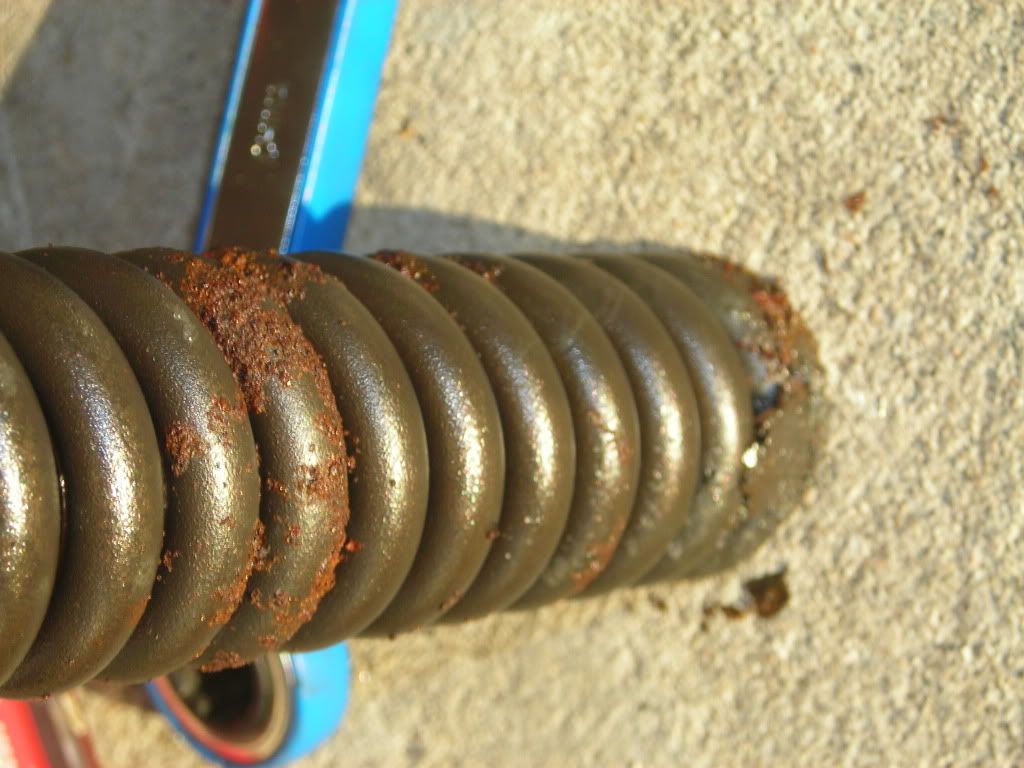
Once the springs were taken out nothing was left inside;
Unless that is the housing assmebly and rings left on the inside.
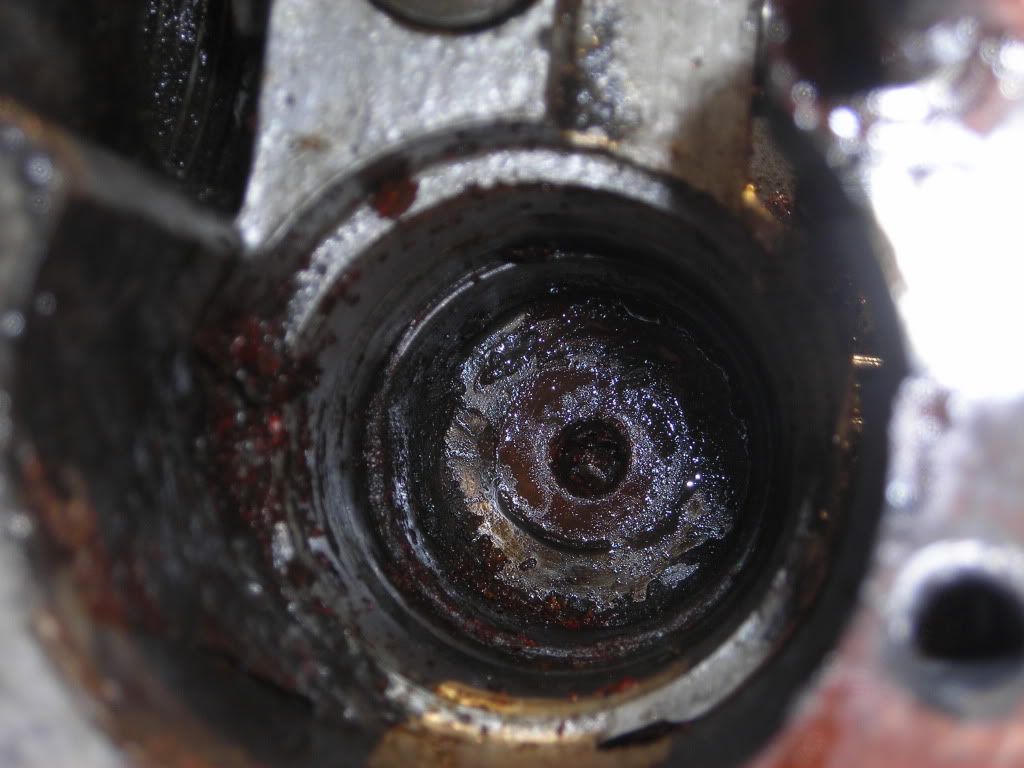
Except for this!
Is that actually the housing assmebly and rings left on the inside still down there?
My unit doesn't look quite the same as the TRF assembly diagrams, so I'm not sure if I'm missing a magnet here or not (I think so).
Out with the springs. There were two, but no inner casing or tubes that the fit inside;
Once the springs were taken out nothing was left inside;
Unless that is the housing assmebly and rings left on the inside.
Except for this!
Is that actually the housing assmebly and rings left on the inside still down there?
Moseso
Jedi Knight
Offline
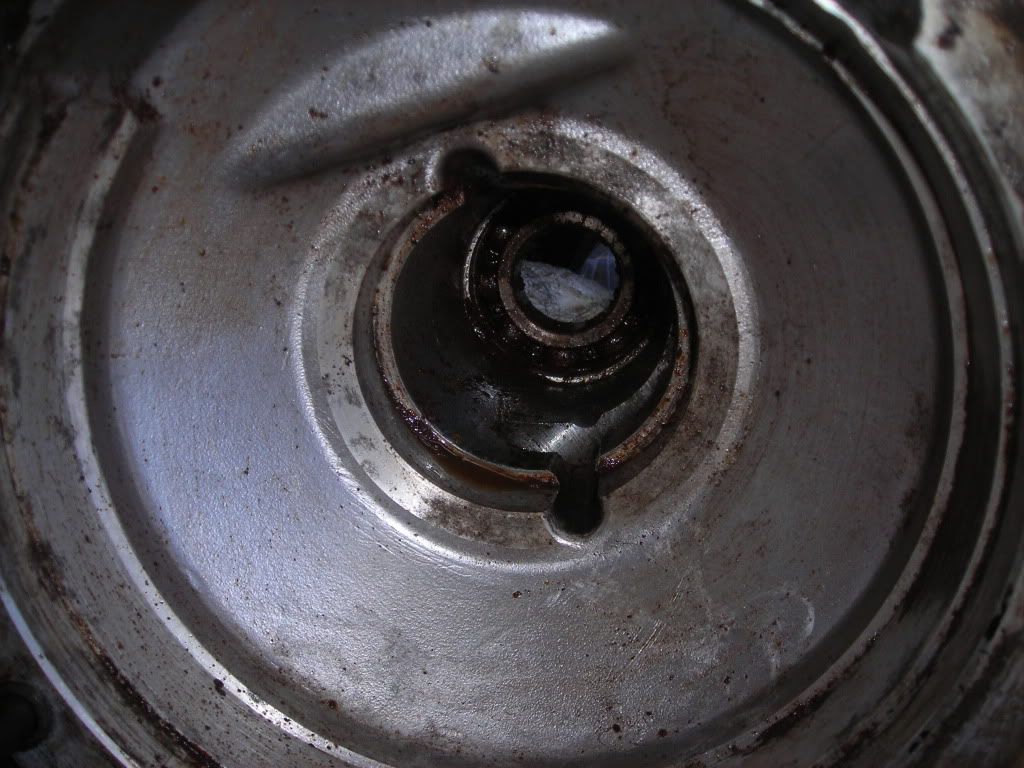
You have the "large" accumulator. All that you see down there is the piston and rings -- there is no sleeve. The piston rides in a bore in the OD case.
IF the bore is all scarred up, you can get the "small" accumulator. That will consist of a sleeve that will fit down into the existing bore with a smaller diameter piston, a single, smaller diameter spring and a sleeve that will contain the spring. This is what Randall mentioned earlier.
The piston can be removed with compressed air applied to the actuator valve hole -- and a big towel over where the piston is going to be flying out.
It's pretty gunky looking, but I'm inclined to agree with Randall that, so far, it looks like a good core. The magnet is a donut shaped thing that lies in the bottom of the big brass cap you removed to expose the filter screen. I haven't seen a picture of that yet, but judging from the rest of what I'm looking at, I'll bet that cap contains a goodly layer of sludge in it and, perhaps, buried in that, will be the magnetic ring.
TR3driver
Great Pumpkin - R.I.P
Offline
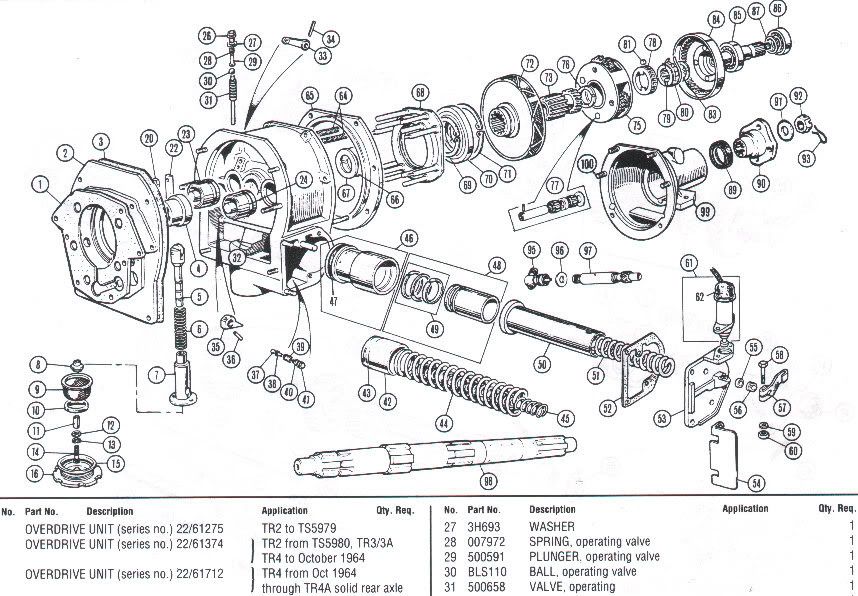
Here's a diagram that shows both the early large piston and later small piston arrangements
That hole visible in the piston should be threaded for a puller, which might be a little safer than the compressed air approach. Clean the exposed bore up as much as you can first, so the rings don't have to drag over the gunk.
The early units I think did not have a magnet from the factory, though IMO it's a worthwhile addition. ISTR one of the later magnet rings will fit into the early cap. I like to also put a magnetic drain plug in the gearbox (which was standard only on Stags).
HerronScott
Darth Vader
Offline
Tom,
I agree with Randy. This is a great thread. The overdrive is the only thing that I did not take apart and rebuild when I did my TR4A (sorry that and the differential).
Scott
I agree with Randy. This is a great thread. The overdrive is the only thing that I did not take apart and rebuild when I did my TR4A (sorry that and the differential).
Scott

Moseso
Jedi Knight
Offline
My reference just shows pictures of a pair of vice-grips being applied to the raised bits in the center of the pistons. (PULL!) They are not a critical mating surface, so it's OK if you scar 'em up, a little.
Anyway, that's how you get one apart that hasn't been rusted solid.
You want to keep those bores as nice as you can -- so -- use your favorite penetrating rust solvent liberally and patiently, and try the universal puller (vice-grips) after a few days soak?
Anyway, that's how you get one apart that hasn't been rusted solid.
You want to keep those bores as nice as you can -- so -- use your favorite penetrating rust solvent liberally and patiently, and try the universal puller (vice-grips) after a few days soak?
T
TRDejaVu
Guest
Guest
Offline
My 2 operating pistons didn't want to come out. Air pressure wouldn't move them, so I soaked them for a few days, first with PB Blaster then with Gibbs. I also used various heat/freeze combinations and then they started to move. They fought me all the way, but I finally got them out. I looked for all the damage that must have been preventing them from moving and found nothing. There were some very minor little marks that I plan on cleaning with crocus paper. My ex TR6 unit has the single o-ring as opposed to the metal ring.
Once moving, it is very easy for them to become cocked inside the bore, which locks them up. Sometimes you have to take a deep breath and push them back in so they get working a bit. This job really tested my patience, but I got there in the end. Still haven't finished the job as I got sidetracked and the original box is still working OK.
Once moving, it is very easy for them to become cocked inside the bore, which locks them up. Sometimes you have to take a deep breath and push them back in so they get working a bit. This job really tested my patience, but I got there in the end. Still haven't finished the job as I got sidetracked and the original box is still working OK.
OK - so here is where we are as of this AM.
No luck on getting these pistons out via pulling them;
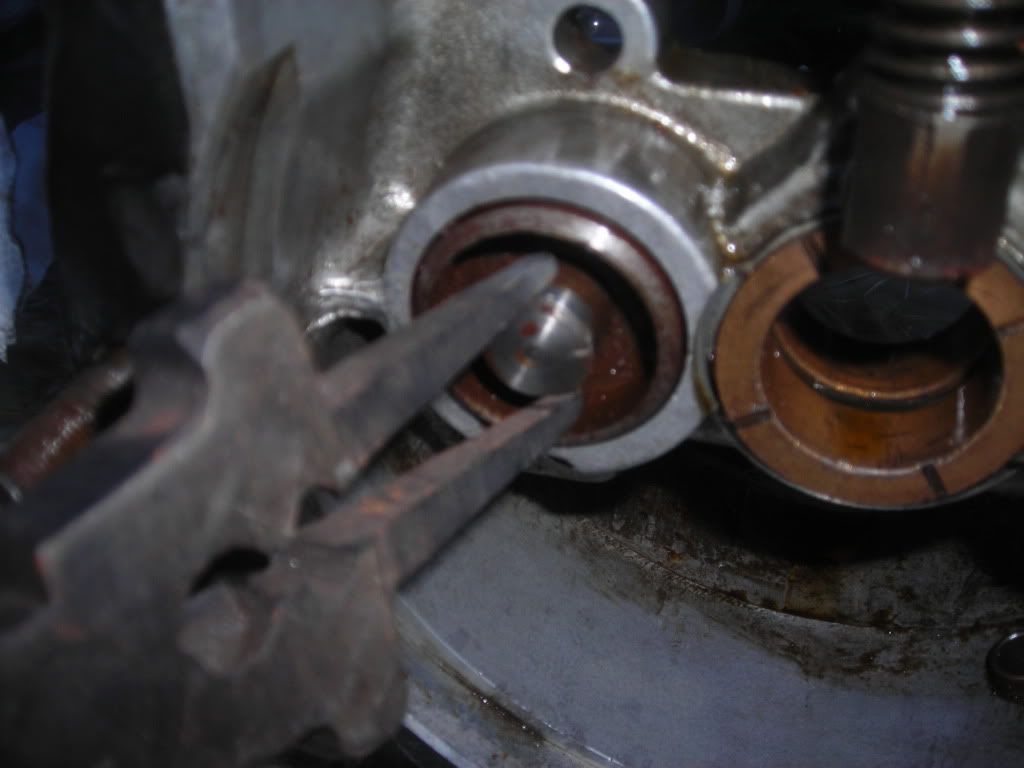
But, this oil pump assembly seems to work smoothly and you can hear the air being compressed when you push up on the oil pump spring;
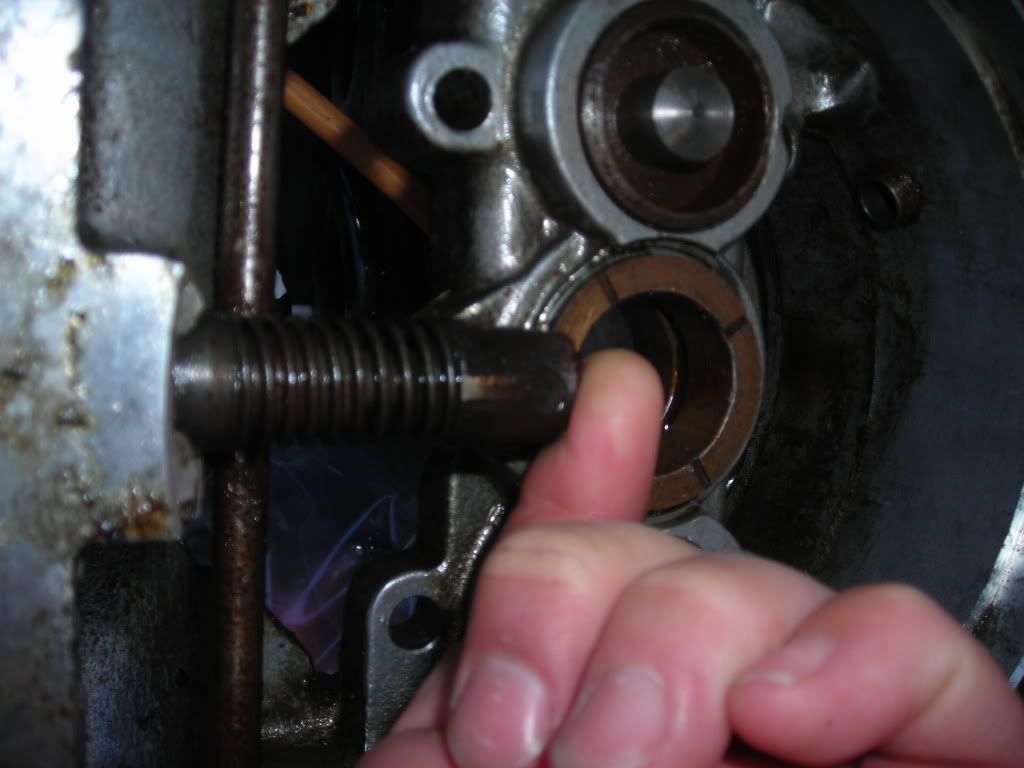
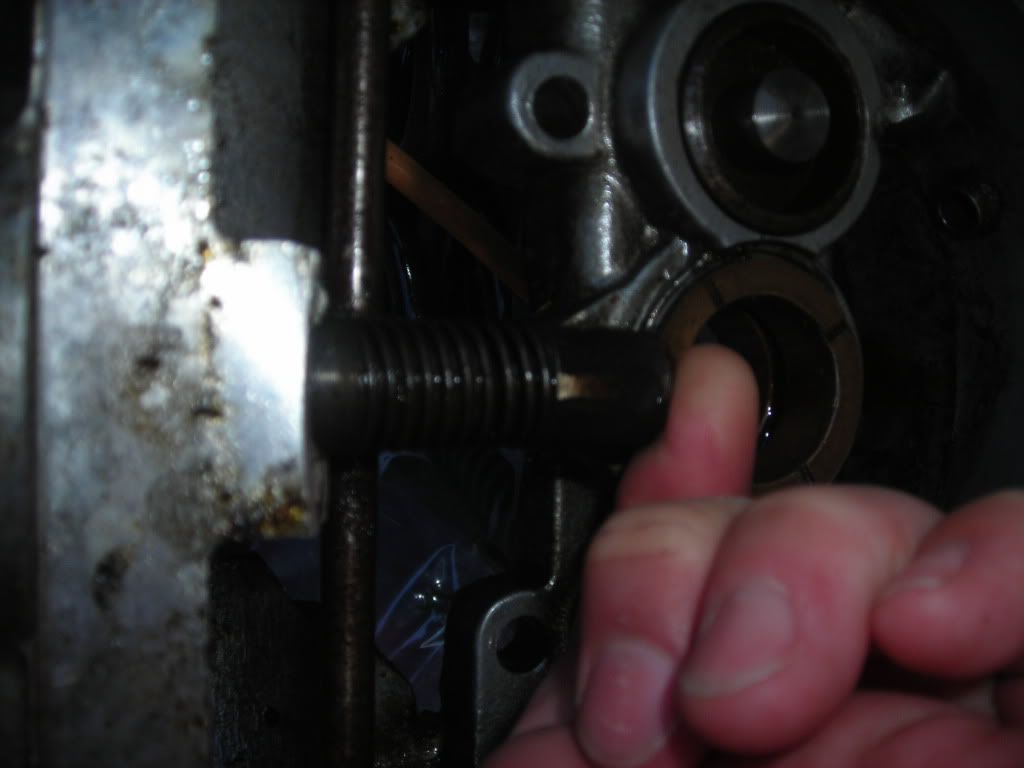
I made some progress in cleaning up the accumulator bore, but here was a lot of junk in there!
No luck on getting these pistons out via pulling them;
But, this oil pump assembly seems to work smoothly and you can hear the air being compressed when you push up on the oil pump spring;
I made some progress in cleaning up the accumulator bore, but here was a lot of junk in there!