• Hey Guest!
    British Car Forum has been supporting enthusiasts for over 25 years by providing a great place to share our love for British cars. You can support our efforts by upgrading your membership for less than the dues of most car clubs. There are some perks with a member upgrade!

    **Upgrade Now**
    (PS: Upgraded members don't see this banner, nor will you see the Google ads that appear on the site.)
Tips
Tips

TR2/3/3A Tr3a Fitting Kruso Seat Covers

Jersey_Royal

Freshman Member
Offline
Hi All,

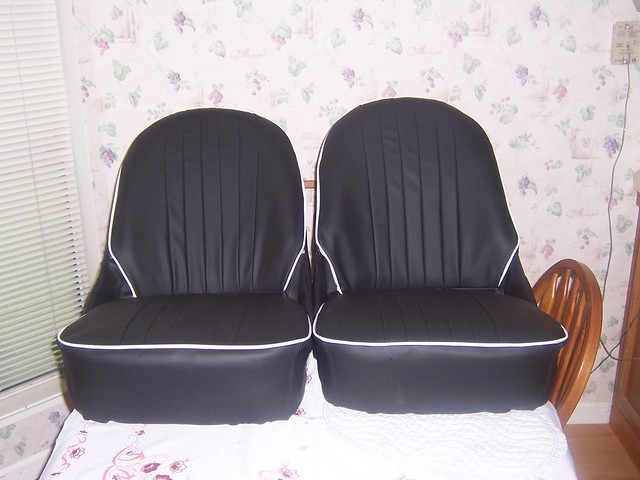
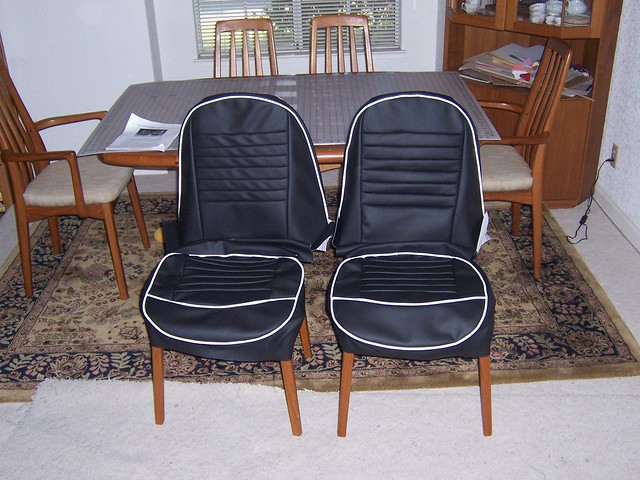
I have a nice set of covers for my 57 Tr3a from Tiim Kruso, and very nice they
look too.

I got a seat foam kit , and was hopeing that someone may have some photos
of how the foam should fit

Thanking you

Cheers
Guy

Untitled-1.jpg
 
Guy-

I'm sorry you haven't seen a response on this yet, I am interested as well. Several years ago there was a good tutorial on seatmaking on this but unfortunately I don't think it is accessible at the moment.

I also have an interior kit from Tim, but my kit is already finished out for the seats as he provides pretty cost effective seat frames at least in the US. For other kits, I also will guess that people try to stick with the original springs/burlap/horsehair internals if they can.

Regards
Randy
 
Hi Peter

Thanks for your reply, i have seen that link, good as it is the foam is totaly different to that supplied by Tim K.
I know i am asking alot , but a photo of Tims foam on the back rest of the seat and padding would help.
I have been playing today with a few trial fits and i seem to have a slope on the top edge between the pipeing, i stuffed
in some more padding and it looked better, but more work to do.

Here is a link for future readers if making your own

https://xjguy.com/triumph/diy_tr3a_seat_covers.pdf

What would be useful for me would be few close up photos of the top edge of the seat.

Thanks Again

Guy
 
Guy-

That is the link I remembered, thanks for posting it again. To be clear, you need photos of the padding only at the top?

Regards
Randy
 
Guy-

That is the link I remembered, thanks for posting it again. To be clear, you need photos of the padding only at the top?

Regards
Randy


Hi Randy,

Yup thats what i was after, i do tend to waffle on
sometimes :tears_of_joy: and for a Tr3a (not a Tr3 as there covers are different consequently padding must be different)

Cheers
Guy
 
The foam kit I used us from Tim.

Hi Peter,

You have Tims foam kit and covers, any chance of a photo so i can see what the top of the seat looks like

I am about to give up on this job, just doesnt look correct

Thank You

Guy
 
Last edited:
I have tried all sorts to get these covers to fit correctly
and it aint happening.

I have emailed T Kruso asking for any photos he may have of padding
or finished seat detail at the top so far no reply.

So monday will be taking them to local trimmer with a couple of photos of how
the top of the backrest should be, to see what they have to say.

I hope i am wrong but in my opinion the back of the backrest cover needs to be taken off
and refitted

Cheers
GUY
 
Can't help more right now, just had hernia repaired on Wed so I am not very mobile.
 
Can't help but would just say I got new foam and seat covers for my 4A. They sat in my living room for a month while I looked at them trying to figure out how to do it. Finally went to oldest upholstry guy in town. Said could't figure how to do seats in Triumph looking for advice. He asked you got a 3, 4 or a 6. I said I will go get um and let you do it, be right back.
 
IMAG0207.jpg
This is my interior done by Tim Kruso. I have the seat foams and they are comfortable. If you send him your rail caps, he will cover them at no charge. Shipping is priced fair but I drove the 2 hrs to Dayton and picked mine up.
 
View attachment 24555
This is my interior done by Tim Kruso. I have the seat foams and they are comfortable. If you send him your rail caps, he will cover them at no charge. Shipping is priced fair but I drove the 2 hrs to Dayton and picked mine up.

Thanks for the above

This is what i achieved, admittedly the cover wasnt stapled down.

2012-11-30104333.jpg


Heres how i would like the top edge

IMG_0324.jpg


The photo below is an original seat cover which has not been touched
577866_4204668750193_771515860_n.jpg


Cheers
Guy
 
Last edited:
They look great! Those small wrinkles will smooth over time. Leather settles with use and temperature changes.

John
 
I sewed my own and then fitted them using the instructions form The Landrum's. Have you tried the thin plastic sheet trick while pulling over the cover? It looks like you are pulling down your padding and therefore your edges are not lining up.
Here is a picture of a set of AH Sprite seats I completed recently.
.
6250758461_78b8225469_z.jpg

Thanks Apbos,

Yup tried the bin liner trick, and various different ways of padding no having much luck, its all great apart from the rear most
beading on the top which is flappy.

I will give Tim a ring once i have worked out the time difference. I must be doing something a miss, i have used his foam kit
three layer on the fron face , one layer on the rear and then white conton wool type wadding around the top and sides,
but not being an upholstery i cant fathom a way to remove the flappy bit.

Congrats on your seats lot of work gone into them .

Cheers
Guy

PS what is "The Landrums"
 
Last edited:
When you said it was not tacked, I assumed it would pull down that little bit to straighten the bead out...and I still think it should. Start at the top and use pressure against the cover to work it in the direction you want it to go. It's a finesse thing, where you have to stand back sometimes and get a big picture of where to tug or push. Try pulling the back side of the cover down to see if you can get the bead to pull back like in your "before" picture.

If still not happy with the results, add more of the cotton batting around the upper edge of the seat and reinstall. In upholstery, pad where it flaps and remove pad where it stretches too much.

John
 
Last edited:
Craig Landrum with some help from his son wrote the diy instructions for the TR3 seats. I think you should take John's advise and work the padding in by hand at the top. I would pad up the to edge with cotton batting as they did on the orginal. Make sure they are nice and warm so they have some extra give!

Here is a picture of mine before I installed them.
Regards
Paul
4047619229_00065f23df_z.jpg
 
Back
Top