
-
 Hey Guest!
British Car Forum has been supporting enthusiasts for over 25 years by providing a great place to share our love for British cars. You can support our efforts by upgrading your membership for less than the dues of most car clubs. There are some perks with a member upgrade!**Upgrade Now**
(PS: Upgraded members don't see this banner, nor will you see the Google ads that appear on the site.)

Tips
- We have a special forum called "Member Articles" where you can submit actual articles for consideration for publication. Learn More
- Don't have an Avatar? If not, your avatar will default to the 1st character in your username. Go into "Account Details" to change your Avatar.
- Some basic forum navigation info: click
 Hey - did you know if you click on the title of a thread it will take you to the first unread post since you last visited that thread?
- Hey Guest - Is your British Car Club in our Clubs database? If not, send me a PM - Basil

- Looking for a local club? Click the "Clubs" tab above and browse hundreds of clubs world-wide.
- Add Android or iPhone APP: click
- Did you know - any picture or video you add in your posts in any marque-specific forum will also get added to the Media Gallery automatically.
- A few more tips about posting and replying: click
- Hey there Guest - be sure to keep your profile page up to date with interesting info about yourself: learn more
- More tips and tricks on Posting and Replying: click
 but were afraid to ask:
  STOP!! Never post your email address in open forums. Bots can "harvest" your email! If you must share your email use a Private Message or use the
  smilie in place of the real @
- Want to mention another member in a post & get their attention? WATCH THIS

- So, you created a "Group" here at BCF and would like to invite other members to join? Watch this!
- Hey Guest - A post a day keeps Basil from visiting you in the small hours and putting a bat up your nightdress!
- Hey Guest - do you know of an upcoming British car event?
 Pretty Please - add it to our Events forum(s) and add to the calendar! >> Here's How <<
- Hey Guest - you be stylin' Change the look and feel of the forum to fit your taste. Check it out
- If you run across an inappropriate post, for example a post that breaks our rules or looks like it might be spam, you can report the post to the moderators: Learn More
- If you would like to try some different "looks" or styles for the site, scroll to the very bottom, on the left and click the Style Selector.
You are using an out of date browser. It may not display this or other websites correctly.
You should upgrade or use an alternative browser.
You should upgrade or use an alternative browser.
Wondow crank
- Thread starter tahoe healey
- Start date
HealeyPassion
Jedi Warrior
Offline
Andy, very very helpful. However, one of the issues is still those clips inner/outer as I ordered all new ones but I'm beginning to think they have the numbers on the clips (they were nicely bagged) are reversed....it sure looks like the ones for the outside are really for the inside. The pic of your door helps but the images of the clips are just to small for me to distinguish....so a close-up pic would still help this old confused sole. But, having said that, your description did help. The first try I made at this the rear nylon bushing broke :-( ... boy those things are brittle.
Sorry for the hijackin' ... just couldn't help myself.
Steve
Sorry for the hijackin' ... just couldn't help myself.
Steve
HealeyPassion
Jedi Warrior
Offline
Wow you must have hit send just when I did!!....that's exactly what I needed to know!!!....THANKS!
I just looked at the time stamps and I was writing the previous post while Andy was sending the answer!!
I might add... are the Healey folks on the BCF great or what!!!! Thanks again!
Steve
I just looked at the time stamps and I was writing the previous post while Andy was sending the answer!!
I might add... are the Healey folks on the BCF great or what!!!! Thanks again!
Steve
andybj8
Jedi Hopeful
Offline
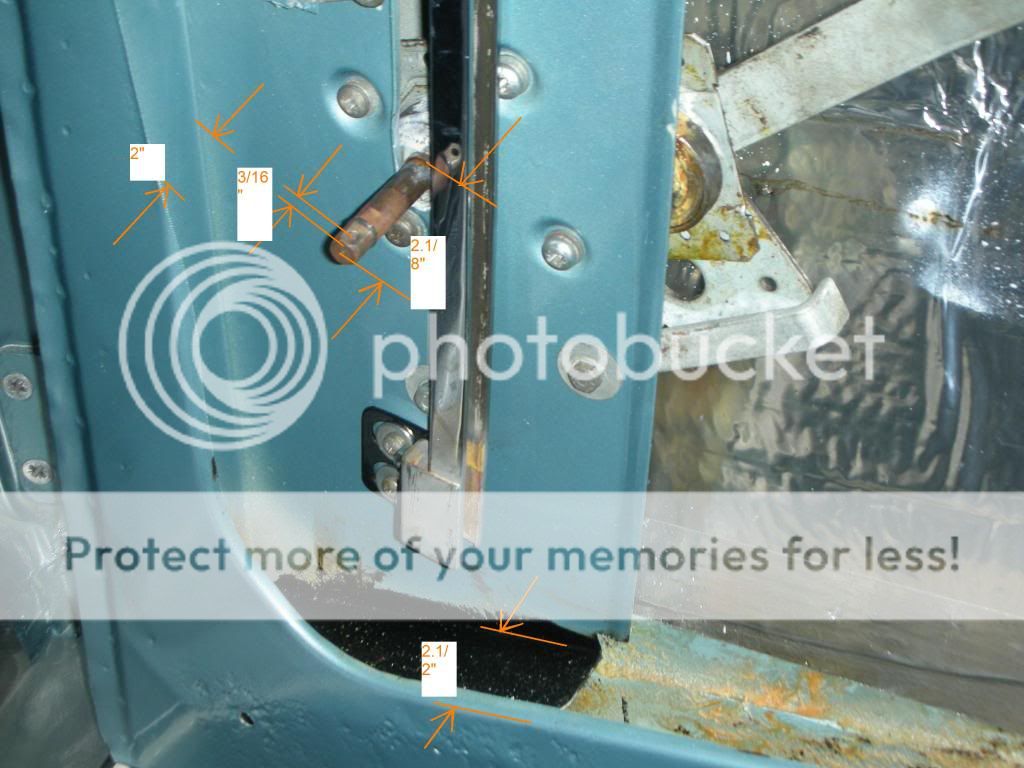
sorry also Th, hopefully you have checked my measurements.
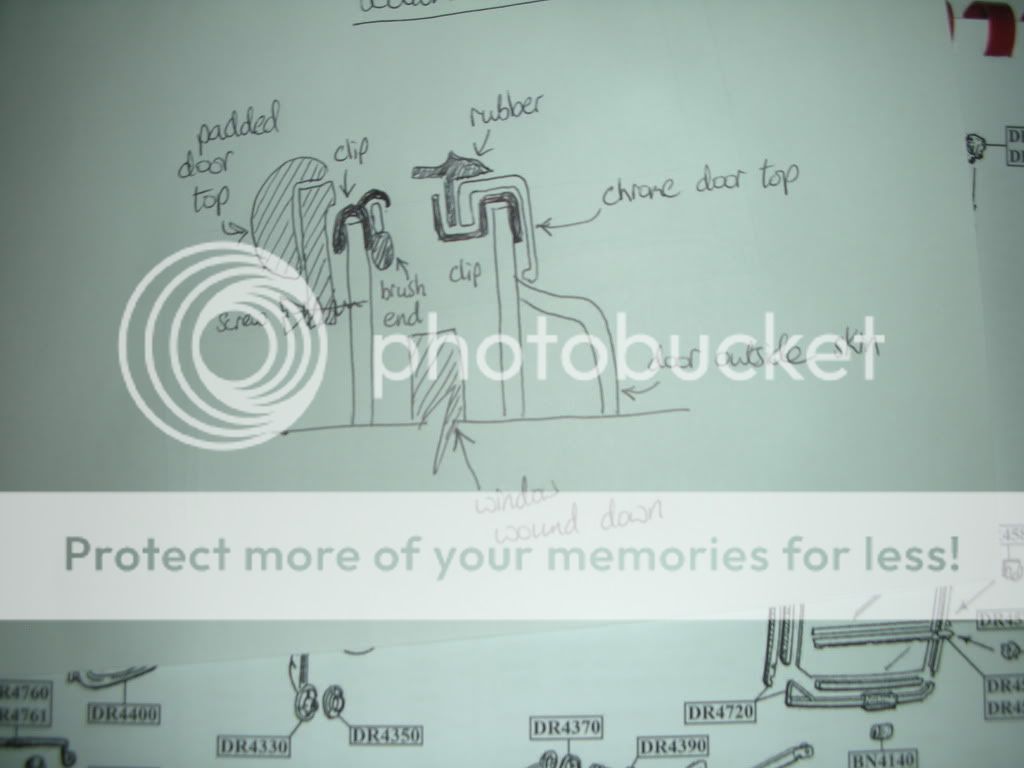
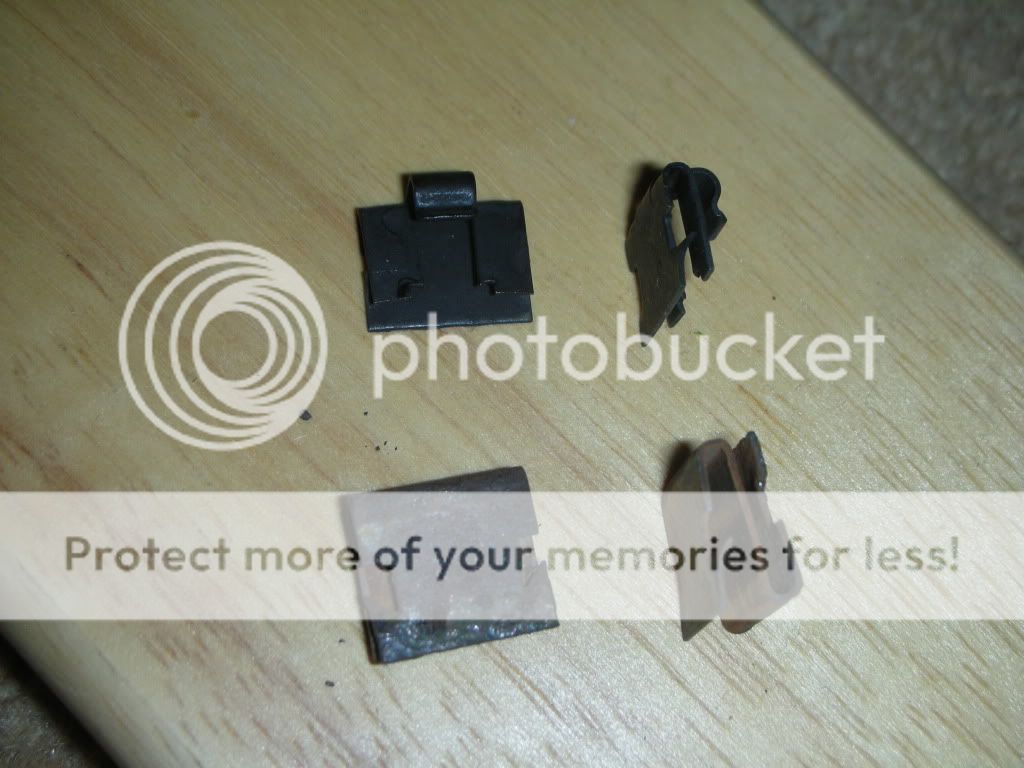
steve, first pic shows the clips, top clips are the brush clips, bottom are rubber clips:
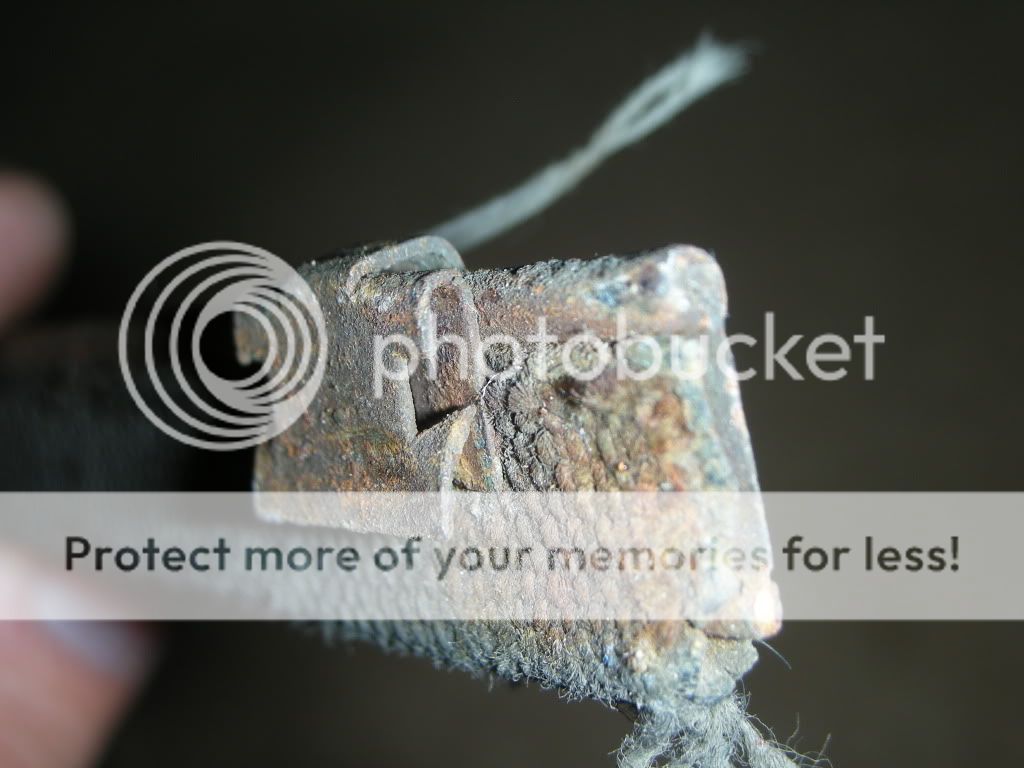
second pics show the clip on the brush:
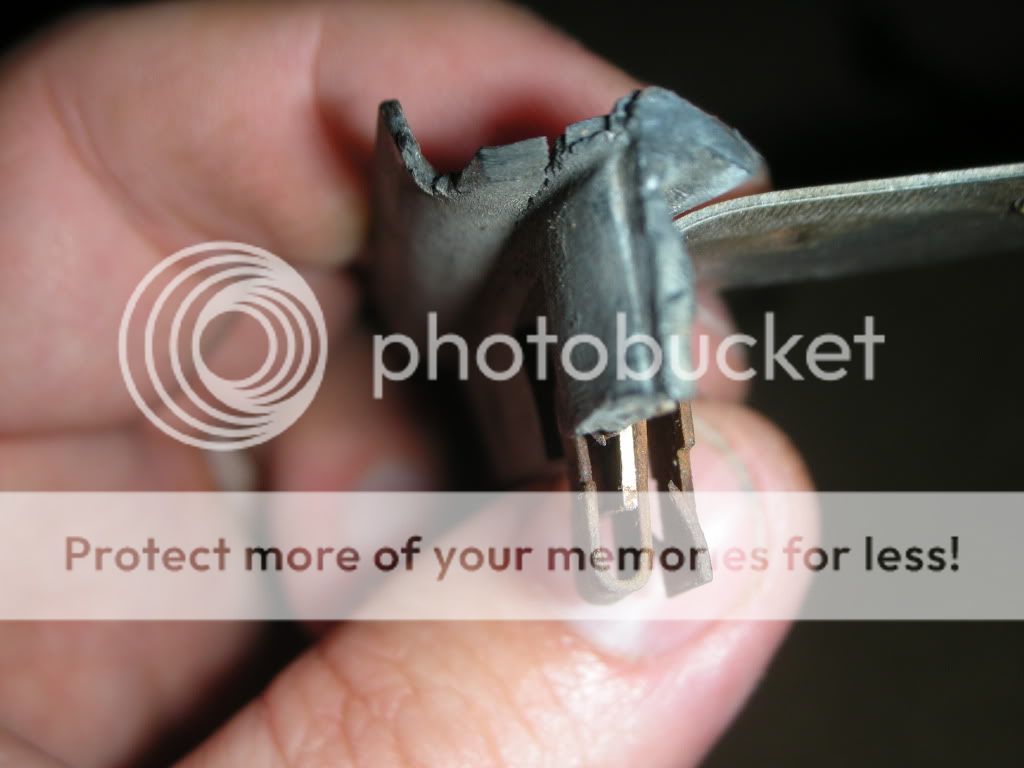
third pic shows the clip on the rubber, first groove sandwiches the rubber (in cutout) onto the door chrome (simulated by piece of metal) with the spare groove to hold the whole lot to the door skin. The palm of my hand is the window side:
looks like I was in the garage taking the pics while you were writing lol
cheers Andy
steve, first pic shows the clips, top clips are the brush clips, bottom are rubber clips:
second pics show the clip on the brush:
third pic shows the clip on the rubber, first groove sandwiches the rubber (in cutout) onto the door chrome (simulated by piece of metal) with the spare groove to hold the whole lot to the door skin. The palm of my hand is the window side:
looks like I was in the garage taking the pics while you were writing lol
cheers Andy
HealeyPassion
Jedi Warrior
Offline
Andy, you have saved me days of hunting!! Now I'm good to go on the door glass!
I may have hijacked this thread BUT if any of you plan on putting your door window glass together I strongly urge you to print out all the stuff Andy has provided... you won't find it anywhere else... at least I couldn't find it in any of the usual places.
Have a great day!!
Cheers,
Steve
I may have hijacked this thread BUT if any of you plan on putting your door window glass together I strongly urge you to print out all the stuff Andy has provided... you won't find it anywhere else... at least I couldn't find it in any of the usual places.
Have a great day!!
Cheers,
Steve

AUSMHLY
Yoda
Offline
So, what were we talking about? Oh yeah, the window crank....LOL
What I find interesting is that you said you haven't changed anything, including parts (except the new thinner wood panel), yet this is how it left the factory, these parts and with a door panel on. Is the door crank handle original? Maybe that's going in the shaft too far? But that ties in with where is the pin hole on the shaft. There's another measurement you can throw out for help. How far away is the hole in the shaft from the metal door skin? What do others have? Rich, I'd consider selling the car. This is totally not acceptable.
Having to weld a longer shaft on....somethings not right. I wouldn't do it.
It's probably some really simple we are over looking.
Have you checked the air pressure in your tires? I hear that affects the performance of our cars. And your handle certainly is not performing properly.
Bad handle, bad!
OP
tahoe healey
Yoda
Offline
Thanks, Andy (for the other forum post, too). Those pictures are exactly what I needed. I'll get a chance to look into it Monday. I've put over 130 hours into getting things back together since mid March. This weekend is the wife's time.
TH
TH
OP
tahoe healey
Yoda
Offline
The solution I came up with was to drill a couple of new holes into the upper part of lower section of the door. I then added a couple of the push clips (as on the bottom edge) which pulled the lower panel inward. I re-worked the forward edge to fit more flush with the door body at the front. Now the window winder works well as does the opener handle. Passenger side looks perfect. Driver side has 1/4 inch gap which I will fix with more clips when the arrive.