• Hi Guest!
    You can help ensure that British Car Forum (BCF) continues to provide a great place to engage in the British car hobby! If you find BCF a beneficial community, please consider supporting our efforts with a subscription.

    There are some perks with a member upgrade!
    **Upgrade Now**
    (PS: Subscribers don't see this gawd-aweful banner
Tips
Tips

wiring harness...

Nunyas

Yoda
Country flag
Offline
So... I'll spare ya'll the dramatics of this evening, and cut to the chase. I think... make that i KNOW i have an electrical problem with my B. After seeing some of the wires chillin in the breeze under my car, i'm supprised nothing terrible has happened yet. Have any of you changed the wiring harness in your B's? How difficult is it? I mean can it be done in a weekend? You don't have to do anything crazy like pull the engine to do it do you?

I think, this will be the project that I'll be working on after replacing the tires.
 
I have no experiance with the B, only my Sprite. You, most likely, won't be able to do it in a weekend. You shouldn't have to pull the engine out...only yer hair! Hardest part was routing cables through the rear end of the car and hookups behind the dash. Not much room to sqeeze in there. I wished I had a second elbow about half way up my forearm at times.
 
Changing the wiring harness in a MGB is not as simple as most would think. If your harness is good from the dash to the engine compartment, then leave it alone. Reason is that the harness will not go through the hole in the firewall without removing all of its fittings. If you don't have to, you don't want to go there! Replace the sub harnesses that are bad. Moss & Victoria Limited has new ones. Also the sub harnesses are much less expensive and are fairly easy to install. Due yourself a favor though, MARK ALL THE CONNECTIONS! You'll be glad you did.
 
Well, I noticed while working on my suspension that I have some bare wires dingle dangling near the starter that appeared to run down under the car and towards the rear... Sub-harness or full front harness?
 
Sub harness, joined in at just rear of the V. regulator to the main with those infamous Lucar connectors. BARE wires suggest something nasty has or is about to occur up or downwind of that sub-harness.

Anyone know if the outfit ~somewhere~ in New England called "Roosters" is still in business? Them lads made a quality replacement loom for about anything you could name. Looked for all the world like original Rist's work. The stuff outta Moss an' Vickie-Brit are smaller diameter wiring than I'd feel comfortable with in my cars.
 
Ditto the warning abut the bare wires- it may be caused by rubbing against something or hitting the ground at speed, but its bad news either way. Tape them up so there's no bare wire showing anywhere and make sure they're secured and do not rub anything and particularly no corners or edges. It would be a good idea to try to make them water-tight if possible. Just a temporary fix until a proper harness may replace it but tape is cheap, and what's your car and safety worth....
 
I'm in the middle of my ground up restoration and it just so happens I'm putting in all new harnesses at the moment. My 'behind the dash isn't so bad as I have my car completely pulled apart at this point. In so much as buying a new harness, I would suggest

www.britishwiring.com

My new harness from them looks like a work of art! I'll attach a photo of it when I first layed out the main harness in my bay.

It would be a LONG weekend job. Probably you would need to do it over two weekends.
 

Attachments

  • 133244-Harness1small.jpg
    133244-Harness1small.jpg
    53.7 KB · Views: 1,243
John, I love ya, man.

They've got *everything*!!!

I've been "outta the game" for a while now and Rooster's WAS the outfit I'd used for any project needing a new loom. They even made up a main harness for a '59 Nasty Martin DB 2/4 Drophead we did (ground, up). It too was a piece of artwork, but I can't find 'em anymore. Looks as if BW is the new source. Thanks fer th' lead/link!
 
I replaced the wire harness in my 67B. It wasn't that bad of a job. One hint. Since you are discarding the old harness, when you remove it, clip off the connectors (leaving a bit of wire with the color showing) so you won't make any mistakes connecting the new wire/
 
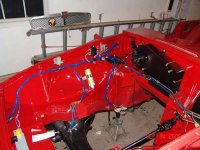
well... I did a "shade tree" fix for the interum... from looking at what I doctored up, I reckon I wasn't the first person to do something down there. I found my bare wires were coming off of the starter. Some went to the battery, and some to the alternator. I found that the big brown wire (I would estimate it to be about 8guage) had "extenders" spliced onto it's end. Instead of another huge honkin' wire whoever did it used like 6 to 8 much smaller guage wires. /ubbthreads/images/graemlins/eek.gif Well, I'll certianly be replacing that relatively soon. The big brown wire that goes back to the battery had a bare spot about 1/2 inch in length near it's starter connecter. Anyways, I sepparated out all the strands (grouped by the connector they were attached to), and double wrapped each connector bundle sepparately with electrical tape. Then I went back and lined up the connector ends (bolted them together) and wrapped the three sepparate bundles together. THEN i wrapped that now single large bundle with 3 connectors at the end with self adhering rubbized shrink tape all the way up to where the wiring harness had started to unravel. Finally, I reconnected all the wires to the starter and "fixed" the alternator wires.

The car's electricals work better than they ever have now. Turn signals now work with lights on and brakes applied. I may have a problem with my wipers though as they still cause my turn signals to flash really really slow to not at all depending on the load on the system.

While I was working on that stuff I decided to adjust the alignment of my headlights. I found the spring clip that holds the beauty ring in place is on the bottom of the head lamp assembly on my car... so no amount of pushing it down would release the bottom. I reckon that the assembly was installed on the car upside down and the spring should be on top so that the bottom will release when I push it downward, right? Anyways, I found the top positioning screw on the passenger side was screwed all the way in... no wonder i was guiding low flying aircraft... /ubbthreads/images/graemlins/rolleyes.gif

In advertantly, I came across what might be a new problem... but I'll post that in a new thread...
 
ack! Actually, the clip holding the "beauty ring" in place ~should~ be at the bottom, and it needs to be pulled *up* to release the ring... it's a "snap" style widget, spring steel. Be very careful not to damage the ring or YOUR EYE as you try to get under it. The best tool I've found is a "pick" from Snap-On with a right angle end to it. Diameter is small (0.010"--just measured it /ubbthreads/images/graemlins/wink.gif) and made from spring steel... ya gotta "go fish" to get the clip just right, but after a few tries you'll do it correctly every time. Put a small gob of grease on it, and it'll come off more easily the next time.

Well done with the wiring "dodge". Isolating them from one-another was 'xcellent. Your wiper prob MAY be a fuse problem. Clean the fuse ends AND the recepticals they set into onna fusebox, retry. If you have the same dozy wipers after that, look to wonky ground wires. Keep at it and you'll sort it, sure.

I've always referred to your last bit (headlamps inna trees) as "squirrel spotting".

HTH!
 
ah well... Now that i know it should be on the bottom it'll stay there. And now that I know where too look for it and how it works, it's much much easier to remove and I know what to look for when I want to take it off next time. I've found that a small screw driver will fit between the beauty ring and the head lamp assembly to pop the spring easily enough. So, that shouldn't be a problem anymore.

I suspect my wimper motor may be dieing, or the wiring in the steering column may not be up to snuff. The wipers only work on the "high" setting and even then (if the wind shield is dry) it's super sluggish.
 
hmmm.... the wiper motor IS a thing of beauty. As such, I humbly suggest you remove it and disassemble it. Clean the commutator with a "Scotch-Brite" scouring pad, clean EVERYTHING in there, oil the bushing and bearing, check to insure the brushes are still long enuff to work, shove some more grease inna gearbox, reassemble and reinstall. All sounds like a chore but it hangs down there just beggin' to be caressed... just expect to spend an inordinate amount of time on the task. It SHOULD be sluggish on a DRY windscreen, BTW ;-}

<snarky mode>
Additionally: Rain-X is your FRIEND!
</snarky mode>
 
yeah, I understand it being sluggish on a dry screen, but is it supposed to have only one speed? I mean my wiper switch has two settings, low and high. The way it's working now, the wipers only move on high, and have never ever worked when on low for as long as i've owned this car.
 
"See Previous Post"... and check that there are actually *three* wires stuffed into the motor /ubbthreads/images/graemlins/wink.gif

I've seen cars fitted with wiper motors with only "on" and "off" as the choices, whereas yours should have a three connection motor. Black (GND), Green (high) and black with a green tracer (low). The motor should have a built-in resistance. That's why I suggested cleaning all the internals on the motor. If ya wanna "over-tech" the prob, put a V/O meter to each wire to insure full current at each, on each setting. and ohm out the motor terminals with GND as the "common"... can't tell ya "off'n th' top" what the resistance should be onna low term, but if'n the high works, the low will be less. If it's "open" then the motor is FUBAR onna low setting... Not the "best" solution, but an adequate one.

HTH.
 
Danmas...where were you when I needed you buddy!!!
I used the "painless" kit on my car. Not the name I was using while tring to customize it!
Now that it is done I am happy though. I used the 8 circut race kit. It is better than what I cut out of the car, at least!
/ubbthreads/images/graemlins/driving.gif
 
oh... hmmm... I missed your post on that should be 3 wires jammed onto the motor, Doc. I'll have to look into that. Sounds like something I should have checked... after all it was the #1 trouble shooting step I learned in the Marines:

Doesn't work?
-Is it connected properly? Reseat the connections.
Still doesn't work?
-Disconnect, clean connections, reconnect.
 
Roger-roger Nunyas. "Check th' 'StupidStuff' FIRST!"

I wuz a "zoomie" but don' matter none:

Semper Fi!
 
Back
Top