• Hi Guest!
    You can help ensure that British Car Forum (BCF) continues to provide a great place to engage in the British car hobby! If you find BCF a beneficial community, please consider supporting our efforts with a subscription.

    There are some perks with a member upgrade!
    **Upgrade Now**
    (PS: Subscribers don't see this gawd-aweful banner
Tips
Tips

water temp bulb loose

Just asking, why did the rebuilder not provide the necessary washer? If they do this as a business service, they should know that there are issues re-fitting their re-built units. Seems like the rebuilder missed something.... I will bet you paid a good buck to have this re-built.
 
Rick, I'm not sure exactly what you're asking about the bore threads. I just put the bulb in hole with the nut pushed back up the line out of the way. With the bulb fully seated I can see threads up the back of the bulb head. Does that help?
Dale
 
John, I did email the rebuilder today. I'll let you know what he says. He has a stellar reputation. I have no complaints.
Dale
 
Rick, I'm not sure exactly what you're asking about the bore threads. I just put the bulb in hole with the nut pushed back up the line out of the way. With the bulb fully seated I can see threads up the back of the bulb head. Does that help?
Dale

Dale,

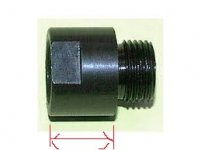
It was suggested using this adapter screwed into your cylinder head and the bulb then screwed into the adapter:

adapter.jpeg

My point was that if the distance shown by the red arrows in the adapter was not greater than the depth of the threads in your cylinder head and of sufficient depth to allow the bulb nut to bottom out, the adapter would not solve the problem.
 
I understand now Rick. Thanks.
Dale
 
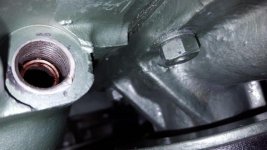
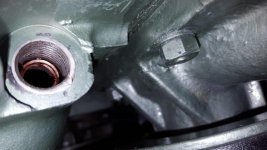
I'm working on the measurements with the vendor. In the mean-time I've tried an experiment by installing a 1/32" thick copper washer to get an idea of how the sensor/bulb is meeting up with the port seat. See pic. I cut a box end wrench and tightened it up as much as possible. No way I'd go more on the torque. I was informed that over tightening would damage the solder joint on the bulb. I think that the edge of the bulb is catching so that the sensor head doesn't meet the port seat. I'm not sure that fully explains the movement.

The link to youtube shows the movement of the line with the copper washer installed.

https://www.youtube.com/watch?v=v9c5IZmAXvQ&feature=youtu.be
 

Attachments

  • Head water temp sensor hole.jpg
    Head water temp sensor hole.jpg
    46.5 KB · Views: 90
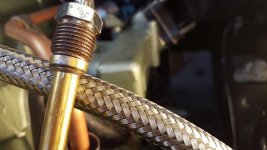
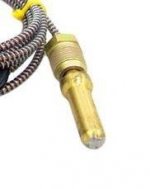
Working with the vendor. He's going to replace the sensor bulb. It's my belief (mine only) that the lip on the sensor is interfering. Look at picture A. That's the sensor bulb that I'm trying seat. Notice the lip on the bulb where it meets the sensor head. Compare that to picture B where the sensor has no lip. The sensor head, not the bulb, seats in the engine head port hole seat, right? I think that bulb lip is catching on the edge of the engine head seat.

Or, maybe I have it backward. Maybe the lip is supposed to go all the way to the top outer edge of the sensor head? Like it seems to in picture B.

Picture C shows the engine head port with the copper washer install. It was taken after an attempt to install the sensor. It looks to me like the lip described above is catching on the edge of the seat. Or if I have it backward the bulb lip is too short not too long.

Side note. The vendor sent me a brass adapter. That didn't help.
https://www.youtube.com/watch?v=wbVM1tXHvDs
 

Attachments

  • A water temp bulb.jpg
    A water temp bulb.jpg
    47.3 KB · Views: 88
  • B temp sensor from AHSpare catalog.jpg
    B temp sensor from AHSpare catalog.jpg
    5.2 KB · Views: 93
  • C Head water temp sensor hole.jpg
    C Head water temp sensor hole.jpg
    46.5 KB · Views: 103
Back
Top