
 Hey Guest!

 Hey - did you know if you click on the title of a thread it will take you to the first unread post since you last visited that thread?
 but were afraid to ask:
  STOP!! Never post your email address in open forums. Bots can "harvest" your email! If you must share your email use a Private Message or use the
  smilie in place of the real @
 Pretty Please - add it to our Events forum(s) and add to the calendar! >>

Offline
So today was a good example of 1 step back, 2 steps forwards. I started out working on the brake line from the union to the front left wheel. That line seemed to be a bit too long, so I was trying to add a few bends to take up some of the excess length. Well, I managed to get rid of that length -- by breaking off the end of the line! Not good.
After a few choice words offered up to the heavens, I broke down and ordered a set of pre-bent brake and clutch lines from Classic Tube. Had I known about these folks when I first ordered lines in 2006, I would have used them. These lines come bent into the proper shape and should be simpler to install. Much simpler. All in all a rough morning, and another expense I didn't want at this point.
That done, I pulled myself together and got to work on the front suspension and steering rack. The steering rack needed new boots and a bit of cleanup. I pulled the old boots and got the new ones installed. The large clamps I had bought for the boots on the inner side were too big, but I was able to clean up and reuse the old ones. Once the boots were in I took a bit of a break to swing into Heber and pick up some grade 8 bolts for the spring pans.
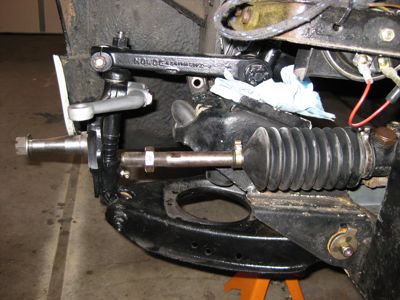
<span style="font-style: italic">Rack boots installed</span>
Next up came the rest of the front suspension. First task was to install the cleaned and painted steering arms from the Bugeye onto the new spindles. A quick look for some torque values, and the assemblies were ready to go onto the car.
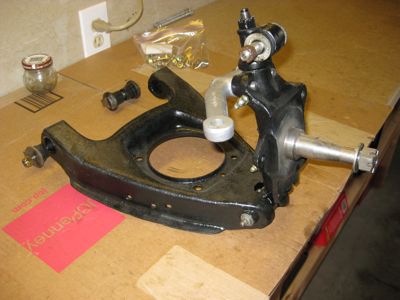
<span style="font-style: italic">Steering arms installed</span>
At this point I was getting close to the end of the day, but wanted to have a bit more to show for my day's work. I went ahead and bolted on the front shocks and the left side a-arm and spindle assembly. It's only in loosely but it is all in, and I think it's even in correctly. Not the best of days, but I trudged on through and was able to still end the day with a bit of progress.
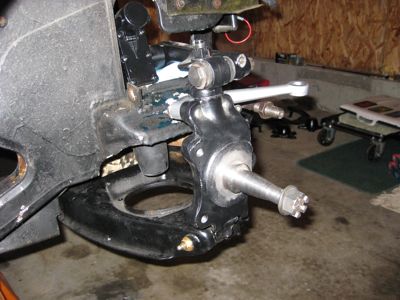
<span style="font-style: italic">A-arms and spindle in place</span>
After a few choice words offered up to the heavens, I broke down and ordered a set of pre-bent brake and clutch lines from Classic Tube. Had I known about these folks when I first ordered lines in 2006, I would have used them. These lines come bent into the proper shape and should be simpler to install. Much simpler. All in all a rough morning, and another expense I didn't want at this point.
That done, I pulled myself together and got to work on the front suspension and steering rack. The steering rack needed new boots and a bit of cleanup. I pulled the old boots and got the new ones installed. The large clamps I had bought for the boots on the inner side were too big, but I was able to clean up and reuse the old ones. Once the boots were in I took a bit of a break to swing into Heber and pick up some grade 8 bolts for the spring pans.
<span style="font-style: italic">Rack boots installed</span>
Next up came the rest of the front suspension. First task was to install the cleaned and painted steering arms from the Bugeye onto the new spindles. A quick look for some torque values, and the assemblies were ready to go onto the car.
<span style="font-style: italic">Steering arms installed</span>
At this point I was getting close to the end of the day, but wanted to have a bit more to show for my day's work. I went ahead and bolted on the front shocks and the left side a-arm and spindle assembly. It's only in loosely but it is all in, and I think it's even in correctly. Not the best of days, but I trudged on through and was able to still end the day with a bit of progress.
<span style="font-style: italic">A-arms and spindle in place</span>