• Hey Guest!
    British Car Forum has been supporting enthusiasts for over 25 years by providing a great place to share our love for British cars. You can support our efforts by upgrading your membership for less than the dues of most car clubs. There are some perks with a member upgrade!

    **Upgrade Now**
    (PS: Upgraded members don't see this banner, nor will you see the Google ads that appear on the site.)
Tips
Tips

Triumph TR Transmission Rebuild

glemon

Yoda
Bronze
Country flag
Offline
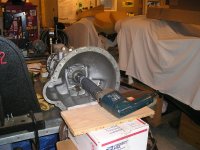
I am in the process of taking apart my TR250 transmission, I have the rear flange off, the taildhaft housing nuts off and the speedo drive housing and gear out, according to the book the tailshaft housing should slide off now, but mine doesnn't want to go farther than a quarter of an inch, am I missing something, or do I need to go to a bigger hammer and or prybar?

Thanks, Greg
 
Yeah, the book is seriously optimistic about that part. To remove the tail housing, the rear bearing has to be driven off the mainshaft, and it's a very snug fit. I have done it with a brass hammer, but IMO it's better to build a puller as shown in Nelson's disassembly article

PS, if you do use a hammer, be sure to replace both of the bearings on the mainshaft. They can be damaged by the impact (since they are what's taking the force), and the damage may not be noticeable when you examine them. But with the puller, the bearings should be OK.
 
Thanks, I have a new favorite website, looks like I will have to fabricate a puller, I am not worried about the rear bearings as I am fitting an O/D, but I do not want to put any undo strain on the gears, top cover is off and gears look great, unfortunately didn't get to drive the car, other than up the driveway, then all brakes and hydraulics quit--any way to tell if the synchros are worn, I am assuming I will replace 2nd and 3rd, but 1st and 4th usually don't see as much wear and tear.
 
It's not just the bearing in the tailhousing that takes the beating, but also the one in the back of the main case (which you could possibly reuse even with OD if you're cheap like me :D).

For synchro wear, first do a visual on the dog teeth and on the legs where the shift hub hits them. If those look OK, push the ring firmly onto it's matching cone on the gear, then measure the gap between the face of the ring & the gear (between the rows of dog teeth). With the gap even all the way around, it should not be less than .025" (as I recall, new is somewhere around .050"). Nelson says to replace them if it's less than .030 (next article on the Buckeye site).

Don't forget to check the force required to move the shift ring away from neutral on the hub. It's often overlooked, but this is what supplies the force for the synchromesh action. If it's too low, you'll get grinding even with new rings. If it's too high, it will be hard to shift.
 
When you take the main shaft out, also the counter shaft, take plenty of pictures and wire the parts in the right sequence. I didn't do that and paid the pain when I started to reassemble everything.
I took catalog pages and went to Staples and had them enlarged and then they went on the wall. Helped with the parts ID and reassembly.
As Randall mentioned the Nelson Reidel info and photos are great.
Mine is back together and in the frame but has not gone through the acid test of actually using it.
When you are ready, I have some decent photos showing how I tested it with a 1/2 inch drill to check the pressure in the O/D. That method worked came from Randall and it worked for me. I can even send you the rubber hose coupling that I made to do it all with.
Stay on course, ask questions and you can do it. Just be very persnickity about it.

Good Luck, Tinkerman
 
Tinkerman,

Please post the pix of the O.D. pressure test for me. I have a used O.D. transmission and don't know whether it works or not and would love to know the answer before I install it.

Thanks in advance.
 
Thanks for the suggestion of wiring the parts together, in sequence I am going to do that, I may even get an appropriate sized dowel or rod. Got the digicam out and have been snapping pics. I need to figure out how to put something together to get the tailshaft off then the rest of it apart, then order parts, then...etc. before I get to testing it--but appreciate the offer on the testing apparatus.

Greg
 
Sorry to be so tardy about sending thee picture. I've had one of those weeks. Here tis anyhow. Randall put his in a vice I just hung on to it.

If you have any questions just PM me.

Tinkerman
 

Attachments

  • 15496.jpg
    15496.jpg
    113 KB · Views: 634
Thanks Tinkerman.
 
Yes thanks, neat idea, I have been very busy with work lately, got to the hardware store to get some bits to fabricate a puller, rather than trying to drill big holes through thick metal (and have to buy an expensive drill bit I will wear out in the process) for the main bar of the puller I am going to try a 2 x 4 and put the threaded rod through it anchored in by big washers, it won't be pretty, but hopefully functional, will see how it goes.
 
Success:

trannypull1.jpg


The crude but it worked puller, the wood creaked and groaned but got the job doen

trannypull2.jpg


Even if you have to lie to me tell me I am done with the hardest part, even with the fabricated puller I had to add force to the stress I was creating with the puller with some whacks with a hammer--then some firmer whacks, then---that wonderful pop and little movement that shows you have broken the 40 year seal of metal that very much wants to stay united and the rest of the run is downhill.

Thanks for pointing to the websites etc. Good to get that part done.
 
Oh yeah, you've finished with the hardest part, uh huh. I wouldn't lie to you, would I?
 
OH yeah. The rest is a piece of cake!
 
Naw, don't listen to them, it really is a piece of cake.....mmmmph, giggle, snort, heh


seriously, when I did mine I got tons of help from the forum so don't be bashful to ask.

Love your rigging!

Good luck!

Tinkerman
 
The hardest part was the circlip on the end of the main-shaft, I had to grind it out. Be sure to get at least two of those. The rest is no big deal. Oh, once into it, I noticed the space washers and other components that were driving be nuts to get to the right clearance, had worn near the shaft. This was giving me false feeler gauge readings. Also a tip. I had to replace the rear main case bearing. I ground the inner race so it would slip easily onto the shaft and used it to set the clearances (swapping spacer washers). If this makes no sense to you, it will in time.

A lot of fun, especially the second or third time...
 
TR6oldtimer said:
I ground the inner race so it would slip easily onto the shaft and used it to set the clearances (swapping spacer washers). If this makes no sense to you, it will in time.
But be sure to check the clearances again with the 'real' bearing. I tried the same trick when doing my Stag diff; and the new bearing needed some .025" more clearance than the old one did.
 
Thanks if the cerclip on the mainshaft is the one accessible when you take the cover behind the release bearing off I may be OK, I have it started, one end came out pretty easily, hope it won't be a problem to work it from there, got called away to supper, so did not get a chance to finish. No the washer stuff doesn't make sense now, but I am sure it will when I get to it.
 
Sorry guys, but the hardest part for me to rebuild my transmission was building a set of dentures for a cranky old lady who was never satisfied. I took that well-earned money and paid John Esposito to overhaul mine. :jester:

I admire anyone that would undertake a tranny overhaul.
 
As mentioned about, you've GOT to get the clearances right. It also helps to have a fair bit of experience with these gearboxes, or any gearboxes.

Nice fab job on the puller!

Keep us posted, tutorials and specific questioning like this are very valuable to the forum. :yesnod:
 
Back
Top