Hey Guest!

 Hey - did you know if you click on the title of a thread it will take you to the first unread post since you last visited that thread?
 but were afraid to ask:
  STOP!! Never post your email address in open forums. Bots can "harvest" your email! If you must share your email use a Private Message or use the
  smilie in place of the real @
 Pretty Please - add it to our Events forum(s) and add to the calendar! >>
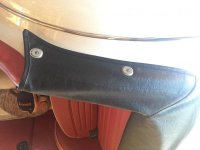
Got the seal in and attached the stanchions. Trimmed the lower seal like CJD showed in his very detailed thread. When I fitted the windshield I found I should not have trimmed the seal so I have a small gap to fill. Must be some change in that area between the TR2 and TR3A.
It looks much better with the screen on the car.
It would have been a good idea to fill all the trim screw holes in the body before painting. I naively thought I may be using them when I replaced the trim work. They usually just do not line up or were drilled too big for the screws I am using.
Continuing with the carpet trim work I am finding the best approach is to use a hole punch to make holes in the carpet padding. That stops the drill grabbing the fibers. Then drill the pop rivet hole. I then put the clip retainer over an ice pick and find the hole that I have just drilled and press the spikes into the padding centered on the ice pick.
I will complete 2 carpet clips and snap the pad in the car then drill the other 2 hole for the second set of clips. That has worked out keeping everything in place.
David