Hey Guest!


 Hey - did you know if you click on the title of a thread it will take you to the first unread post since you last visited that thread?
 but were afraid to ask:
  STOP!! Never post your email address in open forums. Bots can "harvest" your email! If you must share your email use a Private Message or use the
  smilie in place of the real @
 Pretty Please - add it to our Events forum(s) and add to the calendar! >>
SkinnedKnuckles
Jedi Trainee
Offline
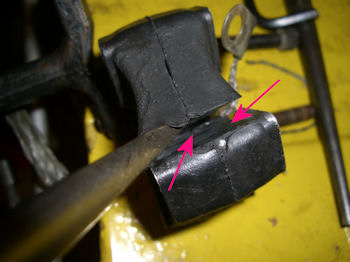
Well that 30 minute job only took over 2 hours! The old one came out in pieces - 2 of the opposing aluminum "wedges" completely separated from the coupling.
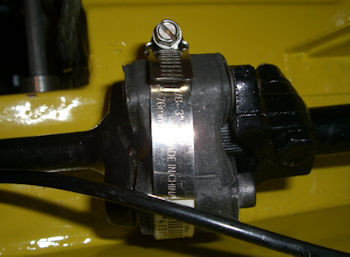
Of course, the new one was a tad too big, so after 10 minutes of fiddling got out a band clamp. Put the squeeze on it and got the screw/bolts/ ground strap on.
It was then I saw the squirm - about 1/4" between sides. No wonder those pieces separated. Moved the upper bracket about 1/8" until there was slop in the dust covers (I guess that's what they are) on the upper piece. Absolutely could not get any purchase from the lower rod that goes down to the u-joint at the pinion. After 2 tries decided to try later when the ball joints go in.
I wasn't pleased with the extreme counterbore depth, but what more can I say. Seems to be a flex coupling now anyway.