• Hi Guest!
    You can help ensure that British Car Forum (BCF) continues to provide a great place to engage in the British car hobby! If you find BCF a beneficial community, please consider supporting our efforts with a subscription.

    There are some perks with a member upgrade!
    **Upgrade Now**
    (PS: Subscribers don't see this gawd-aweful banner
Tips
Tips

TR6 TR6 Hood Respray

hondo402000

Darth Vader
Offline
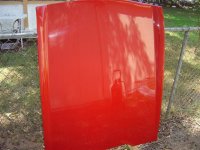
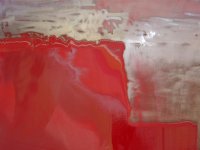
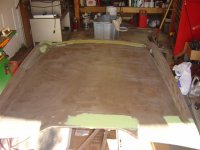
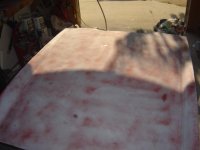
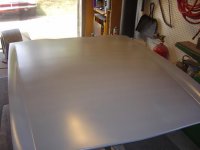
Well you guys have seen my new air compressor and It only took me a day to decide to repaint the bonnet on my TR6, all in all the whole car looks really good except the bonnet, previous painter must have gotten tired when he got to the bonnet. it had a area 2x2 that looked like it was scraped and then just painted over, a few chip and a ding. So saturday I removed the bonnet and away I go. The bonnet has a least 3 spray jobs, no one ever taken it back down to the metal. there was so much paint that sand blasting wasnt working so I got a wire wheel and got the paint off, lots of body filler and must have been a wreck since the nose of the bonnet has a metal piece tack welded on. After filling, sanding, filling sanding Priming, filliing sanding etc and I am down to the final block sanding and hopefully painting this weekend, I have the pics on my camera and will post tonight

but that air compressor puts out the power and hardly runs at all No buyers remorse

Hondo
 
For stripping paint, I find the old fashion method of using an automotive paint stripper works fast and easy. I've used Eastwood ad NAPA stuff, the stronger the better and old layers of paint come off with ease. Strip-Ease for home furniture stripping doesn't cut it, use automotive or aircraft grade (from an autobody supply) and wear gloves and most importantly, goggles.

Wire brushing is tiresome and scratches the metal, blasting removes good metal as well as creating hot spots and a big mess. I resort to blasting the inside corners and the like but for a hood, I'd use chemicals.

I also have a nice compressor (not as nice as yours though) and agree that's it's money well spent. IR is good stuff.
 
I thought about the chemical route but didnt want to mess with the goop and having to neutralize the stuff, the wire wheel didnt creat any hot spots and it didnt really scratch the metal, it took me about 1 hour to get the 3 layers of paint off. Now I have a pile of red dirt

Hondo
 
Place an old t shirt on the hood and with one layer of material between your hand and the hood, feel the entire surface for highs and lows before deciding to paint.
A good looking hood is crucial (in my eyes) in making your TR6 look great. That big hood can take a lot of work getting it right.
 
When I was doing the body work on the TR3, I had and old pro body guy helping me out a bit. He would come over and run his magic fingers all over the panel and then would circle the areas with a pencil that needed attention. I would then run my fingers and hands over the areas just to feel what he was feeling. It didn't take too long to the knack of feeling the highs and lows. If you're paying attention, it's really incredible how sensitive your fingers and hands are when feeling for these highs and lows. I personally think that introducing the t-shirt between the fingers and hands might blur what you can really feel with the fingers and hands alone.

Since I knew I was going to paint the car black, I knew I needed to pay special attention to get the body work straight. My fingers and hands worked overtime on this project, but the results are a very straight body. I tried using the technique of spraying on a contrasting primer and then sanding down to find highs and lows, but I quickly stopped that, as my fingers seemed to find these easier and quicker.

As mentioned above, the TR6 hood is a panel that is basically a big flat expanse that needs to be die straight to look good. Spend a lot of time going over it with your hands and fingers and it'll turn out just fine.
 
as promised here are some pics, the only challenge is the hood is a compound curve, it curves front to back and left to right or in brit land right to left
but I have plent of time and no need to rush and its the 3rd car I owned that I have painted so finger feel lots of thing really well especially with your eyes closed, ok before
 

Attachments

  • 18385.jpg
    18385.jpg
    53.8 KB · Views: 274
finished with paint removal, a little more body work than anticipated, duh what was I thinking, I just finished painting a new hood on my Toyota 4 runner, scuff and paint no such luck here
 

Attachments

  • 18387.jpg
    18387.jpg
    40.8 KB · Views: 286
lots of body filler later and a few primes, that red oxy is for block sanding to show the low spots
 

Attachments

  • 18388.jpg
    18388.jpg
    29 KB · Views: 288
now latest prime before blocking AGAIN but the low spots are getting fewer
 

Attachments

  • 18389.jpg
    18389.jpg
    30.9 KB · Views: 294
The t shirt removes the elements of sweat, body oils, etc. and actually increases the sensitivity of the hand. It's an old bodyman trick.
 
Hey Doug thanks for the old timers tricks but we are in the 21 century now. so to show low spots in body work you spray a mist coat of a different color primer and when you block sand your pannel the low spot show where the primer is left, high spot the mist coat gets sanded off.
so did bubba take his Tee shirt off after sweating all day to do a rub down to find the low spots cause you know his wife wouldnt give him a new shirt she just washed in the creek and dried on the line in back of the trailer. Sorry could help myself

stay tuned more pics comming
 
Bubba don't live north of the Mason Dixon. We do color sanding up here too.
 
Latest up date, the last block sand and only 3 low spots,filled, sanded, primed, so next comes wet block sanding the primer coat, dry, tack and base coat/clear coat, I think saturday is the day, no point in posting any pics till I finish
 
Back
Top