
-
 Hey Guest!
British Car Forum has been supporting enthusiasts for over 25 years by providing a great place to share our love for British cars. You can support our efforts by upgrading your membership for less than the dues of most car clubs. There are some perks with a member upgrade!**Upgrade Now**
(PS: Upgraded members don't see this banner, nor will you see the Google ads that appear on the site.)

Tips
- We have a special forum called "Member Articles" where you can submit actual articles for consideration for publication. Learn More
- Don't have an Avatar? If not, your avatar will default to the 1st character in your username. Go into "Account Details" to change your Avatar.
- Some basic forum navigation info: click
 Hey - did you know if you click on the title of a thread it will take you to the first unread post since you last visited that thread?
- Hey Guest - Is your British Car Club in our Clubs database? If not, send me a PM - Basil

- Looking for a local club? Click the "Clubs" tab above and browse hundreds of clubs world-wide.
- Add Android or iPhone APP: click
- Did you know - any picture or video you add in your posts in any marque-specific forum will also get added to the Media Gallery automatically.
- A few more tips about posting and replying: click
- Hey there Guest - be sure to keep your profile page up to date with interesting info about yourself: learn more
- More tips and tricks on Posting and Replying: click
 but were afraid to ask:
  STOP!! Never post your email address in open forums. Bots can "harvest" your email! If you must share your email use a Private Message or use the
  smilie in place of the real @
- Want to mention another member in a post & get their attention? WATCH THIS

- So, you created a "Group" here at BCF and would like to invite other members to join? Watch this!
- Hey Guest - A post a day keeps Basil from visiting you in the small hours and putting a bat up your nightdress!
- Hey Guest - do you know of an upcoming British car event?
 Pretty Please - add it to our Events forum(s) and add to the calendar! >> Here's How <<
- Hey Guest - you be stylin' Change the look and feel of the forum to fit your taste. Check it out
- If you run across an inappropriate post, for example a post that breaks our rules or looks like it might be spam, you can report the post to the moderators: Learn More
- If you would like to try some different "looks" or styles for the site, scroll to the very bottom, on the left and click the Style Selector.
You are using an out of date browser. It may not display this or other websites correctly.
You should upgrade or use an alternative browser.
You should upgrade or use an alternative browser.
TR6 TR6 half-shaft removal
- Thread starter mrv8q
- Start date
poolboy
Yoda
Offline
Removing the nuts and bolts (4) from the flange may get tiresome. Or it could have been my technique or tools. I found that I had to rotate the Axle each time I wanted to loosen a particular nut in order to find the spot where a box end wrench would fit due to the U-joint itself and with that spot found, I was able to make half circle turns of the wrenches, at most.
Are you looking to replace U-joints or the hub bearings?
Are you looking to replace U-joints or the hub bearings?
OP
mrv8q
Luke Skywalker
Offline
Right now, the U-joints on both sides, but as Ed Hart used to say on the old FNN, "We shall know more in the fullness of time"...poolboy said:Are you looking to replace U-joints or the hub bearings?
OP
mrv8q
Luke Skywalker
Offline
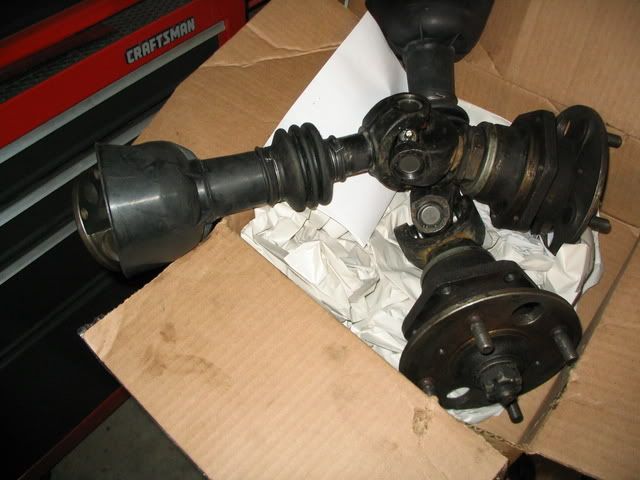
Thanks, fellas for the advice. As Rob says, it really is that easy. However, as Poolboy says, it really is drudgery up there, half a turn at a time. My best bet, after loosening the nylocs, was to use a 1/4 socket wrench, w/ a 9/16 socket.... still took a while. Here's the result:
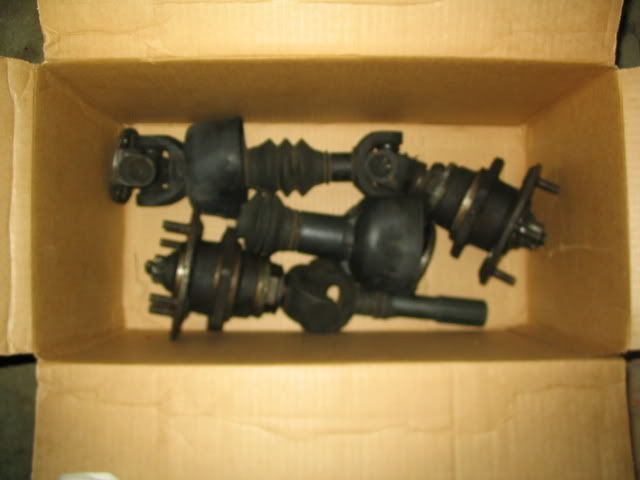
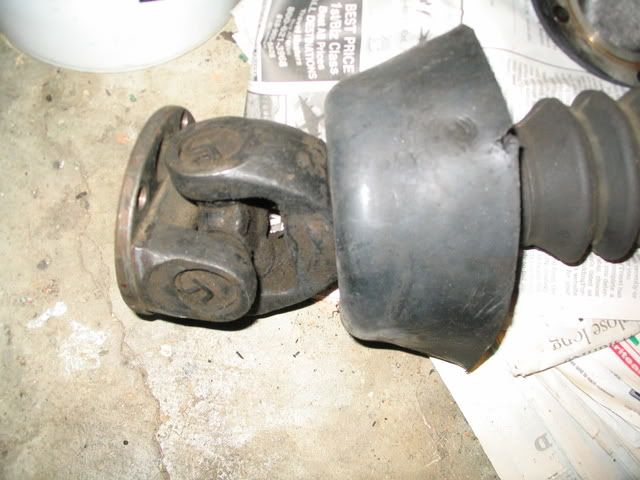
Funny enough, the hardest part was to get the inner u-joint with the round rubber boot combination out the hole, On the second one, I used some Cable-Glide, which is a slick water-based lubricant for running video cable in tight spaces and long runs. Seemed to help a little bit, but still not easy. On reassembly, I think I'll flip the rubber boot like so, to ease re-entry:
Next up, I'll order the 4 boots, and try and find a shop that'll do the u-joints for me: I'm not up for that job!
On a related note, is it possible to remove the diff w/o removing the exhaust? I'm running a solid Monza, all welded, and I'd love to do the driveshaft u-joints as well. I can see how, <span style="font-style: italic">in theory</span>, the diff can ease out w/ a dolly jack, but perhaps some one has already thought of that....
Aeroken
Senior Member
Offline
I just reinstalled my axle shafts this afternoon. Flipping the boot over like you showed worked like a charm. My boots were new and very flexible so that may have helped, but they still slid back through very easily with no lubricant or tie wraps needed. I just slid the flange in then pushed the boot into the hole and through it went. It might have helped that the hole was very clean because I had the TA's media blasted while they were off.
Attaching (or removing) the flange bolts is a whole lot easier with a 24" extension bar (or a couple of 10 inchers will do) through to the outside and a box end wrench on the inside. I was able to sit outside the wheel well and reach through to do the whole thing. This even let me put the torque wrench on to cinch them down nicely. Took less than 15 minutes a side including going around an extra time with the torque wrench to make sure I didn't miss one.
Removing the diff with the exhaust in place would be very difficult if not impossible with the stock exhaust in place, but I'm not familiar enough with the Monza.
Ken
poolboy
Yoda
Offline
I should have mentioned the tight squeeze with the boots. When I saw that it was going to be that tight, I separated the axle at the splines (looks like you did too) and lowered the inboard half down instead of trying to pull it thru the T/A. I put it back together the same way. Putting the inboard half in place first,then sliding the outboard half thru the T/A to mate with it, followed by re clamping the spline joint boot.
I don't blame you one bit for not fooling with the U- joints yourself. I beat on mine for a half hour before I gave up and found a shop to do it.
I don't blame you one bit for not fooling with the U- joints yourself. I beat on mine for a half hour before I gave up and found a shop to do it.
T
Tinster
Guest
Guest
Offline
poolboy said:I don't blame you one bit for not fooling with the U- joints yourself. I beat on mine for a half hour before I gave up and found a shop to do it.
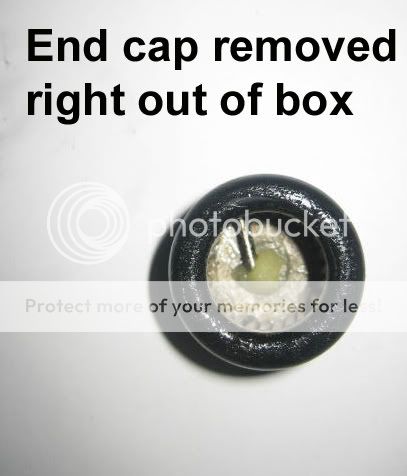
<span style="color: #990000">But remember, even professional shops
can screw up u-joints. Make sure your shop completely
cleans out the factory packing grease and istalls proper
grease. The needle bearings easily slip out of position
and can end up under the cap and really bugger things up. </span>
OP
mrv8q
Luke Skywalker
Offline
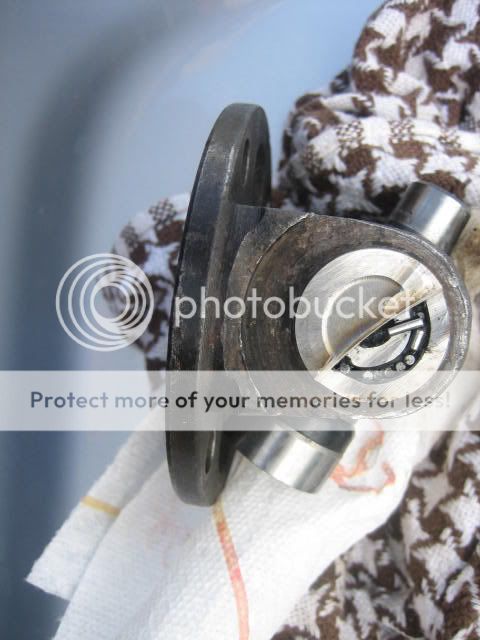
Got my half-shafts back from the drive-line shop today; everything looks good!
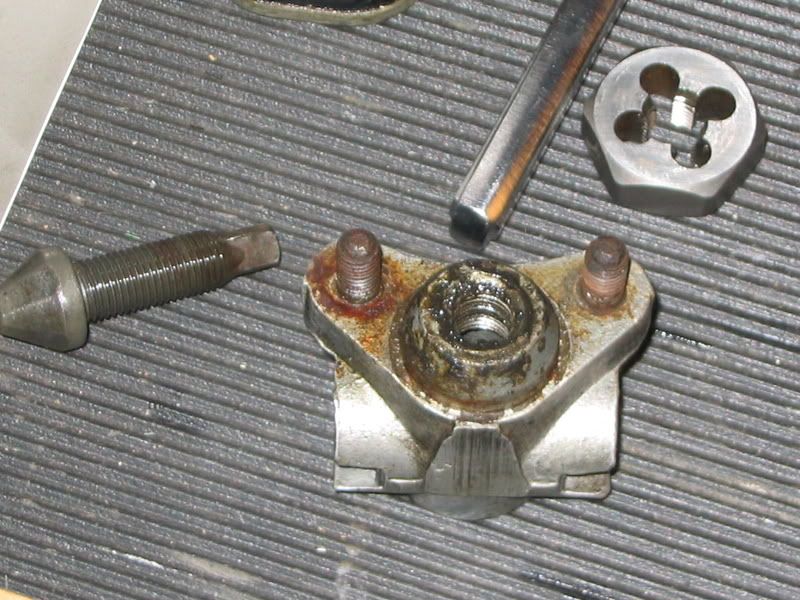
They installed the long grease nipples that came with the Hardy Spicer u-joints, but I think they look odd; there were counter-sunk screws in there before..... I guess they won't foul anything:
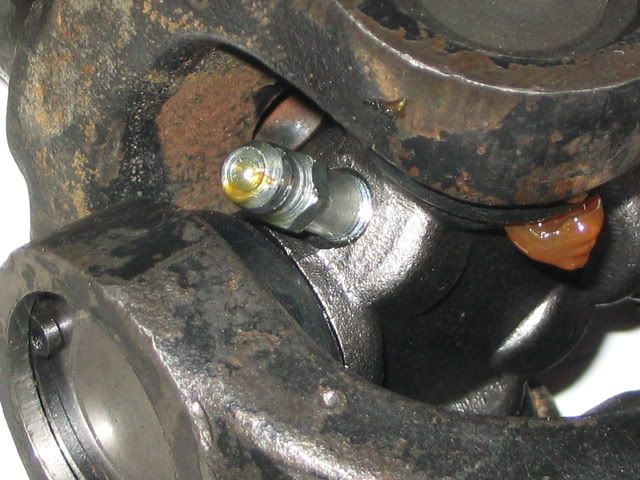
Hopefully, I'll be installing these next weekend... got some more cleanup to do beforehand...
They installed the long grease nipples that came with the Hardy Spicer u-joints, but I think they look odd; there were counter-sunk screws in there before..... I guess they won't foul anything:
Hopefully, I'll be installing these next weekend... got some more cleanup to do beforehand...
OP
mrv8q
Luke Skywalker
Offline
Don, I was lucky enough to find a place about 10 minutes drive from work, https://driveshaftsonly.com/ (NFI) I told them I was in no rush, dropped 'em off Friday at lunch, they were ready Tuesday morning. I supplied boots, gaiters, and 4 Hardy Spicer u-joints. Reassembled, $70; worth it, in my opinion.... The owner said, "I remember those"....
OP
mrv8q
Luke Skywalker
Offline
I thought I'd post a quick update on this job: this is not a difficult task at all. I found replacing the brake shoes on the backing plate the hardest part of the sequence. The Benteley doesn't say to remove the brake shoes, but I found it much easier to put the half-shafts back in w/o the brakes in the way. I also found a good shop to do the u-joint installation, otherwise I might still be at it:

It gave me a chance to clean the backing plates themselves, and also allowed me to clean up the rear brake adjusters:
They were groady to the max; one was completely frozen. Happily, a little PB Blaster, some tap and die work, and I've got some decent rear brakes..... the handbrake also works great.
In reading other posts, I think I was lucky that I had no trailing arms stud issues. One stud on each side was buggered up, but luckily only on the outside threads; the TA sides were great. The lists was helpful in that you advised caution on snugging in those studs, whereas I'd probably tighten them as hard as I could, with the consequence of stripping them out.
So, for the first time in about 5 months, I have all four tires on the ground; no jackstands. My tall "4X4" TR6 has assumed it's intended proportions with terra firma. I think a carburettor overhaul is next, and I can commence with a little driving, and turn my attention to cosmetic interior/exterior details. Hopefully, I'll have a decent driver to join the TR3 by September....
T
Tinster
Guest
Guest
Offline
mrv8q said:Don, I was lucky enough to find a place about 10 minutes drive from work, https://driveshaftsonly.com/ (NFI) I told them I was in no rush, dropped 'em off Friday at lunch, they were ready Tuesday morning. I supplied boots, gaiters, and 4 Hardy Spicer u-joints. Reassembled, $70; worth it, in my opinion.... The owner said, "I remember those"....
<span style="color: #CC0000">Wow!!
Fantastic price, Kevin!!
I paid $450 here on the island
for the same labor.
d </span>
Offline
Personally, I like to leave the counter-sunk screws in there and, as needed, replace them with the long grease nipples ONLY to offer up lubrication...and then put the screws back in. But there might be no harm in leaving the grease nipples in place?mrv8q said:Got my half-shafts back from the drive-line shop today; everything looks good!...They installed the long grease nipples that came with the Hardy Spicer u-joints, but I think they look odd; there were counter-sunk screws in there before.....