• Hi Guest!
    You can help ensure that British Car Forum (BCF) continues to provide a great place to engage in the British car hobby! If you find BCF a beneficial community, please consider supporting our efforts with a subscription.

    There are some perks with a member upgrade!
    **Upgrade Now**
    (PS: Subscribers don't see this gawd-aweful banner
Tips
Tips

TR2/3/3A TR3A Turn Signal Info

CraigLandrum

Jedi Hopeful
Offline
After my recent teardown of TR3A control head, I learned a lot about how the turn signal mechanism operates and wrote up a PDF doc that attempts to explain it - in particular it explains how the mechanism resets to the home position after a turn and the problems that could prevent this from happening.

The file is about 60K.
 

Attachments

  • 14820.pdf
    56.1 KB · Views: 878
Thanks Craig! Just printed it out for my info file. I learned sometime back that you just cannot have to much info as your working on LBC's. Nice job on the diagrams!

Thanks, Tinkerman
 
Thanks Craig,

Will use this one my resto for sure.

Cheers,
M. Pied Lourd
 
very nice write up. i have to tackle this job soon, and this info will be most helpful.

thanks
 
Craig - I plan to use this when I take mine apart later this winter. Mine would not cancel since July 2007 when I re-assembled my 1958 TR3A in a hurry so I could drive it to VTR in Valley Forge, PA. I must have done something wrong because it had been working just before I took it all apart to have it all resprayed. With 94,000 miles of stone chips across the front and on the door sills since 1990, I felt it was time.

The reason I had take the control head off was because I wanted my painter to also spray the steering wheel while he was doing the tub and all the other parts too. He had never heard of anyone doing this before, but I insisted. He masked the shiny rods, etc. and the steering wheel came out beautiful.

Maybe you want to consider this too.

Thanks again for an excellent document and for a very professional presentation. I have printed out a copy for use and I have saved it on my hard disk.
 
Interesting that you had it painted. I have to do something about my steering wheel and was kinda wondering "wot to do, wot to do". What kind of paint did he use and what kind of prep work did he give it? No thread steal, here it's on the same subject. Thats right isn't it? heh

Tinkerman
 
At my shop we repair and re-paint steering wheels with good success.We treat them as though they were flexible bumpers and use materials and paint that repair plastics.Bear in mind that they usually will develop small cracks with use down the road,but for the most part are great looking and long lasting.
MD(mad dog)
 
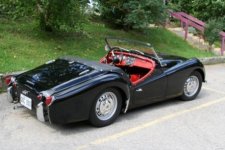
My TR3A is black and while he was spraying all the parts, fenders, hood, etc. off the tub, he did the steering wheel at the same time.

In 7,000 miles since then, I see no cracks or other blemishes.

I assume he used what he was using for the rest of the car. Base coat - clear coat.
 

Attachments

  • 14825.jpg
    14825.jpg
    26.1 KB · Views: 184
Don, the control head was not on the car when we got it, so while the steering wheel was removed from the car I repainted the wheel - masked the chrome sprayed, etc. Came out nice. My problem was that the wheel itself was a bit bent and had a few cracks. I've been told that the wheel core is an aluminum rod in a circle. We put it on a nice flat bench, bent things until the main shaft was 90 degrees to the wheel, and then carefully bent portions of the wheel rim up or down until it laid nice and flat against the bench top. Used a dremel to buff out the chrome rods. After that I epoxied any cracks I found and then bought a black leather stitched cover and stitched it on.

While I had the control head apart I used some soft metal polish and a buffing wheel and used short stints (2-3 seconds) on the wheel to buff out the black plastic (bakelite?) head and chrome trim. Was careful not to leave it on the wheel long enough to heat it up too much. Worked like a champ, and now looks brand new.
 
Sandpaper. My control head was, I suppose, typical aged bakelite, Very dull and kinda gray, It occurred to me that if sandpaper would sharpen tool steel wood chisels and plane blades to a mirror finish (and it will), it ought to be able to get rid of a layer of whatever that gray stuff is on aged bakelite.

I wetsanded with fairly coarse wet/dry paper (from the paint section of the auto parts store). Maybe 220 grit though it might have been coarser, can't remember. Then I progressed through 320/400/600/1000/1500 and finally 2000. That last was probably overkill; 1500 would have been fine. Then, I used a buffing wheel (green compound) to finish it off.

It is not jet black as it probably was when new, but then, it ISN'T new. It now has a very nice patina without that awful gray/green tint. I am very satisfied with the result. The voltage regulator cover looks good too! :smile:

If you decide to give it a shot, try it on something easier and less visible than the control head. The voltage reg cover would be a good choice. It's easier to do as it's flat (mostly) and of course, just a bit easier to remove.
 
CraigLandrum said:
I've been told that the wheel core is an aluminum rod in a circle.
Possibly some are aluminum, but I have several that are clearly steel. Aluminum doesn't rust like that.
 
Back
Top