-
 Hi Guest!
If you appreciate British Car Forum and our 25 years of supporting British car enthusiasts with technical and anicdotal information, collected from our thousands of great members, please support us with a low-cost subscription. You can become a supporting member for less than the dues of most car clubs.
There are some perks with a member upgrade!**Upgrade Now**
(PS: Subscribers don't see this gawd-aweful banner

Tips
- We have a special forum called "Member Articles" where you can submit actual articles for consideration for publication. Learn More
- Don't have an Avatar? If not, your avatar will default to the 1st character in your username. Go into "Account Details" to change your Avatar.
- Some basic forum navigation info: click
 Hey - did you know if you click on the title of a thread it will take you to the first unread post since you last visited that thread?
- Hey Guest - Is your British Car Club in our Clubs database? If not, send me a PM - Basil

- Looking for a local club? Click the "Clubs" tab above and browse hundreds of clubs world-wide.
- Add Android or iPhone APP: click
- Did you know - any picture or video you add in your posts in any marque-specific forum will also get added to the Media Gallery automatically.
- A few more tips about posting and replying: click
- Hey there Guest - be sure to keep your profile page up to date with interesting info about yourself: learn more
- More tips and tricks on Posting and Replying: click
 but were afraid to ask:
  STOP!! Never post your email address in open forums. Bots can "harvest" your email! If you must share your email use a Private Message or use the
  smilie in place of the real @
- Want to mention another member in a post & get their attention? WATCH THIS

- So, you created a "Group" here at BCF and would like to invite other members to join? Watch this!
- Hey Guest - A post a day keeps Basil from visiting you in the small hours and putting a bat up your nightdress!
- Hey Guest - do you know of an upcoming British car event?
 Pretty Please - add it to our Events forum(s) and add to the calendar! >> Here's How <<
- Hey Guest - you be stylin' Change the look and feel of the forum to fit your taste. Check it out
- If you run across an inappropriate post, for example a post that breaks our rules or looks like it might be spam, you can report the post to the moderators: Learn More
- If you would like to try some different "looks" or styles for the site, scroll to the very bottom, on the left and click the Style Selector.
You are using an out of date browser. It may not display this or other websites correctly.
You should upgrade or use an alternative browser.
You should upgrade or use an alternative browser.
TR2/3/3A TR3a Trunk floor removal and replacement
- Thread starter apbos
- Start date


DNK
Great Pumpkin
Offline
apbos said:Thursday afternoom is the big day. ... Things to watch out for? Pictures are welcomed!
Paul
Switch blades?
PatGalvin
Jedi Warrior
Offline
my Father in law is a body man of 50 years. 83 yrs old now. He doesn't really help me but he did tell me I was totally out of my mind and that the car belonged in the scrap heap. But now the body is solid, doors and trunk lid fits (pretty well, pending adjustment), and the chassis is almost ready to roll.
Hope to finish brake lines this weekend, mount steering rack, and go pick up that frozen old engine from storage and start stripping it down for its date with the machine shop.
Pat
Hope to finish brake lines this weekend, mount steering rack, and go pick up that frozen old engine from storage and start stripping it down for its date with the machine shop.
Pat
martx-5
Yoda
Offline
If you're talking about just replacing the trunk (boot) floor, I did this to my TR3. It was time consuming, but not especially difficult. I took the old panel out in sections using one of those pneumatic body saws and cut-off tools. I first cut away the center section that covers the spare tire well. Be careful not to cut into the well or the flange. Then I worked on the outer pieces. At some point, you will have to prop up the spare tire compartment so it doesn't flop down. Drill out whatever spot weld there are, and clean up all the sealing putty. There's a bunch of it at the tail end of panel, which was still soft after 45 years! Grind down any of the remaining spot welds etc, paying close attention to the spare tire well flange. It took me awhile to figure out how to get the new panel in without cutting it in pieces. It will go in, but you'll have to play with it. It took me about a half an hour to get the right angle.
I put it in the best position (it will be a compromise), and then used a few of sheet metal screws to hold it there in the flange of the spare tire well. I marked the areas where I wanted to do the plug welds, took the piece back out, and drilled the holes for the plug welds. Put the floor back in located by the sheet metal screws, and then plug weld everything in place. Remove the screws, and weld the holes shut.
Edit: IIRC, my floor (from Moss) did not come with the right angle brackets for the gas tank fiberboard liner. I just made some from some sheet metal and welded them in place.
HerronScott
Darth Vader
Offline
Pat,
Can you come out here and take care of mine when the time comes? I'll need to do trunk floor, spare tire pan, floors, inner and outer sills, battery tray.. :frown:
Scott
Can you come out here and take care of mine when the time comes? I'll need to do trunk floor, spare tire pan, floors, inner and outer sills, battery tray.. :frown:
Scott
OP
apbos
Jedi Knight
Offline
OK
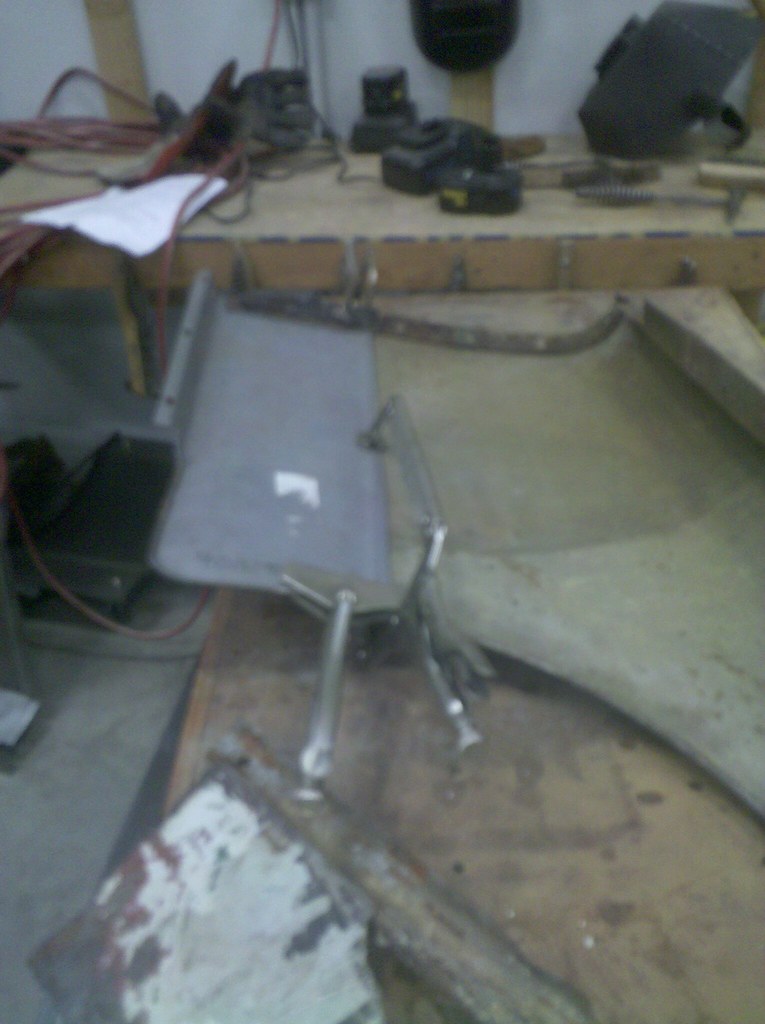
Followed the steps outlined by Art and got out about 80% of the metal today (about an hour and 40 minutes). We also got the fender patch cut in and ready for glueing. If I get time I'll do some more in the afternoon. Need to be done by Monday as school will end soon and then my labor goes an summer vacation.
A die grinder with a cut-of wheel works well. Friday I'll be using an angle grinder to get down to the spot welds and peal away the remaining metal.
Sorry about the picture quality. My cell phone was cover by dust(rust), when I took the pictures
Paul
HerronScott
Darth Vader
Offline
Pat,
Considering I have to build a garage first to work on them, I don't think there's any worry that you will be done before then!
Scott
Considering I have to build a garage first to work on them, I don't think there's any worry that you will be done before then!
Scott
OP
apbos
Jedi Knight
Offline
Got 1hr 20 min in today. Used Eastwood's Body adhesive to glue on the patch. 30 min. later we were able to remove the clamps. No warping and fast.
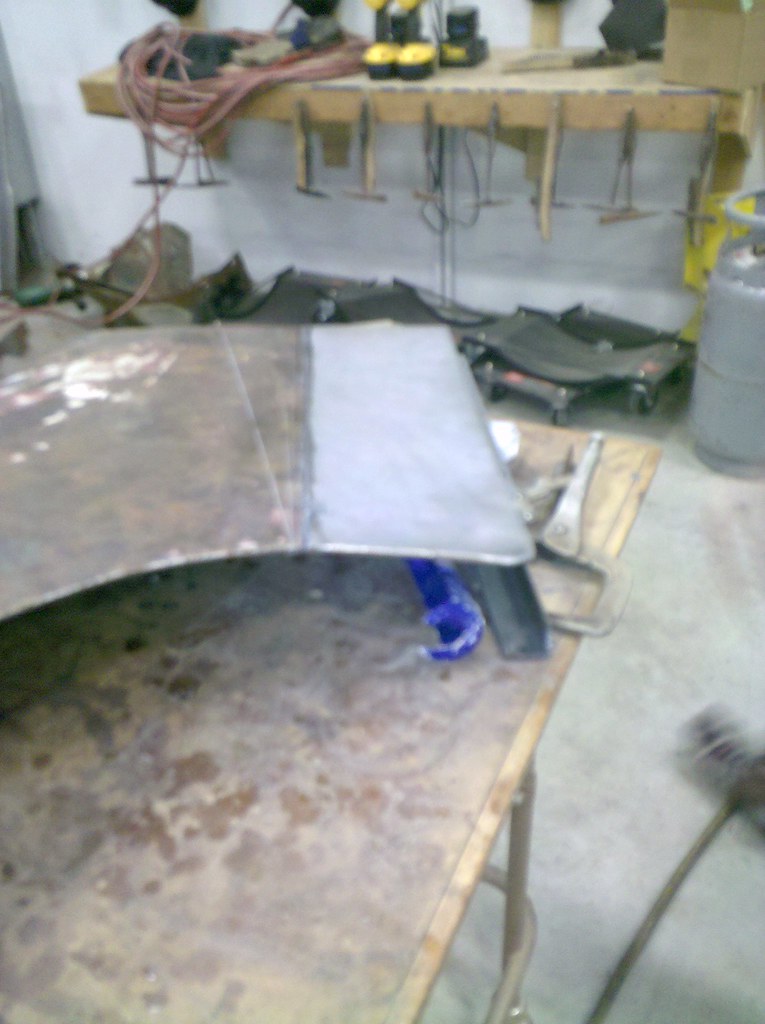
Also got all the steel off the spare tire flange. Monday afternoon I hope to cleanup the remaining trunk steel and get the panel ready for installation.
Paul
Also got all the steel off the spare tire flange. Monday afternoon I hope to cleanup the remaining trunk steel and get the panel ready for installation.
Paul