• Hey Guest!
    British Car Forum has been supporting enthusiasts for over 25 years by providing a great place to share our love for British cars. You can support our efforts by upgrading your membership for less than the dues of most car clubs. There are some perks with a member upgrade!

    **Upgrade Now**
    (PS: Upgraded members don't see this banner, nor will you see the Google ads that appear on the site.)
Tips
Tips

TR2/3/3A TR3A Rear Body Mount/Spare Tire Compartment Repair

Quick update.

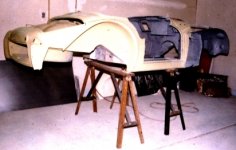
This thread is morphing a little bit and has become more than the title suggests :smile:

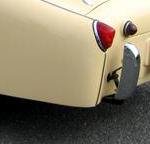
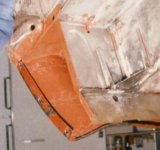
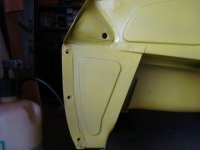
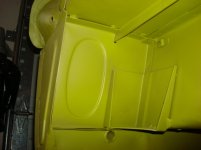
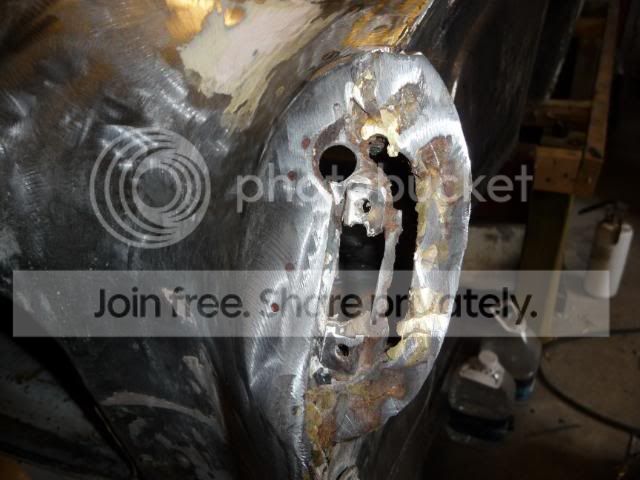
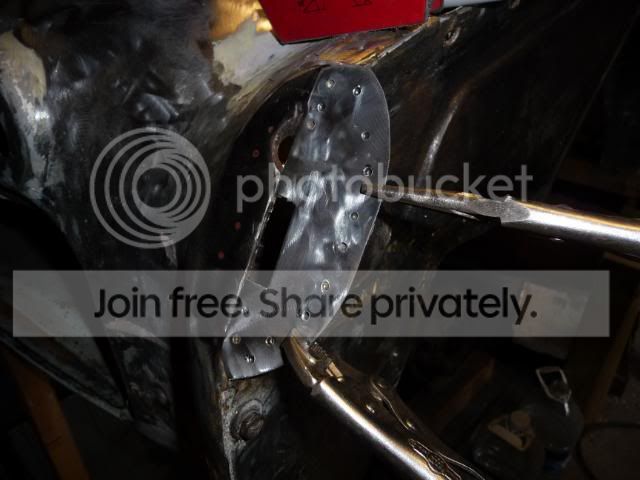
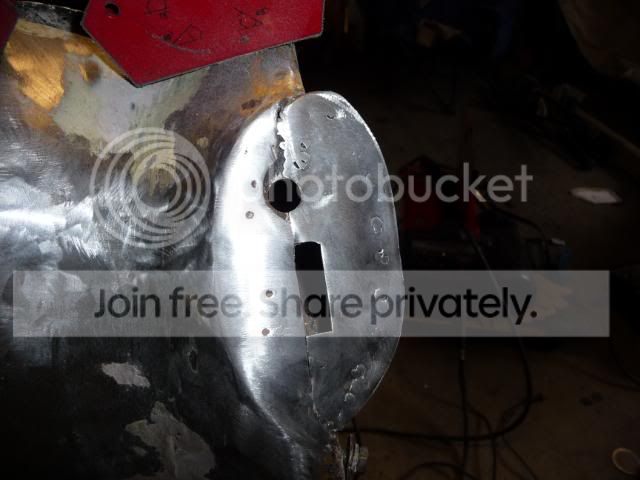
So, fixed the tail light area this morning where it was rusted through. Not quite finished yet and I need to make the opening a little bigger. Thought I would stop and actually test fit the light before I went much further.

P1070168.jpg


P1070174.jpg


P1070177.jpg


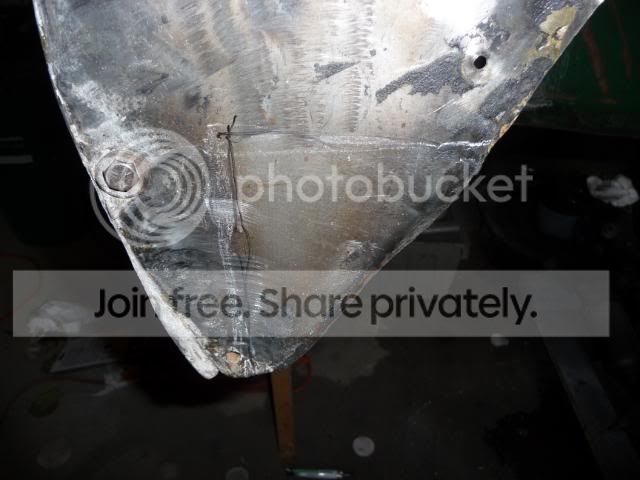
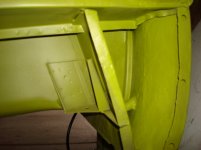
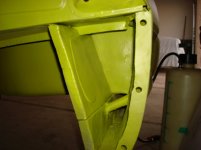
Next, I need to figure out how to fix this punt....

P1070156.jpg


P1070158.jpg


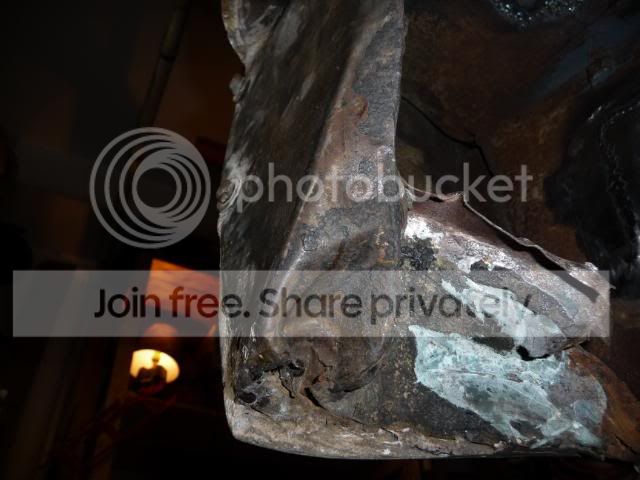
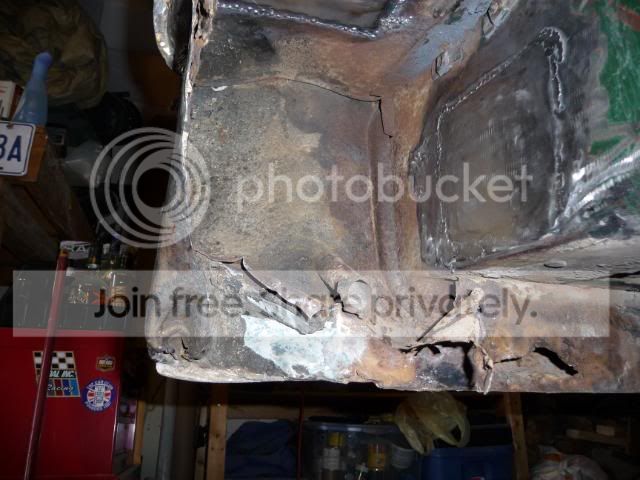
I was thinking of cutting off that lower corner and either replacing it with new metal or trying to hammer out that punt.

Suggestions as always are welcome.

Cheers,
M. Pied Lourd
 
Slide hammer maybe but it's going to require a lot of work. I'd lean towards replacing it personally.

Good progress - now it is just a function of time spent Tush!
 
Thanks Skip,

Here is a side view. Marks are where I was thinking of cutting it.

P1070182.jpg


Don E, do you have any pics showing what this area should look like? Other side is not great on my car either.

Also, are there supposed to be cage nuts on the inside of that side panel at the rear to fasten the fender? Looks like mine are just regular nut and bolts thus the "removeable" section of the rear close out panel....

Cheers,
Dave
 
Going to check the parts car....only problem is that it is difficult to get to as it is sitting on the other side of the car that I am working on plus it is standing on the end that I need to check :smile:

Cheers
Dave
 
David you are doing great work keep it up and she will be on the road in no time!!
 
Dave - I've been looking for that photo for you and the best I can find was right after it had been sprayed with heavy filler primer in mid-1989. Maybe you can zoom in a see the detail you are searching for. I'll send you the 1.9 meg original photo to your home.
 

Attachments

  • 20661.jpg
    20661.jpg
    93.9 KB · Views: 256
Thanks Don,

I dragged out Robin's old tub last night and took a look of what that area looks like. Although it is a little twisted, it gave me a good idea of what it should look like.

On closer inspection, it looks like that little triangular piece that closes off the rear valence corner to the side fender has been crushed. Now that I know what it is supposed to look like I should be ok. There has been quite a bit of work done on that rear valence with huge amounts of bondo thrown in to get it to look ok. I am stripping the bondo out...it must be over 1/2 inch thick in some places. I think that eventually, I will have to visit a local TR3 owner and take some measurements and make a template so I know what the curves are supposed to look like.

I have started stripping the fiberglass out of the drivers side spare wheel compartment. It looks like it might be in a little better shape than the passenger side. Will post some pics again once I make some progress.

Cheers,
David
 
David - my car is down to bare tub and it is sitting up on stands for easy photo access from pretty much any angle... basically I can get you a close up of anything in Don's picture. Let me know exactly the area you want and I can get a pic off to you right away.
 
Way to keep at it Tush - that spot on the tail can always be gotten back...

I can grab a clean section for you from a parts car if you want/need it.
 
Dave - Robin's car always had at least one repro rear fender on it. You can see what I mean if you compare your white one with his (your parts car). See the photo how the stainless strip beading goes straight down on Robin's while it should be curved down - out of sight at the bottom as you look at it straight down when you look at it from above. Here is a photo of a repro rear fender. You'll see why he needed 1/2" on bondo there to try to make the curve from the bumperette to the area below the tail-light - look smooth.
 

Attachments

  • 20665.jpg
    20665.jpg
    3.8 KB · Views: 252
Here is a close-up of my early TR3A from 1988. It's an earlier photo I sent you, but I have turned the photo 180 degs. so you can see it from below. I had to weld on 3 captive boxes for the three rear holes onto the inside of the new triangular panels that mu neighbour pressed out for me and which are needed to close that area. The captive boxes and nuts are on the inside of that panel and the panel slides in behind the flange you see here with the 3 holes. If I remember when I took mine all apart, it had not been welded closed up that seam beside those 3 holes. But I welded it as I did my restoration.
 

Attachments

  • 20667.jpg
    20667.jpg
    16.6 KB · Views: 249
Hi Guys,

Don, thanks for the additional pics and Skip/Luke thanks for the offers.

Took the night off from the car last night but will be back at it tonight.

My plan of action is this. Based on Don's photos, I am going to try and take the side panel off if I can see where it is welded to the rear valence flange. Going to do some clean up tonight and if all goes well, I will be able to drill out some welds then cut the panel at the top straight across just below the tail light bucket. I have a useable repair section from my parts car (if I can remove it successfully) that I will weld in there if all goes well. If it doesn't, then I should be able to fabricate a piece to go in there. Oh, I am hoping to replace the three cage nuts on the rear flange while I am in there as well.

Cheers,
Dave
 
Howdy!

Tonights update.

So, first thing I did tonight was to clean the area a little bit better and to see how things looks as compared to Don's photos above.

I had thought about trying to remove the entire panel off the side....however, that rear flange that you see in Don's picture is non existent in my car. My car I am going to nickname "the rivet queen" as many pieces have been riveted and then it looks like braised. So, I decided to go with my original plan and it looks like it is going to work out ok.

So, in photos

I cut the section out that I had indicated that I was going to...you can see how much damage there was on the bottom.


I cut out a larger section from my parts car.


Haven't trimmed it yet, but it is looking better. At least I can see the form and fit a little better.


I cleaned up the metal a little bit on the underside as well. More pop rivets...


Will trim the piece up tomorrow. Need to get some cage nuts from Macy's to weld in. Thats it for tonight.

Cheers,
Dave
 
These photos may or may not help. Right side original and undamaged, left side was crushed and repaired, still some work to do.
 

Attachments

  • 20683.jpg
    20683.jpg
    78.5 KB · Views: 189
next
 

Attachments

  • 20684.jpg
    20684.jpg
    81.6 KB · Views: 181
next
 

Attachments

  • 20685.jpg
    20685.jpg
    79.8 KB · Views: 179
next
 

Attachments

  • 20686.jpg
    20686.jpg
    81.4 KB · Views: 173
Back
Top