Follow along with the video below to see how to install our site as a web app on your home screen.
Note: This feature may not be available in some browsers.
Hey Guest! British Car Forum has been supporting enthusiasts for over 25 years by providing a great place to share our love for British cars. You can support our efforts by upgrading your membership for less than the dues of most car clubs. There are some perks with a member upgrade!
**Upgrade Now** (PS: Upgraded members don't see this banner, nor will you see the Google ads that appear on the site.)
Tips
We have a special forum called "Member Articles" where you can submit actual articles for consideration for publication. Learn More
Don't have an Avatar? If not, your avatar will default to the 1st character in your username. Go into "Account Details" to change your Avatar.
Hey there Guest - be sure to keep your profile page up to date with interesting info about yourself: learn more
What the heck is that "Resources" tab up there all about? Learn more
More tips and tricks on Posting and Replying: click
Everything you've ever wanted to know about bookmarks, but were afraid to ask: Learn More
STOP!! Never post your email address in open forums. Bots can "harvest" your email! If you must share your email use a Private Message or use the smilie in place of the real @
Want to mention another member in a post & get their attention? WATCH THIS
So, you created a "Group" here at BCF and would like to invite other members to join? Watch this!
Hey Guest - A post a day keeps Basil from visiting you in the small hours and putting a bat up your nightdress!
Hey Guest - do you know of an upcoming British car event? Pretty Please - add it to our Events forum(s) and add to the calendar! >> Here's How <<
Hey Guest - you be stylin' Change the look and feel of the forum to fit your taste. Check it out
If you run across an inappropriate post, for example a post that breaks our rules or looks like it might be spam, you can report the post to the moderators: Learn More
If you would like to try some different "looks" or styles for the site, scroll to the very bottom, on the left and click the Style Selector.
Hi guys, I'm hoping someone can help me understand what the correct parts and mounting are for the license lamp. I did a search and found this problem listed elsewhere, but no solution other than drilling holes in the body, and that's just silly. There's got to be a correct part that I'm missing.
I have a new standard Lucas chrome & glass lamp which appears to be the same as all the British cars used from around 1950 to around 1970. It has 2 small #8 studs and requires the wires to come through a third hole near one of the studs. In the MG/AH cars I'm familiar with, this mounts on a cast aluminum plinth which then bolts to the body. I'm told the TR3A has no such part and it mounts directly.
Well the holes in the body are much too big and a slightly different spacing. Since the studs in the lamp are so high, even if I would use huge fender washers on the studs, part of the lamp would overhang the spare tire door. The lamp needs to be mounted higher.
I would greatly appreciate a picture or description of how this is supposed to look.
Thanks,
Andy
Those two (big) holes are for the wires. Some cars got one, some got two. You appear to be missing the small mounting holes.
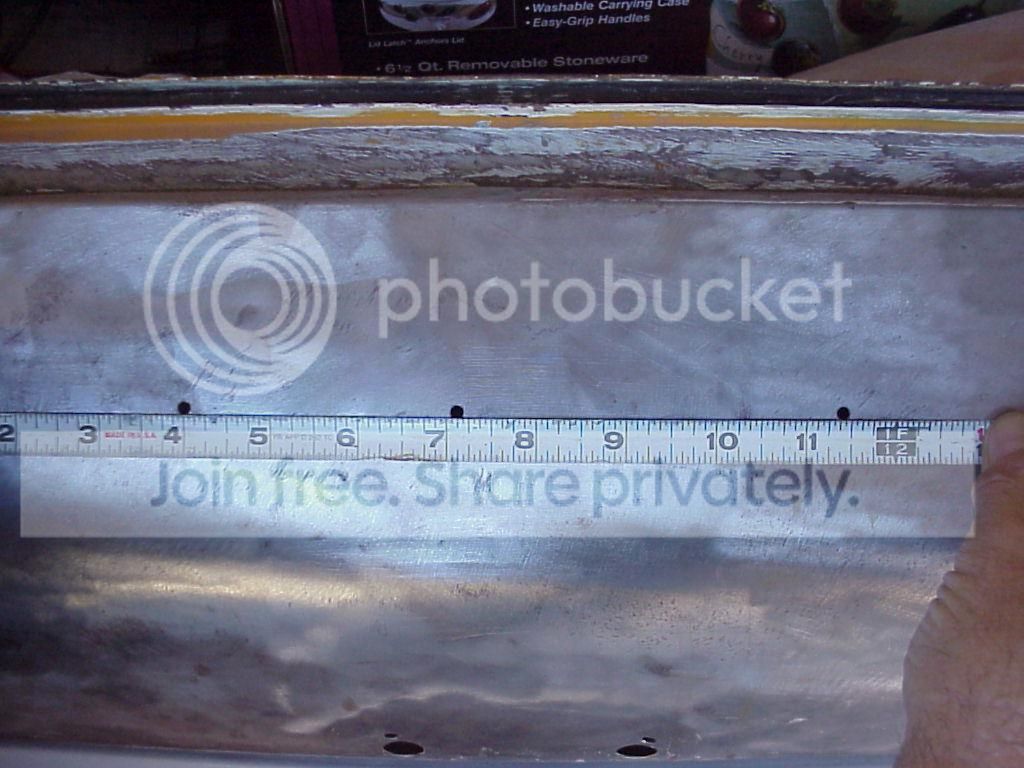
Here's what mine has (just the left hand big hole):
Another view:
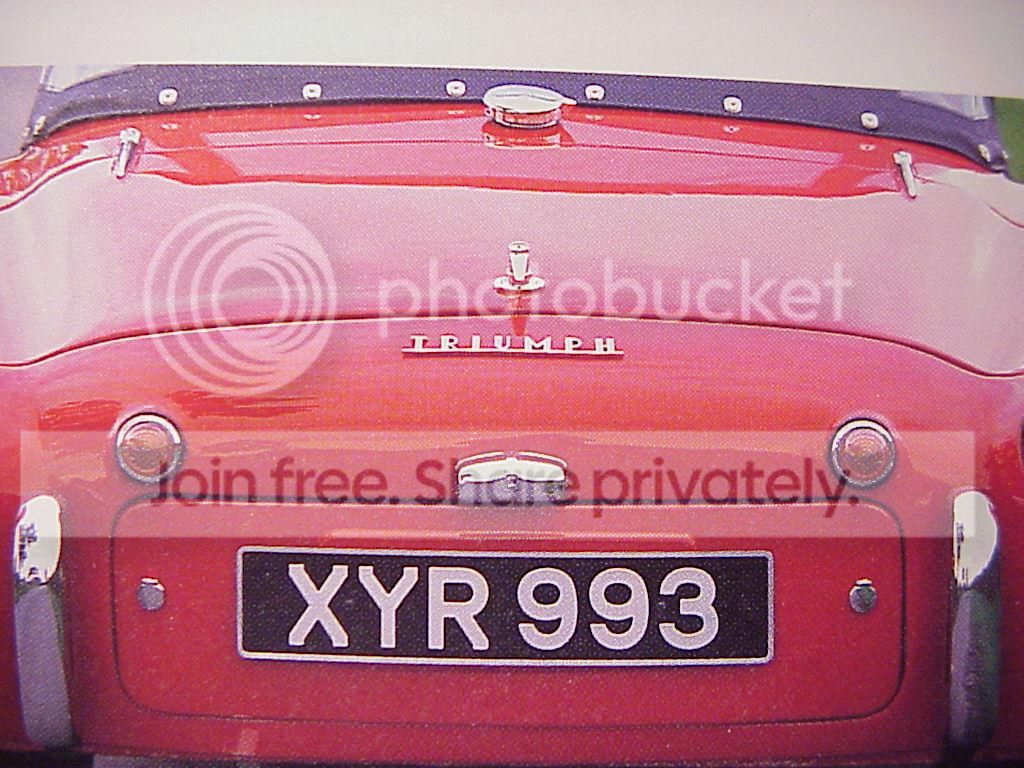
Installed (not mine):
A friend's TR3A that I was using for reference (you can see he has two big holes + two small):
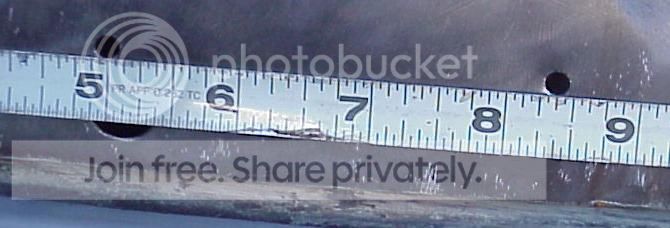
A measurement on the two small holes (I think the tape was covering the RH big hole):
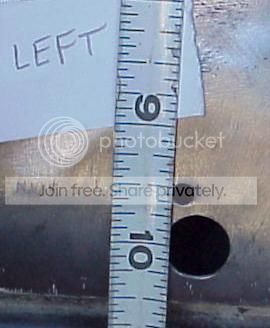
A measurement showing the relationship of the big & small hole on the left end:
I wonder if you can see or feel the remains for those two small holes on the inner side of the panel. The body guy who did my paint thoughtfully welded up a lot of the holes on mine which is why I happened to have these photos.
Oh, in case it isn't obvious -- the wires go through that nub/button on the right side of the gasket in your photo. You poke a hole in it to run the wires through and that nub forms a grommet to seal the big hole. Looks like you will only be using the LH big hole.
Thanks Geo, you are absolutely right. I got a light in there and I could tell that the holes were covered over with a thin layer of body filler. They opened up easily with a drill bit by hand. I have no one to blame but myself on this one as I did all the body work!
This site uses cookies to help personalise content, tailor your experience and to keep you logged in if you register.
By continuing to use this site, you are consenting to our use of cookies.

 Hey Guest!

 Hey - did you know if you click on the title of a thread it will take you to the first unread post since you last visited that thread?
 but were afraid to ask:
  STOP!! Never post your email address in open forums. Bots can "harvest" your email! If you must share your email use a Private Message or use the
  smilie in place of the real @
 Pretty Please - add it to our Events forum(s) and add to the calendar! >>