• Hey Guest!
    British Car Forum has been supporting enthusiasts for over 25 years by providing a great place to share our love for British cars. You can support our efforts by upgrading your membership for less than the dues of most car clubs. There are some perks with a member upgrade!

    **Upgrade Now**
    (PS: Upgraded members don't see this banner, nor will you see the Google ads that appear on the site.)
Tips
Tips

TR2/3/3A TR3A Headlight

rlandrum

Jedi Trainee
Offline
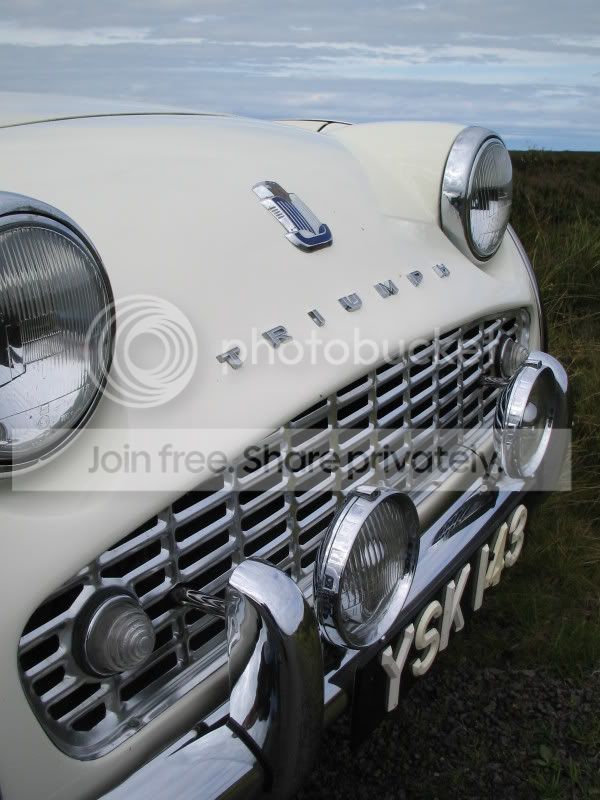
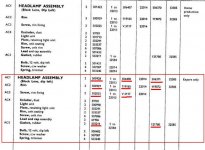
We purchased all new headlights from Moss. These were complete, and included all gaskets and even the bulbs...

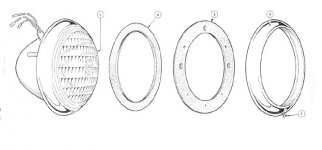
We have it assembled (correctly, we believe), but the finish isn't quite what we had hoped for. The external headlamp rim doesn't sit flush with the body, so there's a slight gap between rim and body. It's probably 1/8th and doesn't look very good, as it sort of exposes the rubber gasket.

Is it possible to get this rim to mount more securely so there is no gap? Or is this just the way it is?
 
Not sure I understand the question. On my TR3A (and the TR3 with the 3A front apron), the trim ring sits against the gasket, so the edge of the gasket does show between the trim ring & the body. I believe that is the way it should be.

For example, here is a blowup from a factory postcard, where you can see the dark line of the gasket between the chrome ring & the body.
 
I think what you describe is normal. From memory there is a rubber gasket and then the metal bowl. The chrome ring sits flush with the metal bowl and the rubber gasket is visible.
There are quite a number of different lights and bowls available and two different widths of the chrome ring, so there could be a problem. Do you have any pictures?
Nick

Having said that, I have just looked through some pictures and the gap doesn't look that large on my car. It's not the best angle, though!
2005-07-31002.jpg
 
I am having the same problem. I think in my case the headlight pod that is part of the Apron is not exactly true. That means the bowl and the gasket get a little distorted when everything is tightened down.
John
TS75605L
 
I'm not sure if this helps, because details are not explained, but look at the drawing and listing. The parts inside the red box are export TR's.

There were two changes in part number shown for tje headlamp assembly, and rim.

From TS1 to TS22013
From TS22013 to TS32585
From TS32585 to (EOP)

There was also a change in the gasket at TS32584

The one change that is plain is the narrow VS wide Rim. Now if we only had details describing the other changes.
 

Attachments

  • 15873.jpg
    15873.jpg
    64.1 KB · Views: 206
  • 15874.jpg
    15874.jpg
    40.5 KB · Views: 207
Actually, Frank, I don't believe any of those change points are for narrow vs wide clip-on trim rings. The TR2 trim rings were, as shown, held on with a screw into the bucket. Then the early TR3 trim rings were held with a clamp screw that ran between the (split) halves of the trim ring. The change at 32585 is to the clip-on style ring. That's why there is still a screw listed between 22015 and 32585 (which is different than the earlier screw).

I believe the change to narrow trim rings happened much later.

Those clamp-on trim rings are rare birds today.

Oh yeah, gaskets. I'm not sure what other changes there were, but the early gaskets had 3 holes (as shown) for the 3 adjusting screws on the early buckets. Later buckets only had 2 adjusting screws (the 3rd screw was replaced by a spring), and the later gasket actually had protrusions to fit over the adjusting screws and (hopefully) keep them dry. The later style is illustrated here (near the bottom).
 
Speaking of rare birds, did Moss have the wide trim rings?
 
The kits that were sent to us included the gaskets with two protrusions for the adjusting screws. The outside rims are attached on the top by an inner-facing shaped ledge that rides just under the top adjusting screw, and on the bottom by an inner-facing tab that snaps into a spring-loaded clip. The clip comes separately with an included pop rivet and replaces a bent-tab thingie that is attached to the shipped base - looks like the shipped setup is designed to accomodate an original style rim that uses a small attachment screw to affix the bottom of the outside rim to the base.

Once the clip is installed, the new style rim is slipped under the top adjusting screw and then simply pressed down on the bottom until the bottom snaps into the spring-loaded catch.

The entire rim seems about a half inch too large for the headlamp that it encloses. I guess it looks OK from a distance but sure looks funky up close. Will call my son and see if he can post a pic of what
the assembled thing looks like.

I'm also somewhat perplexed about the two-screw adjustment. Yes, the spring really pulls down on the third of the headlamp holder that doesn't have an adjustment screw, but it holds that edge flat against the base while the two adjustment screws push up the other two thirds of the lamp. It seems that - to my teensy brain anyway - that the absolute best that can be done with this arrangement is that the headlamps shine straight ahead, or - if the screws are used to push the sides of the lamp up a bit, that the lamp shines towards the left and downwards. This applies equally to both sides.

I probably shouldn't worry about it until I find I actually can't adjust them to point where they need to go, then I'd have a legitimate gripe :smile:
 
Back
Top