• Hi Guest!
    You can help ensure that British Car Forum (BCF) continues to provide a great place to engage in the British car hobby! If you find BCF a beneficial community, please consider supporting our efforts with a subscription.

    There are some perks with a member upgrade!
    **Upgrade Now**
    (PS: Subscribers don't see this gawd-aweful banner
Tips
Tips

TR2/3/3A TR3A Dipping Switch Bracket

Tinkerman

Darth Vader
Offline
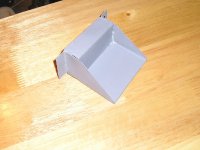
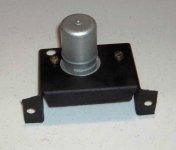
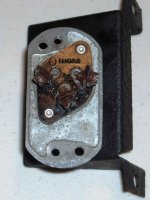
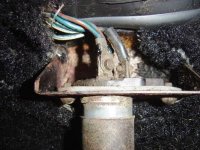
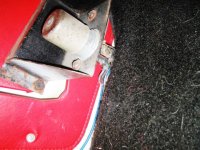
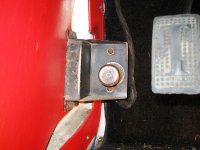
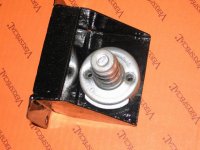
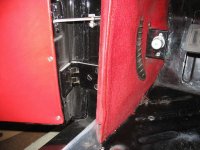
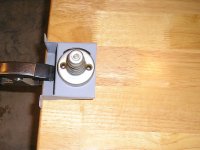
As you can see from the picture my dipping switch bracket is minus a couple of holes. No real problem because I can put them in but not quite sure of the positioning. No I was not smart enough to take a picture before I refabbed it. As I recall it needed a whole new plate where the switch mounts. Any how I really need some positioning help.

The upper mounting bolt hole is about 7/16" from the front edge of the mounting ear. Where is the bottom mounting hole positioned on the bottom mounting ear.

Is the dipping hole centrally positionedd on the plate or is it offset in any way?

Your help greatly appreciated!

Tinkerman
 

Attachments

  • 17622.jpg
    17622.jpg
    86.3 KB · Views: 228
Dick, do these photos help?
 

Attachments

  • 17623.jpg
    17623.jpg
    20 KB · Views: 218
  • 17624.jpg
    17624.jpg
    66.5 KB · Views: 220
  • 17625.jpg
    17625.jpg
    25.7 KB · Views: 223
  • 17627.jpg
    17627.jpg
    134.6 KB · Views: 95
  • 17628.jpg
    17628.jpg
    101.5 KB · Views: 221
Frank - Yours is an early TR3A like mine. Someone posted this showing the round dimmer switch for a later TR3A.
 

Attachments

  • 17629.jpg
    17629.jpg
    40.1 KB · Views: 210
Here's the dimmer on my early TR3A. BTW, that rubber scuff pad is 51 years old. I unstitched it from the original carpet set in 1989. It came with my TR3A new in 1958 and I sent it to Witney near Oxford, England to have it sewn onto the new carpet set which Jim Hawkins made for me in 1989. This photo is from about 2006. I sent him a pattern where exactly I wanted him to sew it. It came out perfect.

BTW Frank - The photo you show of the dimmer from Nick's Black and white TR3A shows the bracket back-to-front compared to mine.

Nick - Have you ever had trouble resting your shoe on your dipper switch with the bracket this way ? Have you ever had difficulty tring to dip your main beams because of the bracket being backwards ?
 

Attachments

  • 17630.jpg
    17630.jpg
    76.2 KB · Views: 217
Thanks for the pictures and the thoughts folks. After reviewing everything and trying the dipping switch in various configurations I think the picture attached is the way it has to go for wire clearance and strength. Even though Don's unit is an earlier version, it is set up the same basic way.

Thanks for the pics and the thoughts, Tinkerman.
 

Attachments

  • 17633.jpg
    17633.jpg
    85.1 KB · Views: 182
My 58 is the same as Don's. But the in-the-box mounting in Frank's red interior photo would be great to use as a foot rest. Just have to toe the switch when you need it.
 
Don Elliott said:
Nick - Have you ever had trouble resting your shoe on your dipper switch with the bracket this way ? Have you ever had difficulty tring to dip your main beams because of the bracket being backwards ?
Don,
I remember after a previous post I took my bracket off, painted it and tried to fit it the other way around. It won't fit because of the screw hole locations. The way it is, I can rest my foot on the bracket without touching the dip switch and just slide my foot slightly to the right to dip. It works very well like that and I assume that it is as originally fitted to the car. We will have to get everyone to stick their head into their footwells to see if there are any other brackets like mine out there!
Nick

Just noticed that the bracket in your picture is the same as mine.
 
My cars have all been like the photo Don posted. Although it's not the same (RHS), the photo in Practical Hints also doesn't show the bracket sticking up next to the button, so I believe that is correct.
 
Yep it is, but I had the ability to drill a new hole so mine will fit the way I pictured it. Course my bracket was reworked so no telling how normal it really is. It will be interesting to see if some one sticks a camera down there and shows us what really happened. I did that at a couple of shows but can't find the bloomin pictures. Did you have any trouble getting the wires in correctly or did you do that before mounting the switch?

Tinkerman
 
Definitely attached the wires first. On the 3A, ISTR I left the bracket attached to the body and just worked the switch out of the bracket.

DSCF0017.jpg


But the TR3 came to me with the bracket already dismounted and the switch still attached to the bracket, so I just bolted the bracket back on (after verifying the switch worked).
DSCF0012-1.jpg
 
Back
Top