• Hi Guest!
    You can help ensure that British Car Forum (BCF) continues to provide a great place to engage in the British car hobby! If you find BCF a beneficial community, please consider supporting our efforts with a subscription.

    There are some perks with a member upgrade!
    **Upgrade Now**
    (PS: Subscribers don't see this gawd-aweful banner
Tips
Tips

T-Series TF is slowly coming together

You are going to be a metal-working expert by the time you're done.

I know that T-series cars all take some fettling to restore, but this seems a bit excessive. Does make you wonder -- if they have to make the panel in the first place, why not just make it a least closer to correct?
 
Could there have been THAT much variance in the original models To make replacement panels That way? I know they were built by hand. Id be interested to know measurements on different cars. Thats frustrating work. You seem to be plugging away at a good speed.
 
These panels have always been the same in physical size and layout. The only difference is they all come through over length and have to be cut to fit. This was done at the factory also. Problem here could be two different fabricators, one who has the basic idea how this panel should look and one that hasn't a clue and doesn't give a d@mn! I blame Moss for this, as their selling it and should monitor their products better. There is no reason to sell a product that has these issues! :grumpy:
 
Big companies. I try to stay with the little man as they are mostly in it for the passion they have.
 
As the right rear fender is a good candidate for a lot of panel beating, I opted to get another fender that came into view. Bought from a Canadian gent who has an abundance of T series parts, it is in great shape. A couple very minor issues, arrows, which since this photo have been removed. Here's a few pics. PJ

I forgot to ad, I removed 3 layers of paint before the photos.:encouragement:

View attachment 33893View attachment 33894View attachment 33896
 
Last edited:
Just got my restored grill from Hugh. It is perfect! Looks a little bit better than the one that came off! :applause: Wrapped up in a blanket after this photo and put on the shelf for a while. :encouragement: PJ


Click on photo.
View attachment 33931
 
That looks really nice, PJ! Got to feel good to get that in place.
 
Just got the paint job set up by a local custom car paint shop. Never realized aprox 6 coats will be applied, primer, sealer, 3 coats of urethane color and one coat of clear. I looked at three of his personal cars and they are beautiful. Hopefully paper work will be done tomorrow. PJ
 
Excellent, good luck with the painters.
 
Ok, tell me I'm crazy but, since the tub is off the chassis and I have plenty of time, I'm pulling the engine and transmission again and painting them the right color! Told before to paint it Duplicolor Canyon Red, I did and now found it's way off from the proper color, too maroon! Found out that Rustoleum Cardinal Red is so close, it's nearly impossible to tell the difference. Since I don't like spray bombs for some things, I'm having a quart of the same color blended in Acrylic Enamel which I can spray with a gun. Well, they say crazy people are happy people! Hopefully that's correct! :highly_amused: PJ
 
Nothing wrong with fixing something that would bug you. Now's the time to do it easily.

Yes, we're all a little nutty when doing these things, but that's okay. :grin:
 
Just got word yesterday from the body shop, to bring in the sheet metal for prep and paint on Monday! Finally! After getting the engine painted, all I have left on the chassis is installing the new brake shoes. Things are looking up. :encouragement: PJ

 
Purdy, Paul!

Now, how do I get this drool out from between the keys of my keyboard?
 
Purdy, Paul!

Now, how do I get this drool out from between the keys of my keyboard?

Thanks Mickey, I'm now waiting for a Moss order on upgraded carb seals. These carbs, as you might know, have the jets that move up and down for priming to start. They normally have two tiny cork seals each to keep them from leaking. Someone came up with the idea to use O rings in place of the cork. Moss sells them. When they get here, along with new Gross float valves, I'm going to install them and see how well they work. PJ
 
That's got to be getting exciting for you.

Once the brake shoes are installed you can bolt on a lawn chair and go for a spin around the block. :grin:
 
Looking great, Paul. I'm looking forward to seeing the car in Regency Red. Did you have the shop do a sprayout for you and is is what you expected?

Rick, He's going to do a couple test strips using two different paint manufactures of regency red. I'll see them Monday. Besides the primer, it will get a white sealer over the primer before the red goes on. He said it will enhance the red and give it a better background. I know nothing about these modern techniques, so it will be interesting to me also. The paint will be urethane, something I've never used, but is supposed to be superior in looks and durability over other paints. Can't wait to see the test strips. PJ
 
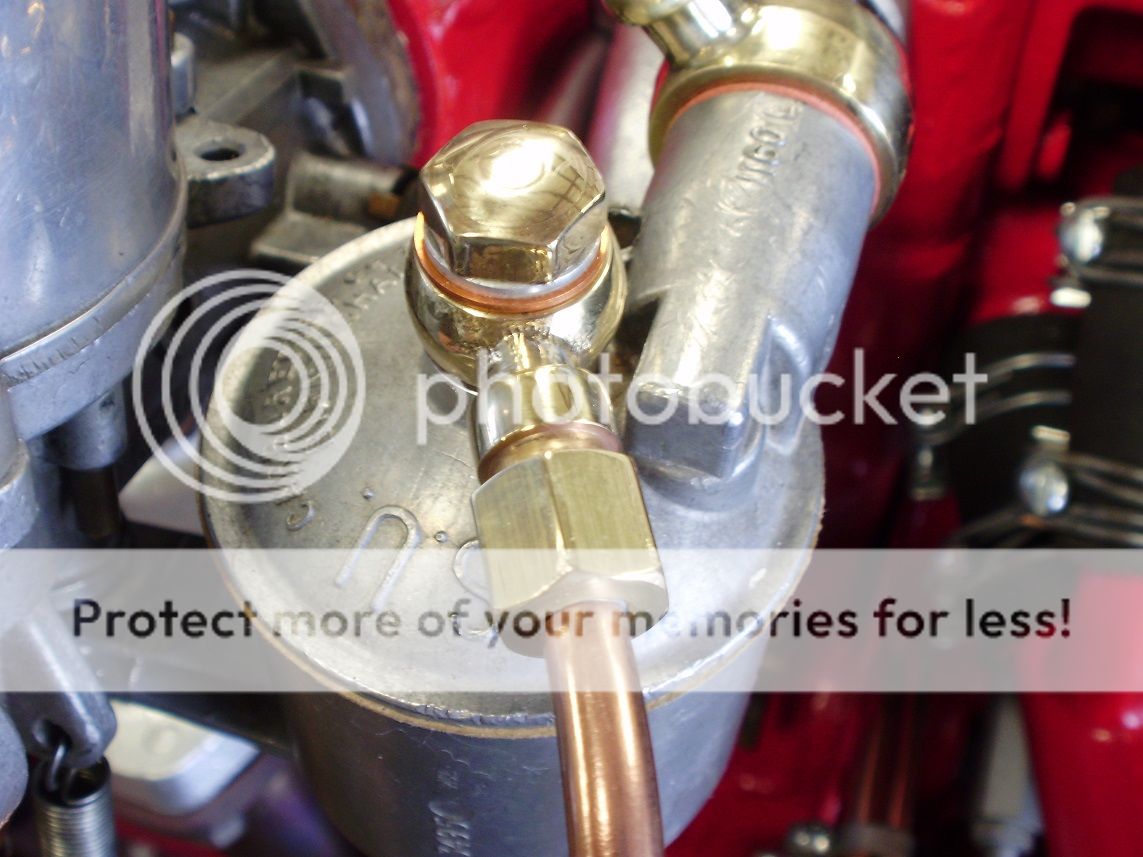
Got my carb overflow lines made up to drain away from the exhaust pipe along with modifying the banjos so the lines can be disconnected without pulling the bowl tops. A lot of little details which are time consuming. PJ


Details are worth it though - that looks gorgeous!
 
Well, the chassis is DONE! Installed all new brake shoes and now it waiting for the tub and other bits before I can go back to work on it. Have to sort out the chrome that needs re doing. Not too tickled about having that done! Only because of $$. :cry: PJ
 
Back
Top