• The Roadster Factory Recovery Fund - Friends, as you may have heard, The Roadster Factory, a respected British Car Parts business in PA, suffered a total loss in a fire on Christmas Day. Read about it, discuss or ask questions >> HERE. The Triumph Register of America is sponsoring a fund raiser to help TRF get back on their feet. If you can help, vist >> their GoFundMe page.
  • Hey there Guest!
    If you enjoy BCF and find our forum a useful resource, if you appreciate not having ads pop up all over the place and you want to ensure we can stay online - Please consider supporting with an "optional" low-cost annual subscription.
    **Upgrade Now**
    (PS: Subscribers don't see this UGLY banner)
Tips
Tips

TR6 Starting my frame restoration

OP
Got_All_4

Got_All_4

Luke Skywalker
Country flag
Offline
Romulus, Michigan and it's a $1,000. Like you said 2 trips to drop off and pick up. I think it's worth it to know the rust is taken care of. there are 2 more in Ohio that only dip and no coating. One in Toledo and the other in Bedford. Half that price. There may be more hat I don't know of.
 

Rut

Obi Wan
Country flag
Offline
I am interested in your frame coating . I looked into Ecoating my TR3A frame and was cost prohibitive. I could only find one place that would do it. The cost was $1200 plus 2 trips to Mississippi, one to deliver the frame and one to pick it up a week later. I could not find anybody in the south that would acid dip the frame. The company I found sandblast the frame then puts it in an oven to strip any remaining paint, rust ,grease that might remain inside the frame. Then it went to the Coating tanks. Frank
Is this the place just outside of Jackson, MS? They quoted me $3000+ to dip and ecoat a Bugeye, so I opted for sandblast, epoxy primer and paint for roughly $2500 at a shop near Huntsville, AL. I had my TR4a frame sandblasted, reinforcement brackets welded in and powder coated for $300 in S AL which was a bargain to me.
Rut
 
OP
Got_All_4

Got_All_4

Luke Skywalker
Country flag
Offline
I felt the best thing for me was this dip. Highly recommended from one of my restoration customers. He's been using this guy for 15+ years. My concern is the rust inside the frame. These frames rust mainly from the inside out. So neutralize the rust, top coat it and then seal it and it will never be a problem of mine. My only concern is that I only get back the new parts I welded in?
I had my TR3 frame sandblasted back in the late 70's and painted it with an industrial paint my dad got me from where he worked. Out side still looks great but the I can tell over the years the frame is getting softer.
 
OP
Got_All_4

Got_All_4

Luke Skywalker
Country flag
Offline
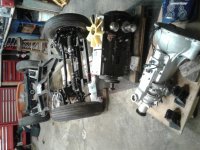
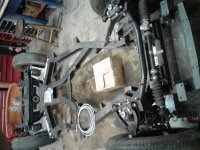
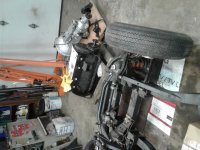
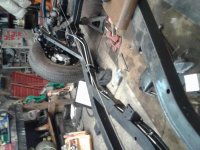
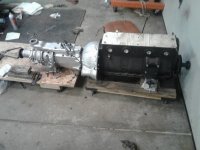
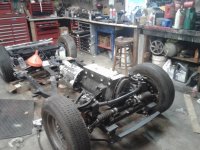
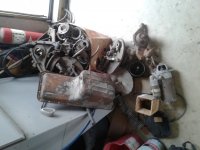
After 3 years of starting the frame and getting to this point in the restoration it went on hold. Brought it back to my working garage as of today. Got the tranny back from complete rebuild with overdrive. Plan to marry the engine and tranny up soon. Do the brake and fuel lines then swap it to the body. Got a goal and that is to get it to 6pack in September. Use to go to the Roadster Factory Parties and loved them.

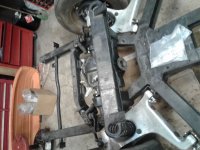
Question. This is crucial while the body is off the frame and don't know how to do this. Need to set the trailing arms and the front suspention. I would suppose that a center line must be established then measurements taken from there. I've searched for months on how to do this and no luck. Hoping someone here has done it and can explain it to me.
 

Attachments

  • 20230207_144648.jpg
    20230207_144648.jpg
    1.3 MB · Views: 59
  • 20230207_144709.jpg
    20230207_144709.jpg
    1.3 MB · Views: 53
  • 20230207_144721.jpg
    20230207_144721.jpg
    1.2 MB · Views: 49
  • 20230207_144739.jpg
    20230207_144739.jpg
    1.2 MB · Views: 43
  • 20230207_144954.jpg
    20230207_144954.jpg
    1.4 MB · Views: 49
OP
Got_All_4

Got_All_4

Luke Skywalker
Country flag
Offline
Got brake and fuel lines completed today. Just posted another thread. Can't get the throw out bearing fork to operate correcly.
 

Attachments

  • 20230211_155457.jpg
    20230211_155457.jpg
    1.2 MB · Views: 38
  • 20230211_155532.jpg
    20230211_155532.jpg
    1.1 MB · Views: 43
  • 20230211_155620.jpg
    20230211_155620.jpg
    1.3 MB · Views: 39

Hamish Racing

Jedi Warrior
Country flag
Offline
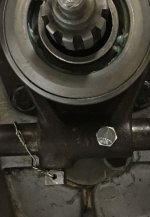
I’d reuse the fork that works. Wire lock the bolt pin AND drill fork and shaft for a secondary lock pin.
These bolt pins have been known to sheer leaving you with working hydraulics and shaft but not fork or clutch.
think you are running an A type od?
You don’t want to be taking that lump out and in again due to rubbish parts or a $5 pin bolt break.
This is what mine looks like (TR3a with a TR6 box)
 

Attachments

  • C62F9AA3-DE25-405B-A08D-6CB48EA508C6.jpeg
    C62F9AA3-DE25-405B-A08D-6CB48EA508C6.jpeg
    140.5 KB · Views: 42

KVH

Darth Vader
Country flag
Offline
Looks amazing. Being a good welder must be a huge plus. Did Richard Good give you any advice Re restoration? Good parts? Also, I’m afraid to ask, but was the trailing arm corrosion obvious from the outside or did discovery require some digging around?
 
OP
Got_All_4

Got_All_4

Luke Skywalker
Country flag
Offline
If you look closes to the pics of the 2 forks you will see the extra hole drilled for a 1/4" grade 8 bolt. I've been doing that for years. Now that I spent the $40 for the new fork I want it to work. Actually I have the fork pics on my other thread.

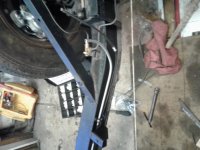
Actually I thought the frame was going to be a piece of cake to restore. The car was stored in a body shop for decades but near the detail area. I think the moisture got to it. But when the body came off and I started to get into it, it was a mess. As you can see in the pics it was very rotted out. The front end must have been wrecked as the suspension parts weren't lining up. The shock tower cross bar had several shims in them. 1/2" on one side and 3/8s on the other. Took it to one of my body shops and they did the pulling and straighten. Shock bar fits perfectly now.

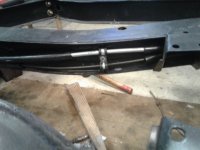
As far as the rear end trailing arm cross members go there was a lot of rebuilding. Took my time and just didn't try to patch anything. Cut out all the bad and welded in new metal. I've met Richard Good 20+ years ago at the Roadster Factory Summer Parties. But our discussion was mostly about engine performance. Got to drive one of his cars too and it was fantastic. If your curious where I came up with the jig to a properly attach the TA cross members, it came from You Tube. I think from the Rusty Beauties' guy. Nice set up and I just tried to measure the rear trailing arms and the right side seemed perfect and I took out 1 shim on the left. Don't know that it's correct because I can't find any info on how to align the TAs and no one around here can help.
 
OP
Got_All_4

Got_All_4

Luke Skywalker
Country flag
Offline
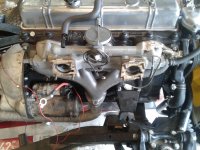
Fork issue resolved no thanks to Moss. Called tech department I think on the 9th and still never heard from them. Good thing I have a machine shop. Ground off the riff raff from the cashing on the inside of the forks. Filed off some material around the pins. Everything I did just slightly improved it until I turned the throw-out bearing carrier. Took a couple of thousands off the inside where the pins ride both sides and the rear flange. Now it moves smoothly with out any slop. Engine and tranny now mated and installed.
 

Attachments

  • 20230220_151606.jpg
    20230220_151606.jpg
    1.1 MB · Views: 30
  • 20230220_172949.jpg
    20230220_172949.jpg
    1.4 MB · Views: 33
OP
Got_All_4

Got_All_4

Luke Skywalker
Country flag
Offline
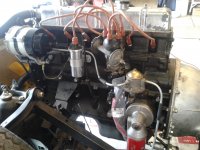
Some more pics of what I did today. Got a question. Since I've never seen this together. Does the muffler ride between the frame or below it?
But the head and manifolds on yesterday. When I go to put the body back on will it go on the frame with the carbs on?
 

Attachments

  • 20230222_123109.jpg
    20230222_123109.jpg
    1.2 MB · Views: 27
  • 20230222_123129.jpg
    20230222_123129.jpg
    1 MB · Views: 36
OP
Got_All_4

Got_All_4

Luke Skywalker
Country flag
Offline
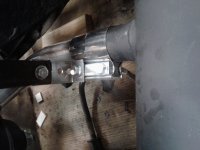
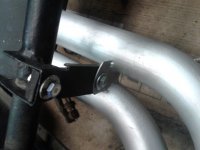
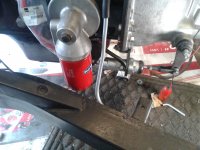
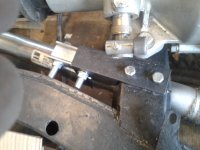
Finally got to update some work. Biggest upgrade is moving the slave cylinder to the back side of the tranny flange and supporting it like on the TR3s with a rod. This was to make room for the spin on oil filter. On my Tr250 I just tilted it forward but always seemed hokey to me. Put in some fuel line supports. Need some Ideas for the forward exhaust mount. It is too riged and leaves no flex for engine movement. The bracket I made bolts up to the tranny mount and to the stainless band clamp.
 

Attachments

  • 20230318_114736.jpg
    20230318_114736.jpg
    1.2 MB · Views: 26
  • 20230318_115101.jpg
    20230318_115101.jpg
    1.6 MB · Views: 26
  • 20230318_115133.jpg
    20230318_115133.jpg
    1.5 MB · Views: 26
  • 20230318_115232.jpg
    20230318_115232.jpg
    1.6 MB · Views: 22
  • 20230318_115249.jpg
    20230318_115249.jpg
    1.2 MB · Views: 27
  • 20230318_115340.jpg
    20230318_115340.jpg
    1.1 MB · Views: 26
Similar threads
Thread starter Title Forum Replies Date
K TR2/3/3A Pushing down the clutch pedal when starting the car? Triumph 13
angelfj1 TR5/TR250 TR250 - Lucas 4ST Starting Solenoid-Mounting Location/Details Triumph 2
angelfj1 TR5/TR250 TR250 Need Help identifying wires (2 - black) feeding starting solenoid Triumph 6
bigjones TR2/3/3A Starting up an engine that hasn't ran for a while. Triumph 39
S TR2/3/3A TR3 Hard Starting Triumph 4
H MGB Starting Problems MG 3
J TR4/4A 1964 Triumph TR4 - Not Starting/Running Triumph 3
angelfj1 TR5/TR250 Starting a TR250 that's been sitting for 10 years Triumph 12
T TR6 Continuous Starting and Ignition Issues Triumph 6
M TR6 Just starting out… Triumph 16
RichB4493 TR2/3/3A TR3 not starting - Slow/Weak Starter Triumph 33
M TR2/3/3A 1958 TR 3 , crankshaft nut for hand starting Triumph 7
P Wedge Starting problems TR8 Triumph 3
K TR6 tr6 not starting Triumph 11
Jim_Stevens TR2/3/3A Intermittent starting Triumph 14
R TR2/3/3A Starting car for 1st time after rebuild. Triumph 13
F TR2/3/3A starting scuttle repair Triumph 27
jdubois GT6 After over two years stalled at the body shop, my GT6 is starting come back to life! Triumph 5
R TR2/3/3A Starting TR-2 for first time after restoration Triumph 58
D Wanted TR3A starting handle Triumph Classifieds 0
D Starting After Carbs Rebuilt Austin Healey 30
Jayplum TR2/3/3A Starting from scratch what color Triumph 25
sundown TR6 Starting Triumph 43
F TR2/3/3A I'm stuck... alternator/wiring/starting/? Triumph 2
F TR2/3/3A 1960 TR3A starting chassis work Triumph 81
J TR2/3/3A Starting my TR3 A restoration Triumph 8
F TR2/3/3A Starting Triumph 4
N Hesitant starting Austin Healey 16
Got_All_4 TR6 Starting The Tear Down Of MY 1969 TR6 Triumph 6
G TR4/4A Starting without Transmission attached Triumph 9
P BN4 Hesitates on Starting Austin Healey 12
D Hard Starting Austin Healey 14
mgedit TR2/3/3A 56 TR3 Starting Issue Triumph 9
M Starting from cold Austin Healey 2
R Very Difficult cold weather starting problems! Austin Healey 21
R TR4/4A Starting TR4A after 30 years Triumph 12
R winter hard starting BJ7 Austin Healey 16
P Jump starting a positive ground BJ8 Austin Healey 4
W starting motor Jaguar 0
D TR2/3/3A Starting my Bodywork journey. Triumph 166
P TR6 Quick starting Triumph 2
Joe Reed General Tech Starting a screw in a tight location... MG 9
P TR6 TR6 hard starting Triumph 24
Q Just Starting Restoration Of 1967 E Type Jaguar OTS Jaguar 13
stretchit2 Starting Issue Austin Healey 6
M TR6 Intermittant starting problems Triumph 4
Willie_P TR4/4A Starting long dormant TR engine..start up procedures? Triumph 10
S Hard starting on Webers from cold Austin Healey 12
T TR4/4A Weird starting issue with my TR-4 Triumph 15
M '61 BN-7 Progressively Harder Starting . . . Now Won't Start Austin Healey 9

Similar threads

Top