• Hi Guest!
    You can help ensure that British Car Forum (BCF) continues to provide a great place to engage in the British car hobby! If you find BCF a beneficial community, please consider supporting our efforts with a subscription.

    There are some perks with a member upgrade!
    **Upgrade Now**
    (PS: Subscribers don't see this gawd-aweful banner
Tips
Tips

Spring Clamps needed for 1/4 Elliptics

Jim_Gruber

Yoda
Country flag
Offline
Guys,

Anyone have a trashed set of 1/4 Elliptics that has the Spring Clamps available. This part is NLA and I can't seem to find from any vendor. I can find a set of 1 3/4" W x 1.5" Deep clamps for the small spring clamp section available from Speedway Motors but I'm stumped trying to source a clamp for the fatter section of the Spring Stack that measures 1 3/4" W x about 2.5 - 2.75" Thick. Otherwise I will need to fab something up.

Present Springs are banded with a Steel Strap and Welded. I'm told that is done by a Signode Machine but no one seems to have one of those available that I can seem to find.


I have not taken the last step and cut the steel band and separated all of the Spring Leaves as I'm afraid I can't find the clamps to put them back together. I want to paint and clean up springs and lube with Slip Plate so they look good on Bugsy II. I can't be the first person to take these apart and wanted to put them back together. Thinking someone has an unusable set of 15 leaf Springs that clamps could be pulled off of. Those two clamps shown below without any parts numbers shown on them are what I am looking for. Need Clamps for both sides 2 large 2 small. Anyone got some taking up space in the garage. Thanks Team.
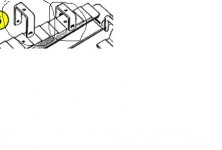
Quarter Elliptic Spring Part.jpg
 
Jim, making them should be really easy for a good old fashioned welding, blacksmith shop. Should be able to rivet them on to the leaf as well.

Kurt.
 
Jim,
What Kurt said! You can buy the strap metal and bolts and make your own using your vise as a brake...its just U shaped steel with holes drilled for the rivet and retaining bolt. Try your hand at making a few before you remove yours.
Rut
 
Rut,
thanks for the link. They are in Springfield OH and I go right by Springfield on my way home. And if I go way back 20 years to my AT&T Days these folks were actually a customer of mine. I'll call then tomorrow.
And yes I was planning on making some clamps myself. I figured I needed something a little better that a steel strap from Ace Hardware that I bend up. Do you know by any chance the thickness of the strap/clamp as well as the width of the clamp. Probably between 1/2 to 3/4" width would work. closer to 3/4 I think. Thickness of steel would be likely 1/8". I do have a set of Springs that are new that I can use as a Template to bend around. Weekend is coming and temps in the 40's yeah, some garage time.
 
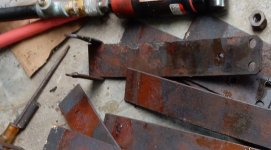
Jim--unfortunately I am not near my car so I can't give you dimensions but in this pile of the springs I refinished last year you can see the strap that is around the smaller of the two springs. It is not that big, maybe 1 x 1/8 strap but here's the beauty part: it won't hurt you to go bigger if you want. The piece is riveted onto the spring--the round side of the rivet is on the top, flat side on bottom. Drill a hole in the strap, insert a cut off bolt through that and the hole in the spring, put it on an anvil and beat until flat.

I think a blacksmith could do this in about 30 seconds or possibly you could just do it cold but obviously you don't want to put a torch to that spring and draw the temper out of it. You are both flattening the rivet shank but also expanding it sideways all around, that helps hold it. In a previous post I mentioned using a stove bolt but you could also just cut off any old bolt and use it for a rivet. I would say you want it 3/16 or so longer than the thickness of the strap + the thickness of the spring.

The bottom legs of the strap are drilled both sides a bolt going through a bushing holds the spring pack together. The bushing, I believe, rotates as the spring flexes, to prevent wear on the bolt itself. I believe I used 1/4 grade 8, but judging from the bolt I took out it was just grade 2. I used a hardware store steel bushing.
2015-07-18 10.41.24.jpg
 
Last edited:
Thannks guys. Bought a piece of 1" x 1/8" Stock today. Planning to have at it on Saturday. Still need ot find a bushing. didn't see any at my local True Value in their stacks of nuts and bolts. I'll figure out the spacer piece. Possibly McMaster Carr. There will be something I can find to use.
 
Perfect. Time to order 3 tomorrow. Thanks for finding this for me. See it takes a team and together great things get done.Thanks again.
 
Found the perfect spacer in the McMcaster Carr Catalog 1 3/4 Wide x 1/4" ID Part # 92320A922. $8.95 ea. No drilling needed to increase ID. I can focus on bending up 4 Straps this weekend. My only question is how close does the bottom spacer come to the Spring Stack. What is the clearance between OD of the spacer and bottom of the spring. That determines how far down I drill the mounting holes. Thanks again for the help in locating the needed part.
 
Good for finding that bushing. Yay, go team.

If no one here can give you the exact dimension--which might vary depending on the wall thickness of your bushing, I would stack your springs up in the order they will be assembled and then clamp them with four C-clamps. You will put one at each end, or, at the small end you could actually use the short U bolt you will be installing there.

Bend up your straps then secure them with the other two clamps to the spring pack where they will be when they've been riveted in place.

Put your bushing down where it is going to sit at the bottom of the straps, and the location of its center will give you the center point for your hole. As I remember the bushing was tight against the bottom spring but not under any stress. The leaves have to be able to slide back and forth in the horizontal plane when the car goes over a bump, and the bushing needs to be able to roll as they do, so you want them tight but not too tight. This was not one of the areas where the manufacturing is precise to the .001s.

This is a photo of somebody else's car that I think I got off of Spritespot, but it will give you an idea of what it is going to look like put back together. As I look at it, that 1" strap may be too wide if it contacts the end of the next larger spring leaf, but you can grind a little off, or just offset the rivet hole a little bit.
81607_208.sized.jpg

By the way, this photo is interesting because you will notice he has created an alternative to the U-bolt at the spring box--it looks like it is a bar that has been drilled and threaded for two bolts. I will say I had to turn my head and hold my tongue just right to get that OEM u-bolt to go back in place, so that is an interesting idea.
 
Thanks again. My plan is to hit the garage tomorrow morning and see if I can bend up a few of those clamps. The spacers will arrive Tuesday, Wednesday next week, and I can finish putting them back together. But first I need to get the springs part sand them,wire brush them,and get them painted and finished as a subassembly. Hopefully temps won't be too chilly in thr garage tomorrow.
 
First set of springs the clamps slid off when persuaded a little with a hammer. With small U bolt undone the entire spring pack came apart. All leaves are good to go. Interesting no hole drilled in one of spring leaves on the small end by the small U bolt. If I want to add a river I'll need to drill a 1/4 hole. Sort of tempted to paint and reassemble. But will fabricate proper clamps.
 
I need to count spring leaves and see if there are 15 there. Perhaps one was removed to soften the ride. Hence the reason why the springs were rebranded. All sorts of possibilities.

Tomorrow need s to extract a bushing. A little flame first to set rubber of the bushing on fire to melt out the center and then hacksaw to cut the outer sleeve off and then cleanup and paint.
 
On mine there was only a steel inner sleeve surrounded by a rubber sleeve. Put the torch to it, melted it and it pushed right out, no need for a hacksaw.

If there is a missing leaf I think you would notice it by the way they stair step down--as you go toward the rear of the car each leaf gets longer, and there would be gap somewhere. If one of the short leaves was removed those in the middle of the stack would not have had to be rebanded.

Does that make sense?
 
Unfortunately there is a bastard on an inner sleeve. Brass fortunately it appears but I wailed away at it for over and hour to no effect. Used hacksaw to partially cut the outer sleeve off to try and break and roll it up all to no avail. Saw a truck using an air chisel but my little pancake comiressir cannot generate the needed oomph to drive through and cut out the inner sleeve. Will take it down the street to my mechanic's place and see if he can help. I know he can and if nothing else he's got a big press to pop them out. And to press in the new bushings tgat arrive along with RH floorpan this week. Was trying to get these springs finished before starting that job.
 
The press will prevail, (although I would assume you have been soaking them in penetrating oil already)!

For what it's worth, the poly rear spring bushings from Robert Kirk do not have outer steel sleeves, so no press is required to install them. I don't know about the rubber ones.
 
Last edited:
The Press prevailed. Outer Sleeves are now out. Time to clean up the spring leaves. make my spring clamps now that I have the right 1 3/4" spacers. Will need to drill one leaf on each side for the bottom clamp as for some reason the hole is not drilled. Only a hole exists for the middle clamp. As someone mentioned will be interesting trying to drill tempered steel. If all else fails will slip the old band back on. it cannot come off and can float on there. Can only move an inch or two,
 
Back
Top