• Hey Guest!
    British Car Forum has been supporting enthusiasts for over 25 years by providing a great place to share our love for British cars. You can support our efforts by upgrading your membership for less than the dues of most car clubs. There are some perks with a member upgrade!

    **Upgrade Now**
    (PS: Upgraded members don't see this banner, nor will you see the Google ads that appear on the site.)
Tips
Tips

Setting timing.

Crisis

Jedi Hopeful
Offline
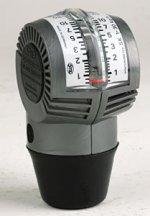
I have been giving my 73 TR6 a "tune up", and I was hoping someone could clear up my confusion on how to set timing on my 73 TR6? I have adjusted the rocker clearances (found to be mostly ok), installed a silicone gasket under the valve cover and now want to use the new timing light I purchased over a year ago. Instructions are scant with the light and I assume the procedure has more to do with the car? I can barely read the markings on the pulley, but they are there. There is a bright white stripe painted across one of the marks. I want to do a dynamic setting seeing as I have this light.
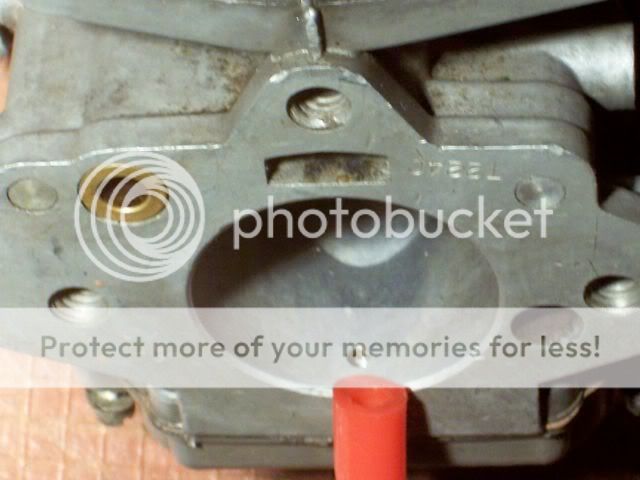
The white mark is painted across the 4 which is to the left of the 0 mark. Here is where some of my confusion begins. Shouldn't the white stripe be on the 12* marking? I found a previous post which indicated idle timing should be around 12* btdc? Does that mean I should put a white mark at the 12* indicator and adjust the dizzy until this mark appears to be not moving at the pointer when I have the strobe on it? Btw, I have removed the retard pipe and plugged the port on the carb and don't plan on reinstalling it.
Any help on clearing this up would be appreciated. Thanks.
 
Timing a TR6 with a light IS a confusing topic, due to the presence (originally) of the vacuum retard. Because of the rather bone-headed regulations in the USA at the time, the timing is supposed to be set with the retard connected and operating, which means the timing should be set to 4 degrees after TDC. That explains the white stripe on the 4 ATDC line.

To add to the confusion, the timing procedure given in most manuals says to disconnect the vacuum line (because it is written for cars with vacuum advance, rather than vacuum retard).

With the retard disconnected, the timing spec for 73 would be 10 BTDC (although 12 is likely OK).

If you want to learn more about how it "should be", download "1973 Emission Control systems" from https://tinyurl.com/37voevm
 
I'd suggest, once you figure the marks out, do it both ways, using the light, then the vacuum gauge. See what gives you better performance. Neither is irreversable and a short test drive will be conclusive.
 
You can also check your damper by rotating no 1 cylinder on the compression stroke, to TDC take the No 1 spark plug out, stick one of those bamboo squirs in the hole and might be difficult but bring the piston to the top, basically done by feel and the bamboo stick stops moving out and see if the damper is at or near zero

not quite exact unless you take the head off to be 100 percent dead on
 
So what do I need to tune using a vacuum gauge. Obviously a gauge; is that something I can readily get at the auto store (here in Canada we have 'Canadian Tire')? Some tubing? And probably a fitting? Where should I hook it up on a 73?
Thanks.
 
Any auto parts store should stock it. If it don't I wouldn't use the store.

Unless it's the only one around
 
Right.
They come with the tubing and adaptors for less than 30 USD bucks. But for a 73 you won't need the adaptor.
Look on the intake manifold. You will see a "banjo fitting". It has 2 nipples on it. One, the largest, has a hose to the brake servo (booster); the other nipple is for the Anti Run-on Valve, (ARV).
That's the nipple you use. The Vacuum Gauge tube fits good on that one.
What I do is loosen the dizzy clamp, but leave the vacuum retard vacuum line connected if that's the way you want to normally run. If not, just cap the nipple on the bottom of your rear carb that the retard vacuun line connects to.
Next, connect the Vacuum Gauge to the ARV nipple on the Banjo fitting, start the engine and let it warm.
When the temp Gauge begins to move, rev the engine, to 2 k for about 10 seconds and then let the engine settle to idle speed,
Rotate the dizzy so the Vac. Gauge reads 17-18.
It's important to keep an eye on the tach because the speed may increase as you zero in on your "sweet spot".
Remember that the Vacuuum Gauge readings should be made at idle speed; so if the idle increases, adjust the throttle stop (idle speed) screws to maintain 850-900 rpms.
When you get it, tighten the dizzy clamp, reattach the ARV hose, go for a test drive. I think you'll be a happy camper.
 
Crisis said:
Obviously a gauge; is that something I can readily get at the auto store (here in Canada we have 'Canadian Tire')?
Here it is on their web site:
https://www.canadiantire.ca/AST/browse/4/...r.jsp?locale=en

Also, without meaning to rehash an old argument, I would suggest disconnecting and plugging the vacuum retard line while setting timing with a vacuum gauge; even if you plan to reconnect the retard for normal operation. The vacuum gauge is referencing "ideal" timing, while the vacuum retard is deliberately retarding the timing from it's optimum value. If you set the timing to be "ideal" while the retard module has it retarded, then you will have too much advance when the retard kicks out (it is only active at idle).
 
Hooked up the vac gauge last night and found the level to be 17 at roughly 850 rpm's; so I didn't touch the distributor. From what I've read, thats probably good?
My reason for doing all this? The car smells bad. Obviously unburnt hydrocarbons; even driving I get a lot of smell in the cockpit as the backdraft from the rear comes forward. Sometimes I'm needing to breath some fresh air. I have now adjusted the rocker clearances and checked the timing. I suppose all thats left to do is adjust the mixture? I can use the vac gauge for this as well? Is that an accurate method? Thanks for all the help.
 
I use the Vacuum Gauge for a lot of things and it can help in adjusting the mixture, but I've not done it.

Hopefully you know how to use the 2 piece Adjusting Tool ?

First understand that there are slightly less than 2-1/2 turns that you can make with the adjuster from full rich to full lean. At around the 2-1/2 Counterclockwise turns from full rich, the needle carrier becomes unthreaded from the adjustment screw.
After warming up the engine, then killing it, the way I start is by turning the adjuster fully Clockwise, raising the needle to full rich then Counterclockwise 1-1/2 as a starting point, and sometimes thats enough.
If you end up being able to make more than 2-1/2 CW turns, then the needle was off the adjuster to begin with.
OK lets assume you were able to go back down 1-1/2 and want to use the traditional "lift the air valve" test for correct mixture, that's where experience comes into play.
Lift the air valve with the tip of a screwdriver as close to 1/8" as you can figure. You will be listening for an immediate reaction of the engine speed.
Take too long to decide and the result won't be valid, because more than likely the engine will start to stall or slow down which normally idicates a lean condition.
The other pitfall which may give a false indication is that after idling for 20-30 seconds the carbs start to load up (rich).
So it's best to rev the engine up to 2-2.5k for about 10 seconds to clear them out before resuming.
Some may have other techniques, but that is mine. and another thing I may do differently is balance the carbs AFTER I've found the best mixture.

BTW, Crisis, just so you won't feel like you wasted money on the Vacuum Gauge, have a look at the "Scenario's" at the bottom of this link: Great diagnostic tool
https://www.secondchancegarage.com/public/186.cfm
 
poolboy said:
If you end up being able to make more than 2-1/2 CW turns, then the needle was off the adjuster to begin with.
Or the hex in the adjusting screw is stripped. The screw is brass and not very strong, so a gentle touch is needed. If it is stiff or binding, don't force it but instead remove the piston to find and fix the problem!
<div class="ubbcode-block"><div class="ubbcode-header">Quote:]and another thing I may do differently is balance the carbs AFTER I've found the best mixture. [/QUOTE]IMO they need to be at least approximately balanced beforehand, as you won't get an accurate mixture reading if one carb is doing all the work. But balance in general is not all that critical; I find that simply listening to the hiss (using a length of tubing if available) works well enough (even though I do have a Uni-syn).

There is a good article that covers adjusting ZS carbs at https://www.buckeyetriumphs.org/technical/Carbs/CarbsIII/CarbsIII.htm
 
I don't care for the Unisyn. It's difficult to see if it's been placed concentrically over the carb's mouth and if I manage to get it on one, the chances are slim that I get it in the same place on the others.
Pictured here is the tip of my stethoscope approaching my reference point (the threaded hole).
CarbSyncing.jpg
 
This is my favorite, as I hate the Unisyns and don't trust the ears completely anymore.
 

Attachments

  • 22176.jpg
    22176.jpg
    17.5 KB · Views: 352
<span style="font-size: 20pt">He said he don't hear so good!! </span>
 
And the best fit for Brosky's carb balancer is go the local hardware store, buy a pvc elbow(you know the white plastic plumbing kine) that fits over the rubber cone, the other end goes around the intake of the carb. Get a large rubber o-ring while you're in the plumbing side of the hardware store(usually a box of different size o-rings). Glue the oring to one end of the elbow...
Now you get to put the elbow with the oring on the carb face, drop the balance tool in the upper opening of the elbow and you have a great balancing tool(that fits keihin motorcycle carbs, Webers(at least the dcoe's), SU's Zenith Strombergs, etc..
 
Back
Top