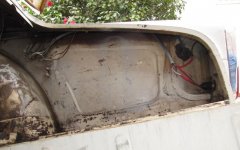
Malbaby, thank you for the advice about leaving space adjacent to the underlayment which, in my case, will be Dynapad four‑part, composite-barrier, constrained‑layer material
https://www.dynamat.com/automotive-and-transportation/automotive-restoration/dynapad/ instead of the standard jute, which I hope would absorb some of the low-frequency droning that is quite loud at 3000 RPM when the hood is installed and the windows are closed. The carpet itself is a standard grey Wilton-wool kit from Rimmer Brothers that I bought during the recent sale. Beneath the Dynapad underlayment will be Dynamat Extreme damping material
https://www.dynamat.com/automotive-and-transportation/automotive-restoration/dynamat-xtreme/ stuck directly to the floor, firewall, and driveshaft tunnel to suppress resonances in the sheet metal.
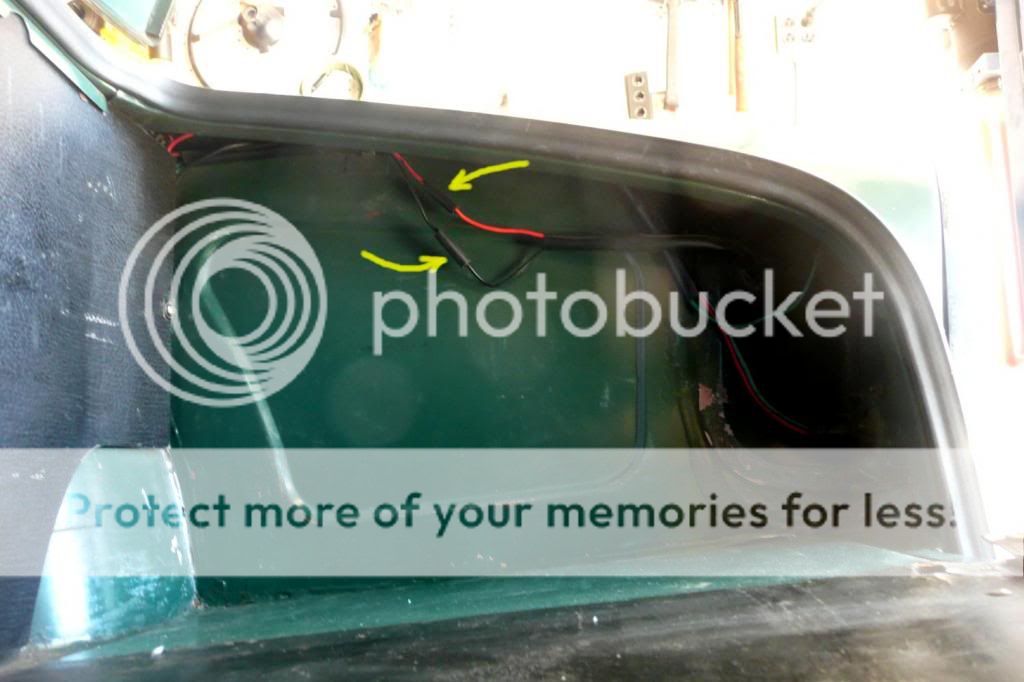
Of the two new wires, one is for an existing after-market light in the boot that is activated by the opening of the lid but that presently has power to its switch only when the tail lights are illuminated, and the other is for a future backup light if I could find something inconspicuous, such as a narrow strip of white LEDs mounted discreetly beneath the bottom edge of the rear panel. (Recommendations are gladly welcomed.)
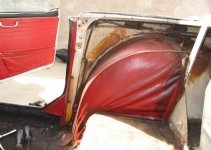
Thank you for your advice about the outer seat-belt anchors. As part of this project, my lap belts will be replaced with a three-point (UK: "lap-and-diagonal") system. When I last drove the car in June, I had not noticed any interference between the outer attachments and the vinyl on the wheel arches, but I will examine that when I again have the car in a few weeks.

 Hey Guest!

 Hey - did you know if you click on the title of a thread it will take you to the first unread post since you last visited that thread?
 but were afraid to ask:
  STOP!! Never post your email address in open forums. Bots can "harvest" your email! If you must share your email use a Private Message or use the
  smilie in place of the real @
 Pretty Please - add it to our Events forum(s) and add to the calendar! >>