
-
 Hey Guest!
British Car Forum has been supporting enthusiasts for over 25 years by providing a great place to share our love for British cars. You can support our efforts by upgrading your membership for less than the dues of most car clubs. There are some perks with a member upgrade!**Upgrade Now**
(PS: Upgraded members don't see this banner, nor will you see the Google ads that appear on the site.)

Tips
- We have a special forum called "Member Articles" where you can submit actual articles for consideration for publication. Learn More
- Don't have an Avatar? If not, your avatar will default to the 1st character in your username. Go into "Account Details" to change your Avatar.
- Some basic forum navigation info: click
 Hey - did you know if you click on the title of a thread it will take you to the first unread post since you last visited that thread?
- Hey Guest - Is your British Car Club in our Clubs database? If not, send me a PM - Basil

- Looking for a local club? Click the "Clubs" tab above and browse hundreds of clubs world-wide.
- Add Android or iPhone APP: click
- Did you know - any picture or video you add in your posts in any marque-specific forum will also get added to the Media Gallery automatically.
- A few more tips about posting and replying: click
- Hey there Guest - be sure to keep your profile page up to date with interesting info about yourself: learn more
- More tips and tricks on Posting and Replying: click
 but were afraid to ask:
  STOP!! Never post your email address in open forums. Bots can "harvest" your email! If you must share your email use a Private Message or use the
  smilie in place of the real @
- Want to mention another member in a post & get their attention? WATCH THIS

- So, you created a "Group" here at BCF and would like to invite other members to join? Watch this!
- Hey Guest - A post a day keeps Basil from visiting you in the small hours and putting a bat up your nightdress!
- Hey Guest - do you know of an upcoming British car event?
 Pretty Please - add it to our Events forum(s) and add to the calendar! >> Here's How <<
- Hey Guest - you be stylin' Change the look and feel of the forum to fit your taste. Check it out
- If you run across an inappropriate post, for example a post that breaks our rules or looks like it might be spam, you can report the post to the moderators: Learn More
- If you would like to try some different "looks" or styles for the site, scroll to the very bottom, on the left and click the Style Selector.
You are using an out of date browser. It may not display this or other websites correctly.
You should upgrade or use an alternative browser.
You should upgrade or use an alternative browser.
Richmond VA 1960 Bugeye Bringing Miss Eva back to life.
- Thread starter hcallaway
- Start date
Jim_Gruber
Yoda
Offline
Here are a few ways to make the rotisserie a bit more stable.
1) Pivot Point In the front is higher so the car is better balanced. You can roll it through 360 degrees and not an issue to get it back upright.
2) All of those 2 x 6's build out the rotisserie pivot point so the frame rails do not interfere with the front of the engine stand. Now attaching directly to the frame rails also solves that problem, But car needs to be attached further away up front
3) Removing the center leg allows the rotisserie pivot point to be at 90 degrees from floor. Otherwise difficult to get ot to an angle where it rotates easily in the pivot point
4) Bigger wheels increase floor clearance as well as 2 " 4 bolted to front cross member increases height off of floor
5) Electrical conduit was used to stabilize and keep both ends of the rotisseries aligned. I simply flattened the ends in the vise and used a big lag bolt to attach to a piece if the 2 x 4 extension for the wheels
6) one pair of wheels swivels and has locks on casters.
7) Initially putting on the rotisserie the ends looked like /----\ I used a ratchet strap to pull the ends in so car was then sitting like |----| and then added the 12' 2 x 4 in the center to hold everything together.
8) I have a chain hoist I used to pick up the rear that runs to an overhead beam and front can be picked up by 4-5 Grandsons, they had to work for Thanksgiving dinner or engine crane can pick up the front. I leave the chain hoist attached when car is on it's side and I am working on it. A little tension on the chain vastly increases stability when I am whailing and flailing on the Body of Bugsy.
9) Wheels came from Harbor Freight in Rear and Tractor Supply in Front. U Bolts Tractor Supply.


10) Conduit only comes 10' lengths. coupler is required. Do not count on pressure on coupler screws to hold things together . I put things together then drilled holes through the screw holes on the coupler into the conduit itself and then screwed screws all of the way in. Physical lock instead of just a friction locking screw.
1) Pivot Point In the front is higher so the car is better balanced. You can roll it through 360 degrees and not an issue to get it back upright.
2) All of those 2 x 6's build out the rotisserie pivot point so the frame rails do not interfere with the front of the engine stand. Now attaching directly to the frame rails also solves that problem, But car needs to be attached further away up front
3) Removing the center leg allows the rotisserie pivot point to be at 90 degrees from floor. Otherwise difficult to get ot to an angle where it rotates easily in the pivot point
4) Bigger wheels increase floor clearance as well as 2 " 4 bolted to front cross member increases height off of floor
5) Electrical conduit was used to stabilize and keep both ends of the rotisseries aligned. I simply flattened the ends in the vise and used a big lag bolt to attach to a piece if the 2 x 4 extension for the wheels
6) one pair of wheels swivels and has locks on casters.
7) Initially putting on the rotisserie the ends looked like /----\ I used a ratchet strap to pull the ends in so car was then sitting like |----| and then added the 12' 2 x 4 in the center to hold everything together.
8) I have a chain hoist I used to pick up the rear that runs to an overhead beam and front can be picked up by 4-5 Grandsons, they had to work for Thanksgiving dinner or engine crane can pick up the front. I leave the chain hoist attached when car is on it's side and I am working on it. A little tension on the chain vastly increases stability when I am whailing and flailing on the Body of Bugsy.
9) Wheels came from Harbor Freight in Rear and Tractor Supply in Front. U Bolts Tractor Supply.
10) Conduit only comes 10' lengths. coupler is required. Do not count on pressure on coupler screws to hold things together . I put things together then drilled holes through the screw holes on the coupler into the conduit itself and then screwed screws all of the way in. Physical lock instead of just a friction locking screw.
Jim_Gruber
Yoda
Offline
One more thing. Front Mount fits between radiator uprights.
1) 3/4" Plywood in the rear cut to size
2) Opened up hole size in radiator uprights to get a little bigger bolt in there
3) side Support Braces for radiator are in place
4) Up front three 2 x 6" through bolted with large washers are in place. That many boards were needed in order to allow frame rails to clear the rotisserie
More questions or pictures needed, just ask
Jim,
Thanks for the suggestions. I can change the front to a higher position by using the engine stand arms in the upper level. When I mounted the buyeye both times it was by myself. I do have a tractor with forks to pick it up higher to mount the front. Stability so far has not been any issue; however, that is why I was not real excited to rise it as high as I think I can make it go. Once it is up there outriggers will be needed. I am guessing the shell is about 500#. The angle iron in back is more than adequate. It will be a while before I flip it on its back. I have plenty of patching to do that I can reach the way it is.
When I connected the front to the rear stand, my only concern was them possibly moving too much. I have allowed for them to be able to spread since the engine stand head is not parallel to the ground.
Available panels. Both the front and rear valances are available. The front valance is out of stock and supposedly the dies are being redone. It runs about $350 to $450 with VAT and shipping. Flimsy sheet metal better be packaged if you don't want it to be bent. Rear Valance is also a little pricey. The shop I use is a guy that I have been selling steel to for over 20 Years. He is a master fabricator, English Wheel etc.. He did a Abarth that was featured at Amelia Island. His only issue is time. Lucky for me he likes the way I do business. I have the piece or project ready to go. Clean, metal on hand (if he does not usually stock it), and a plan. For him I don't waste his time. Race cars are how he makes his money. Plus my projects are at least somewhat interesting and my expectations and appreciation of his skills are within reason.
To This.
From This.

To This.

From This.


This is a cage he did for me. I had the basic's done. He fabricated the rest with more supports. We designed it to bolt in and out. Bars in rear extend into the engine cage and sandwich the fiberglass.
I don't have pictures of the English Wheel work for a rear engine cover on a drag bug running a reverse rotation Corvair engine with twin Holly 500 Carbs. Kind of neat.
He feels he can make both panels in about 2 hours each. I am looking at around $400 and he would also weld them in place.
At least that is the plan right now.

Jim_Gruber
Yoda
Offline
The engine stand will be sturdier if you app something on the ends to keep things steady and both ends parallel. You still need a central brace to help pull it together . As I said I jeep the hoist connected to add additional stability. I need to move it outside to pressure wash but when I do I will rotate to parallel to ground rather than being on it's side. Good luck. Floorpan arrives this week. Then the fun really starts.
That is first classHere is the finished rotisserie, it will go all the way around, is very stable and I added wheels capable of rolling around on my gravel driveway.
BlueMax
Jedi Warrior
Offline
I wanted to have the ability of doing all metal work, body work, and painting all while on the rotisserie. If you attach rear bracket support to tail light area you have hindered yourself of all of those functions being done without having to remove car in fear of dropping it.
If your leaf spring boxes are in good shape your better off using that area to attach the rear section of your rotisserie. If spring boxes are in need of repair fix them first and redesign the rotisserie to enable you to have complete autonomy afterwards. It enable me to install all the brake and fuel lines while on the rotisseries with out issues after painting which made everything so accessible to bend tubing very accurately.


If your leaf spring boxes are in good shape your better off using that area to attach the rear section of your rotisserie. If spring boxes are in need of repair fix them first and redesign the rotisserie to enable you to have complete autonomy afterwards. It enable me to install all the brake and fuel lines while on the rotisseries with out issues after painting which made everything so accessible to bend tubing very accurately.
I wanted to have the ability of doing all metal work, body work, and painting all while on the rotisserie. If you attach rear bracket support to tail light area you have hindered yourself of all of those functions being done without having to remove car in fear of dropping it.
If your leaf spring boxes are in good shape your better off using that area to attach the rear section of your rotisserie. If spring boxes are in need of repair fix them first and redesign the rotisserie to enable you to have complete autonomy afterwards. It enable me to install all the brake and fuel lines while on the rotisseries with out issues after painting which made everything so accessible to bend tubing very accurately.
View attachment 40863
what's the purpose of the notches cut out of the shock mounting brackets/braces?
Jim_Gruber
Yoda
Offline
My plan calls for new PS Floorpan so I need access to Springbox Area on PS. Need work on joints where floorpan needs bulkhead so I need to leave access free. Will install new floorpan and get all work complete, paint undercarriage, install brake lines, and then put it back upright sitting on a roll about cart 4 x 4' cart sitting underneath the cockpit, and utilizing wheels presently on my engine stands. Mobility is key at that point. If I choose to have someone else paint, Bugsy will be mobile. If I elect to roll my own I can move outside for sanding, washing, the nasty work I don't want in a single car garage that I need to walk through to get access to the house from the driveway.

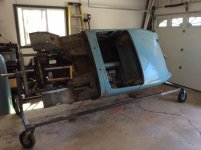
Finally had time to start on the body. Lower door pillars need to be replaced. Test fitted a door so I know that the body is pretty much square.
Since this car is like building blocks the sills have to be fitted first and other parts fitted afterwards.
I will add some more later.
Since this car is like building blocks the sills have to be fitted first and other parts fitted afterwards.


I will add some more later.

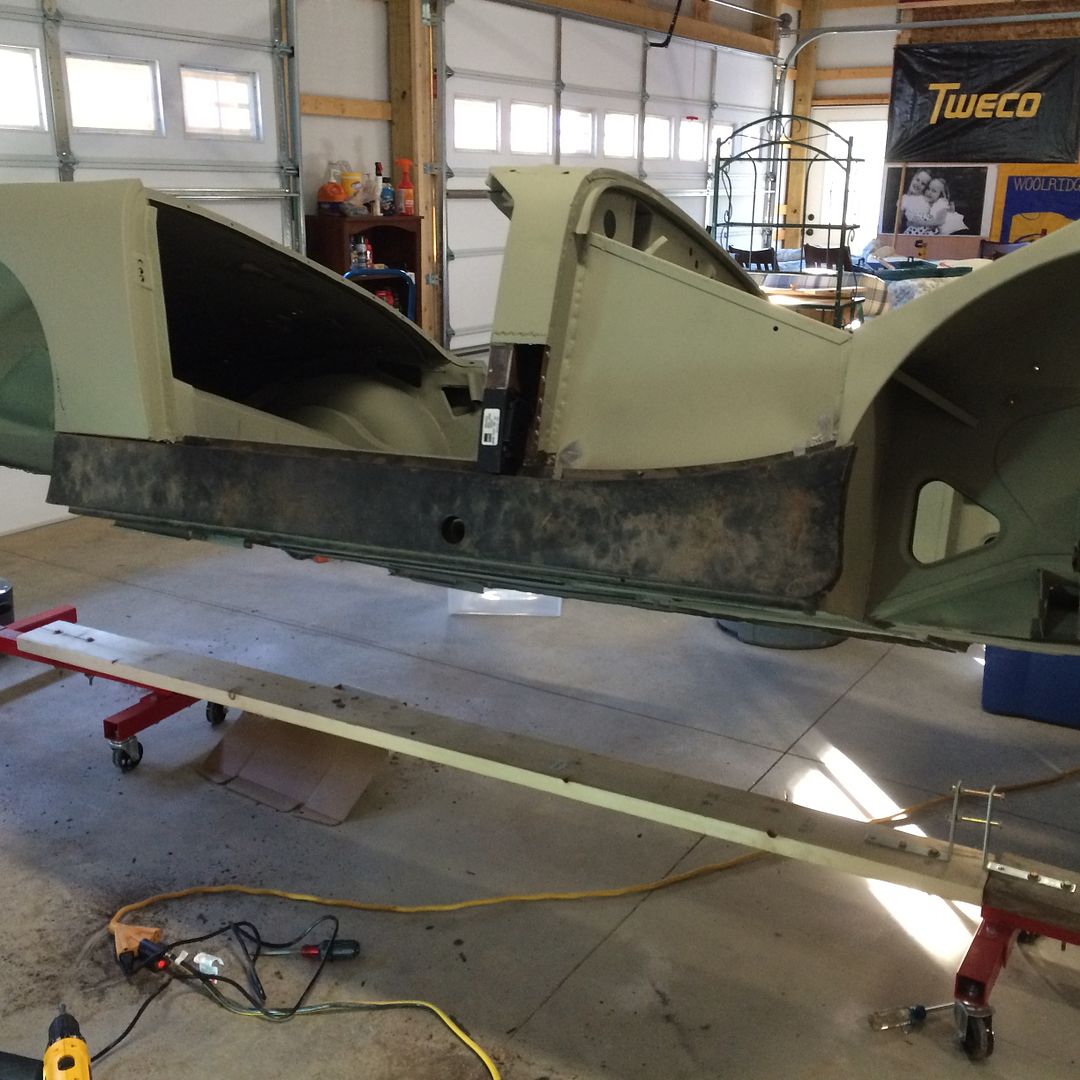
Cut and fitted the lower pillar on the drivers side. Sill is solid so I needed was the short repair piece (same as the other side) and the cover piece.
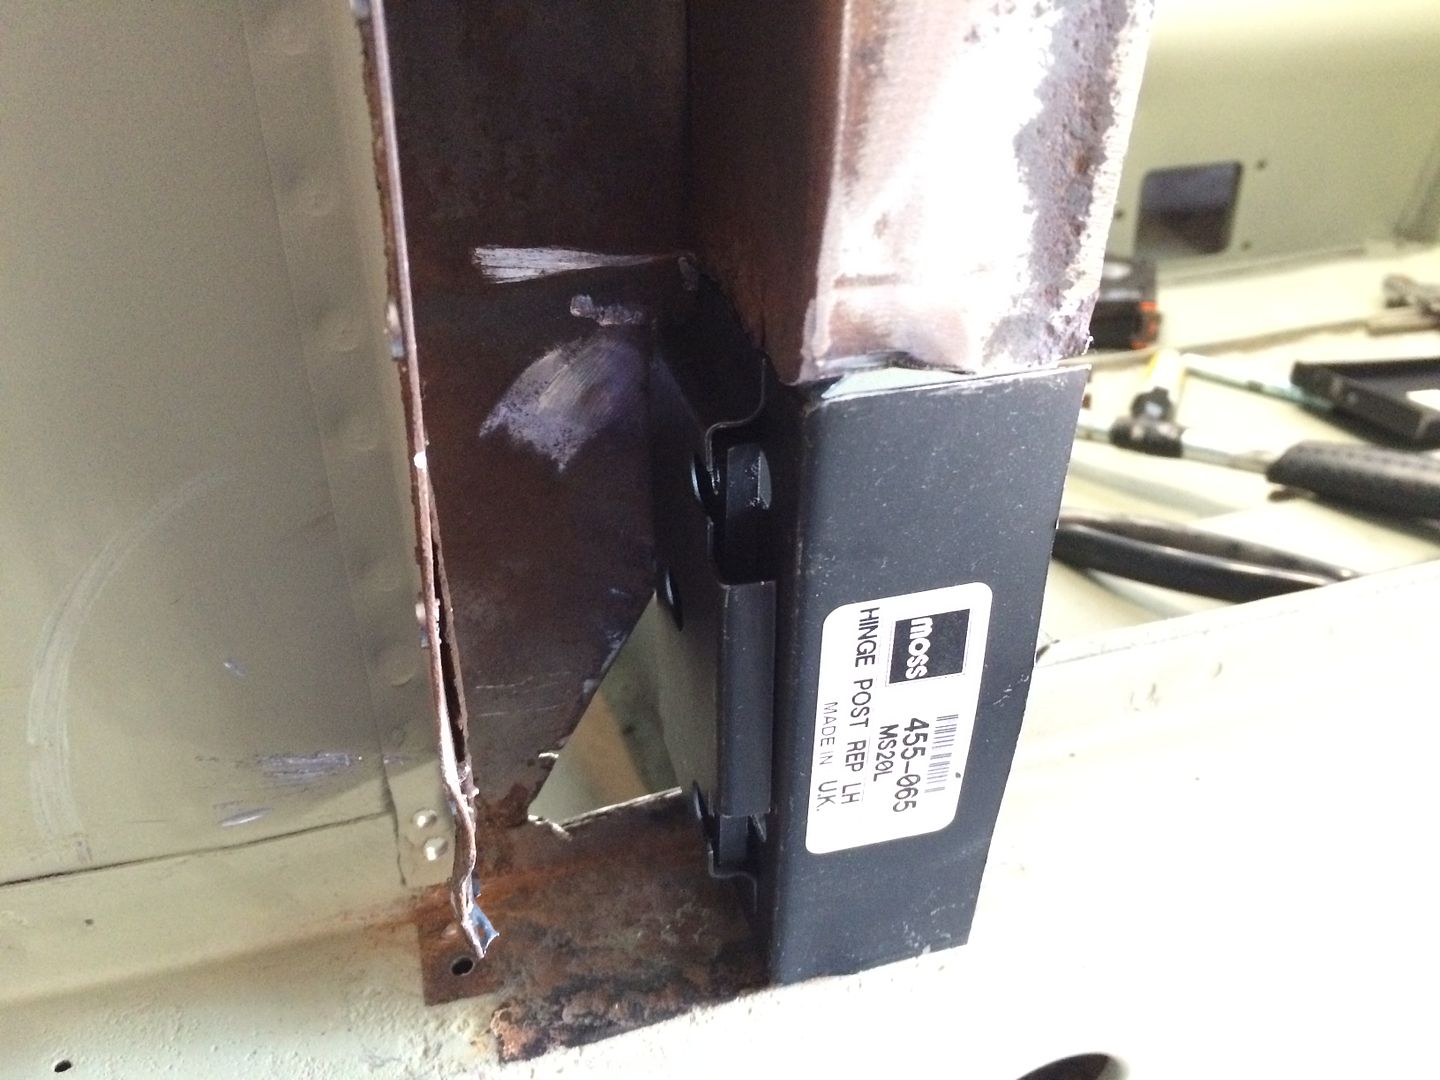
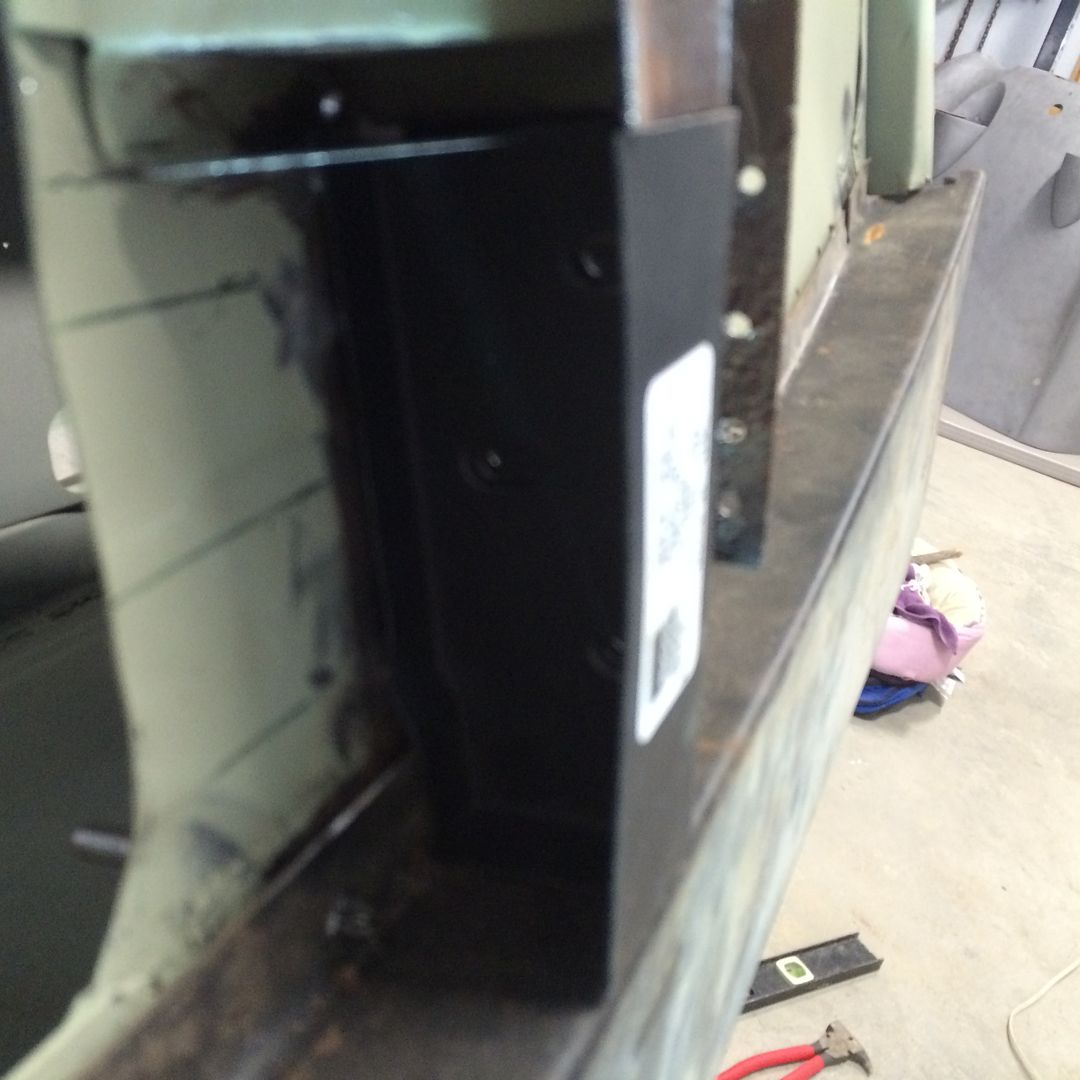
The hinge piece goes directly on the sill. You can use the cover as the alignment guide for the positioning. Then I drill and use cleco fasteners to hold in place until I am ready to weld.
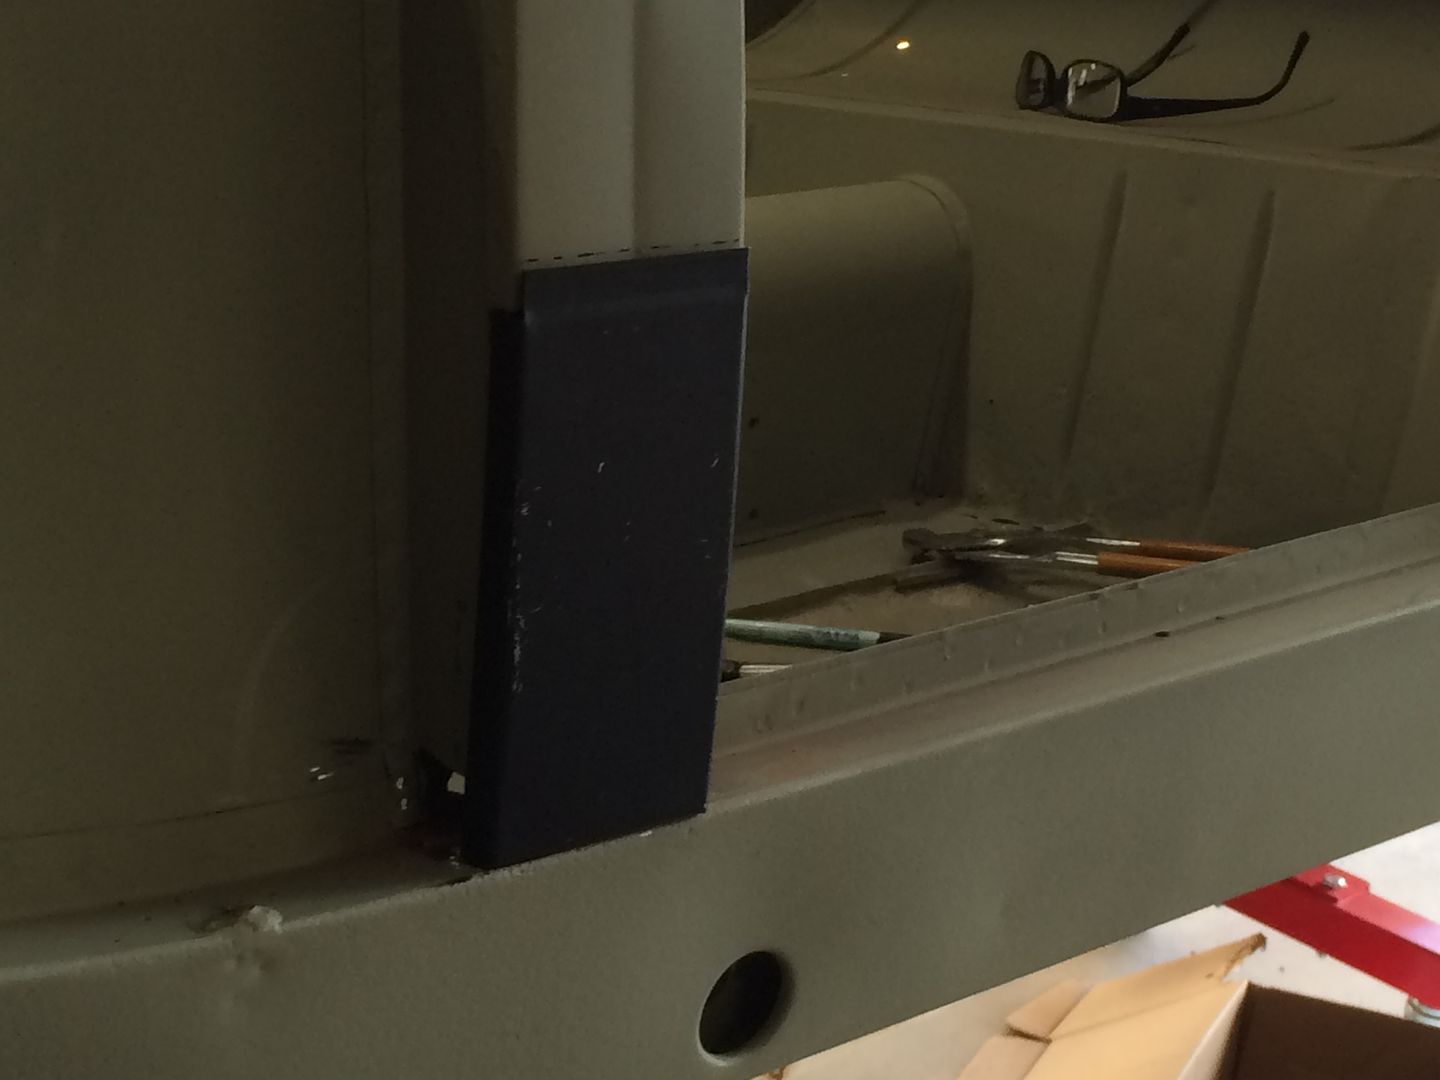
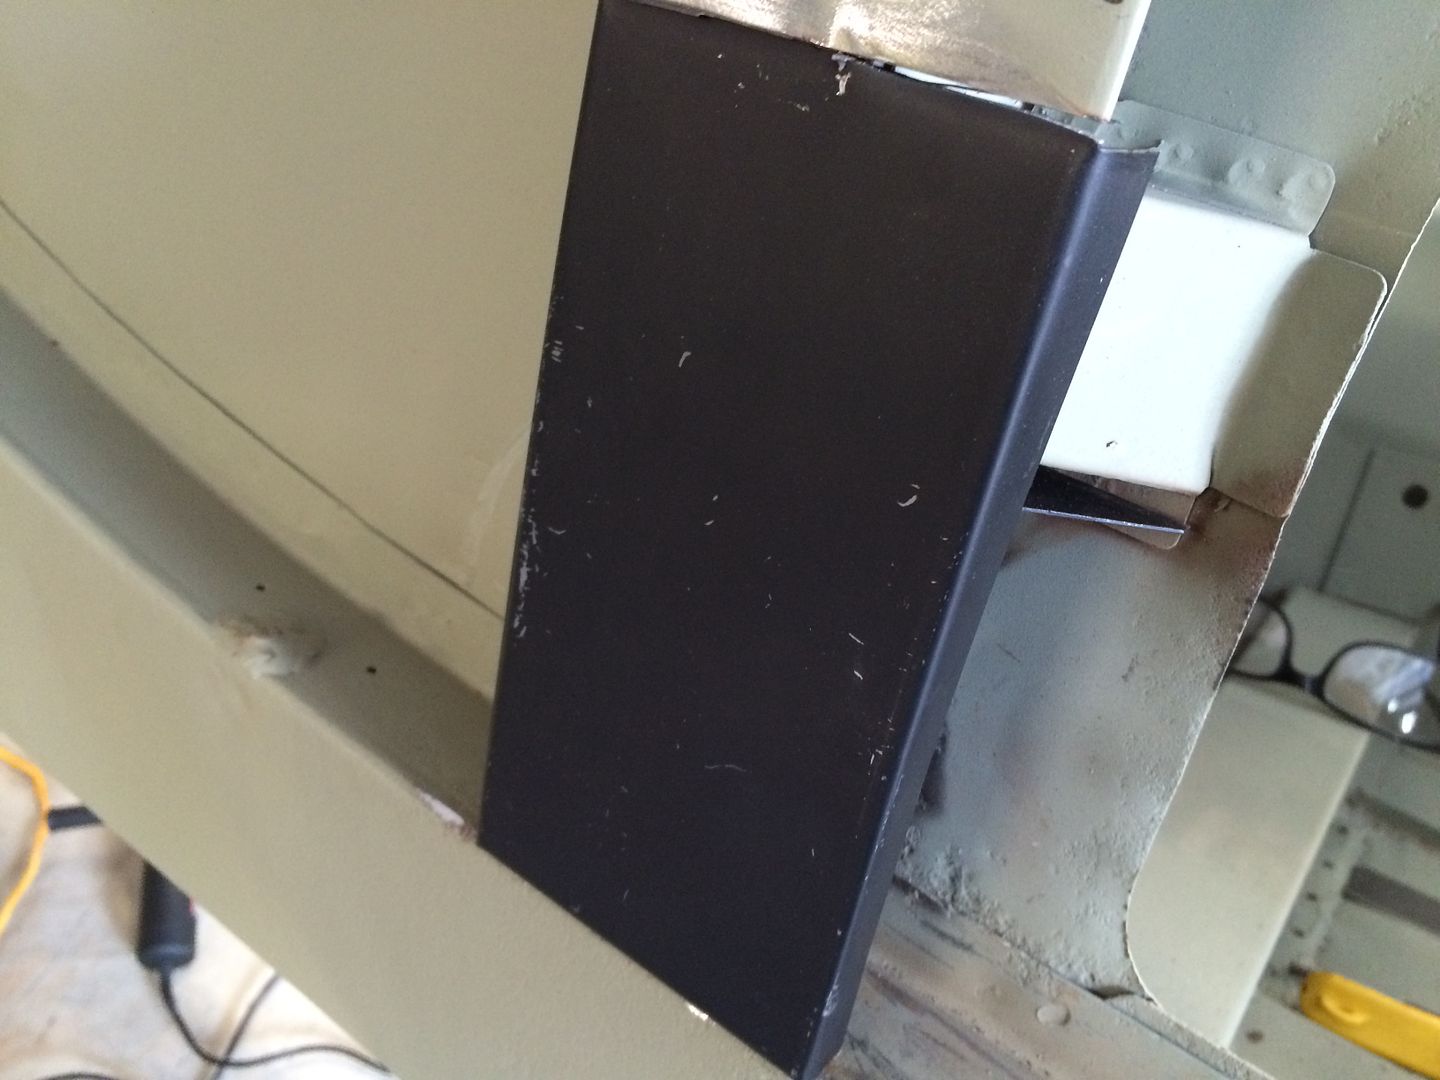
After they are welded in place you bend the cover along the edge that faces the front of the door. It laps back against itself.


I am getting the body ready for a shop to weld up my patch panels. Even with .023 wire and a pretty good machine I am still blowing holes on my welds.
It is the welder not the machine.

The shop I use is pretty much a friend, but I am real paying customer. He does not like to do this kind of work as he specializes in Race Cars. I have learned that if I fit the panels, do most of the cutting, so he spends his time welding not sorting out issues, he will agree to take on my projects. I have to get them in and out asap.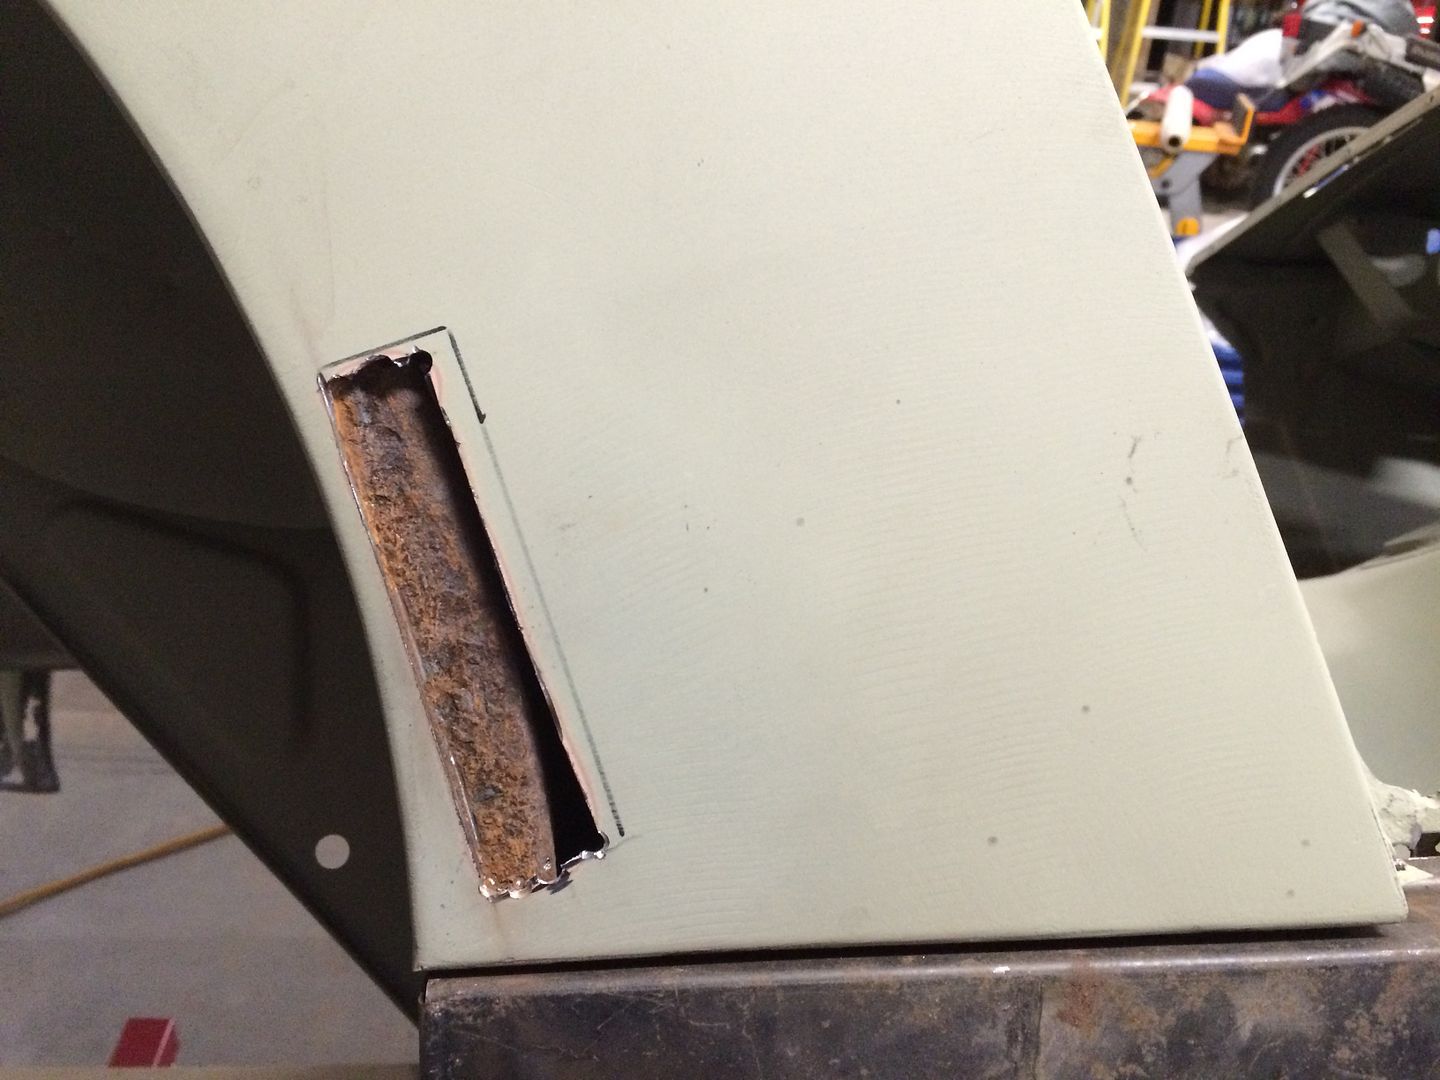

Trevor Jessie
Yoda
Offline
You may be blowing holes in the metal if you are not cutting back to totally rust free metal.
You may be blowing holes in the metal if you are not cutting back to totally rust free metal.
I agree. If it was me I think I would be cutting away a lot more. Not my car so I'll step back!
Kurt.