• Hey Guest!
    British Car Forum has been supporting enthusiasts for over 25 years by providing a great place to share our love for British cars. You can support our efforts by upgrading your membership for less than the dues of most car clubs. There are some perks with a member upgrade!

    **Upgrade Now**
    (PS: Upgraded members don't see this banner, nor will you see the Google ads that appear on the site.)

TR2/3/3A replacing the middle section of a tr3

sp53

Yoda
Offline
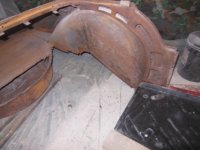
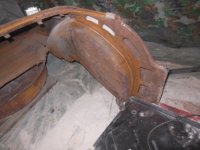
I have some early tr3 parts cars that I would like to make into one good body tub.. I plan to cut out the back seat bench from one car and put that on the other car.

Anyways my latest idea is to cut the donor car right on top of the wheel well as close to the inner edge. I figured if I left about an inch of the old seat sticking out of the wheel well and then cut the donor car with most of the wheel well still on that fender. I could lap the 2 pieces onto the remaining one inch. Anyone ever try something like this or could it done some other way I am wide open for suggestions.

This is probably clear as mud, in other words I want to leave an 1 icnhc legger stickout off the fender and drop the other full piece right on top and weld the 2 together.
steve
 

Attachments

  • DSCN0159.JPG
    DSCN0159.JPG
    1.5 MB · Views: 24
  • DSCN0157.JPG
    DSCN0157.JPG
    1.3 MB · Views: 16
I don't know the condition of the rear of your donor car, but I once cut a good rear off from just behind the B-post, around the rear floor pan and back out the other B-post. Worked quite well without much complicated geometry.
Bob
 
I don't understand where you are planning the cut. In general, I would cut at the natural edges. If you cut in the middle of a panel, the overlap, even though it's only 20 gages...will cause issues. If you decide cutting the middle is best anyway, then there are hand tools that will put a lip on the edges...to make the alignment problem go away.
 
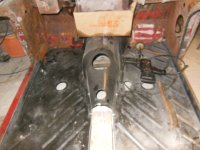
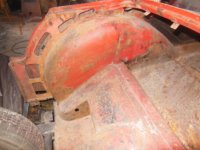
Thanks you guys for looking, well I planned to cut the red one right along the seam at top where the wheel well meets its vertical point. Then on the older looking rusty tub (which I plan to use because the red tub has issues not visible yet), I was going to cut and leave an inch of rusty one horizontally sticking out of wheel the arch . Next I want take the red tub and drop the whole thing with the drive line tunnel included onto the inch I left sticking out and onto the floor section for the drive line. Drop the whole thing straight down and weld on the top.

Hope you guys can see what I am up to because the first cut is where the fear of getting started is.

I will take some more pics and try and make my plan clearer.

steve
 
Sounds like you are doing overlaps. If so, as John says, there are tools to make an offset flange so the overlap does not displace the panels. There are nice pneumatic tools to do it. If you do the flanges, getting the height just right is quite a fiddle. As John says, best to try to cut and join at existing joints.
Bob
 
I plan to cut along the chalk line on top and then drop the other piece right over the top. I think I could drop the piece over the top and not cut it until I see how it fits over the top; basically I am replacing both wheel wells and installing the back seat and some of the trunk at the same time. It should work, but it will leave a seam inside the wheel well at the top. My fear is I am missing something in the cuts, but I think I got it, maybe
 

Attachments

  • DSCN0164.JPG
    DSCN0164.JPG
    1.4 MB · Views: 5
  • DSCN0170.JPG
    DSCN0170.JPG
    1.3 MB · Views: 5
Back
Top