• The Roadster Factory Recovery Fund - Friends, as you may have heard, The Roadster Factory, a respected British Car Parts business in PA, suffered a total loss in a fire on Christmas Day. Read about it, discuss or ask questions >> HERE. The Triumph Register of America is sponsoring a fund raiser to help TRF get back on their feet. If you can help, vist >> their GoFundMe page.
  • Hey there Guest!
    If you enjoy BCF and find our forum a useful resource, if you appreciate not having ads pop up all over the place and you want to ensure we can stay online - Please consider supporting with an "optional" low-cost annual subscription.
    **Upgrade Now**
    (PS: Subscribers don't see this UGLY banner)
Tips
Tips

TR2/3/3A Replacing the cam shaft

Nobbster77

Freshman Member
Country flag
Offline
Well...you can change the cam bearings, but you will have to open the rear plug, so the tranny must be removed to do it for the rear bearing. That said, you should not have to change the cam bearings because of the bad lobes. The bearings receive clean, pressurized oil from the oil filter, so they should not be contaminated...and if they are contaminated, then all your rod and crank bearings will also be contaminated. Honing of the cam bearings will introduce grit and metal into the oil gallery, so I would not recommend that either, unless you plan to clean out the entire engine oil system.

I short, unless the cam bearings are notably bad, I'd run them Opps as is. They do not wear very fast, and even if they are worn, they were not the cause of the lobe problem.
Yep forgot it’s still attached to the gear box. It’s always hard discussion as to how far you go . I have finished rebuilding my 3A engine and found that the Cam timing was out by a tooth and a half from standard, which was apparently common. I pulled the oil gallery plugs and the was quite a bit of debris. The oil pressure was fine before the strip but the big end bearings were down to copper. Fitting a new timing chain and a vernier timing gear will help considerably but what ever you do don’t buy a cheap timing chain. I rebuilt a customers engine with a cheap Moss chain and had to replace it due to noise, fitted a Heavy duty one, no issues . Pulling the filter head and cleaning is a good idea. I would still undo a big end bearing cap and check the shells, as they can be changed with the engine in the car, the oil complete with metal from the cam world have been circulating through the bearings for some time. If you can get someone to operate the clutch while you are underneath, check for crank movement. If considerable you need to replace the thrust washers which can be done with the engine in place
Rgds

Steve
 

CJD

Yoda
Country flag
Offline
One more tip that you probably already know, Steve...What kills the tensioner (aside from bad material from many repros) is when the hardened chain links cut through it. The solution is to carefully sand the outside of the links smooth, where they have sharp edges from the stamping process. That will ensure a long tensioner life.
 

Nobbster77

Freshman Member
Country flag
Offline
That's a good tip as the sides of some of the tensioners are almost razor sharp. Again I'm not a fan of the Moss tensioner , they compress very easily. Would also recommend replacing the crank gear as they wear unevenly if the chain has stretched .It also helps loads when setting the cam timing as there is very little slack to compensate for but no previous marks to use when installing the cam.
 
OP
S

sp53

Yoda
Country flag
Offline
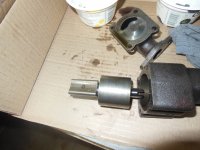
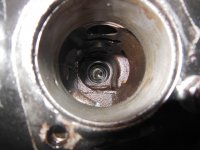
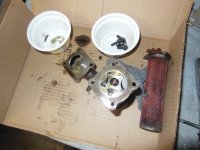
The metal shavings mostly were in the bottom of the pan and in the oil filter canister. I have not looked in the peruse regulator yet. The shaving stuff looks different from the oil by its color. I can see the difference kinda clearly I think. I took the oil pump off and the oil pump looked fine inside and the oil around everything in the pump looked like clean oil. There was some of the shaving colored oil on the outside of the screen on the fixing end, and actually not much or any metal chunks on the oil screen. The stuff on the screen is mostly the red goop gasket sealer I used. I will get off the oil pressure deal soon and take it apart and clean it.

The cam bearings look like they should work out fine. They appear to be plenty thick enough without a bunch of deep scaring. I plan to order gaskets and other parts now that I feel better about the size of the pistons.

thanks for the support steve
 

Attachments

  • DSCN4446.JPG
    DSCN4446.JPG
    3.4 MB · Views: 53
  • DSCN4442.JPG
    DSCN4442.JPG
    3.3 MB · Views: 49
  • DSCN4443.JPG
    DSCN4443.JPG
    3.4 MB · Views: 49
OP
S

sp53

Yoda
Country flag
Offline
What are your guys suggestions for oiling the cam before I install it. My thoughts are to use motor oil and spread it around throughout the area with my hands plus do the same to the cam by spreading an oil bath everywhere on the cam and surrounding areas. I have some break in stuff around here somewhere, but it might be old, but I guess it is oi----l and I think I used it last time.

Thanks steve
 
OP
S

sp53

Yoda
Country flag
Offline
I started the car yesterday Feb14 and started the repair around Dec10. I let it run at 1800rpm for ten minutes and then drove it around the neighborhood and to the gas station. It ran excellent, so I pray this cam will work out. I am going to adjust the gas pedal some and drive it more like John suggested. I should know in a short time if the cam is a keeper.

When do you guys think I should adjust the valves again?

On the Ford truck forum this guy with a new high dollar 390 took all the precaution and had a cam failure. He went through all the stuff I did before figuring out it was the cam. Those guys took a while to find it and figured it was fuel, a tooth off, or distributor advance. In the end they blamed the way out of town manufacture. The one thing I had in common was he need a higher idle to drive it. This time with the new cam my idle is stronger, so I am optimistic.

steve
 

CJD

Yoda
Country flag
Offline
Outstanding! Just in time for the spring driving season too.

Oh, forgot...anytime between about 100 and 500 miles on the tappets.
 
Similar threads
Thread starter Title Forum Replies Date
L Replacing Followers/Lifters and more cam questions Spridgets 5
S TR2/3/3A Pinion tail bearing replacing Triumph 12
B Replacing the Handbrake Cable Austin Healey 8
drooartz Replacing Bugeye windshield rubber Spridgets 6
K TR2/3/3A Replacing engine and gearbox mounts? Triumph 8
TR3Acustodian TR2/3/3A Replacing "H" front badge Triumph 11
K TR2/3/3A Replacing water pump pulley.....memory refresh. Triumph 7
I Replacing Windscreen Wiper Wheel Boxes Austin Healey 0
S MGB 1978, replacing the clutch. MG 3
PAUL161 T-Series Replacing Transmission MG 3
fpstude TR4/4A Replacing Rear Flexible Brake Hoses on TR4A w/ IRS Triumph 11
J TR4/4A Replacing springs Triumph 7
Got_All_4 TR5/TR250 Need guidance for replacing steering column bushings Triumph 11
L Replacing veneer on wood dashboard Restoration & Tools 14
D TR6 Replacing Horn insert in steering column Triumph 11
69MGC MGC Replacing an Outer Wheel Well panel MG 3
maxwedge5281 Replacing Factory Hardtop Rear Window Austin Healey 24
BN6_2197 Replacing gearbox switch of the overdrive system Austin Healey 10
TomMull replacing walnut veneeron the dash Lotus 17
R TR2/3/3A Replacing rear springs Triumph 51
Jer refresh my foggy memory - replacing clutch in my 67 Midget Spridgets 1
RAC68 Clutch Still Slipping after replacing 30W-Non-Det. for Red Line Austin Healey 52
T Replacing O/D switch with a clock Austin Healey 4
simon1966 Replacing the witches nose in-situ. BN1 Austin Healey 14
KVH TR4/4A Replacing Front Windshield Gasket Triumph 5
Michael Oritt Replacing timing chain tensioner and more Austin Healey 24
Rut Replacing rocker assembly Spridgets 1
T TR4/4A Replacing rear pinion seal - remove driveshaft? Triumph 21
J Replacing BJ7 Dash - Detailed Photos/Schematics Austin Healey 3
M Replacing front shocks, torque setting? Spridgets 2
T TR4/4A Replacing in situ oils sealing gearbox and rear axle Triumph 18
55modified TR2/3/3A warning indicator bulbs need replacing where and what to buy? Triumph 4
Jim_Gruber Replacing Wheel Studs Spridgets 10
P Replacing the crankshaft damper [harmonic balancer] Austin Healey 15
K TR4/4A Replacing a broken 4A turn signal switch indicator? Triumph 2
55modified Replacing rear spring eye bushings on a BN1. How difficult? Austin Healey 8
Michael Oritt Replacing Cold Air Box with Velocity Stacks Austin Healey 10
Rhodyspit75 Replacing boot floor need bracing? Spridgets 2
RickB MGB 1980 MGB No rear brakes after replacing MC & booster MG 5
Popeye TR4/4A Steering bushing: replacing rubber with poly, do I snug to 1/8" gap or...? Triumph 3
Jim_Gruber Replacing Spridget Coolant Spridgets 21
TimK Old brake hoses need replacing, if you need proof look here... Austin Healey 1
KVH TR4/4A Replacing the Real Axle Tube Seal Triumph 17
KVH General TR Short Wheel Studs for Wire Wheels--Replacing Triumph 17
GTP1960 TR2/3/3A Question on replacing brake lines & converting to Dot 5 Triumph 9
tomshobby replacing water pump Spridgets 1
D TR2/3/3A Patching, versus replacing floors? Triumph 15
T Replacing the crank pulley/damper Austin Healey 4
M TR4/4A Replacing the hood/bonnet onto the body Triumph 11
T TR4/4A Replacing Drive Train Seals Triumph 5

Similar threads

Top