
-
 Hey Guest!
British Car Forum has been supporting enthusiasts for over 25 years by providing a great place to share our love for British cars. You can support our efforts by upgrading your membership for less than the dues of most car clubs. There are some perks with a member upgrade!**Upgrade Now**
(PS: Upgraded members don't see this banner, nor will you see the Google ads that appear on the site.)

Tips
- We have a special forum called "Member Articles" where you can submit actual articles for consideration for publication. Learn More
- Don't have an Avatar? If not, your avatar will default to the 1st character in your username. Go into "Account Details" to change your Avatar.
- Some basic forum navigation info: click
 Hey - did you know if you click on the title of a thread it will take you to the first unread post since you last visited that thread?
- Hey Guest - Is your British Car Club in our Clubs database? If not, send me a PM - Basil

- Looking for a local club? Click the "Clubs" tab above and browse hundreds of clubs world-wide.
- Add Android or iPhone APP: click
- Did you know - any picture or video you add in your posts in any marque-specific forum will also get added to the Media Gallery automatically.
- A few more tips about posting and replying: click
- Hey there Guest - be sure to keep your profile page up to date with interesting info about yourself: learn more
- More tips and tricks on Posting and Replying: click
 but were afraid to ask:
  STOP!! Never post your email address in open forums. Bots can "harvest" your email! If you must share your email use a Private Message or use the
  smilie in place of the real @
- Want to mention another member in a post & get their attention? WATCH THIS

- So, you created a "Group" here at BCF and would like to invite other members to join? Watch this!
- Hey Guest - A post a day keeps Basil from visiting you in the small hours and putting a bat up your nightdress!
- Hey Guest - do you know of an upcoming British car event?
 Pretty Please - add it to our Events forum(s) and add to the calendar! >> Here's How <<
- Hey Guest - you be stylin' Change the look and feel of the forum to fit your taste. Check it out
- If you run across an inappropriate post, for example a post that breaks our rules or looks like it might be spam, you can report the post to the moderators: Learn More
- If you would like to try some different "looks" or styles for the site, scroll to the very bottom, on the left and click the Style Selector.
You are using an out of date browser. It may not display this or other websites correctly.
You should upgrade or use an alternative browser.
You should upgrade or use an alternative browser.
TR2/3/3A removing tr3 instrument panel
- Thread starter ekamm
- Start date
TR3driver
Great Pumpkin - R.I.P
Offline
No real tricks, just the obvious stuff. Disconnect the battery first, of course.
I like to start by removing the temperature gauge, as the capillary tube is kind of awkward and easily damaged. The tube has to be undone from the thermostat housing and pulled all the way out through the hole in the panel. Usually it's best to pry the grommet from the bulkhead and leave it on the tube.
Then once you've removed the choke cable and undone the oil line, you can remove the 4 wing nuts and push the panel out from the dash so the wires are easier to access.
Here's a shot of mine when I was almost done removing it.
mrv8q
Luke Skywalker
Offline
The only difficulties I had was with the temp gauge capillary tube. The nut fused itself with the thermostat housing, so all was sacrificed upon removal. Luckily, the temp gauge can be rebuilt, (even at home), but I had it done out of house.
You'll love how nice the center panel looks when you're done. This can be a very satisfying task. The cleaned gauges can be renewed very nicely.
You'll love how nice the center panel looks when you're done. This can be a very satisfying task. The cleaned gauges can be renewed very nicely.
Geo Hahn
Yoda
Offline
TR3driver said:...you can remove the 4 wing nuts and push the panel out from the dash so the wires are easier to access...
You may find that the 2 top mounting holes in the center panel are slotted so you only have to loosen those top nuts to remove the panel (bottom edge forward, then down). Anyway, that's how mine was.
Gordon_Dedrick
Jedi Trainee
Offline
Couple of small items to be aware of.....my panel was screwed in with reg hex nuts....real tough to get off. Use wing nuts when you re-install and be sure to protect the new dash covering while you rest the panel on the edge and re-attach all the wiring. A couple of layers of masking tape will work and protect it.
Gordon
Gordon
OP
ekamm
Jedi Warrior
Offline
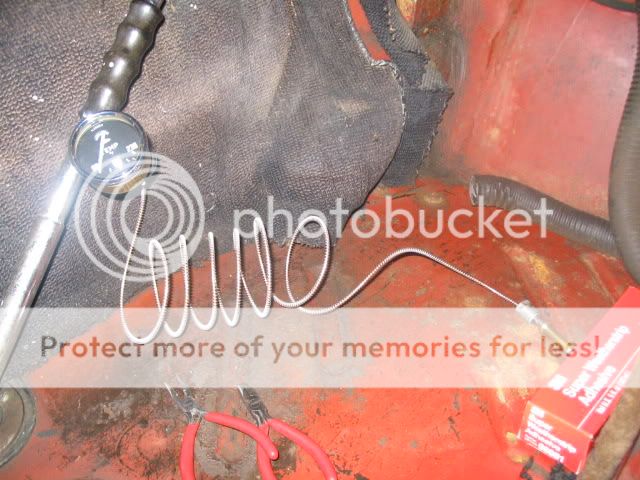
So I have a question regarding the capillary tub you can see in the pic that it doesn't make the half turn around the heater. For some reason it is semi coiled under the dash.

I understand that I will need to attempt to remove the capillary tube from the thermostat, and I assume in eventuality the tube will come out through the panel when I take the gauge out of the panel. From what I have read there may be some difficulty removing the tube from the thermostat. Any tips on the best way to do that? I am pretty sure that I will be able to put it all back the correct way if I can get it out without any damage. Are there any tips in handling the tube to prevent damage?
I understand that I will need to attempt to remove the capillary tube from the thermostat, and I assume in eventuality the tube will come out through the panel when I take the gauge out of the panel. From what I have read there may be some difficulty removing the tube from the thermostat. Any tips on the best way to do that? I am pretty sure that I will be able to put it all back the correct way if I can get it out without any damage. Are there any tips in handling the tube to prevent damage?
mrv8q
Luke Skywalker
Offline
Here's a previous post about the cap tube:
https://www.britishcarforum.com/bcforum/u..._Tub#Post662728
Even if you get the nut off the housing, you may find the temp sender itself is fused hard into the housing.

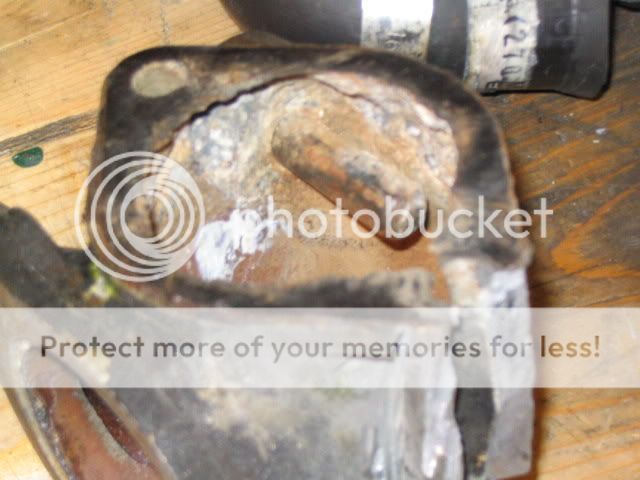
Mine was unsalvageable. Here's my rebuilt one:
Good luck on yours!
https://www.britishcarforum.com/bcforum/u..._Tub#Post662728
Even if you get the nut off the housing, you may find the temp sender itself is fused hard into the housing.
Mine was unsalvageable. Here's my rebuilt one:
Good luck on yours!
OP
ekamm
Jedi Warrior
Offline
Wow, that was way too easy. After hearing the horror stories of pulling the tube from the thermostat housing I sprayed some PB on the connections and waited an hour. It came right off and the bulb slipped right out, Whew! Now the oil tube that I will no doubt need to block to keep the oil in it. I've always used a golf tee to do this sort of thing FYI.
TR3driver
Great Pumpkin - R.I.P
Offline
If you loosen the nut and then wait a bit, it's less likely to drip. Once air can get in, the oil will run back towards the engine.
If you think there is a chance you might forget and crank the engine with the line disconnected, you could disconnect the braided line under the hood. That way, at least the mess would be on the floor instead of on your carpet.
But since you should have disconnected the battery before starting on the dash, it shouldn't be an issue.
OP
ekamm
Jedi Warrior
Offline
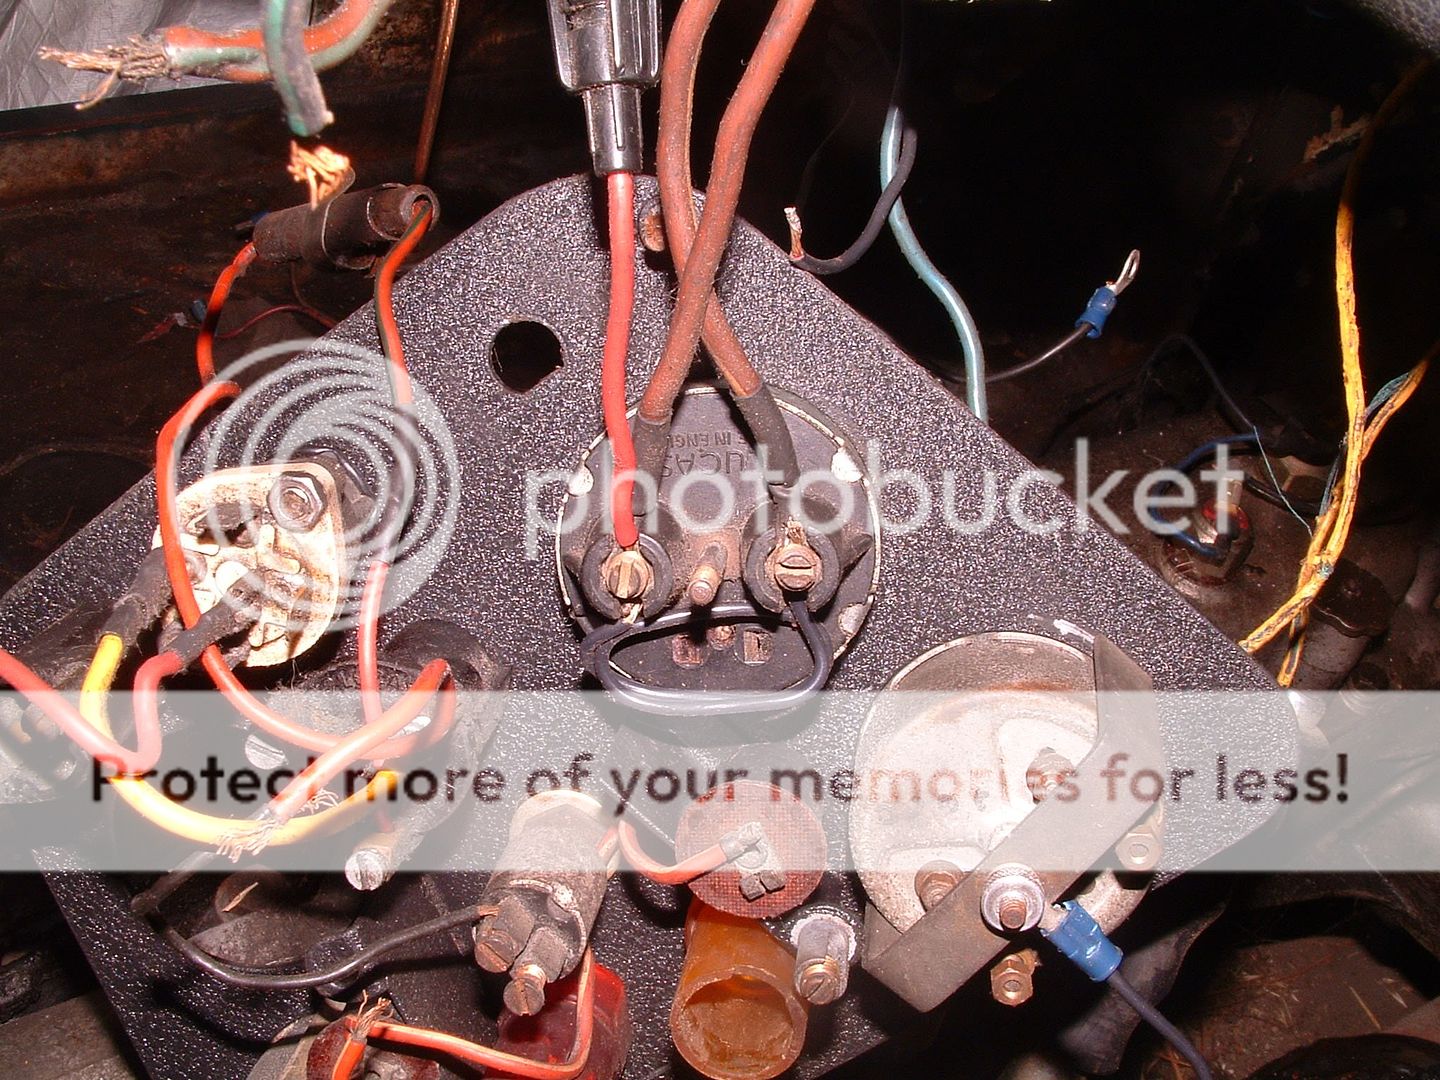
I got everything apart. I numbered all the wires as I disconnected them. I started to clean gauges and such and will likely paint the panel tomorrow so that the paint can dry for a while. I still need to take all of the other stuff from the dash so that I can pull the dash. And ya the leather washer was there.

Offline
I'm resurrecting this old thread to ask if there is a first place to check to solve a problem.
At the same time my fuel gauge, panel lights and ignition warning light all stopped working. I usually think ground if more than one thing fails at the same time. Could it be?
I'm going to remove the instrument panel regardless to clean up from soda blasting which was done for a recent repaint.
At the same time my fuel gauge, panel lights and ignition warning light all stopped working. I usually think ground if more than one thing fails at the same time. Could it be?
I'm going to remove the instrument panel regardless to clean up from soda blasting which was done for a recent repaint.
TR3driver
Great Pumpkin - R.I.P
Offline
True, but not on the same fuse.
Also, the ignition warning light is not grounded through the panel. (It actually grounds through the generator armature, which is why it goes out when the generator is working.)
I think you must have multiple problems, that just happened to show up at the same time. Pick one and troubleshoot it; then recheck the others.
But, while you have the panel out, I would definitely clean any stray paint off of the ground tie point on the back. Also add a ground wire from there to the fuel gauge mounting post (if you don't have one already).
Offline
I thank you both for the guidance. The back side of the panel looks to be pretty much in need of attention. As I press forward I'm sure I'll need more advice. I'll start a new thread when I do.