
-
 Hey Guest!
British Car Forum has been supporting enthusiasts for over 25 years by providing a great place to share our love for British cars. You can support our efforts by upgrading your membership for less than the dues of most car clubs. There are some perks with a member upgrade!**Upgrade Now**
(PS: Upgraded members don't see this banner, nor will you see the Google ads that appear on the site.)

Tips
- We have a special forum called "Member Articles" where you can submit actual articles for consideration for publication. Learn More
- Don't have an Avatar? If not, your avatar will default to the 1st character in your username. Go into "Account Details" to change your Avatar.
- Some basic forum navigation info: click
 Hey - did you know if you click on the title of a thread it will take you to the first unread post since you last visited that thread?
- Hey Guest - Is your British Car Club in our Clubs database? If not, send me a PM - Basil

- Looking for a local club? Click the "Clubs" tab above and browse hundreds of clubs world-wide.
- Add Android or iPhone APP: click
- Did you know - any picture or video you add in your posts in any marque-specific forum will also get added to the Media Gallery automatically.
- A few more tips about posting and replying: click
- Hey there Guest - be sure to keep your profile page up to date with interesting info about yourself: learn more
- More tips and tricks on Posting and Replying: click
 but were afraid to ask:
  STOP!! Never post your email address in open forums. Bots can "harvest" your email! If you must share your email use a Private Message or use the
  smilie in place of the real @
- Want to mention another member in a post & get their attention? WATCH THIS

- So, you created a "Group" here at BCF and would like to invite other members to join? Watch this!
- Hey Guest - A post a day keeps Basil from visiting you in the small hours and putting a bat up your nightdress!
- Hey Guest - do you know of an upcoming British car event?
 Pretty Please - add it to our Events forum(s) and add to the calendar! >> Here's How <<
- Hey Guest - you be stylin' Change the look and feel of the forum to fit your taste. Check it out
- If you run across an inappropriate post, for example a post that breaks our rules or looks like it might be spam, you can report the post to the moderators: Learn More
- If you would like to try some different "looks" or styles for the site, scroll to the very bottom, on the left and click the Style Selector.
You are using an out of date browser. It may not display this or other websites correctly.
You should upgrade or use an alternative browser.
You should upgrade or use an alternative browser.
TR2/3/3A Radiator Air Deflector / Shroud
- Thread starter af3683
- Start date


Geo Hahn
Yoda
Offline
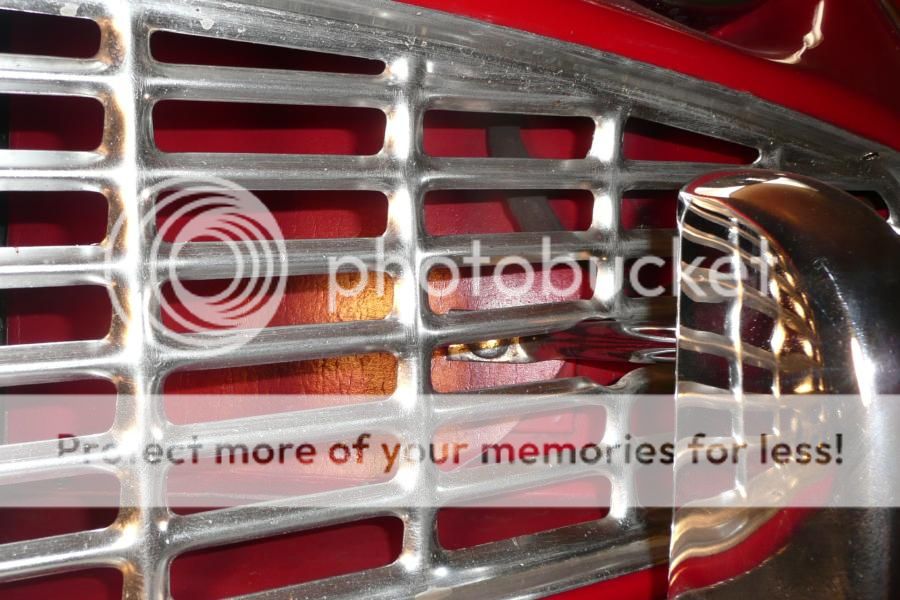
The one I got from Moss had creases stamped in along the edges that meet the radiator. These I folded back and along the edge of the radiator body. Going to be hard to see because of the grille but this is it:


Whichever style you have, you may find you need to modify the vertical edges of the shroud to accommodate the bulge of the electric fan.
Whichever style you have, you may find you need to modify the vertical edges of the shroud to accommodate the bulge of the electric fan.
TR3driver
Great Pumpkin - R.I.P
Offline
The one I got from TRF in 2008 was the same way. Obviously made from 3 pieces, but the pieces were already joined; and creases where it is supposed to bend. Didn't fit all that well inside the apron, I wound up making some extensions to be able to bolt it to the 'floor'. But that may have been due to having a 3A apron on a TR3 (came that way to me, since been fixed), or some previous accident damage.
The one I got from Moss had creases stamped in along the edges that meet the radiator. These I folded back and along the edge of the radiator body. Going to be hard to see because of the grille but this is it:
I used the one with the creases from Moss also. It was pretty stiff after it had been painted so it took a lot of fiddling to get the fit right. But you're right, with the vertical creased edges folded aft, it fits perfectly along the sides of the radiator. That helps hold it in position.
I just finished installing mine this afternoon so I have some photos with the grille off.


Rick...
luke44
Jedi Warrior
Offline
...I just finished installing mine this afternoon so I have some photos with the grille off. Rick...
Rick: looking good, I love the powder blue color.
One thing worth noting is I did not screw/bolt mine down, there were no holes there (I see yours has 3 per side) to bolt to. This is because this part was introduced as a TR3A mid run change to try to deal with the overheating that never existed with the TR3 models.
I forget the exact number it was introduced at, but my guess from memory is it was somewhere around s/n 38000, maybe later. It was a dealer warranty back-fit for earlier TR3A cars at no cost to the owners who requested it, so perhaps these holes only existed on the later cars.
toysrrus
Yoda
Offline
Rick & All,
Thanx for posting all your pics.
My recent purchase of the shroud from Moss came with "4 Small (#8 or #10) Sheet Metal Screws"!! I said to myself; "What the heck am I supposed to do with these"? Certainly, Not mount the Shroud!! Thats what Moss`s catalog calls for?!?!?!?
No; I`m not going to use them!!
When I cross that bridge to install mine (Soon); It`ll be "2 or 3 Bolts" per side.
Rick; What size bolts did use? I have`nt looked to see if there any "Pre-Drilled" holes there, Yet.
Thanx Again All,
Russ
Geo Hahn
Yoda
Offline
Sheet metal screws are what I used, they seemed right for the factory holes.
It shouldn't take much to hold that lower edge in place, the shroud itself is securely clamped by the back end of the bumper guard support and the bolt that holds it.
Looking at Dick's photos, I think he also used sheet metal screws -- the kind with a hex head and flange (can't remember what they're called).
Tinkerman
Darth Vader
Offline
Russ, mine is a post 60000 car and has three holes per side on the apron. The holes are a size 10. No way to get a nut and bolt there unless I drilled them out so I'm going to use some pan head screws and washers. I think stainless because of where they are.
Great pictures! Sure answered all of my questions.
Dick
Great pictures! Sure answered all of my questions.
Dick
Bruce...
Mine is TS51502 (1959 TR-3A) and there was no deflector on it when I bought it in 1963. I wasn't paying much (any :rapture attention to the "details" back then so I don't know if there were ever any screw holes. If there were any, I suspect that they were covered over during the recent body and paint work with the multiple coats of primer and paint. I improvised and drilled some new holes that are probably a little further out than what the original holes would have been. I don't think I'd have been able to use any original holes anyway. With the paint on the deflector, the crease on that lower flap is more like a rounded corner.
I must add here that you are partly responsible for the "looking good". The photos and dialog you've posted and provided have been a major help in my quest to get this job done right.
Rick...
Mine is TS51502 (1959 TR-3A) and there was no deflector on it when I bought it in 1963. I wasn't paying much (any :rapture
attention to the "details" back then so I don't know if there were ever any screw holes. If there were any, I suspect that they were covered over during the recent body and paint work with the multiple coats of primer and paint. I improvised and drilled some new holes that are probably a little further out than what the original holes would have been. I don't think I'd have been able to use any original holes anyway. With the paint on the deflector, the crease on that lower flap is more like a rounded corner.I must add here that you are partly responsible for the "looking good". The photos and dialog you've posted and provided have been a major help in my quest to get this job done right.
Rick...
Russ...
I too had my doubts about the screws they listed, and that I bought from Moss. As I mentioned to Bruce below I opted for drilling new holes and using more substantial hardware. I considered using bolts, but decided to go with #10 SS hex head sheet metal screws. The deflector material is pretty stiff, but I also used #10 SS washers. The sheet metal at that location is sturdy enough for the screws to get a good bite.
I should add that there is enough room above that area so there is no problem getting a power drill in there.
Rick...