• Hey Guest!
    British Car Forum has been supporting enthusiasts for over 25 years by providing a great place to share our love for British cars. You can support our efforts by upgrading your membership for less than the dues of most car clubs. There are some perks with a member upgrade!

    **Upgrade Now**
    (PS: Upgraded members don't see this banner, nor will you see the Google ads that appear on the site.)
Tips
Tips

Progress on the $40 Paint Job

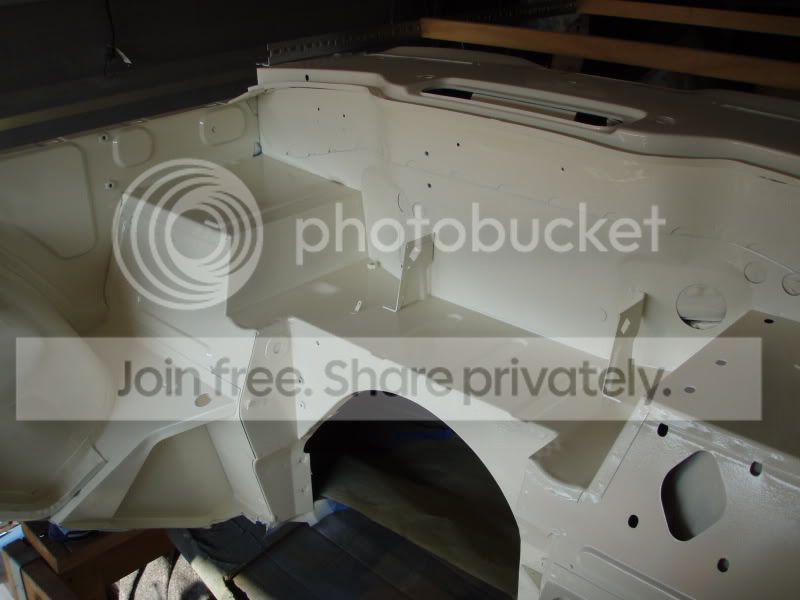
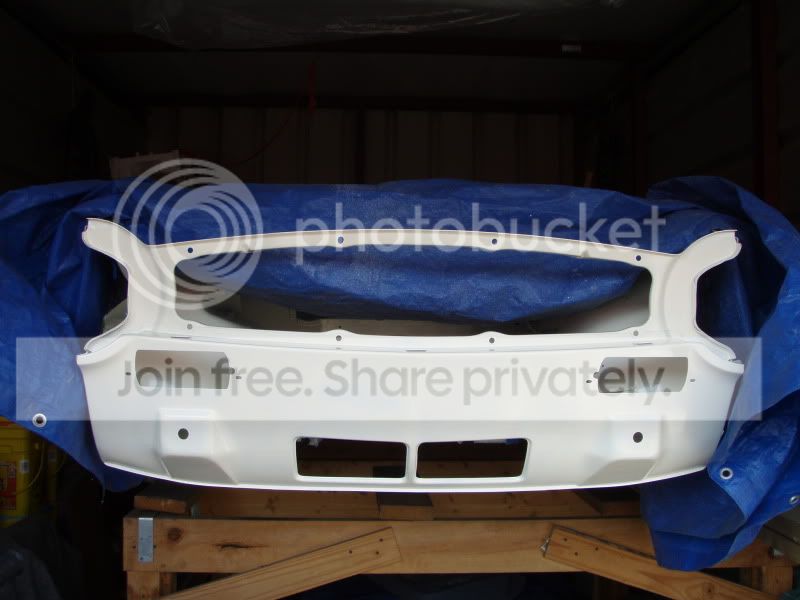
When I put the new primer down before my buddy shot the paint, we went over it and did sand out any orange peel we found. The paint still looked pretty good after the first two coats he sprayed. It was that third coat that did it. I don't know what happened, but there it was. What was I gonna say, he was doing me a favor, and he did help me with a ton of body work before the paint. I call him 'magic fingers', because he could find small imperfections in the body work that I never could find myself.

So, there you have it. I'm not bummed about it any more. The biggest cost was alot of time. There are more important things to worry about then a paint job. I'm alot smarter because of it, and yes I would repaint it myself if I ever get to the point I have nothing better to do. Would I use the Brightside again?? I might consider it, but because of the time involved, probably not. Too bad, that stuff really looked good. /bcforum/images/%%GRAEMLIN_URL%%/smile.gif

Edit: And you know, it sure was better to have that stuff peel off when it did. I could've had the whole car together and running down the highway watching the paint fly off in all directions. /bcforum/images/%%GRAEMLIN_URL%%/jester.gif /bcforum/images/%%GRAEMLIN_URL%%/sick.gif
 
BOXoROCKS said:
...it looks super,...who makes "brightside" and where did you buy it.

It's a marine topside paint made by Interlux. I bought it from a local marine supply.
 
from the link:

BARE METAL: Sandblast or grind, remove sanding residue. Immediately apply Viny-Lux Primewash 353/354 thinned 25% with Viny-Lux Solvent 355. Allow to dry for 1-24 hours. Apply one coat of Epoxy Barrier-Kote 404/414.

CLEAR EPOXY: Clean as for Bare Fiberglass above. Sand with 80 grade (grit) paper. Remove sanding residue. Apply one coat of Epoxy Barrier-Kote 404/414.

PREVIOUSLY PAINTED SURFACES: The surface must be clean and dry. Sand with 220-320 grade (grit) paper. Remove sanding residue.

Method:Apply 2-3 coats of Brightside following the proper dry times. Sand between coats using 220-320 grade (grit) paper. Remove sanding residue with a rag dampened with Brushing Liquid 333. Brightside may be applied by roller and brush using the roll and tip method.

Interlux
 
Art, such a shame after you put in all that work - keep the faith.

I haven't had any adhesion problems going the Rustoleum Pro route, but I did get some "burn through" issues during wet sanding. I tried buffing it up and could get it to be a "one footer", but after a couple of weeks the feathered edges would show up again. It is now back to being a "five to ten" footer, so I said to heck with it and just enjoyed driving it for the remainder of the year.

I have a replacement trunk lid and door that may be changed out this year. I will paint them the same way, but this time using some Penetrol to improve the flow and hopefully reduce the amount of wet sanding needed. I hope that this will prevent the burn though issue. If it does then I will add a couple of coats to the rest of the car.

Even with all that, I keep telling myself that for me it's a 2-part hobby that I really enjoy; rolling resto and driving fun. As I have said many times, give me an OK looking driver over a glistening trailer queen any time.
 
i went to pick up the paint, primer etc. today. the plan is/was to use the brightside paint. when i got to the shop (a boat shop) i found the paint and the primer that i thought was correct for the paint...afterall its said "for use with brightside paint". upon further inspection i found a small note on the back saying that if you were applying it to steel you needed to contact customer service. customer service tells me i need to prep the bare metal with "202 solvent", then sand with 150 grit, apply another application of 202, then prime with "viny-lux" 2 part primer before then priming with two coats 404/415 primer that the shop didn't have in stock. obviously i am going to follow their reccomendations after reading Art's experiences above. still, there is suprising more to this than i expected. i'll have to adjust my timeline.

i'll post some pics when i get a coat of something...anything...on it.
 
Just out of curiosity - is there anyone who has used the Brightside paint who actually followed all the directions?

I agree - sure seems more involved than what I've seen described here by the painters.

Thanks.
Tom
 
I've read the original posts out there about the guy that did his charger with Tremclad brand rust paint (sold only in Canada). Created quite a stir since Tremclad is made by the same people that do Restoleum. There was much discussion (and even emails to the Rustoleum people) about whether Tremclad and Rustoleum were the same paint with different labels. I gave up after reading about 15 pages of posts and they still hadn't resolved the issue (the Rustoleum responses were ambiguous and no real help), but the pictures posted by the original Tremclad painter (put on with a 4 inch high density foam roller and foam brush!!!) were impressive enough to light a fire under a lot of people to try this low-cost, low-tech method.

The essence of the original (Tremclad) post was this:

The paint was thinned using mineral spirits about 10-20% (he did it by "feel" and simply said "just a bit thicker than water").

The paint was applied in thin layers - roll it on, wait a minute or so and "tip it off" with the roller or foam brush to get rid of any bubbles. After a few minutes the paint lay down "flat as glass".

Two coats, then wet sand with 600, two coats, wet sand with 800, two coats then wet sand with 1000 or 1500, then buff using cheap Turtle buffing compound (NO rubbing compound), then wax.

Paint could be put on over bare steel or fiberglass or bondo or old paint if it was roughed up with sandpaper first. Never any primer used or needed. No clear coat used - just buffing and waxing.

The paint layers were thinned out enough that it took 4 layers before the old surface (steel/bondo/paint) was completely obscured.

A number of guys were planning on trying some of the various brands of Rustoleum, but I never read where anyone had ever completed a car with it nor did I ever see any pics of a completed job.

Heres a question - has anyone ever used this Rustoleum/roll on technique to paint their car and did it do a decent job? Did it last? Did it stick and not come off with masking tape? Do you have pictures? A description of exactly what you did?

I'm just curious if this is real or not and a viable option.
 
As I mentioned on the previous page I have done it and here is a link to a previous thread of mine.

https://www.britishcarforum.com/bcforum/ubbthreads.php/ubb/showflat/Number/293639/fpart/1


NearlyDone1.jpg
 
Haven't been able to psych myself up to going back to it yet. This winter I have concentrated on an OD conversion (that may or may not get fitted this year) and installing a wooden dash.

I have a replacement door and trunk lid to paint, when I will try out the use of the Penetrol approach that I mentioned in the earlier post. Driving season is upon us, so I'll see if I get around to it.
 
I went from this
FrontLeftsm.jpg


to this
100_1863sm-1.jpg


I think I reported that I have issues in some areas, which are due to my prep and technique rather than the paint. I would categorize this overall as a 10 footer; that will do for me. In the areas I got it right, it stands up to very close inspection. I just don't have the motivation to fix the mistakes as it is a driver and not a show queen, so I live with the imperfections. Also, a number of times we have done country drives and ended up on gravel roads. I don't like it and I slow right down, but I find that I don't fret about the possibility of stone chips. It has proved to be very resilient to them.

It's not for the majority of people, but it works for me.
 
Getting closer. I did my B/E hard top using Interlux Brightside and it made a believer out of me. Still need to finish the rest of the body work on the B/E and the TR3 before painting will begin.
Before:
2519706163_836082feae_o.jpg


After:
3385568899_73e753224e_o.jpg
 
If you have swirl marks after buffing you need to get a few foam pads(soft to hard) and some different grades of polishing compounds and it will take the micro scratches and swirls out

Hondo
 
apbos said:
Getting closer. I did my B/E hard top using Interlux Brightside and it made a believer out of me. Still need to finish the rest of the body work on the B/E and the TR3 before painting will begin.
I look forward to hearing about your on-going progress and seeing pics along the way.
 
NutmegCT said:
Just out of curiosity - is there anyone who has used the Brightside paint who actually followed all the directions?

Yes, I did my engine bay and front clip with brightside paint and followed the directions. Granted this is an involved/manual process but these paints are proven in the marine industry and designed to be applied without modern spray equipment or facilities (think two guys in a boat yard on a saturday afternoon). I'm pleased with the results.

Jamestown Distributors carries interlux products and often has free shipping or sale promotions. I chose the Hatteras off-white as it has a rich creamy color and is more forgiving than some of the other colors. I even used disposable Preval sprayers for everything but the epoxy coat which I rolled-on as it was too thick for the cheap sprayer.

Pictures below of the engine bay before and after.

What I had to start with...
[img:left]
IMGP2025.jpg
[/img]

After lots and lots of elbow grease...
[img:left]
PA060178.jpg
[/img]

Coated with Brightside Viny-Lux (etch primer)...
[img:left]
PA060180.jpg
[/img]

Followed by Pre-Kote (epoxy primer), sorry no photos..
then top-coated with two coats of Brightside paint...
[img:left]
PB130807.jpg
[/img]

And one more...
[img:left]
P8150714.jpg
[/img]
 
I am looking to trying this out in the next month myself. I am thinking about using Awlgrip as that paint seems to be highly regarded.

After reading and learning how the technique is applied I only have one real question. How much paint do I need?

I have a 75 spitfire. The paint would exclusively be for the exterior. The engine bay, trunk (boot), and baseboards/trim is being done with Rustoleum Pro paint (cans).

I also want to do the top but again just the exterior (the interior will be done with fabric).

Will 2 quarts be enough? Or do I need a gallon?

Thanks
 
So check me on this idea guys - since the paint application is fairly forgiving since you are going to wet sand it all anyway, why couldn't you simply deliberatley apply a heavy set of coats and then have some one professionally wet sand it for you. Isn't that the stage which is really critical?
 
Back
Top